2016 MERCEDES-BENZ E-CLASS SALOON reset
[x] Cancel search: resetPage 29 of 557
Diagnostics connection
The diagnostics connection is on ly intended for
th e connection of diagnostic devices at a quali‐
fi ed specialist workshop. &
WARNING Risk of accident due tocon‐
necting devices tothe diagnostics con‐
nection
If yo u connect equipment toa diagnostics
connection in theve hicle, it may af fect the
operation of vehicle sy stems.
As a result, the operating saf ety of theve hi‐
cle could be af fected. #
Only connect equipment toa diagnos‐
tics connection in theve hicle which is
appr ovedfo ryo ur vehicle byMercedes-
Benz. &
WARNING Risk of accident due to
objects in the driver's foot we ll
Objects in the driver's foot we ll may impede
pedal tr avel or block a depressed pedal. This jeopardises
the operating and road
saf ety of theve hicle. #
Stow all objects in theve hicle securely
so that they cannot getinto the driver's
fo ot we ll. #
Alw aysfit th efloor mats securely and
as prescribed in order toensure that
th ere is alw ays suf ficient room forthe
pedals. #
Do not use loose floor mats and do not
place floor mats on top of one ano ther. *
NO
TEBattery discharging from using
devices connected tothe diagnostics
connection Using devices at
the diagnostics connection
drains the batter y. #
Check thech arge leve l of the batter y. #
Ifth ech arge leve l is lo w,charge the
batter y,e.g. bydriving a considerable
dis tance. Connecting equipment
tothe diagnostics con‐
nection can lead toemissions monitoring infor‐
mation being reset, forex ample. This may lead
to theve hicle failing tomeet therequ irements of
th e next emissions inspection during the main
inspection. Qualified specialist
workshop
A qu alified specialist workshop has the neces‐
sary special skills, tools and qualifications to
cor rectly car ryout any necessary workon your
ve hicle. This particularly applies towo rkreleva nt
to saf ety.
Alw ays ha vethefo llowing workcar ried out on
yo ur vehicle at a qualified specialist workshop:
R Workreleva nt tosaf ety
R Service and maintenance work
R Repair work
R Modifications, ins tallations and con versions
R Workon electronic component parts
Mercedes‑Benz recommends a Mercedes‑Benz
service centre. 26
General no tes
Page 83 of 557
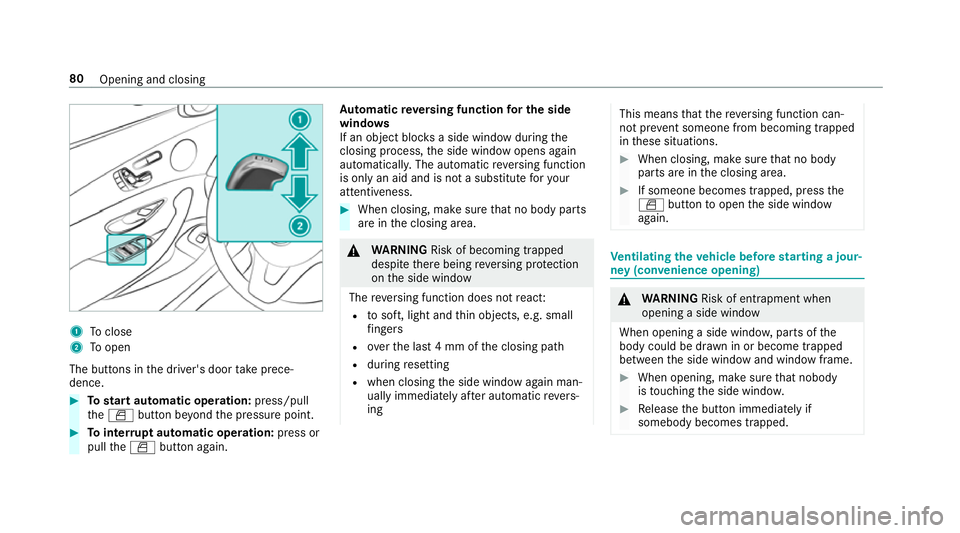
1
Toclose
2 Toopen
The buttons in the driver's door take prece‐
dence. #
Tostart automatic operation: press/pull
th eW button be yond the pressure point. #
Tointer rupt automatic operation: press or
pull theW button again. Au
tomatic reve rsing function for the side
windo ws
If an object bloc ksa side wind owduring the
closing process, the side window opens again
automaticall y.The automatic reve rsing function
is only an aid and is not a substitute foryo ur
attentiveness. #
When closing, make sure that no body parts
are in the closing area. &
WARNING Risk of becoming trapped
despi tethere being reve rsing pr otection
on the side window
The reve rsing function does not react:
R tosoft, light and thin objects, e.g. small
fi ngers
R overth e last 4 mm of the closing path
R during resetting
R when closing the side window again man‐
ually immediately af ter auto matic reve rs‐
ing This means
that there ve rsing function can‐
not pr event someone from becoming trapped
in these situations. #
When closing, make sure that no body
parts are in the closing area. #
If someone becomes trapped, press the
W button toopen the side window
again. Ve
ntilating theve hicle before starting a jour‐
ney (con venience opening) &
WARNING Risk of entrapment when
opening a side window
When opening a side windo w,parts of the
body could be dr awn in or become trapped
between the side window and window frame. #
When opening, make sure that nobody
is touching the side windo w. #
Release the button immediately if
somebody becomes trapped. 80
Opening and closing
Page 85 of 557
Problem
Possible causes/consequences and M
MSolutions
& WARNING Risk of entrapment if reve rsing pr otection is not activated
If yo u close a side wind owagain immediately af ter it has been bloc ked or reset, the side window closes
with increased or maximum forc e. The reve rsing feature is then not active.
Pa rts of the body could be trapped in the closing area in the process. #
Make sure that no parts of the body are in the closing area. #
Tostop the closing process, release the button or press the button again toreopen the side win‐
do w. If a side window is obstructed during closing and
reopens again slightly: #
Immediately af terth e window bloc ks, pull the cor responding button again until the side window has
closed, and hold the button for an additional second.
The side window is closed with increased forc e.
If a side window is obstructed again during closing and reopens again slightly: #
Repeat the pr evious step.
The side window is closed without the automatic reve rsing function. 82
Opening and closing
Page 87 of 557

1
Toraise
2 Toopen
3 Toclose/l ower
Use the3 button tooperate the panoramic
sliding sunroof and thero ller sunblind.
R The panoramic sliding sunroof can only be
opened when thero ller sunblind is open. R
The roller sunblind can only be opera ted
when the panoramic sliding sunroof is
closed. #
Tostart automatic operation: press/pull
th e3 button be yond the pressure point. #
Tointer rupt automatic operation: press/
pull the3 button again.
Re strictions:
R The panoramic sliding sunroof cannot be
opened if a roof rack isfitted. The panoramic
sliding sunroof closes again au tomatically
when it encounters resis tance.
Au tomatic reve rsing function of the sliding
sunroof
If th ere is an object obstructing the sliding sun‐
ro of during the closing process, the sliding sun‐
ro of opens again automatically. The automatic
re ve rsing function is only an aid and is not a sub‐
st itute foryo ur attentiveness. #
When closing, make sure that no body parts
are in the closing area. &
WARNING Risk of entrapment even wi th
th ere ve rsing feature active
The reve rsing function does not react:
R tosoft, light and thin objects, e.g. small
fi ngers
R during the last 4 mm of the closing path
R during resetting
R when closing the sliding sunroof again
manually immediately af ter auto matic
re ve rsing
This means that there ve rsing feature cannot
pr eve nt someone being trapped in these sit‐
uations. #
When closing, make sure that no body
parts are in the closing area. #
Release the switch immediately if
somebody becomes trapped.
or #
Press the switch in any direction during
th e automatic closing process.
The closing process is stopped. 84
Opening and closing
Page 89 of 557
#
If somebody becomes trapped, immedi‐
ately pull back the sliding sunroof
switch.
The sliding sunroof lifts during opening. Problems with
the sliding sunroof %
The term "sliding sun roof" also refers to the
panoramic sliding sunroof. Problem
Possible causes/consequences and M MSolutions
The sliding sunroof cann otbe closed
and you cannot see the cause. &
WARNING Risk of entrapment byclosing the sliding sunroof again
If yo u close the sliding sunroof again immediately af ter it has been bloc ked or reset, the sliding sunroof
closes with increased or maximum forc e.
The reve rsing feature is then not active. Parts of the body could be trapped in the closing area in the
process. This poses an increased risk of injury or evenfa ta l injur y. #
Make sure that no parts of the body are in the closing area. #
Release the switch immediately if somebody becomes trapped.
or #
Press the switch in any direction during the automatic closing process.
The closing process is stopped. If
th e sliding sunroof is obstructed during closing and reopens again slightly: #
Immediately af ter auto matic reve rsing, pull and hold the3 button down again tothe point of resist‐
ance until the sliding sunroof is closed.
The sliding sunroof is closed with increased forc e. 86
Opening and closing
Page 102 of 557
Ac
tive Workout prog rams
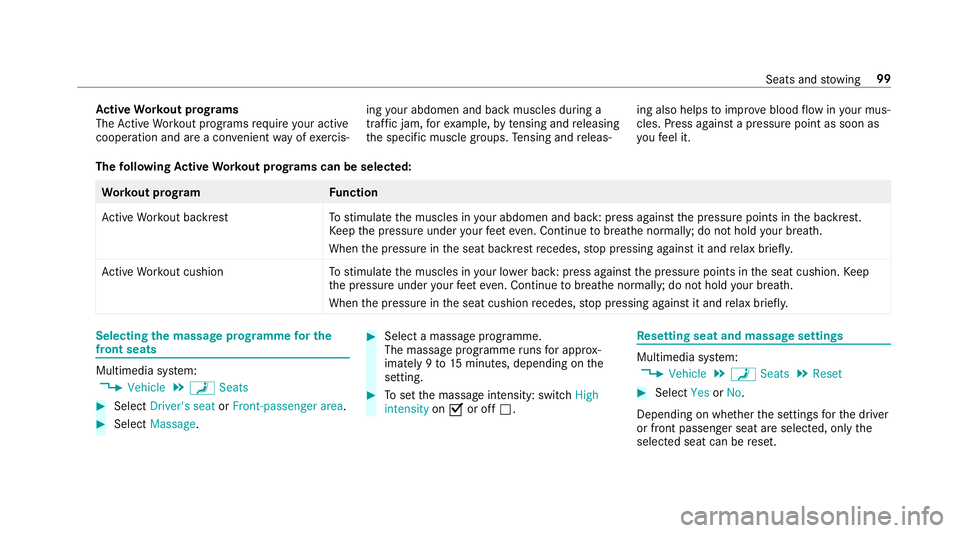
The Active Workout programs requ ire your active
cooperation and are a co nvenient way of exercis‐ ing
your abdomen and back muscles during a
traf fic jam, forex ample, bytensing and releasing
th e specific muscle groups. Tensing and releas‐ ing also helps
toimpr oveblood flow inyour mus‐
cles. Press against a pressure point as soon as
yo ufe el it.
The following Active Workout prog rams can be selected: Wo
rkout prog ramF unction
Ac tive Workout backres tT ostimulate the muscles in your abdomen and back: press against the pressure points in the backrest.
Ke ep the pressure under your feet eve n. Continue tobreathe normally; do not hold your breath.
When the pressure in the seat backrest recedes, stop pressing against it and relax briefly.
Ac tive Workout cushion Tostimulate the muscles in your lo wer back: press against the pressure points in the seat cushion. Keep
th e pressure under your feet even. Continue tobreathe normall y;do not hold your breath.
When the pressure in the seat cushion recedes, stop pressing against it and relax briefly. Selecting
the massage prog ramme for the
front seats Multimedia sy
stem:
, Vehicle .
a Seats #
Select Driver's seat orFront-passenger area. #
Select Massage. #
Select a massage programme.
The massage programme runs for appro x‐
ima tely 9to 15 minutes, depending on the
setting. #
Toset the massage intensity: switch High
intensity onO or off ª. Re
setting seat and massa gesettings Multimedia sy
stem:
, Vehicle .
a Seats .
Reset #
Select YesorNo.
Depending on whe ther the settings forth e driver
or front passenger seat are selected, only the
selected seat can be reset. Seats and
stowing 99
Page 126 of 557

Exterior lighting
Changing
the lights when driving abroad Ve
hicles with halogen or static LED head‐
lamps: It is not necessa ryto change the head‐
lamps. The legal requ irements are also met in
countries where people drive on theot her side
of thero ad.
Ve hicles with Intelligent Light Sy stem: Before
crossing the border into count ries where they
drive on theot her side, it is necessary toset the
headlamp sto symmetrical dipped beam
(→ page 129).
Af terch anging the headlamps:
R Oncoming tra ffic is not dazzled.
R The edge of thero ad is not illuminated as far
or as high.
R The "mo torw ay mode" and "enhanced fog
light functions" are not available.
The headlamps must be reset toasymm etrical
dipped beam af terre turning from ab road. Lighting sy
stems and your responsibility The
various lighting sy stems of theve hicle are
only aids. The driver of theve hicle is responsible
fo r cor rect vehicle illumination in accordance
with the pr evailing light and visibility conditions,
legal requirements and traf fic situation. Light switch
Ope
rating the light switch #
1 W Left-hand pa rking lights #
2 X Right-hand parking lights #
3 T Standing lights and licence plate
lighting Light and sight
12 3
Page 140 of 557
%
The duration of the colour change varies
depending on the usage conditions. Mir
rors Operating
the outside mir rors &
WARNING Risk of inju rythro ugh adjust‐
ing vehicle settings while theve hicle is in
motion
Yo u could lose cont rol of theve hicle in the
fo llowing situations:
R ifyo u adjust the driver's seat, the head
re stra ints, thesteering wheel or the mir‐
ro r while theve hicle is in motion
R ifyo ufast enyour seat belt while theve hi‐
cle is in motion #
Before starting the engine: adjust the
driver's seat, the head restra ints, the
st eering wheel or the mir ror and fasten
yo ur seat belt. &
WARNING Risk of accident due tomis‐
judgement of dis tances when using the
outside mir ror
The outside mir rors reflect objects on a
smaller scale. The objects in view are in fact
closer than they appear.
As a result, you may misjud gethe dis tance
between you and thero ad user driving
behind you, e.g. when changing lanes. #
Therefore, alw ays look over your shoul‐
der in order toensure that you are
aw are of the actual dis tance between
yo u and thero ad users driving behind
yo u. #
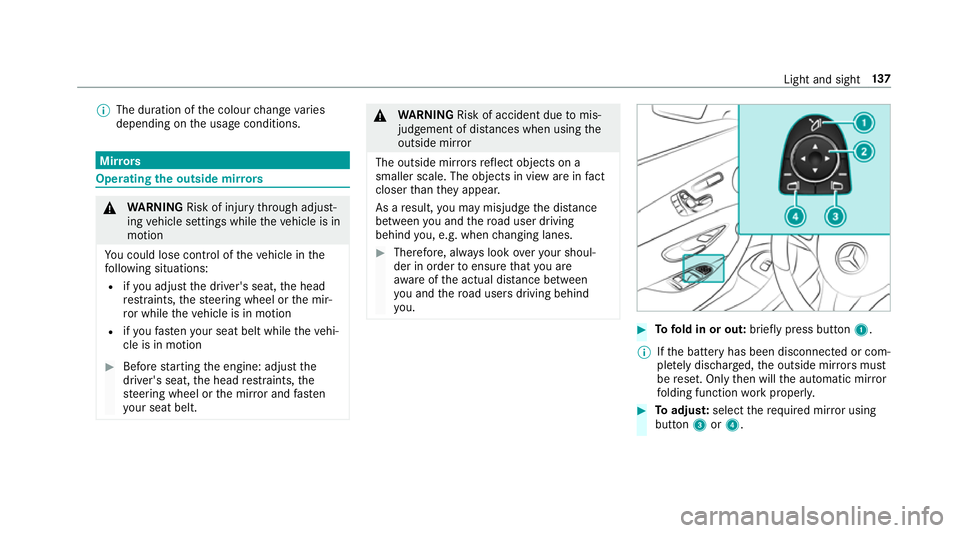
Tofold in or out: brieflypress button 1.
% Ifth e battery has been disconnected or com‐
ple tely discharged, the outside mir rors must
be reset. Only then will the automatic mir ror
fo lding function workproperly. #
Toadjus t:select therequ ired mir ror using
button 3or4. Light and sight
137