2016 MERCEDES-BENZ E-CLASS SALOON USB port
[x] Cancel search: USB portPage 109 of 557
#
Alw ays be particular lycareful around
th eta ilpipe and theta ilpipe trim. #
Allow theve hicle parts tocool down
before youto uch them. The handling
characteristics of your vehicle are
dependent on the distribution of the load within
th eve hicle. You should bear thefo llowing in
mind when loading theve hicle:
R neverex ceed the maximum permissible
gross mass or the permissible axle loads for
th eve hicle (including occupants).
R the load must not pr otru de abo vethe upper
edge of the seat backrests.
R always place the load behind unoccupied
seats if possible.
R secure the load using the tie-down eyes and
distribute the load evenl y. Interior
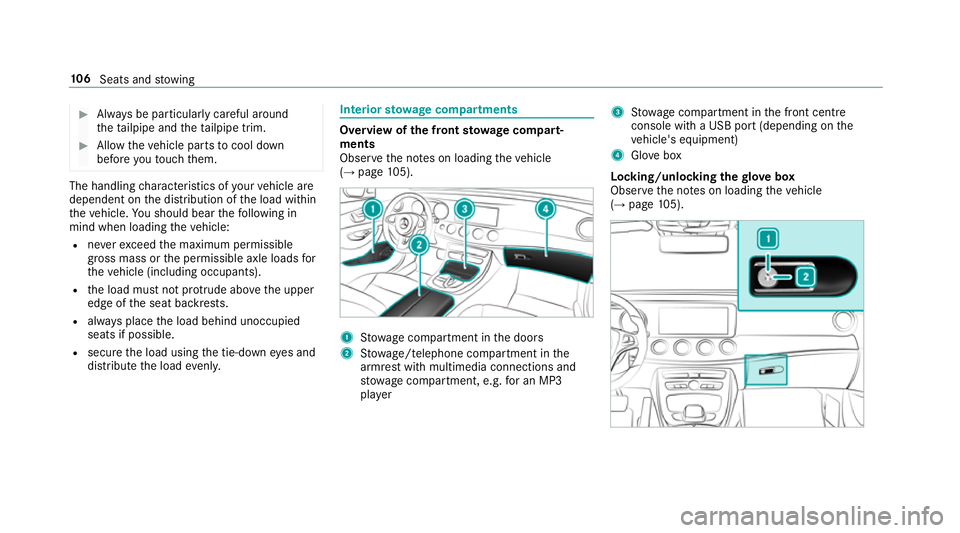
stowage compa rtments Overvi
ewofthe front stowage compa rt‐
ments
Obse rveth e no tes on loading theve hicle
(→ page 105). 1
Stow age compartment in the doors
2 Stow age/telephone compartment in the
armrest with multimedia connections and
stow age compartment, e.g. for an MP3
pla yer 3
Stow age compartment in the front cent re
console wi tha USB port (depending on the
ve hicle's equipment)
4 Glovebox
Locking/unlocking thegl ove box
Obser vethe no tes on loading theve hicle
(→ page 105). 106
Seats and stowing
Page 261 of 557

Vo
ice prom pting #
Tostart or continue a dialogue: pressthe
ó button on the multifunction steering
wheel.
Yo u can say a command af ter an acou stic
signal. #
Tocor rect an ent ry:say theCorrection
command. #
Toselect an entry from the selection lis t:
say the line number or the conte nts. #
Tobrows eth e selection lis t:say theCon-
tinue orBack command. #
Tointer rupt the dialogue: saythePause
command. #
Tocancel the dialogue: saytheCancel
command. Operable functions
Yo
u can use the LINGU ATRO NIC voice control
sy stem tooperate thefo llowing equipment
re ga rdless of thefe atures:
R Telephone R
Text messa ges
R Navigation
R Address book
R Radio
R Audio (memory card, Media Inter face, USB
and Blu etoo th®
audio)
R TV
R Vehicle Command types
A distinction is made between
thefo llowing
command types:
R Global commands can be said at any time
and rega rdless of the cur rent application,
e.g. theNavigate to, CallorText message to
commands.
R Application-specific commands are only
av ailable forth e active application. 1
Global commands
2 Application-specific commands
On the display next tothe active application,
va rying global commands and the cor responding
application-specific commands are displa yed on
an autocue. This makes ent ryeasier and sup‐
ports interactive operation. The list can be scrol‐
led or it can be operated byspeech or the con‐
troller/touchpad. Entering numbers
Ente
ring numbe rs:
R The numbers allo wed are zerotonine . 258
LINGUATRONIC
Page 284 of 557

Ac
tivating/deactivating the COMAND Touch
ch ild saf ety lock
Multimedia sy stem:
, System .
COMAND Touch
Child saf ety lock #
Switch Parental control onO or off ª.
The content displa yed on theex tern al device
can on lybe set on the multimedia sy stem. Sy
stem language Note
s onthe sy stem language
This function allo wsyouto determ ine the lan‐
guage forth e menu displa ysand the navigation
announcements. The selected language af fects
th ech aracters available for entr y.The navigation
announcements are not available in all lan‐
guages. If a language is not available, the naviga‐
tion announcements will be in Engl ish.
Setting the sy stem language
Multimedia sy stem:
, System .
Language #
Set the language. %
Ifyo u are using Arabic map data, thete xt
information can also be shown in Arabic on
th e navigation map. Todo so, select ةيبرعلاas
th e language from the language list. Naviga‐
tion announcements are then also made in
Arabic. Setting
the distance unit Multimedia sy
stem:
, System .
Units #
Select kmormi. #
Switch Additional speedometer onO todis‐
play in the instrument clus ter's multifunction
displa y. Data import and
export Data import/export function
The
following functions are possible:
R transfer ring da tafrom one sy stem or vehicle
to ano ther sy stem or vehicle.
R creating a bac kup copy of your personal data
and loading it again. R
protecting your personal data against un wan‐
te dex port with PIN pr otection.
Yo u can either use an SD card or a USB storage
device as temp orary storage.
% Please no tethat the NTFS file sy stem is not
suppor ted. The FAT32 file sy stem is recom‐
mended.
Importing/exporting data
* NO
TEData loss #
Do not remo vethe data storage
medium when data is being expor ted.
Mercedes-Benz is not liable for any loss of
data. Re
quirements:
R The vehicle is stationar y.
R The ignition is switched on or theve hicle has
been star ted.
R The SD card is inser ted (→ page 338) or the
USB device is connecte d (→page 341). Multimedia sy
stem 281
Page 286 of 557

Importing/exporting user profiles
Re
quirements:
R There is an Internet connection
(→ page 329).
R A Mercedes me account exists at http://
www.me rcedes.me.
R The Personalisation service is activated.
Multimedia sy stem:
, System .
g Personalisation .
Man-
ual export/import
This function is not available in all countries.
On lyindividual profiles can be impor ted or
ex por ted.
The individual profiles are alw ays collectively
impor ted or expor ted. #
Impor t:select Import profiles from the
server.
The The profile import overwrites the exist-
ing profiles. Do you want to continue? mes‐
sage appears. #
Select Yes.
User profiles are impor ted. #
Expor t:select Export profiles to the server.
User profiles are expor ted.
% Certain settings such as address book
ent ries or pr evious destinations from the
navigation sy stem are not expor ted.
User profile options
Multimedia sy stem:
, System .
g Personalisation #
Highlight a profile. #
¥ Select an option.
The following options are available:
R Rename
R Delete
R Reset
% The guest profile cannot be dele ted or
re named. So
ftwa reupdate Information on software updates
The multimedia sy
stem pr ovides a message
when an update is available. Depending on
the source, you can per form vari‐
ous updates:
Software update Source of
the
update Up
date type
Interne tN avigation maps, sys‐
te m updates
External storage
medium, e.g. USB
st ick Na
vigation maps Pe
rforming a software upda te
Re quirement:
An Internet connection is requ ired for updates
which are obtained online (→ page 329).
Multimedia sy stem:
, System .
Software update
Au tomatically #
Activate Othe automatic software update.
Up dates are per form ed. Multimedia sy
stem 283
Page 316 of 557
R
geo-coordinates
Editing thefo rm at of a contact's name
Multimedia sy stem:
, Telephone .
Z Options .
Name
format
The following options are available:
R Surname, first name
R Surname First name
R First name Surname #
Select an option.
Importing contacts into the contacts menu
Vi aZ Options, you can import contacts into
th ete lephone book as elect ronic business cards
from di fferent sources. Overview of importing contacts as electronic
business cards Source
Requirements:
ò Memory car dThe SD memory card
is inser ted.
ò USB device The USB device is
inserted into the USB
port.
ñ Bluetooth ®
con‐
nection If
th e sending of
vCards is suppor ted
via Blue tooth®
,
vCard s can be
re cei ved on mobile
phones or netbooks,
fo rex ample.
Blue tooth ®
is activa‐
te d in the multimedia
sy stem and on the
re spective device
(see the manufactur‐
er's operating instruc‐
tions). Saving a mobile phone contact
Multimedia sy
stem:
, Telephone .
ª Contacts #
Call up a mobile phone conta ctó
(→ page 312). #
Select ¥. #
Select Save in vehicle.
The contact sa ved in the multimedia sy stem
is identified bythef symbol.
Calling a contact
Multimedia sy stem:
, Telephone .
ª Contacts #
Ente rch aracters into the sear chfield. #
Select the conta ct. #
Select a telephone number.
The number is dialled.
Fu rther options in the contacts menu
Multimedia sy stem:
, Telephone .
ª Contacts #
Select ¥. Multimedia sy
stem 313
Page 329 of 557
Te
rm inating the connection between the
mo bile phone and thete lephone module
There are two waysof disconnecting the
mo bile phone and module:
Au tomatic discon‐
nection Occu
rsafte r leaving
th ere ception range
Manual disconnec‐
tion Occu
rsby term inating
th e Blue tooth®
con‐
nection on the mobile
phone (see the manu‐
fa cturer's ope rating
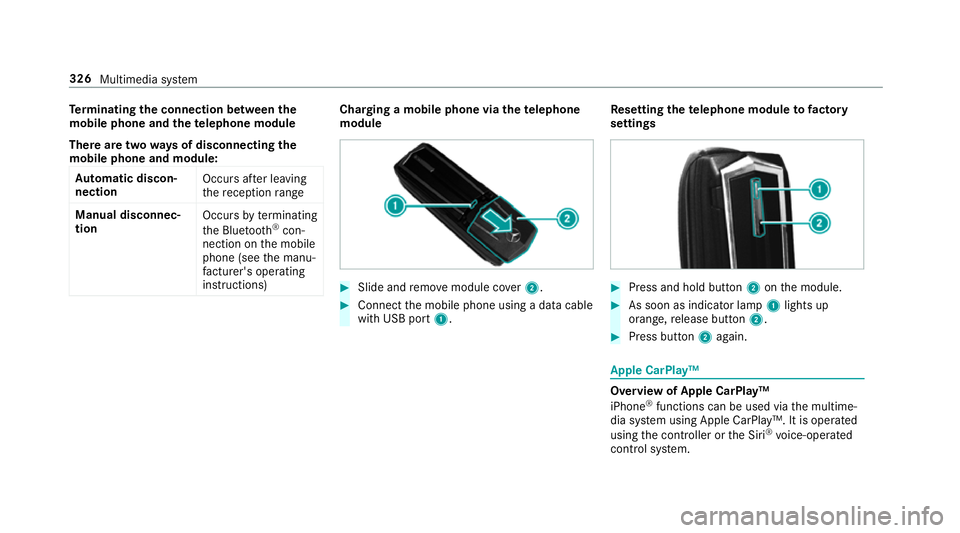
instructions) Charging a mobile phone via the
telephone
module #
Slide and remo vemodule co ver2. #
Connect the mobile phone using a data cable
with USB port 1. Re
setting thete lephone module to factory
settings #
Press and hold button 2onthe module. #
As soon as indicator lamp 1lights up
orange, release button 2. #
Press button 2again. Apple CarPlay™
Overview of Apple CarPlay™
iPhone
®
functions can be used via the multime‐
dia sy stem using Apple CarPlay™. It is operated
using the controller or the Siri ®
vo ice-operated
control sy stem. 326
Multimedia sy stem
Page 330 of 557
Only one mobile phone at a time can be connec‐
te
d via Apple CarPlay™ tothe multimedia sys‐
te m.
While using Apple CarPlay™, various functions of
th e multimedia sy stem, e.g. the navigation, are
not available.
The availability of Apple CarPlay™ may vary
according tothe count ry.
The service pr ovider is responsible forth is appli‐
cation and the services and conte nt connected
to it.
Connecting an iPhone ®
via Apple CarPlay™
Requ irements:
R Apple CarPlay™ can be used with Apple ®
operating sy stem version iOS 8.3 or abo ve.
R The full range of functions for Apple Car‐
Play™ is only possible with an Internet con‐
nection.
R The iPhone ®
is connected tothe multimedia
sy stem via the USB port çusing a suita‐
ble cable (→ page 341). Multimedia sy
stem:
, Connect .
Apple CarPlay
Setting automatic or manual start
A messa geappears when connec tedfo rth efirst
time. #
Automatic star t:select Automatically.
Start automatically is activatedO.
Apple CarPlay™ will now start immediately
af te rth e iPhone ®
is connected tothe multi‐
media sy stem using a USB cable. #
Manual star t:select Manually . #
Select the iPhone ®
in the device list.
Ac cepting/rejecting the data pr otection reg‐
ulations
A message with the data pr otection regulations
appears. #
Select Accept and start.
or #
Select Reject and end.
If yo u selected automatic start, you will ha ve
to start Apple CarPlay™ manually the next
time youwa nttouse it. Exiting Apple CarPlay™ #
Select Úin Apple CarPlay™.
Calling up Apple CarPlay™ tone settings
Multimedia sy stem:
, Connect .
Apple CarPlay .
Sound #
Select theto ne menu (→ page 360).
Ending Apple CarPlay™
Multimedia sy stem:
, Connect .
Apple CarPlay #
Select Disconnect.
The connection is ended.
The mobile phone continues tobe supplied
with elect ricity.
or #
Disconnect the connecting cable between
th e mobile phone and multimedia sy stem.
Mercedes-Benz recommends disconnecting
th e connecting cable only when theve hicle is
st ationar y. Multimedia sy
stem 327
Page 331 of 557
Android
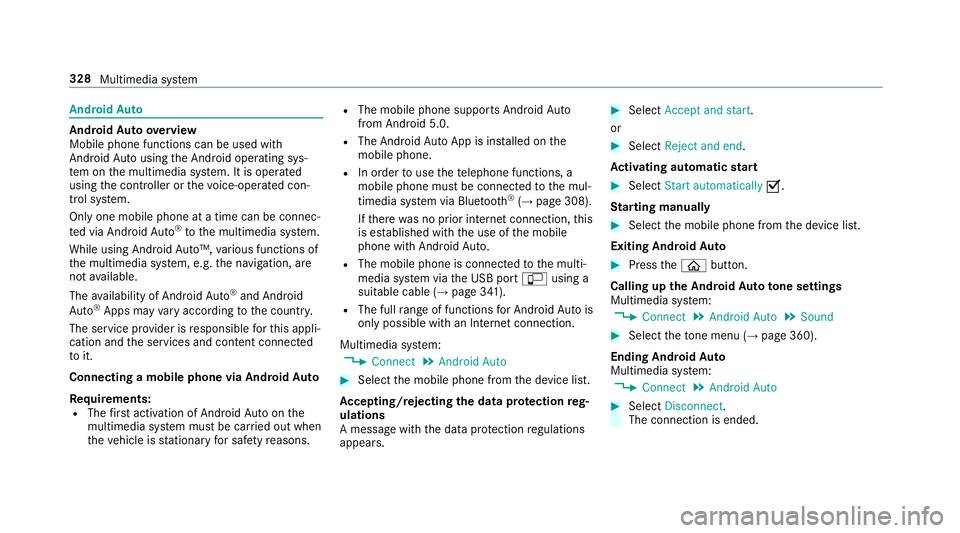
Auto Android
Autoove rview
Mobile phone functions can be used with
Android Autousing the Android operating sys‐
te m on the multimedia sy stem. It is operated
using the controller or thevo ice-operated con‐
trol sy stem.
Only one mobile phone at a time can be connec‐
te d via Android Auto®
to the multimedia sy stem.
While using Android Auto™, various functions of
th e multimedia sy stem, e.g. the navigation, are
not available.
The availability of Android Auto®
and Android
Au to®
Apps may vary according tothe count ry.
The service pr ovider is responsible forth is appli‐
cation and the services and conte nt connected
to it.
Connecting a mobile phone via Android Auto
Requ irements:
R The firs t acti vation of Android Autoon the
multimedia sy stem must be car ried out when
th eve hicle is stationary for saf etyre asons. R
The mobile phone suppo rts Android Auto
from Android 5.0.
R The Android AutoApp is ins talled on the
mobile phone.
R In order touse thete lephone functions, a
mobile phone must be connec tedto the mul‐
timedia sy stem via Blue tooth®
(→ page 308).
If th ere was no prior internet connection, this
is es tablished with the use of the mobile
phone with Android Auto.
R The mobile phone is connected tothe multi‐
media sy stem via the USB port çusing a
suitable cable (→ page 341).
R The full range of functions for Android Autois
only possible with an Internet connection.
Multimedia sy stem:
, Connect .
Android Auto #
Select the mobile phone from the device list.
Ac cepting/rejecting the data pr otection reg‐
ulations
A message with the data pr otection regulations
appears. #
Select Accept and start.
or #
Select Reject and end.
Ac tivating automatic start #
Select Start automatically O.
St arting manually #
Select the mobile phone from the device list.
Exiting Android Auto #
Press theò button.
Calling up the Android Auto to ne settings
Multimedia sy stem:
, Connect .
Android Auto .
Sound #
Select theto ne menu (→ page 360).
Ending Android Auto
Multimedia sy stem:
, Connect .
Android Auto #
Select Disconnect.
The connection is ended. 328
Multimedia sy stem