2016 MERCEDES-BENZ E-CLASS ESTATE wiper blades
[x] Cancel search: wiper bladesPage 145 of 565
#
1 b Wipes with washer fluid #
2 ISwit ches on intermittent wiping #
3 0Switches off intermittent wiping #
4 b Wipes with washer fluid Re
placing the windsc reen wiper blades &
WARNING Risk of becoming trapped if
th e windscreen wipers are switched on
while wiper blades are being replaced
If th e windscreen wipers begin tomo vewhile
yo u are changing the wiper blades, you can
be trapped bythe wiper arm. #
Alw ays switch off the windscreen wip‐
ers and ignition before changing the
wiper blades. Moving
the wiper arms toave rtical position #
Set the windscreen wipers tothe° slow
continuous wiping position on the combina‐
tion switch. #
As soon as the wiper arms are vertical rela‐
tive tothe engine bonn et, switch off the igni‐
tion. #
Foldthe wiper arm away from the wind‐
screen.
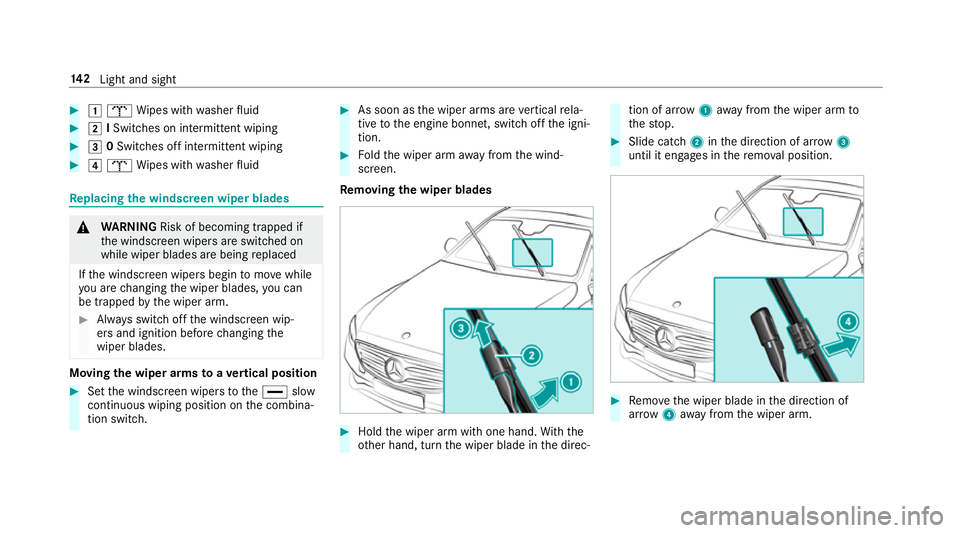
Re moving the wiper blades #
Hold the wiper arm with one hand. With the
ot her hand, turn the wiper blade in the direc‐ tion of ar
row1away from the wiper arm to
th estop. #
Slide catch 2inthe direction of ar row 3
until it engages in there mo val position. #
Remo vethe wiper blade in the direction of
ar row 4away from the wiper arm. 14 2
Light and sight
Page 146 of 565
Fi
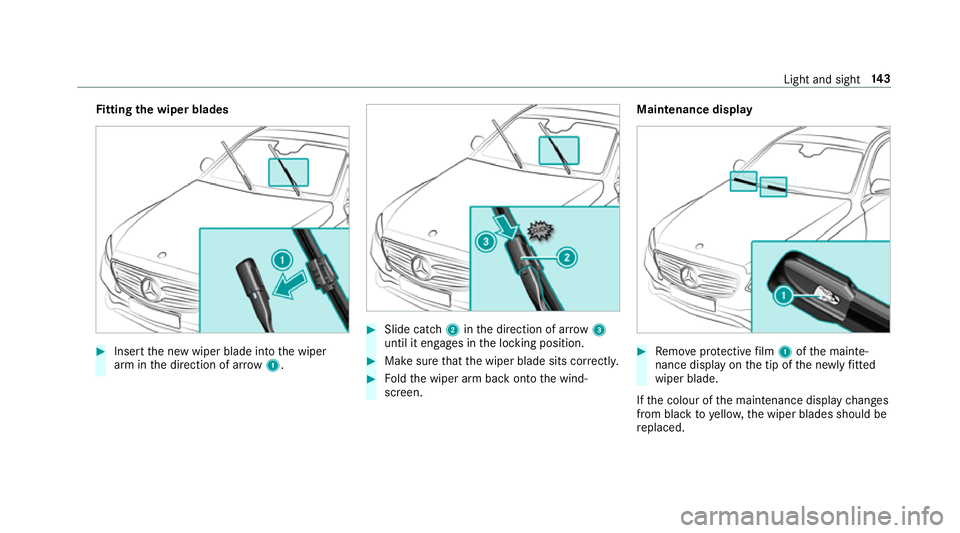
tting the wiper blades #
Inse rtthe new wiper blade into the wiper
arm in the direction of ar row1. #
Slide catch 2inthe direction of ar row 3
until it engages in the locking position. #
Make sure that the wiper blade sits cor rectly. #
Foldthe wiper arm back onto the wind‐
screen. Maintenance display
#
Remo veprotective film 1 ofthe mainte‐
nance display on the tip of the newly fitted
wiper blade.
If th e colour of the maintenance display changes
from black to yellow, the wiper blades should be
re placed. Light and sight
14 3
Page 147 of 565
%
The duration of the colour change varies
depending on the usage conditions. Re
placing the rear window wiper blades Re
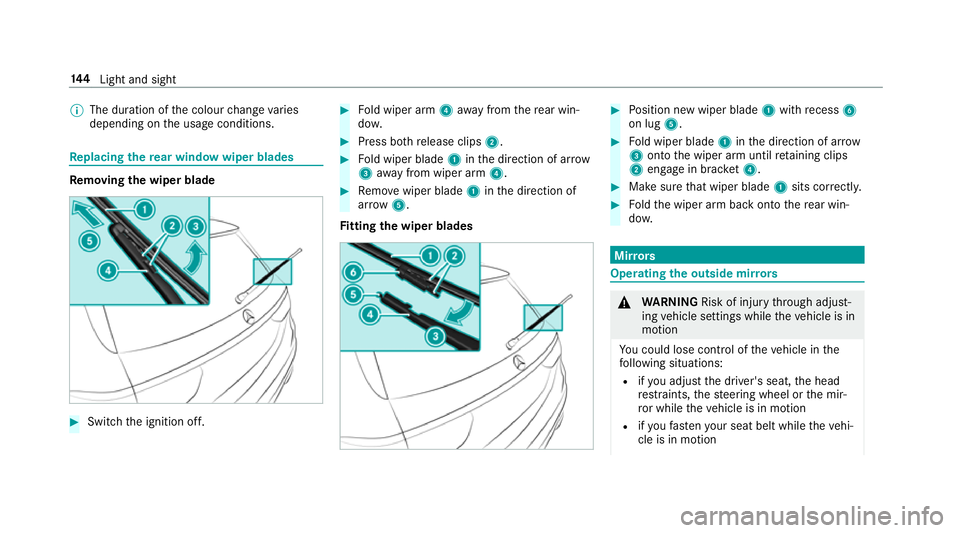
moving the wiper blade #
Switch the ignition off. #
Fold wiper arm 4away from there ar win‐
do w. #
Press bo threlease clips 2. #
Fold wiper blade 1inthe direction of ar row
3 away from wiper arm 4. #
Remo vewiper blade 1inthe direction of
ar row 5.
Fi tting the wiper blades #
Position new wiper blade 1with recess 6
on lug 5. #
Fold wiper blade 1inthe direction of ar row
3 onto the wiper arm until retaining clips
2 engage in brac ket4. #
Makesure that wiper blade 1sits cor rectl y. #
Foldthe wiper arm back onto there ar win‐
do w. Mir
rors Operating
the outside mir rors &
WARNING Risk of inju rythro ugh adjust‐
ing vehicle settings while theve hicle is in
motion
Yo u could lose cont rol of theve hicle in the
fo llowing situations:
R ifyo u adjust the driver's seat, the head
re stra ints, thesteering wheel or the mir‐
ro r while theve hicle is in motion
R ifyo ufast enyour seat belt while theve hi‐
cle is in motion 14 4
Light and sight
Page 386 of 565
Note
s on care of vehicle parts &
WARNING Risk of entrapment if the
windscreen wipers are swit ched on while
th e windscreen is being cleaned
If th e windscreen wipers are set in motion
while you are cleaning the windscreen or
wiper blades, you can be trapped bythe
wiper arm. #
Alw ays switch off the windscreen wip‐
ers and the ignition before cleaning the
windscreen or wiper blades. &
WARNING Risk of bu rns from tailpipes
and tailpipe trim
The tailpipe and tailpipe trim can become
ve ry hot. If you come into contact with these
parts of theve hicle, you could burn yourself. #
Alw ays be particular lycareful around
th eta ilpipe and theta ilpipe trim. #
Allow theve hicle parts tocool down
before youto uch them. Obser
vethefo llowing information: Information on cleaning and car
eAvoiding vehicle damage
Wheels/rims Usewate r and acid-free wheel cleaners. R
Do not use acidic wheel cleaners toremo vebrake dust.
This could damage wheel bolts and brake components.
R Toavoid cor rosion of the brake discs and brake linings,
drive theve hicle for a few minutes af ter cleaning before
parking it. The brake discs and brake linings warm up and
dried out.
Wi ndo ws
Cleanthe windo wsonthe inside and outside using a damp
clo thand cleaning products recommended byMercedes-
Benz. Do not use dry clo
ths, abrasive products or cleaning agents
containing sol vents toclean the inside of the windo ws. Maintenance and care
383
Page 387 of 565
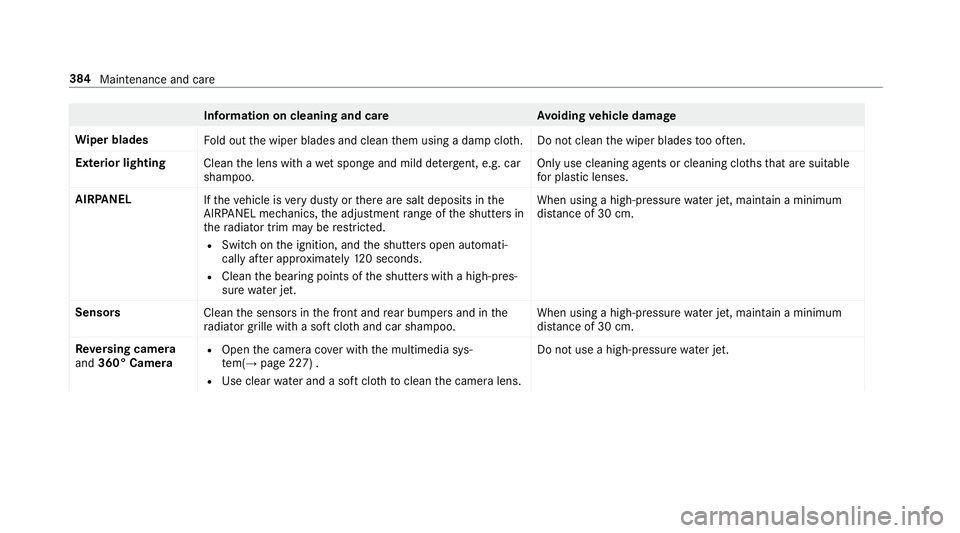
Information on cleaning and car
eAvoiding vehicle damage
Wi per blades
Fold out the wiper blades and clean them using a damp clo th.D o not clean the wiper blades too of ten.
Ex terior lighting
Cleanthe lens with a wet sponge and mild de terg ent, e.g. car
shampoo. Only use cleaning agents or cleaning clo
thsth at are suitable
fo r plast ic lenses.
AIRPANEL Ifth eve hicle is very dusty or there are salt deposits in the
AIR PANEL mechanics, the adjustment range of the shutters in
th era diator trim may be restricted.
R Switch on the ignition, and the shutters open automati‐
cally af ter appro ximately 12 0 seconds.
R Clean the bearing points of the shutters with a high-pres‐
sure water jet. When using a high-p
ressure water jet, maintain a minimum
dis tance of 30 cm.
Sensors Cleanthe sensors in the front and rear bumpers and in the
ra diator grille with a soft clo thand car shampoo. When using a high-pressure
water jet, maintain a minimum
dis tance of 30 cm.
Re versing camera
and 360° Camera R
Open the camera co ver with the multimedia sys‐
te m(→ page 227) .
R Use clear water and a soft clo thtoclean the camera lens. Do not use a high-pressure
water jet. 384
Maintenance and care
Page 547 of 565
Ra
dio
Ac tivating ............................................ 359
Ac tivating/deactivating radio text ....... 362
Calling up a slide show ........................ 361
Calling up thest ation list .................... .361
Commands (LINGU ATRO NIC) ............... 274
Del eting stations .................................. 361
Direct frequency ent ry......................... 361
Displaying information ......................... 362
Editing station presets ........................ .361
Fr equency fix ....................................... 362
Menu (on-boa rdcompu ter) .................. 262
Moving stations .................................. .361
Overview ............................................. 360
Sear ching forst ations .......................... 361
Setting a station .................................. 361
Setting station tracking ...................... .362
Setting the frequency band .................. 361
Setting the traf fic information
service volume inc rease ...................... 362
St oring stations .................................. .361
Switching traf fic announcements
on/off ................................................. 362
Ta gging music trac ks........................... 362
To display radio text ............................ 362 Ra
dio stations
Selecting (on-boa rdcompu ter) ............ 262
Ra in-closing feature
Sliding sunroof ...................................... 85
Ra ising
Ve hicle ................................................ 423
Ra nge
Displaying ............................................ 259
Re ading lamp
see Interior lighting
Re ar door (child saf ety lock) .....................61
Re ar fog light ...........................................1 32
Re ar seat
see Seat
Re ar seat belt
St atus display ........................................ 36
Re ar seat belt status display .................... 36
Re ar window
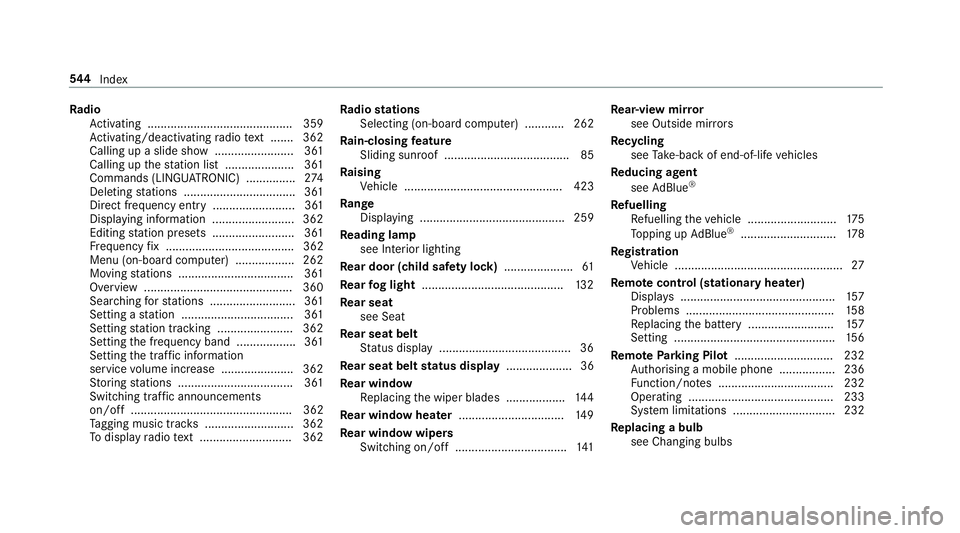
Re placing the wiper blades .................. 14 4
Re ar window heater ................................ 14 9
Re ar window wipers
Switching on/off .................................. 141Re
ar-view mir ror
see Outside mir rors
Re cycling
see Take -ba ckof end-of-life vehicles
Re ducing agent
see AdBlue ®
Re fuelling
Re fuelling theve hicle ........................... 175
To pping up AdBlue ®
............................. 178
Re gistration
Ve hicle ................................................... 27
Re mo tecont rol (stationa ryheater)
Displ ays ............................................... 157
Problems ............................................. 15 8
Re placing the battery .......................... 157
Setting ................................................. 15 6
Re mo teParking Pilot .............................. 232
Auth orising a mobile phone ................. 236
Fu nction/no tes ................................... 232
Operating ............................................ 233
Sy stem limitations ...............................2 32
Re placing a bulb
see Changing bulbs 544
Index
Page 559 of 565
Calling up options ..............................
.344
Calling up settings .............................. .344
Closing ................................................ 345
Deleting In tern et favo urites ................ .345
Deleting Internet his tory ...................... 345
Overview ............................................. 344
Setting Internet favo urites .................. .345
We bsite
Calling up ............................................ 344
Wheel change .......................................... 427
Fitting a new wheel ............................ .425
Lo we ring theve hicle ........................... 426
Preparation ......................................... 422
Ra ising theve hicle .............................. 423
Re moving a wheel .............................. .425
Re moving/fitting hub caps .................. 422
Wheel chock ............................................ 421
Wheel rotation ........................................ .420
Wheels Care .................................................... 383
Changing ............................................. 422
Changing hub caps .............................. 422
Checking ............................................. 409 Checking
the tyre pressure (tyre
pressure monitoring sy stem) ............... 413
Fitting .................................................. 425
Flat tyre ............................................... 390
MOExtended tyres ............................... 390
Noise ................................................... 409
No tes on fitting .................................... 417
Re moving ............................................ 425
Re placing .............................................4 17
Re starting the tyre pressure loss
wa rning sy stem .................................... 417
Re starting the tyre pressure monitor‐
ing sy stem ...........................................4 13
Ro tating ............................................... 420
Selection .............................................. 417
Snow chains ........................................ 409
St oring .................................................4 21
TIREFIT kit ...........................................3 92
Ty re pressure (N otes) ........................... 41 0
Ty re pressure loss warning sy stem
(function) ............................................. 416
Ty re pressure monitoring sy stem
(function) ............................................. 412
Ty re pressure table ...............................4 11
Un usual handling characteristics ........ 409 Wi
-Fi
Overview ............................................. 288
Setting ................................................ .288
Setting up a hotspot ............................ 289
Setting up an Internet connection ....... 340
Wi ndow airbag ...........................................36
Wi ndow lif ter ............................................. 79
Wi ndo ws .................................................... 79
Closing .................................................. 79
Opening ................................................. 79
Wi ndo ws(Care) ...................................... .383
Wi ndscreen ...................................... 142, 14 9
Demi sting ............................................ 14 9
Infrared reflective ................................ 147
Re placing the wiper blades .................. 14 2
Wi ndscreen
see Windsc reen
Wi ndscreen heater ..................................1 54
Wi ndscreen heating
see Windsc reen heater
Wi ndscreen washer fluid ........................ 441
No tes ................................................... 441556
Index
Page 560 of 565
Wi
ndscreen washer sy stem
To pping up ...........................................3 79
Wi ndscreen wipers
Re placing the wiper blades .................. 14 2
Switching on/off .................................. 141
Wi nter operation
Snow chains ........................................ 409
Wi nter tyres
Setting the permanent speed limit ...... 202
Wi per blades
Ca re .................................................... 383
Changing ............................................. 14 2
Wire lesscharging
Fu nction/no tes ................................... 12 8
Mobile phone ....................................... 12 9
Wire lessvehicle comp onents
Declaration of Conformity .................... .24
Wo rkout prog ramme
Overview ............................................... 98
Wo rkshop
see Qualified specialist workshop Index
557