2016 MERCEDES-BENZ E-CLASS ESTATE height
[x] Cancel search: heightPage 177 of 565
#
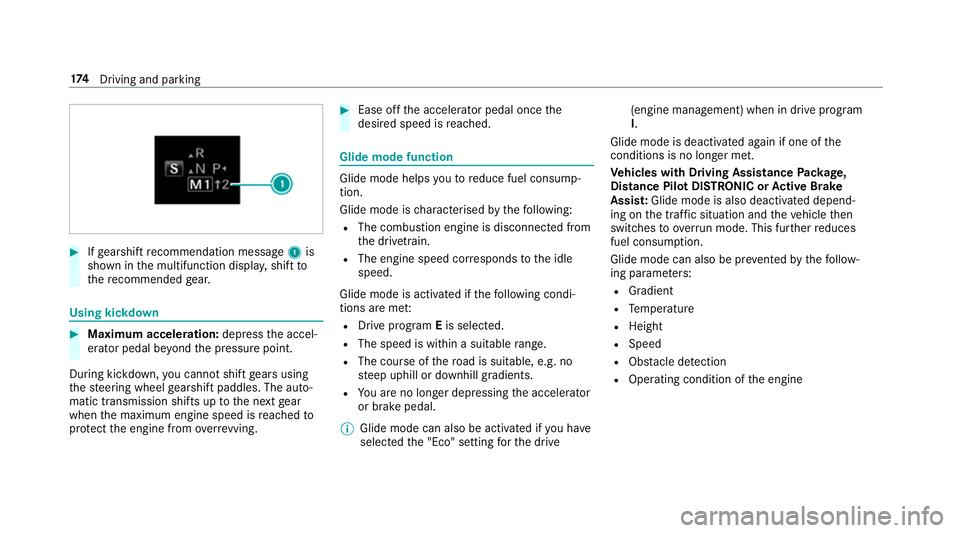
Ifge arshift recommendation message 1is
shown in the multifunction displa y,shift to
th ere commended gear. Using kickd
own #
Maximum acceleration: depressthe accel‐
erator pedal be yond the pressure point.
During kickdown, you cannot shift gears using
th esteering wheel gearshift paddles. The auto‐
matic transmission shifts up tothe next gear
when the maximum engine speed is reached to
pr otect the engine from overrev ving. #
Ease off the accelera tor pedal once the
desired speed is reached. Glide mode function
Glide mode helps
youto reduce fuel consump‐
tion.
Glide mode is characterised bythefo llowing:
R The combustion engine is disconnected from
th e driv etra in.
R The engine speed cor responds tothe idle
speed.
Glide mode is activated if thefo llowing condi‐
tions are me t:
R Drive program Eis selected.
R The speed is wi thin a suitable range.
R The cou rse of thero ad is suitable, e.g. no
st eep uphill or downhill gradients.
R You are no lon ger depressing the accelerator
or brake pedal.
% Glide mode can also be activated if you ha ve
selected the "Eco" setting forth e drive (engine management) when in drive program
I.
Glide mode is deactivated again if one of the
conditions is no longer met.
Ve hicles with Driving Assistance Package,
Dist ance Pil otDISTRONIC or Active Brake
Assi st:Glide mode is also deacti vated depend‐
ing on the traf fic situation and theve hicle then
switches toove rrun mode. This fur ther reduces
fuel consum ption.
Glide mode can also be pr evented bythefo llow‐
ing parame ters:
R Gradient
R Temp erature
R Height
R Speed
R Obs tacle de tection
R Ope rating condition of the engine 174
Driving and pa rking
Page 220 of 565
ri
ses slightly and then returns tothe set le vel
shortly af terw ards.
Yo u or an yone else in the vicinity of the
wheel ar ches or the underbody could thus
become trapped.
The vehicle can also be lo wered af ter being
loc ked. #
When leaving theve hicle, make sure
th at nobody is in the vicinity of the
wheel ar ches or the underbody. Re
quirements:
R The vehicle's engine must be switched on.
R Allvehicles except All- Terra invehicles:
The vehicle must not be moving fasterthan
60 km/h.
R All-Terrain vehicles: Thevehicle must not be
moving faster than 35 km/h. Ra
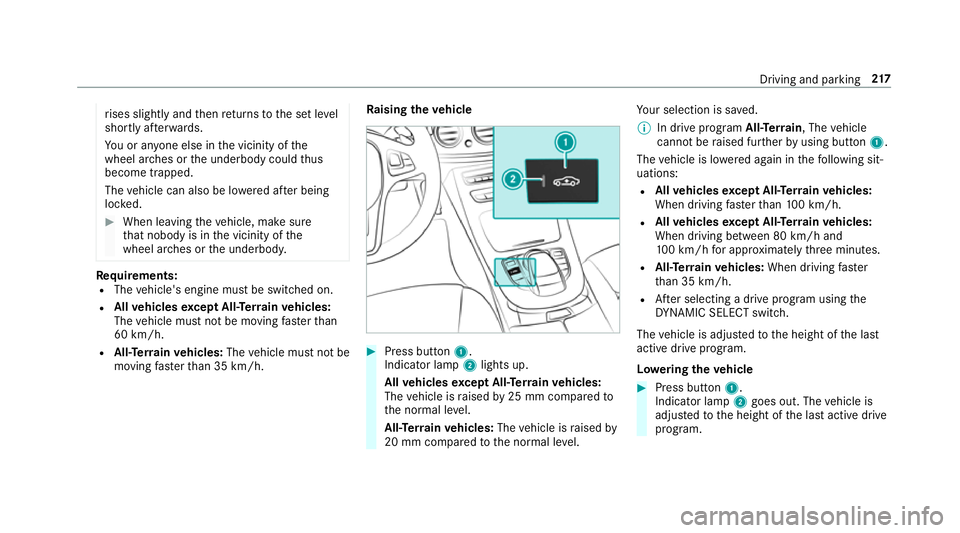
ising theve hicle #
Press button 1.
Indica tor lamp 2lights up.
All vehicles except All- Terra invehicles:
The vehicle is raised by25 mm compared to
th e normal le vel.
All- Terrain vehicles: Thevehicle is raised by
20 mm compared tothe normal le vel. Yo
ur selection is sa ved.
% In drive prog ram All-T errain, The vehicle
cannot be raised fur ther by using but ton1.
The vehicle is lo wered again in thefo llowing sit‐
uations:
R Allvehicles except All- Terrain vehicles:
When driving fasterthan 100 km/h.
R Allvehicles except All- Terrain vehicles:
When driving between 80 km/h and
10 0 km/h for appro ximately thre e minutes.
R All-Terrain vehicles: When driving faster
th an 35 km/h.
R After selecting a drive program using the
DY NA MIC SELECT switch.
The vehicle is adjus tedto the height of the last
active drive prog ram.
Lo weri ngtheve hicle #
Press button 1.
Indica tor lamp 2goes out. The vehicle is
adjus tedto the height of the last active drive
program. Driving and parking
217
Page 229 of 565
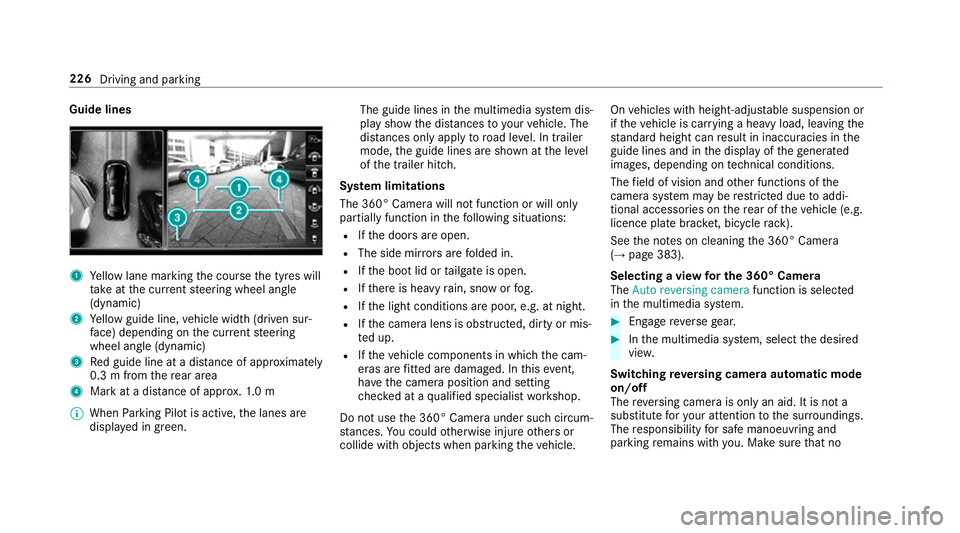
Guide lines
1
Yellow lane marking the course the tyres will
ta ke atthe cur rent steering wheel angle
(dynamic)
2 Yellow guide line, vehicle width (driven sur‐
fa ce) depending on the cur rent steering
wheel angle (dynamic)
3 Red guide line at a dis tance of appr oximately
0.3 m from there ar area
4 Mark at a distance of appr ox.1. 0 m
% When Parking Pilot is active, the lanes are
displa yed in green. The guide lines in
the multimedia sy stem dis‐
play show the dis tances toyour vehicle. The
dis tances only apply toroad le vel. In trailer
mode, the guide lines are shown at the le vel
of the trailer hitch.
Sy stem limitations
The 360° Camera will not function or will only
partially function in thefo llowing situations:
R Ifth e doors are open.
R The side mir rors are folded in.
R Ifth e boot lid or tailgate is open.
R Ifth ere is heavy rain, snow or fog.
R Ifth e light conditions are poor, e.g. at night.
R Ifth e camera lens is obstructed, dirty or mis‐
te d up.
R Ifth eve hicle components in which the cam‐
eras are fitted are dama ged. In this event,
ha ve the camera position and setting
ch ecked at a qualified specialist workshop.
Do not use the 360° Camera under such circum‐
st ances. You could otherwise injure others or
collide with objects when parking theve hicle. On
vehicles with height-adjus table suspension or
if th eve hicle is car rying a heavy load, leaving the
st andard height can result in inaccuracies in the
guide lines and in the display of thege nerated
ima ges, depending on tech nical conditions.
The field of vision and other functions of the
came rasystem may be restricted due toaddi‐
tional accesso ries on there ar of theve hicle (e.g.
licence plate brac ket, bicycle rack ).
See the no tes on cleaning the 360° Camera
(→ page 383).
Selecting a view for the 360° Camera
The Auto reversing camera function is selected
in the multimedia sy stem. #
Enga gereve rsege ar. #
Inthe multimedia sy stem, select the desired
vie w.
Switching reve rsing camera automatic mode
on/off
The reve rsing camera is only an aid. It is not a
substitute foryo ur attention tothe sur roundings.
The responsibility for safe manoeuvring and
parking remains with you. Make sure that no 226
Driving and parking
Page 319 of 565
Displaying
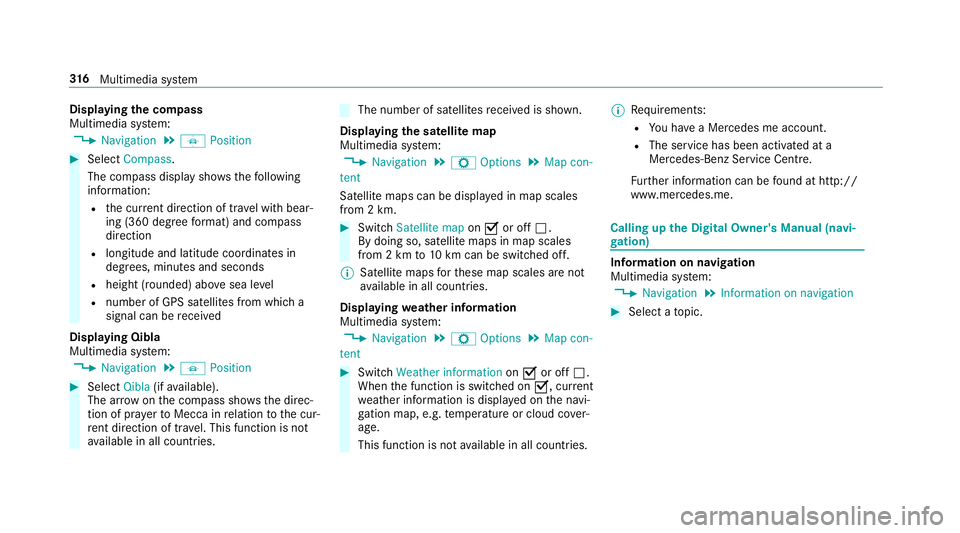
the compass
Multimedia sy stem:
, Navigation .
Á Position #
Select Compass.
The compass display sho wsthefo llowing
information:
R the cur rent di rection of tr avel with bear‐
ing (360 deg reefo rm at) and compass
direction
R longitude and latitude coo rdinates in
degrees, minutes and seconds
R height (rounded) abo vesea le vel
R number of GPS sa tellites from which a
signal can be recei ved
Displaying Qibla
Multimedia sy stem:
, Navigation .
Á Position #
Select Qibla(ifavailable).
The ar rowonthe compass sho wsthe direc‐
tion of pr ayer toMecca in relation tothe cur‐
re nt di rection of tr avel. This function is not
av ailable in all countries. The number of satellites
recei ved is shown.
Displaying the satellite map
Multimedia sy stem:
, Navigation .
Z Options .
Map con-
tent
Satellite maps can be displa yed in map scales
from 2 km. #
Switch Satellite map onO or off ª.
By doing so, satellite maps in map scales
from 2 km to10 km can be switched off.
% Satelli temaps forth ese map scales are not
av ailable in all countries.
Displ aying weather information
Multimedia sy stem:
, Navigation .
Z Options .
Map con-
tent #
Switch Weather information onO or off ª.
When the function is switched on O, current
we ather information is displa yed on the navi‐
ga tion map, e.g. temp erature or cloud co ver‐
age.
This function is not available in all countries. %
Requirements:
R You ha vea Mercedes me account.
R The service has been activated at a
Mercedes-Benz Service Cent re.
Fu rther information can be found at http://
www.mercedes.me. Calling up
the Digital Owner's Manual (navi‐
ga tion) In
fo rm ation on navigation
Multimedia sy stem:
, Navigation .
Information on navigation #
Select a topic. 316
Multimedia sy stem
Page 378 of 565
th
era diator and parts of theex haust sy stem. #
Let the engine cool down and only
to uch the component parts described
below: &
WARNING Risk of inju ryfrom using the
windscreen wipers while the engine bon‐
net is open
When the engine bonn etis open, and the
windscreen wipers are set in motion, you can
be trapped bythe wiper linkage. #
Alw ays switch off the windscreen wip‐
ers and ignition before opening the
engine bonn et. #
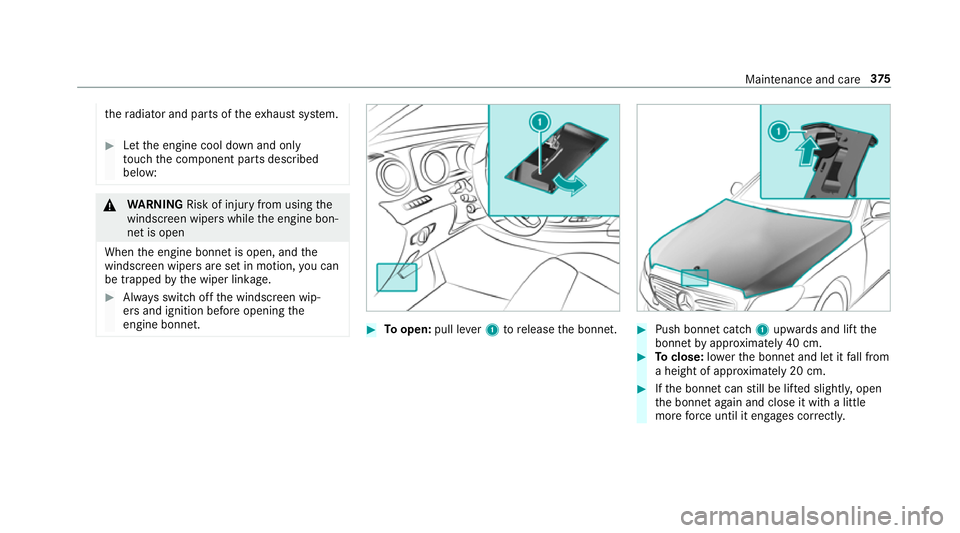
Toopen: pull lever1 torelease the bonn et. #
Push bonnet catch 1upwards and lift the
bonn etby appr oximately 40 cm. #
Toclose: lowe rth e bonn etand let it fall from
a height of appr oximately 20 cm. #
Ifth e bonn etcan still be lif ted slightl y,open
th e bonn etagain and close it with a little
more forc e until it engages cor rectly. Maintenance and care
375
Page 444 of 565
R
A maximum of 55% (antifreeze pr otection
down to-45 °C). Note
s on windscreen washer fluid Obser
vethe no tes on operating fluids
(→ page 433). &
WARNING ‑ Risk of fire and injury due to
windscreen washer concentrate
Wi ndsc reen washer concentrate is highly
fl ammable. It could ignite if it comes into
con tact wi thhot engine component parts or
th eex haust sy stem. #
Make sure that no windsc reen washer
concentrate spills out next tothefiller
opening. *
NO
TEDama getotheex terior lighting
due tounsuitable windsc reen washer
fl uid Uns
uitable windsc reen washer fluids may
damage the plastic sur face of theex terior
lighting. #
Only use windscreen washer fluids
which are also suitable for use on plas‐
tic sur faces, e.g. MB SummerFit or MB
Wi nterFit. *
NO
TEBlocked spr aynozzles caused by
mixing windscreen washer fluids #
Do not mix MB SummerFit and MB Win‐
te rFit with other windscreen washer flu‐
ids. Do not use distilled or de-ionised
water asthefill
le ve l sensor may be triggered er roneously.
Re commended windscreen washer fluid:
R Abo vefreezing point: e.g. MB SummerFit
R Below freezing point: e.g. MB WinterFit
Fo rth e cor rect mixing ratio referto the informa‐
tion on the antif reeze reser voir.
Mix thewa sher fluid with the windscreen washer
fl uid all year round. Ve
hicle data Ve
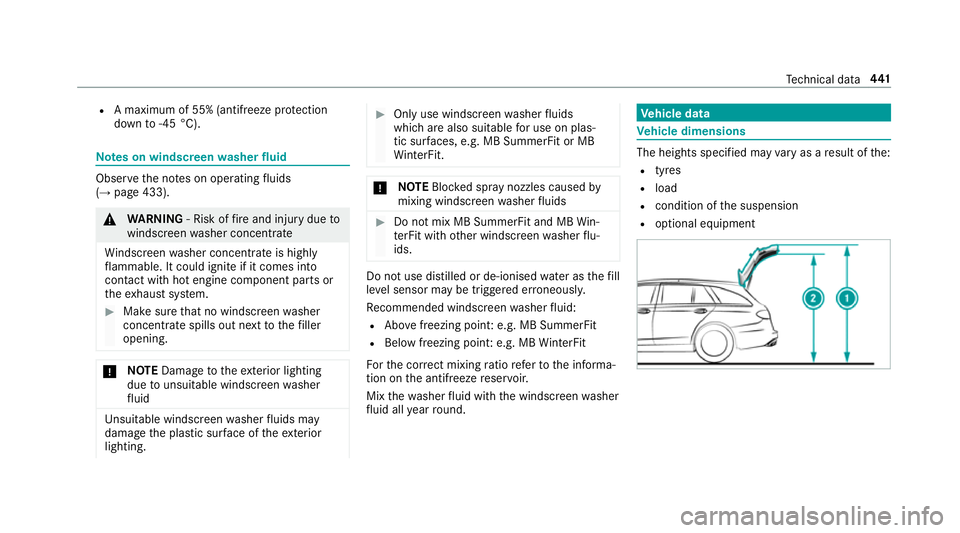
hicle dimensions The heights speci
fied may vary as a result of the:
R tyres
R load
R condition of the suspension
R optional equipment Te
ch nical da ta441
Page 445 of 565
Opening height
Model
1 1
Opening
height 2 2
Head‐
ro om
E 400 4MATIC 20 61mm 1937 mm
E 200 4MATIC
E 220 d 4MATIC 20
76 mm 1950 mm
E 220 d 4MATIC All-
Te rrain 2098 mm
1972 mm
All other models 2070 mm 1944 mm Ve
hicle dimensions E 220 d 4MATIC All
-Ter rain
Ve hicle lengt h4 947 mm
Ve hicle width including out‐
side mir rors 2065 mm
Ve hicle width excluding out‐
side mir rors 18
61 mm E 220 d 4MATIC All-T
errain
Ve hicle height 1497 mm
Wheelbase 2939 mm All
other models
Ve hicle lengt h4 933 mm
Ve hicle width including out‐
side mir rors 2065 mm
Ve hicle width excluding out‐
side mir rors 18
52 mm
Wheelbase 2939 mm Model
sV ehicle
height
E 400 4MATIC 1466 mm
E 200 4MATIC
E 220 d 4MATIC 14
81 mm
All other models 1475 mm We
ights and loads Please no
tethat forth e specified vehicle data:
R items of optional equipment increase the
unladen weight and reduce the maximum
pa yload.
R vehicle-specific weight information can be
fo und on theve hicle identification plate .
Ro of load All models
Maximum
roof load 100kg Tr
ailer hitch Gene
ral no tes on the trailer hit ch Not all models can be used
to tow a trailer
(→ page 247).
Modi fications tothe engine cooling sy stem may
be necessar y,depending on theve hicle model.
The retrofitting of a trailer hitch is only pe rmissi‐
ble if a towing capacity is specified in your vehi‐
cle documents. 442
Tech nical da ta
Page 549 of 565
Saf
ety sy stems
see Driving saf ety sy stem
Saf etyve st ............................................... 388
Satelli temap ............................................ 316
SD card Inserting/re moving ............................. 348
Seat ..................................................... 91,111
4-w aylumbar support .......................... .95
Ad justing (electrically) ........................... 94
Ad justing (manually and electrically) ..... 91
Ad justing (Seat Comfort) ....................... 93
Ad justing the seat backrest angle
(rear) ....................................................1 13
Backrest (rear) folding forw ards .......... .111
Backrest (rear) locking ......................... 11 3
Cor rect driver's seat position ................ 90
Dynamic multicontour seat ................... 98
Fo lding the backrest (rear) back ..........1 12
Massage programme overview .............. 98
Pa nel heating ....................................... 101
Re setting the settings .......................... 100
Selecting a massa geprogramme ........ 100
Setting options ...................................... 16
Using the memory function ................. 107Seat
see Folding bench seat
see Head restra int
Seat belt Activating/deactivating seat belt
adjustment ............................................ 36
Ad justing the height .............................. 35
Care ....................................................3 85
Fa stening ............................................... 35
Pr otection ..............................................32
Re ar seat belt status display ................ .36
Re leasing .............................................. .35
Seat belt adjustment (function) ............. 35
Seat belt see Belt
see Occupant sa fety
Seat belt adjustment Activating/deactivating ......................... 36
Fu nction ................................................ 35
Seat belt tensioners
Ac tivation .............................................. 31
Seat belt warning
see Seat belts Seat belts
.................................................. .36
Re duced pr otection ...............................33
Wa rning lamp ........................................ 36
Seat co ver (Care) .................................... .385
Seat heater Switching on/off ................................. 100
Seat settings Configuring ............................................ 97
Seat ventilation
Switching on/o ff................................. 101
Selecting a gear
see Shifting gears
Selecting a POI see De stination ent ry
Selecto r lever........................................... 171
Selecto r lever
see DIRECT SELECT le ver
Sensors (Care) ......................................... 383
Service Menu (on-board computer) .................. 258
Service see ASS YST PLUS 546
Index