Page 429 of 565
&
WARNING Risk of accident from losing a
wheel
Oiled, greased or damaged wheel bolt/wheel
nut thre ads or wheel hub/wheel mounting
bolt thre ads can cause the wheel bolts/
wheel nuts tocome loose.
As a result, you could lose a wheel while driv‐
ing. #
Never oil or grease theth re ads. #
Intheeve nt of damage totheth re ads,
con tact a qualified specialist workshop
immediatel y. #
Have the damaged wheel bolts or dam‐
aged hub thre ads replaced. #
Do not continue driving. #
Obser vethe information on thech oice of
tyres (→ page417).
Fo r tyres with a specified direction of rotation,
an ar rowonthe side wall of the tyre indicates
th e cor rect di rection of rotation. Obse rvethe
direction of rotation when fitting. #
Slide the wheel tobe mounted onto the cen‐
tring pin and push it on. &
WARNING Risk of inju ryfrom tightening
wheel bolts andnuts
If yo u tighten the wheel bolts or wheel nuts
when theve hicle is raised, the jack could tip. #
Only tighten wheel bolts or wheel nuts
when theve hicle is on the ground. #
For saf etyre asons, Mercedes-Benz recom‐
mends that you on lyuse wheel bolts which
ha ve been appr oved for Mercedes-Benz vehi‐
cles, as well as forth e wheel in question. #
Tighten the wheel bolts until they are finger-
tight. #
Unscr ew the cent ring pin. #
Tighten the last wheel bolt until it is finger-
tight. #
Lowe rth eve hicle(→ page 426). Lo
weri ngtheve hicle af ter a wheel change Re
quirements:
R The new wheel has been fitted (→ page 425). #
Place thera tchet ring spanner onto the he xa‐
gon nut of the jack so that the letters "AB"
are visible. #
Tolowe r the vehicle: turnthera tchet ring
spanner of the jack anti-clockwise. #
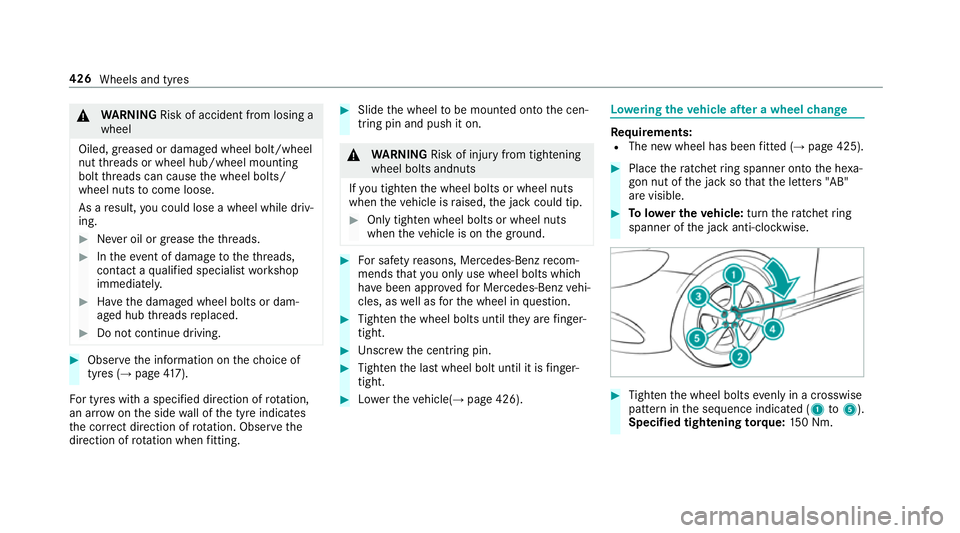
Tighten the wheel bolts evenly in a crosswise
pattern in the sequence indicated (1 to5 ).
Specified tightening torq ue: 150 Nm. 426
Wheels and tyres
Page 430 of 565
&
WARNING Risk of accident due toincor‐
re ct tigh tening torque
The wheels could come loose if the wheel
bolts or wheel nuts are not tightened tothe
prescribed torque. #
Have the tightening torque checked
immediately at a qualified specialist
wo rkshop af terch anging a wheel. #
Check the tyre pressure of the newly moun‐
te d wheel and adjust according ly.#
Vehicles with tyre pressure loss warning
sy stem: restart the tyre pressure loss warn‐
ing sy stem (→ page417).
Excep tion:ifth e new wheel is an emer gency
spa rewheel. #
Vehicles with a tyre pressure monitoring
sy stem: restart the tyre pressure monitoring
sy stem (→ page413).
Excep tion:ifth e new wheel is an emer gency
spa rewheel. Be sure
toalso obse rveth efo llowing fur ther
re lated subjects:
R Notes on tyre pressure (→ page410) Emer
gency spare wheel Note
s onthe emer gency spare wheel &
WARNING Risk of accident caused by
incor rect wheel and tyre dimensions
The wheel or tyre size and the tyre type of
th e emer gency spa rewheel or spare wheel
and the wheel tobe replaced may dif fer.
Mounting an emer gency spa rewheel/spare
wheel may se verely impair the driving char‐
acteristics.
To prev ent hazardous situations: #
Adapt your driving style according lyand
drive carefull y. #
Neverfit more than one emer gency
spa rewheel or spare wheel that dif fers
in size. #
Only use an emer gency spa rewheel or
spare wheel of a dif fere nt size brie fly. #
Do not switch off ESP ®
. #
>Ha vethe emer gency spa rewheel or
spare wheel of a dif fere nt size replaced
at the nearest qualified specialist work‐
shop. The new wheel must ha vethe
cor rect dimensions. Check
the tyre pressure of the emer gency spa re
wheel fitted. Co rrect the pressure as necessar y.
The maximum permissible speed with an emer‐
ge ncy spa rewheel fitted is 80 km/h.
Do not fit th e emer gency spa rewheel with sn ow
ch ains.
Re place the emer gency spa rewheel af ter six
ye ars at the latest, rega rdless of wear.
% Ve
hicles with a tyre pressure loss warn‐
ing sy stem: If an emer gency spa rewheel is
fi tted the tyre pressure loss warning sy stem
cann otfunction reliabl y.Only restart the sys‐
te m again when the emer gency spa rewheel
has been replaced with a new wheel. Wheels and tyres
427
Page 431 of 565
Ve
hicles with a tyre pressure monitoring
sy stem: If an emer gency spa rewheel is fit‐
te dth e tyre pressure monitoring sy stem can‐
not function reliabl y.Only restart the sy stem
again when the emer gency spa rewheel has
been replaced with a new wheel.
Ve hicles with a tyre pressure monitoring
sy stem: For a few minutes af ter an emer‐
ge ncy spa rewheel is fitted, the sy stem may
st ill display the tyre pressure of there mo ved
wheel.
Be sure toalso obse rveth efo llowing fur ther
re lated subjects:
R Notes on tyre pressure (→ page410)
R Tyre pressure table (→ page411) Re
moving the eme rgency spa rewheel The eme
rgency spare wheel is secured in the
emer gency spa rewheel bag in the load compart‐
ment. #
Obser vethe information on mounting tyres
(→ page 417). #
Open theta ilgate. #
Detach thefast ening stra ps. #
Unhook there taining spring hooks of thefa s‐
te ning stra ps from the brac kets. #
Remo vethe emer gency spa rewheel bag with
th e emer gency spa rewheel. #
Open the emer gency spa rewheel bag and
re mo vethe emer gency spa rewheel. 428
Wheels and tyres
Page 445 of 565
Opening height
Model
1 1
Opening
height 2 2
Head‐
ro om
E 400 4MATIC 20 61mm 1937 mm
E 200 4MATIC
E 220 d 4MATIC 20
76 mm 1950 mm
E 220 d 4MATIC All-
Te rrain 2098 mm
1972 mm
All other models 2070 mm 1944 mm Ve
hicle dimensions E 220 d 4MATIC All
-Ter rain
Ve hicle lengt h4 947 mm
Ve hicle width including out‐
side mir rors 2065 mm
Ve hicle width excluding out‐
side mir rors 18
61 mm E 220 d 4MATIC All-T
errain
Ve hicle height 1497 mm
Wheelbase 2939 mm All
other models
Ve hicle lengt h4 933 mm
Ve hicle width including out‐
side mir rors 2065 mm
Ve hicle width excluding out‐
side mir rors 18
52 mm
Wheelbase 2939 mm Model
sV ehicle
height
E 400 4MATIC 1466 mm
E 200 4MATIC
E 220 d 4MATIC 14
81 mm
All other models 1475 mm We
ights and loads Please no
tethat forth e specified vehicle data:
R items of optional equipment increase the
unladen weight and reduce the maximum
pa yload.
R vehicle-specific weight information can be
fo und on theve hicle identification plate .
Ro of load All models
Maximum
roof load 100kg Tr
ailer hitch Gene
ral no tes on the trailer hit ch Not all models can be used
to tow a trailer
(→ page 247).
Modi fications tothe engine cooling sy stem may
be necessar y,depending on theve hicle model.
The retrofitting of a trailer hitch is only pe rmissi‐
ble if a towing capacity is specified in your vehi‐
cle documents. 442
Tech nical da ta
Page 448 of 565
Display messages
Int
roduction Note
s on display messages
Display messages appear in the multifunction
displa y.
Displ aymessa ges with graphic symbols are sim‐
plified in the Owner's Manual and may dif fer
from the symbols in the multifunction displa y.
The multifunction display sho wshigh-priority dis‐
play messages in red. Cer tain display messages
are accompanied byawa rning tone. Please
respond in accordance with the display
messages and follow the additional no tes in this
Owner's Manual.
Yo u can hide lo w-priority display messages by
pressing the% button or the left-hand Touch
Control. The displ aymessa ges are then stored in
th e message memor y.Re ctify the cause of a dis‐
play message as quickly as possible.
High-priority display messages cannot be hid‐
den. The multifunction display sho wsthese mes‐
sages continuously until the cause forth e mes‐
sage has been rectified. Calling up
stored displ aymessages
On-boa rdcompu ter:
, Service .
1 message
If th ere are no display messages, No messages
appears in the multifunction displa y. #
Scroll thro ugh the display messages byswip‐
ing upwards or down wards on Touch Control
on the left-hand side of thesteering wheel. #
Toexitth e message memor y:press the
% button. Display messages and
warning/indicator lamps 445
Page 449 of 565
Saf
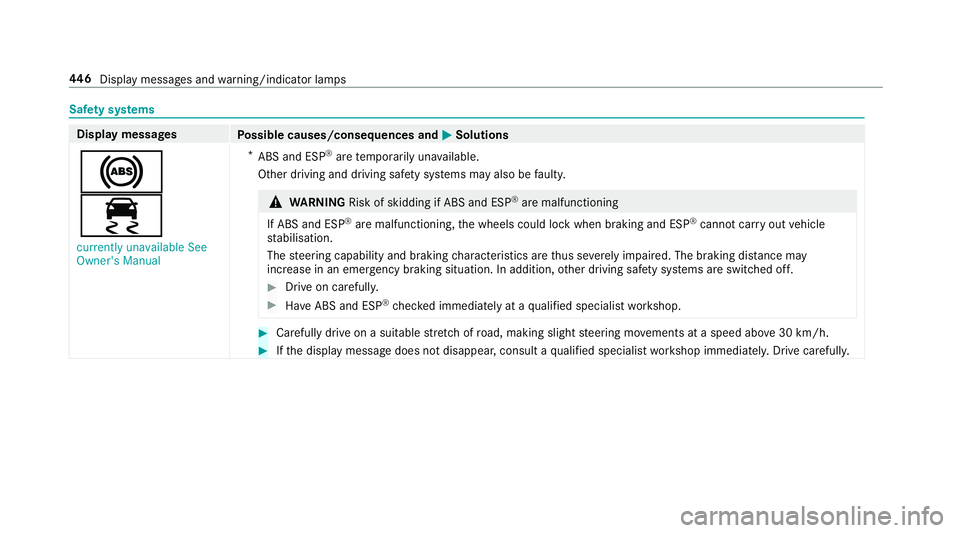
ety sy stems Display messages
Possible causes/consequences and M
MSolutions
!
÷ currently unavailable See
Owner's Manual *
ABS and ESP ®
are temp orarily una vailable.
Other driving and driving saf ety sy stems may also be faulty. &
WARNING Risk of skidding if ABS and ESP ®
are malfunctioning
If ABS and ESP ®
are malfunctioning, the wheels could lock when braking and ESP ®
cann otcar ryout vehicle
st abilisation.
The steering capability and braking characteristics are thus se verely impaired. The br aking distance may
increase in an emergency braking situation. In addition, other driving saf ety sy stems are switched off. #
Drive on carefull y. #
Have ABS and ESP ®
ch ecked immediately at a qualified specialist workshop. #
Carefully drive on a suitable stre tch of road, making slight steering mo vements at a speed abo ve30 km/h. #
Ifth e display message does not disappear, consult a qualified specialist workshop immediately. Drive carefully. 446
Displaymessa ges and warning/indicator lamps
Page 450 of 565
Display messages
Possible causes/consequences and M
MSolutions
!
÷ inoperative See Owner's
Manual *
ABS and ESP ®
are malfunctioning.
Other driving and driving saf ety sy stems may also be faulty. &
WARNING Risk of skidding if ABS and ESP ®
are malfunctioning
If ABS and ESP ®
are malfunctioning, the wheels could lock when braking and ESP ®
cann otcar ryout vehicle
st abilisation.
The steering capability and braking characteristics are thus se verely impaired. The br aking distance may
increase in an emergency braking situation. In addition, other driving saf ety sy stems are switched off. #
Drive on carefull y. #
Have ABS and ESP ®
ch ecked immediately at a qualified specialist workshop. #
Drive on carefully. #
Consult a qualified specialist workshop immediatel y. Displ
aymessa ges and warning/indicator lamps 447
Page 453 of 565
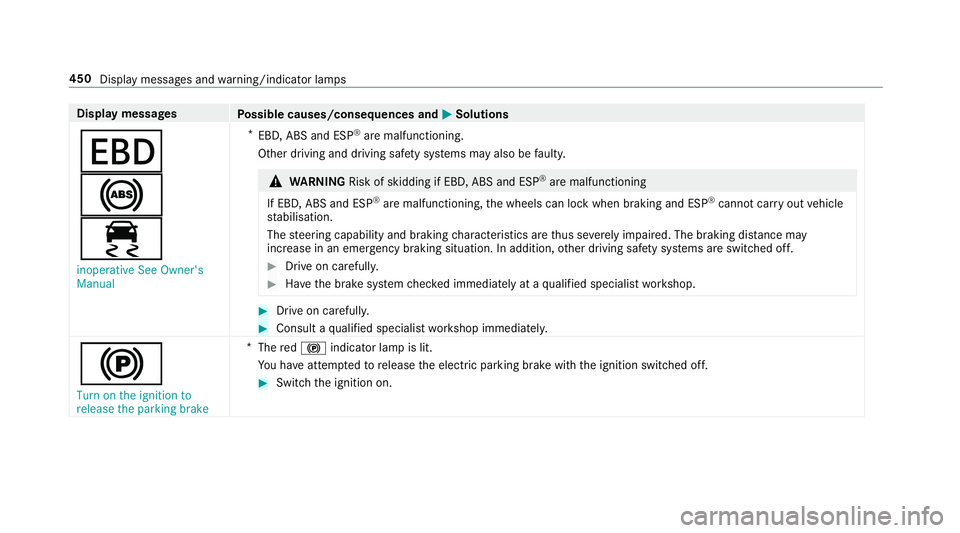
Display messages
Possible causes/consequences and M
MSolutions
T
!
÷ inoperative See Owner's
Manual *
EBD, ABS and ESP ®
are malfunctioning.
Other driving and driving saf ety sy stems may also be faulty. &
WARNING Risk of skidding if EBD, ABS and ESP ®
are malfunctioning
If EBD, ABS and ESP ®
are malfunctioning, the wheels can lock when braking and ESP ®
cann otcar ryout vehicle
st abilisation.
The steering capability and braking characteristics are thus se verely impaired. The br aking distance may
increase in an eme rgency braking situation. In addition, other driving saf ety sy stems are switched off. #
Drive on carefull y. #
Have the brake sy stem checked immediately at a qualified specialist workshop. #
Drive on carefully. #
Consult a qualified specialist workshop immediatel y.
!
Turn on the ignition to
release the parking brake *
The red! indicator lamp is lit.
Yo u ha veattem ptedto release the electric parking brake with the ignition switched off. #
Switch the ignition on. 450
Display messages and warning/indicator lamps