Page 113 of 190

XTo selectG: slide 9the controller.
XTo select Details: turn and press the con-
troller.
The display is shown in full.
XTo close the detailed display: press the %
button.
Editing a contact
XCall up the address book (Ypage 108).
XTo select a contact: turn and press the con-
troller.
The details for the contact are displayed.
XTo highlight the desired entry: turn the con-
troller.
XTo select G: slide 9the controller.
XTo select Edit: turn and press the controller.
The entry field for the selected entry is dis-
played.
Information about character entry (
Ypage 30).
Changing the category of an entry
XCall up the address book (Ypage 108).
XSelect an entry: turn and press the controller.
The details for the contact are displayed.
XTo highlight the desired entry: turn the con-
troller.
XTo select G: slide 9the controller.
XTo select Change Category: turn and press
the controller.
XTo select a category: turn the controller and
press to confirm.
Storing the phone number as a speed
dial number
XCall up the address book (Ypage 108).
XSelect an entry: turn and press the controller.
The details for the contact are displayed.
XTo highlight the desired telephone number:
turn the controller.
XTo select G: slide 9the controller.
XTo select Speed Dial: turn and press the
controller.
XTo select AssignSpeedDialPreset: turn
and press the controller.
XTo select a memory position for the speed
dial: turn and press the controller.
The phone number has been saved as a speed
dial.
Voice tags
Introduction
You can enter voice tags via the Voice Control
System (see the separate operating instruc-
tions). Once you have assigned a voice tag to an
address book entry, you can call up this entry
with a voice command and dial a phone number,
for example. You can add one voice tag per
address book entry.
Adding a voice tag
XCall up the address book (Ypage 108).
XSearch for an address book entry with or with-
out a voice tag ¦(Ypage 108).
XTo select G: slide 9the controller.
XTo select VoiceTag: turn and press the con-
troller.
XTo select Add: turn and press the controller.
Subsequent operation is voice-controlled.
The Voice Control System guides you through
the dialogs.
Deleting a voice tag
XCall up the address book (Ypage 108).
XSearch for an address book entry with a voice
tag (Ypage 108).
XTo select G: slide 9the controller.
Address book111
Telephone
Z
Page 114 of 190

XTo selectVoiceTag: turn and press the con-
troller.
XTo select Delete: turn and press the control-
ler.
XTo select Yes: turn and press the controller.
The voice tag is deleted.
or
XTo select No: turn and press the controller.
The process is canceled.
Listening to a voice tag
XSearch for an address book entry with a voice
tag (Ypage 108).
XTo select G: slide 9the controller.
XTo select VoiceTag: turn and press the con-
troller.
XTo select Listen: turn and press the control-
ler.
You hear the voice tag.
Changing the display and sorting cri-
teria for contacts
XCall up the address book (Ypage 108).
XTo show the menu bar: slide 6the control-
ler.
XTo select Options: turn and press the con-
troller.
XTo select Display and Sorting: turn and
press the controller.
You have the following options:
RLast Name, First Name(default setting)
The contacts are sorted by surname and dis-
played with a comma.
RLast Name First Name
The contacts are sorted by surname and dis-
played without a comma.
RFirst Name Last Name
The contacts are sorted by first name and dis-
played without a comma.
XTo select the required option: turn and press
the controller.
The contacts are sorted and displayed
according to the selection.
Automatically importing contacts
from the phone
Depending on the mobile phone used, you can
set whether the contacts should be called up
automatically after the mobile phone is connec-
ted to the multimedia system.
XConnect a mobile phone (Ypage 96).
XCall up the address book (Ypage 108).
XTo show the menu bar: slide 6the control-
ler.
XTo select Options: turn and press the con-
troller.
XTo select Automatically Import Con‐tacts from Phone: turn and press the con-
troller.
You can allow Oor suppress ªthe auto-
matic download.
Saving a contact
Saved contacts are indicated in the phone book
by different symbols (Ypage 105).
XCall up the address book (Ypage 108).
XTo select a contact: turn and press the con-
troller.
The details for the contact are displayed.
XTo select G: slide 9the controller.
XTo select Save: turn and press the controller.
The contact has now been saved.
iIf the saved address book entry contains a
phone number, the entry is also displayed in
the phone book.
Saving or editing the contact data in the mul-
timedia system does not change the contacts
on the mobile phone. If automatic download-
ing of phone contacts is activated, the multi-
media system displays the copy ¥with the
changed data. To add additional data, such as additional phone numbers or e-mail
addresses, select this contact. In this way,
you avoid creating additional copies of the
mobile phone entry.
Deleting a name
XCall up the address book (Ypage 108).
XSearch for a contact (Ypage 108).
112Address book
Telephone
Page 115 of 190

XTo selectG: slide 9the controller.
XTo select Delete Entry: turn and press the
controller.
XTo select Yes: turn and press the controller.
The contact is deleted.
or
XTo select No: turn and press the controller.
The process is canceled.
Importing contacts
Information and requirements
Contacts can be imported as vCards (vcf files). A vCard is an electronic business card. A memory
card, USB device or a Bluetooth
®connection
can be used for importing.
iUp to 2000 entries can be imported into the
address book. A message notifies you when
the maximum number is reached. In order to
be able to then import new contacts, you have
to delete existing contacts (
Ypage 112).
SourcePrerequisites
Memory cardThe SD memory card is inser-
ted. It contains importable
contact details.
USB deviceThe USB device is inserted
into the USB port. It contains
importable contact details.
Bluetooth®
connection
If the sending of vCards is
supported via Bluetooth®,
vCards can be received on
mobile phones or netbooks,
for example.
Bluetooth
®must be activa-
ted in the multimedia system
and on the respective device
(see the manufacturer's
operating instructions).
iIf automatic calling up of the contacts is
deactivated (Ypage 112), the ImportfromPhoneoption is available.
Importing from the memory card or USB
device
Contacts imported from the memory card or
from a USB device are identified by the ¯
symbol.
The following conditions must be fulfilled in
order to import vCards:
RvCards (vcf files) may be located in the main
directory or in folders. The multimedia system
allows for a targeted selection of the corre-
sponding directories.
RvCards must have the file extension "vcf".
iThe multimedia system supports vCards in
versions 2.1 and 3.0.
XTo switch to the menu bar in the telephone
menu or the address book: slide 6the con-
troller.
XTo select Options: turn and press the con-
troller.
XTo select Download Contacts: turn and
press the controller.
XTo select From Memory CardorFrom USBdevice: turn and press the controller.
Receiving vCards via Bluetooth®
Multimedia system
XTo switch to the menu bar in the telephone
menu or the address book: slide 6the con-
troller.
XTo select Options: turn and press the con-
troller.
XTo select Download Contacts: turn and
press the controller.
XTo select FromBluetoothDevice: turn and
press the controller.
If the multimedia system is connected to a
mobile phone, the connection is terminated.
Address book113
Telephone
Z
Page 116 of 190
 via Bluetooth®.
External device
XStart the data transfer (see the manufactur-
ers operating instructions).
The number of vCards received is")
vCards can now be received by a device (PC,
mobile phone) via Bluetooth®.
External device
XStart the data transfer (see the manufactur-
er's operating instructions).
The number of vCards received is displayed in the multimedia system.
Multimedia system
XTo cancel the transfer: press the controller.
If a mobile phone was connected, the con-
nection to the mobile phone is established
again.
Received vCards are identified by the ®
symbol in the address book.
iIf you switch to another main function, e.g.
navigation, while receiving vCards, the recep- tion of vCards will be terminated.
Deleting imported contacts
XTo change to the menu bar when in the
address book or the telephone menu: slide
6 the controller.
XTo select Options: turn and press the con-
troller.
XTo select Delete Contacts: turn and press
the controller.
XSelect one of the following options:
RInternal Contacts
RImported from Storage Device
RImported from Bluetooth Devices
RDownloaded from Phone
Turn and press the controller.
XTo select Yes: turn and press the controller.
The contacts are deleted.
or
XTo select No: turn and press the controller.
The process is canceled.
Closing the address book
XPress the %button one or more times.
Call lists
Introduction
If your mobile phone supports the PBAP Blue-
tooth®profile, the call lists from the mobile
phone are displayed in the multimedia system.
When connecting the mobile phone, you may
have to confirm the connection for the PBAP
Bluetooth
®profile.
If your mobile phone does not support the PBAP
Bluetooth
®profile, the multimedia system gen-
erates its own call lists. These are not the same
as the call lists in your mobile phone.
The call lists option is not available unless a
mobile phone is connected to the multimedia
system.
If the contact for an incoming call is not saved in
the address book, you can use the call list to
save the telephone number. You can save this
telephone number as a new contact in the
address book or add it to an existing contact
(
Ypage 115).
iIf you connect a different mobile phone to
the multimedia system, the call lists from the
new mobile phone are displayed.
Opening the call list and selecting an
entry
Example: list of selected phone numbers
:
Date and time (if available)
;Telephone number of the highlighted entry
and symbols (if assigned)
XTo call up the telephone menu: press the
% button.
XTo switch to the menu bar: slide 6the con-
troller.
XTo select Call Lists: turn and press the
controller.
114Call lists
Telephone
Page 117 of 190

XTo selectCallsReceivedorCallsDialed:
turn and press the controller.
The relevant list is displayed.
XTo select an entry and make a call: turn and
press the controller.
Closing the call list
XTo select &to the left of the list: slide 8
the controller.
or
XPress the %button.
The list is closed.
iYou can also call up the list of dialed num-
bers by pressing the 6button when the
telephone menu is shown. In this case, the list
will only show names or phone numbers.
Displaying details from a list entry
Abbreviated list entries can also be shown in full.
XTo call up the telephone menu: press the
% button.
XTo switch to the menu bar: slide 6the con-
troller.
XTo select Call Lists: turn and press the
controller.
XTo select CallsReceivedorCallsDialed:
turn and press the controller.
The relevant list is displayed.
XTo highlight the desired entry: turn the con-
troller.
XTo select G: slide 9the controller.
XTo select Details: turn and press the con-
troller.
The details are displayed.
XTo go back to the list: slide 8the controller
repeatedly until the list is highlighted.
Saving telephone numbers
Adding new entries to the address book
XTo call up the telephone menu: press the
% button.
XTo switch to the menu bar: slide 6the con-
troller.
XTo select Call Lists: turn and press the
controller.
XTo select CallsReceivedorCallsDialed:
turn and press the controller.
The relevant list is displayed.
XTo highlight the desired telephone number:
turn the controller.
XTo select G: slide 9the controller.
XTo select Save: turn and press the controller.
XSelectNew Entry.
XSelect a number category, e.g. Home.
XSelect a telephone category, e.g. MobilePhone.
The selected category is marked with #.
If you have marked a number as Preferred
, it
is shown at the top of the list and is highligh-
ted.
XSelect Continue.
The entry field for the name of the new con-
tact is displayed. The entry field for the tele-
phone number is filled in automatically.
XEnter characters using the controller
(Ypage 30) or the touchpad (Ypage 26).
XTo finish and save an entry: select ¬.
The new contact has been created.
Call lists115
Telephone
Z
Page 118 of 190

Adding information to an address book
entry
XTo call up th etelephon emenu: press th e
% button.
XTo switch to th emen ubar: slid e6 thecon-
troller .
XTo select CallLists:tur nand press th e
controller .
XTo selectCallsReceivedorCallsDialed:
tur nand press th econtroller .
The relevan tlist is displayed.
XTo highligh tth edesired telephon enumber :
tur nth econtroller .
XTo select G:slide9 thecontroller .
XTo selectSave:tur nand press th econtroller .
XSelectAdd Phone No..
XSelec t anumber category, e.g. Home.
XSelec t atelephon ecategory, e.g. MobilePhone.
XSelectContinue.
The address book is displayed.
XSearc hfor th edesired contact (Ypage 108).
XPress thecontroller when you hav efinishe d
searching .
The telephon enumber has been saved.
A maximum of fiv etelephon enumber scan be
saved for on econtact .
If fiv enumber sare already store dfor th eentr y
you are searching for , aprompt will appear ask -
ing whether you wish to overwrit eon eof th e
existing numbers.
Overwriting an entry
XTo select Yes:tur nand press th econtroller .
A list of th eexisting fiv enumber sis displayed.
XTo select th enumber to be overwritte nfrom
th elist :tur nth econtroller and press to con-
firm.
The entr yis overwritte nwit hth ene wtele-
phone number .
Canceling th eoverwriting of an entry
XTo select No:tur nand press th econtroller .
The process is canceled.
Deleting call lists
Call list swhic hare generated and managed by
th emultimedia system can be delete din th e
multimedia system. You canno
tdelete call list sfrom th emultimedia
system whic hare displayed on amobile phone
that support sth ePBAP Bluetoot h
®.
XTo call up thetelephon emenu: press th e
% button.
XTo switch to th emen ubar: slid e6 thecon-
troller .
XTo select CallLists:tur nand press th e
controller .
XSelectDelete Cal lLists.
A prompt appear sasking whether you wish to
delete all call lists.
XTo select Yes:tur nand press th econtroller .
The call list sare deleted.
or
XTo select No:tur nand press th econtroller .
The process is canceled.
iIf you delete call list sfrom th emobile phone
(see th emanufacturer' soperating instruc-
tions), th emultimedia system updates th e
call list display th enext time it connects .
Speed dial lists
Setting up
XTo call up thetelephon emenu: press th e
% button.
XTo call up th emen ubar: slid e6 thecon-
troller .
XTo select CallLists:tur nand press th e
controller .
XSelectSpeed Dia lPreset Lis t.
The spee ddial list is displayed.
XTo highligh t amemory position for th espee d
dial: tur nth econtroller .
If you highligh tan entr ythat already exist sin
th espee ddial list ,this is overwritte nwit hth e
ne wentry.
XTo select G:slide9 thecontroller .
XSelectAssign Speed Dia lPreset.
The phone book is displayed.
XSearc hfor acontact (Ypage 106).
XTo select acontact :tur nand press th econ-
troller .
The phone number has been saved as aspee d
dial.
116Speed dial lists
Telephone
Page 119 of 190

Deleting
Deleting aspeed dial preset
XTo cal lup th etelephon emenu: press th e
% button.
XTo cal lup th emen ubar :slid e6 thecon-
troller.
XTo selec tCal lLists:turn and press th e
controller .
XSelectSpeed Dia lPreset Lis t.
The speed dial list is displayed.
XTo highlight th ememor yposition you wan tto
delete :turn th econtroller .
XTo selectG: slide9 thecontroller .
XTo selectDeleteSpeedDia lPreset:turn
and press th econtroller .
XTo selectYes:turn and press th econtroller .
The speed dial preset has bee ndeleted.
or
XTo selec tNo:turn and press th econtroller .
The process is canceled.
Deleting all speed dial preset s
XTo callup th etelephon emenu: press th e
% button.
XTo cal lup th emen ubar :slid e6 thecon-
troller.
XTo selec tCal lLists:turn and press th e
controller .
XSelectSpeed Dia lPreset Lis t.
The speed dial list is displayed.
XTo highlight th edesire dmemor yposition :
turn th econtroller .
XTo selectG: slide9 thecontroller .
XTo selectDelete All Speed Dia lPre ‐sets:turn and press th econtroller .
XTo selectYes:turn and press th econtroller .
Al lspeed dials are deleted.
or
XTo selec tNo:turn and press th econtroller .
The process is canceled.
Messages (text messages an de-
mails)
General notes
New messages are identifie dby th e/ sym-
bol in th edisplay of th emultimedia system and
an audible signal .Once you hav erea dall th e
messages, th esymbol is no longer displayed.
The multimedia system displays th e10 0newest
text messages and e-mails.
The ú symbol is displaye dwhen th emobile
phone's messag ememor yis full .The symbol is
no longer displaye dif you delete messages on
th emobile phone .
Function restrictions
Textmessages canno tbe written whil eth evehi-
cl e is in motion .
Prerequisites
To use themessag efunctions, th econnecte d
mobile phone mus tsuppor tth eMA PBluetoot h®
profile. The prompt fo rth eMA PBluetoot h®pro-
fil e may hav eto be confirmed on th emobile
phone .
Wit hsom emobile phones, som esetting sstill
hav eto be mad eafter connecting to th emulti-
media syste m(se eth emanufacturer's operat -
in g instructions). The messages are then dis -
playe dth enext time you connec tto th emulti-
media system.
An e-mail accoun tmus tbe set up on th emobile
phone fo rth ee-mail function (se eth emanufac -
turer’s operatin ginstructions).
To rea dand write e-mail sin th emultimedia sys-
tem, th ee-mail accoun tfirst needs to be con-
figure d (
Ypage 118).
Som emobile phones wit hth eMAP Blue-
toot h
®profile:
Ronly sho wne wtext messages.
Rdo no tsuppor tth edeleting or editin gof text
messages.
Rdo no tsuppor tth edraft sfolder fo rtext mes -
sages.
Rdo no tsuppor tth esendin gof text messages.
Rdo no tsuppor tth ee-mail function .
Rdo notsen dmessages in alocke dstatus.
Messages (text messages and e-mails)11 7
Telephone
Z
Page 120 of 190

Not all mobile phones available on the market
are equally suitable. Further information about
settings and supported functions of Bluetooth
®-
capable mobile phones can be found on the
Internet at
http://www.mercedes-benz.com/connect .
Or call the Mercedes-Benz Customer Assistance
Center at 1-800-FOR-MERCedes
(1-800-367-6372) (for the USA) or Customer
Relations at 1-800-387-0100 (for Canada).
Settings
Calling up the settings menu for mes-
sages
XTo call up the telephone menu: press the
% button.
XTo switch to the menu bar: slide 6the con-
troller.
XTo select 1: turn and press the controller.
The message menu is displayed.
XTo switch to the menu bar: slide 6the con-
troller.
XTo select Settings: turn and press the con-
troller.
The text message settings and the available e-
mail accounts of the connected mobile phone
will be displayed.
Configuring the text messages dis-
played
XCall up the settings menu for messages
(Ypage 118).
XTo highlight Text Message: turn the control-
ler.
XTo select G: slide 9the controller.
A menu with the following options is shown:
RAll Messages
All the messages are displayed.
RNew Messages
Only the messages that are new on the
mobile phone are displayed. You can also
display the last 100 text messages using
the Download
option in the message menu.
ROff
The messages are not displayed automati-
cally. You can display the 100 newest text messages from the mobile phone using the
Download
option in the message menu.
XTo select the required option: turn and press
the controller.
Configuring the e-mails displayed
XCall up the settings menu for messages
(Ypage 118).
XTo highlight an e-mail account: turn the con-
troller.
XTo select G: slide 9the controller.
A menu with the following options is shown:
RAll Messages
All the messages are displayed.
RNew Messages
Only the messages that are new on the
mobile phone are displayed. You can also
display the last 100 text messages using
the Download
option in the message menu.
ROff
The messages are not displayed automati-
cally. You can display the last 100 text
messages using the Download
option in the
message menu.
Configuring an e-mail account
XCall up the settings menu for messages
(Ypage 118).
XTo select an e-mail account: turn and press
the controller.
The e-mail account is now configured. E-mails
can now be received and sent in the multi-
media system.
Deactivating the e-mail function
XCall up the settings menu for messages
(Ypage 118).
XTo select E-Mail Off: turn and press the
controller.
E-mail reception is deactivated.
118Messages (text messages and e-mails)
Telephone
 1
1 2
2 3
3 4
4 5
5 6
6 7
7 8
8 9
9 10
10 11
11 12
12 13
13 14
14 15
15 16
16 17
17 18
18 19
19 20
20 21
21 22
22 23
23 24
24 25
25 26
26 27
27 28
28 29
29 30
30 31
31 32
32 33
33 34
34 35
35 36
36 37
37 38
38 39
39 40
40 41
41 42
42 43
43 44
44 45
45 46
46 47
47 48
48 49
49 50
50 51
51 52
52 53
53 54
54 55
55 56
56 57
57 58
58 59
59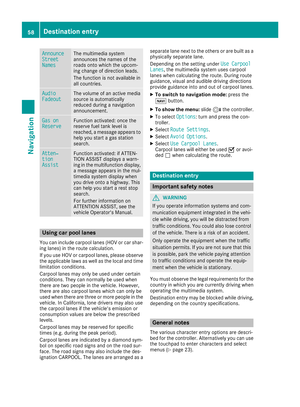 60
60 61
61 62
62 63
63 64
64 65
65 66
66 67
67 68
68 69
69 70
70 71
71 72
72 73
73 74
74 75
75 76
76 77
77 78
78 79
79 80
80 81
81 82
82 83
83 84
84 85
85 86
86 87
87 88
88 89
89 90
90 91
91 92
92 93
93 94
94 95
95 96
96 97
97 98
98 99
99 100
100 101
101 102
102 103
103 104
104 105
105 106
106 107
107 108
108 109
109 110
110 111
111 112
112 113
113 114
114 115
115 116
116 117
117 118
118 119
119 120
120 121
121 122
122 123
123 124
124 125
125 126
126 127
127 128
128 129
129 130
130 131
131 132
132 133
133 134
134 135
135 136
136 137
137 138
138 139
139 140
140 141
141 142
142 143
143 144
144 145
145 146
146 147
147 148
148 149
149 150
150 151
151 152
152 153
153 154
154 155
155 156
156 157
157 158
158 159
159 160
160 161
161 162
162 163
163 164
164 165
165 166
166 167
167 168
168 169
169 170
170 171
171 172
172 173
173 174
174 175
175 176
176 177
177 178
178 179
179 180
180 181
181 182
182 183
183 184
184 185
185 186
186 187
187 188
188 189
189