2016 MERCEDES-BENZ B-Class ELECTRIC warning
[x] Cancel search: warningPage 125 of 342
Problems with the rear window defroster
ProblemPossible causes/consequences andMSolutions
The rear window
defroster has deactiva-
ted prematurely or can-
not be activated.The battery has not been sufficiently charged.
XSwitch off any consumers that are not required, e.g. reading
lamps, interior lighting or the seat heating.
When the battery is sufficiently charged, the rear window
defroster can be activated again.
Switching air-recirculation mode
on/off
General notes
You can deactivate the flow of fresh air if
unpleasant odors are entering the vehicle
from outside. The air already inside the vehi-
cle will then be recirculated.
If you switch on air-recirculation mode, the
windows can fog up more quickly, in particu-
lar at low temperatures. Only use air-recircu-
lation mode briefly to prevent the windows
from fogging up.
Switching on/off
XTurn the SmartKey to position 2in the igni-
tion lock (
Ypage 131).
XTo activate: press theebutton.
The indicator lamp in the ebutton lights
up.
Air-recirculation mode switches on automat-
ically:
Rat high outside temperatures
Rat high levels of pollution
When air-recirculation mode is activated
automatically, the indicator lamp in the e
button is not lit. Outside air is added after
about 30 minutes.
XTo deactivate: press theebutton.
The indicator lamp in the ebutton goes
out.
iAir-recirculation mode deactivates auto-
matically:
Rafter approximately five minutes at out-
side temperatures below approximately
45 ‡ (7 †)
Rafter approximately five minutes if the
"Cooling with air dehumidification" func-
tion is deactivated
Rafter approximately 30 minutes at out-
side temperatures above approximately
45 ‡ (7 †) if the cooling with air dehu-
midification function is activated
Convenience opening or closing using
the air-recirculation button
GWARNING
When using the convenience closing feature,
parts of the body could be trapped in the clos-
ing area when a side window is being closed.
There is a risk of injury.
Observe the complete closing procedure
when the convenience closing feature is oper-
ating. Make sure that no body parts are in
close proximity during the closing procedure.
GWARNING
During convenience opening parts of the body could be drawn in or become trapped
between the side window and window frame.
There is a risk of injury.
Make sure that nobody touches the side win-
dow during the opening procedure. If some-
one becomes trapped, immediately press
Operating the climate control systems123
Climate control
Z
Page 127 of 342

Pre-entry climate control at departure
time and immediate pre-entry climatecontrol
Important safety notes
GWARNING
If persons, particularly children are subjected to prolonged exposure to extreme heat or
cold, there is a risk of injury, possibly even
fatal. Never leave children unattended in the
vehicle.
General notes
Using the "Pre-entry climate control at depar-
ture time" function, you can cool or heat the
vehicle interior prior to the desired departure
time.
When using the "Pre-entry climate control at
departure time" function, the condition of
charge of the high-voltage battery must be
higher than the specified minimum condition
of charge.
The running time of the climate control may
be reduced if:
Rthe vehicle is not connected to an electric
power supply
Rthe high-voltage battery is not fully charged
With active "Pre-entry climate control at
departure time" the condition of charge of the
high-voltage battery can be reduced, even if
the charge cable connector is connected.
In certain situations, the desired interior tem-
perature cannot be reached.
When the vehicle is cooled, the following
functions are activated as necessary:
RClimate control system
RCooling with air dehumidification
RBlower
When the vehicle is heated, the following
functions are activated as necessary:
RClimate control system
RBlower
RSeat heating
RWindshield heating
RRear window defroster
"Immediate pre-entry climate control" is auto-
matically switched off when operational read- iness mode is requested.
Setting the departure time
You can set a departure time for the "Pre-
entry climate control at departure time". Your
vehicle will then be cooled or heated until the
desired temperature is reached in time for the
set departure time. "Pre-entry climate control
at departure time" will be activated a maxi-
mum of 35 minutes before departure. If the
departure is delayed, the vehicle will be
heated or cooled for a further five minutes.
You can set the desired departure time in the
E-CELL
submenu on the on-board computer
(
Ypage 195).
Activating immediate pre-entry climate
control
You can activate "Immediate pre-entry cli-
mate control" even if the vehicle interior is
already at the desired temperature. This
means that the vehicle interior continues to
be cooled or heated, e.g. if the journey is
interrupted for up to 50 minutes, and the inte-
rior temperature is kept constant. You can
only set the desired temperature using the
climate control unit. If you do not pre-select a
temperature, the last temperature set will be
automatically adopted.
Operating the climate control systems125
Climate control
Z
Page 128 of 342
To activate/deactivate "Immediate pre-
entry climate control"
XPress button:in the center console.
The blue or red indicator lamp in the button
lights up or goes out.
The colors of the indicator lamps in the button have the following meanings:
Re dH eating activated
Blue Cooling activated
Yellow Pre-entry climate control at depar- ture is preselected
Air vents
Important safety notes
GWARNING
Very hot or very cold air can flow from the air
vents. This could result in burns or frostbite in
the immediate vicinity of the air vents. There
is a risk of injury.
Make sure that all vehicle occupants always
maintain a sufficient distance to the air out-
lets. If necessary, redirect the airflow to
another area of the vehicle interior.
In order to ensure the direct flow of fresh air
through the air vents into the vehicle interior,
please observe the following notes:
Rkeep the air inlet between the windshield
and the hood free of blockages, such as ice, snow or leaves.
Rnever cover the air vents or air intake grillesin the vehicle interior.
iFor optimal climate control in the vehicle,
open the air vents completely and set the
adjusters to the central position.
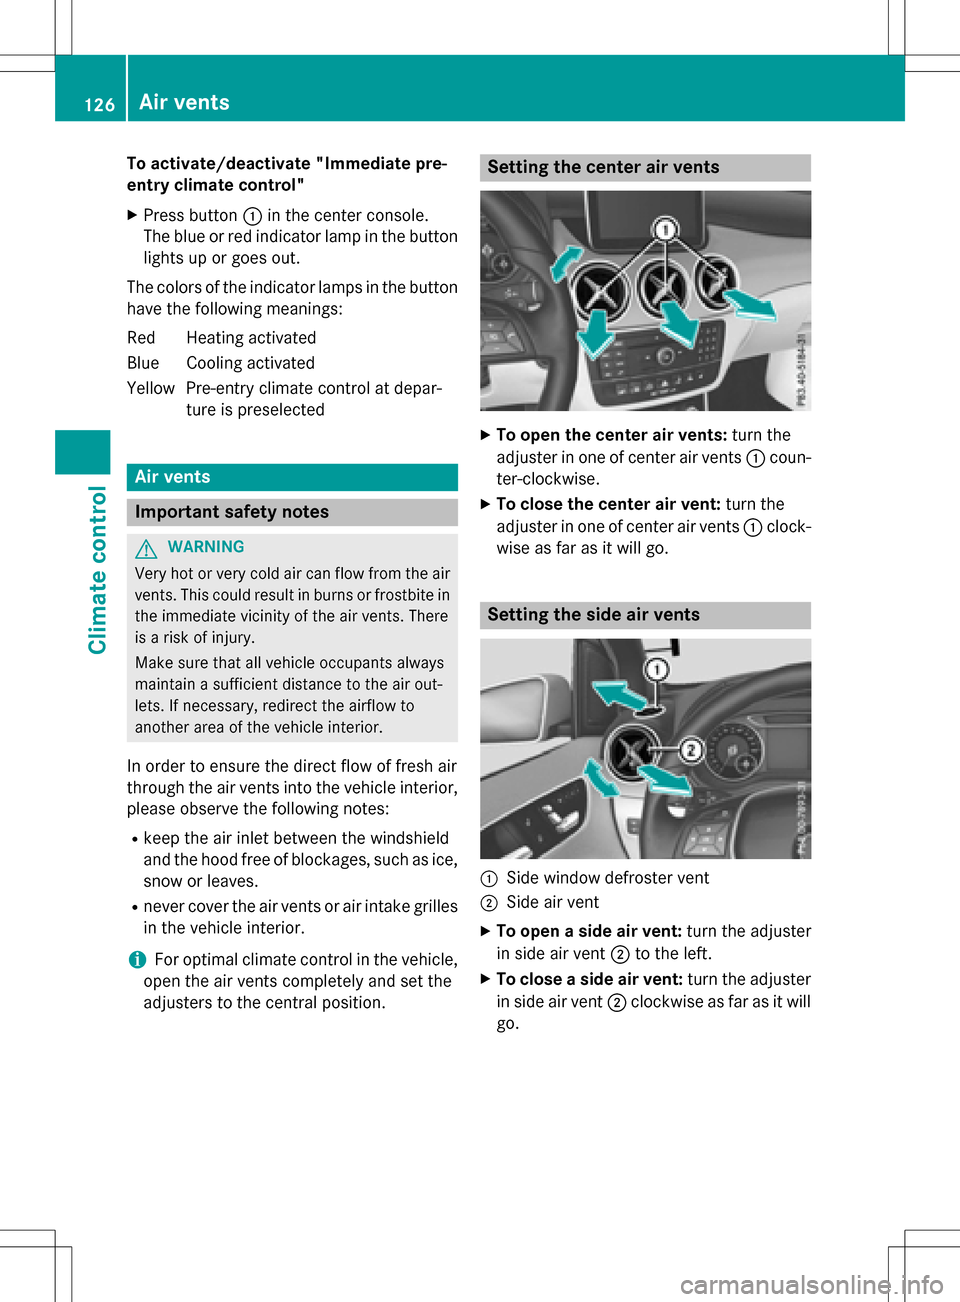
Setting the center air vents
XTo open the center air vents: turn the
adjuster in one of center air vents :coun-
ter-clockwise.
XTo close the center air vent: turn the
adjuster in one of center air vents :clock-
wise as far as it will go.
Setting the side air vents
:Side window defroster vent
;Side air vent
XTo open a side air vent: turn the adjuster
in side air vent ;to the left.
XTo close a side air vent: turn the adjuster
in side air vent ;clockwise as far as it will
go.
126Air vents
Climate control
Page 132 of 342
Useful information
i
This Operator's Manual describes all
models and all standard and optional equip-
ment of your vehicle available at the time of
publication of the Operator's Manual.
Country-specific differences are possible.
Please note that your vehicle may not be
equipped with all features described. This
also applies to safety-related systems and
functions.
iRead the information on qualified special-
ist workshops (
Ypage 26).
Notes on breaking-in a new vehicle
The sensor system of some driving and driv-
ing safety systems adjusts automatically
while a certain distance is being driven after
the vehicle has been delivered or after
repairs. Full system effectiveness is not
reached until the end of this teach-in proce-
dure.
New and replaced brake pads and discs only
reach their optimum braking effect after sev-
eral hundred kilometers of driving. Compen-
sate for this by applying greater force to the
brake pedal.
Driving
Important safety notes
GWARNING
Objects in the driver's footwell can restrict the pedal travel or obstruct a depressed pedal.
The operating and road safety of the vehicle is
jeopardized. There is a risk of an accident.
Make sure that all objects in the vehicle are
stowed correctly, and that they cannot enter
the driver's footwell. Install the floormats
securely and as specified in order to ensure
sufficient clearance for the pedals. Do not use
loose floormats and do not place floormats on
top of one another.
GWARNING
Unsuitable footwear can hinder correct usage of the pedals, e.g.:
Rshoes with thick soles
Rshoes with high heels
Rslippers
There is a risk of an accident.
Wear suitable footwear to ensure correct
usage of the pedals.
GWARNING
If you switch off the ignition while driving,
safety-relevant functions are only available
with limitations, or not at all. This could affect, for example, the power steering and the brake
boosting effect. You will require considerably
more effort to steer and brake. There is a risk
of an accident.
Do not switch off the ignition while driving.
GWARNING
If the parking brake has not been fully
released when driving, the parking brake can:
Roverheat and cause a fire
Rlose its hold function.
There is a risk of fire and an accident. Release
the parking brake fully before driving off.
!Before driving away, you must ensure
that, for your own safety and to avoid dam-
age, the charging cable has been removed
from the vehicle socket. Otherwise, you
cannot shift the transmission out of posi-
tion P.
The braking performance of the electric
motor using recuperative braking is, in some
operating modes, either reduced or not effec-
tive:
Rwhen the condition of charge of the high-
voltage battery increases
Rif the high-voltage battery is not yet at a
normal operating temperature
Rwhen driving close to the maximum speed
Rwhen the vehicle is almost stationary
130Driving
Driving and parking
Page 134 of 342
The drive system can be switched off while
the vehicle is in motion by pressing and hold-
ing the Start/Stop button for three seconds.
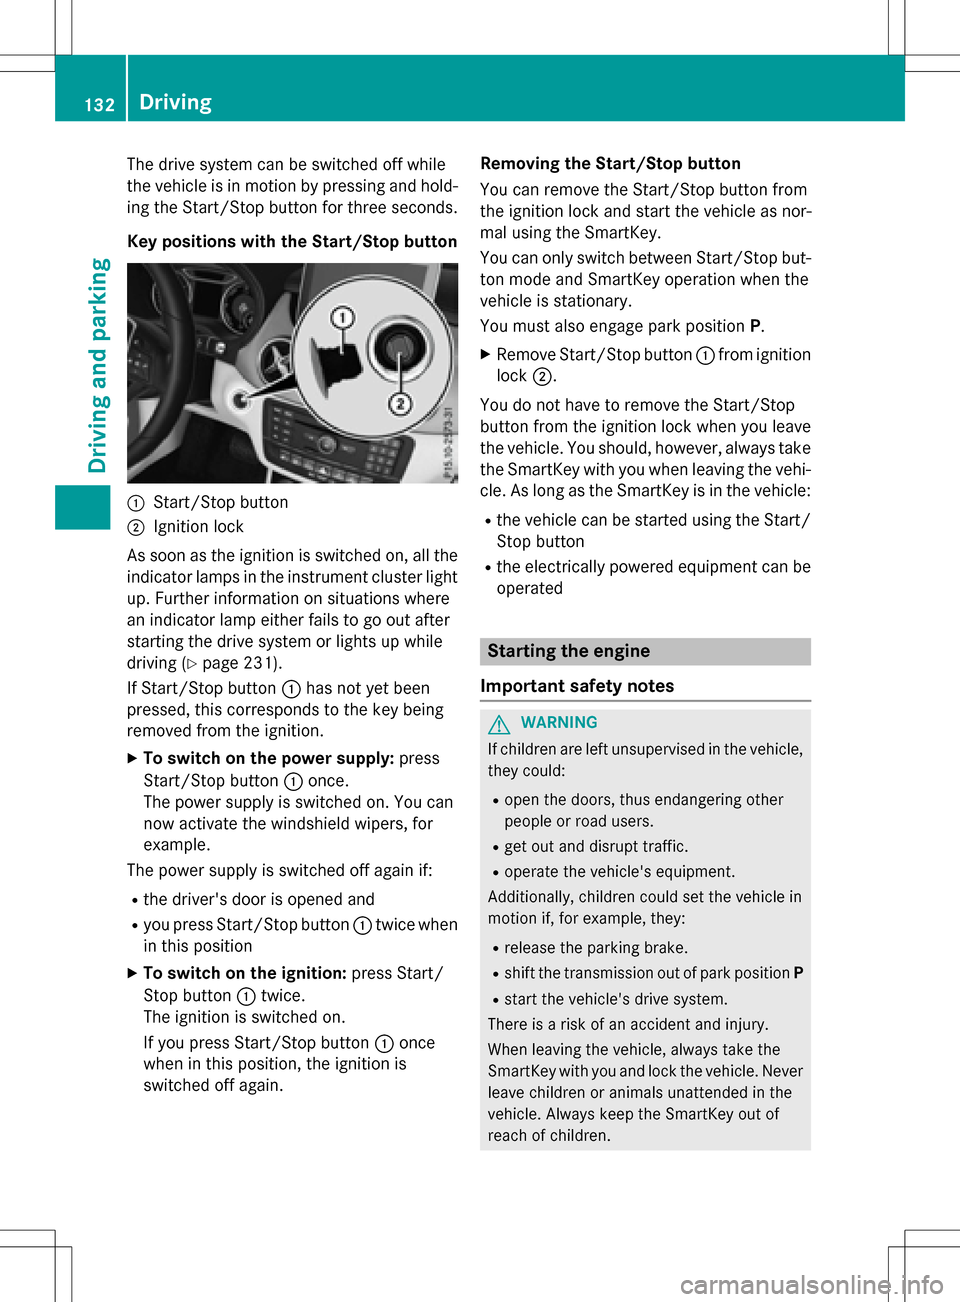
Key positions with the Start/Stop button
:Start/Stop button
;Ignition lock
As soon as the ignition is switched on, all the
indicator lamps in the instrument cluster light
up. Further information on situations where
an indicator lamp either fails to go out after
starting the drive system or lights up while
driving (
Ypage 231).
If Start/Stop button :has not yet been
pressed, this corresponds to the key being
removed from the ignition.
XTo switch on the power supply: press
Start/Stop button :once.
The power supply is switched on. You can
now activate the windshield wipers, for
example.
The power supply is switched off again if:
Rthe driver's door is opened and
Ryou press Start/Stop button :twice when
in this position
XTo switch on the ignition: press Start/
Stop button :twice.
The ignition is switched on.
If you press Start/Stop button :once
when in this position, the ignition is
switched off again. Removing the Start/Stop button
You can remove the Start/Stop button from
the ignition lock and start the vehicle as nor-
mal using the SmartKey.
You can only switch between Start/Stop but-
ton mode and SmartKey operation when the
vehicle is stationary.
You must also engage park position P.
XRemove Start/Stop button:from ignition
lock ;.
You do not have to remove the Start/Stop
button from the ignition lock when you leave
the vehicle. You should, however, always take
the SmartKey with you when leaving the vehi-
cle. As long as the SmartKey is in the vehicle:
Rthe vehicle can be started using the Start/ Stop button
Rthe electrically powered equipment can be
operated
Starting the engine
Important safety notes
GWARNING
If children are left unsupervised in the vehicle,
they could:
Ropen the doors, thus endangering other
people or road users.
Rget out and disrupt traffic.
Roperate the vehicle's equipment.
Additionally, children could set the vehicle in
motion if, for example, they:
Rrelease the parking brake.
Rshift the transmission out of park position P
Rstart the vehicle's drive system.
There is a risk of an accident and injury.
When leaving the vehicle, always take the
SmartKey with you and lock the vehicle. Never
leave children or animals unattended in the
vehicle. Always keep the SmartKey out of
reach of children.
132Driving
Driving and parking
Page 136 of 342
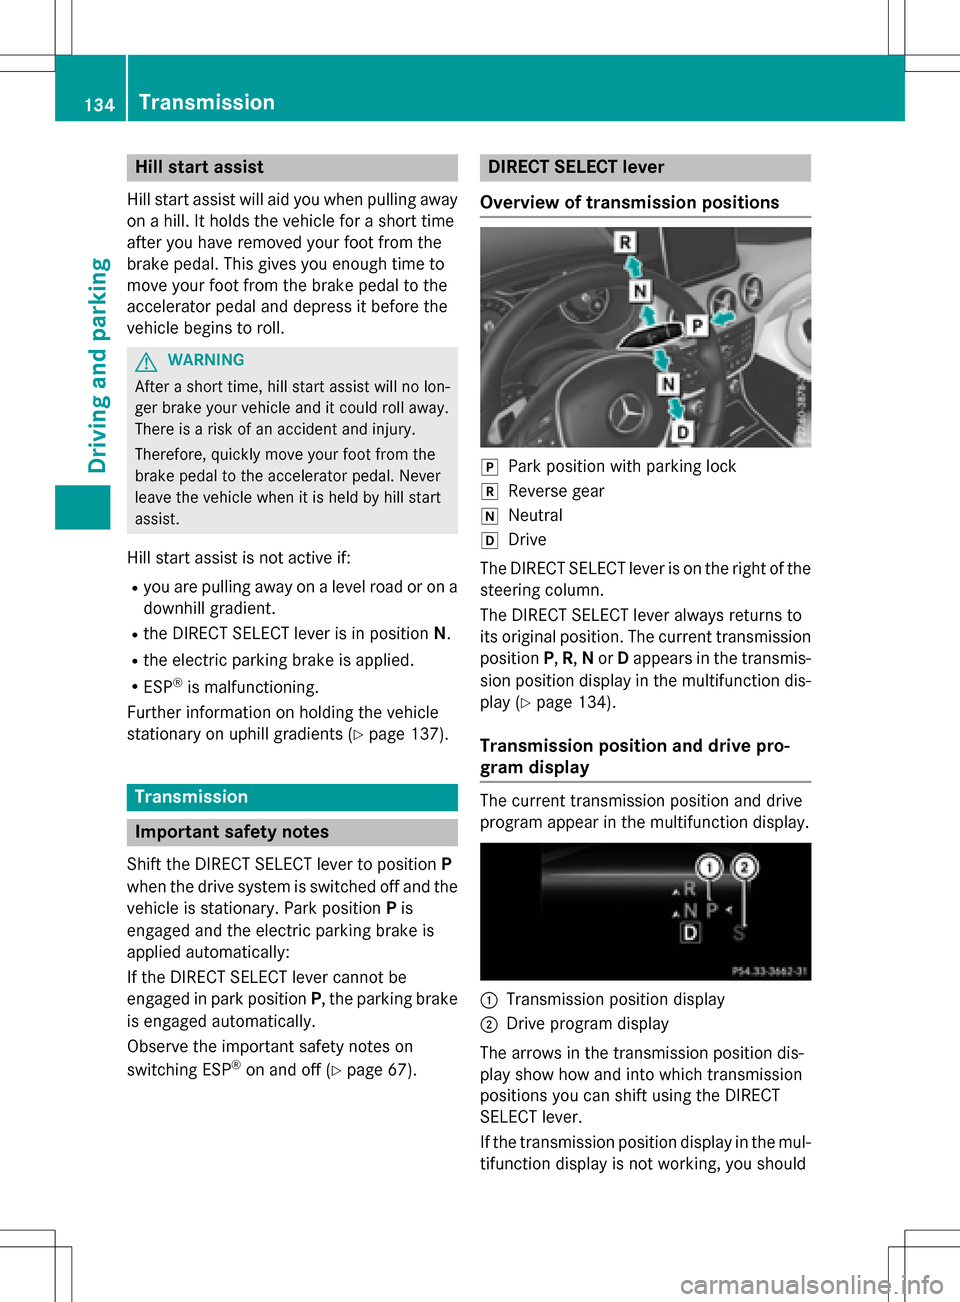
Hill start assist
Hill start assist will aid you when pulling away
on a hill. It holds the vehicle for a short time
after you have removed your foot from the
brake pedal. This gives you enough time to
move your foot from the brake pedal to the
accelerator pedal and depress it before the
vehicle begins to roll.
GWARNING
After a short time, hill start assist will no lon-
ger brake your vehicle and it could roll away.
There is a risk of an accident and injury.
Therefore, quickly move your foot from the
brake pedal to the accelerator pedal. Never
leave the vehicle when it is held by hill start
assist.
Hill start assist is not active if:
Ryou are pulling away on a level road or on a downhill gradient.
Rthe DIRECT SELECT lever is in position N.
Rthe electric parking brake is applied.
RESP®is malfunctioning.
Further information on holding the vehicle
stationary on uphill gradients (
Ypage 137).
Transmission
Important safety notes
Shift the DIRECT SELECT lever to position P
when the drive system is switched off and the vehicle is stationary. Park position Pis
engaged and the electric parking brake is
applied automatically:
If the DIRECT SELECT lever cannot be
engaged in park position P, the parking brake
is engaged automatically.
Observe the important safety notes on
switching ESP
®on and off (Ypage 67).
DIRECT SELECT lever
Overview of transmission positions
jPark position with parking lock
kReverse gear
iNeutral
hDrive
The DIRECT SELECT lever is on the right of the
steering column.
The DIRECT SELECT lever always returns to
its original position. The current transmission
position P,R, Nor Dappears in the transmis-
sion position display in the multifunction dis-
play (
Ypage 134).
Transmission position and drive pro-
gram display
The current transmission position and drive
program appear in the multifunction display.
:Transmission position display
;Drive program display
The arrows in the transmission position dis-
play show how and into which transmission
positions you can shift using the DIRECT
SELECT lever.
If the transmission position display in the mul-
tifunction display is not working, you should
134Transmission
Driving and parking
Page 137 of 342
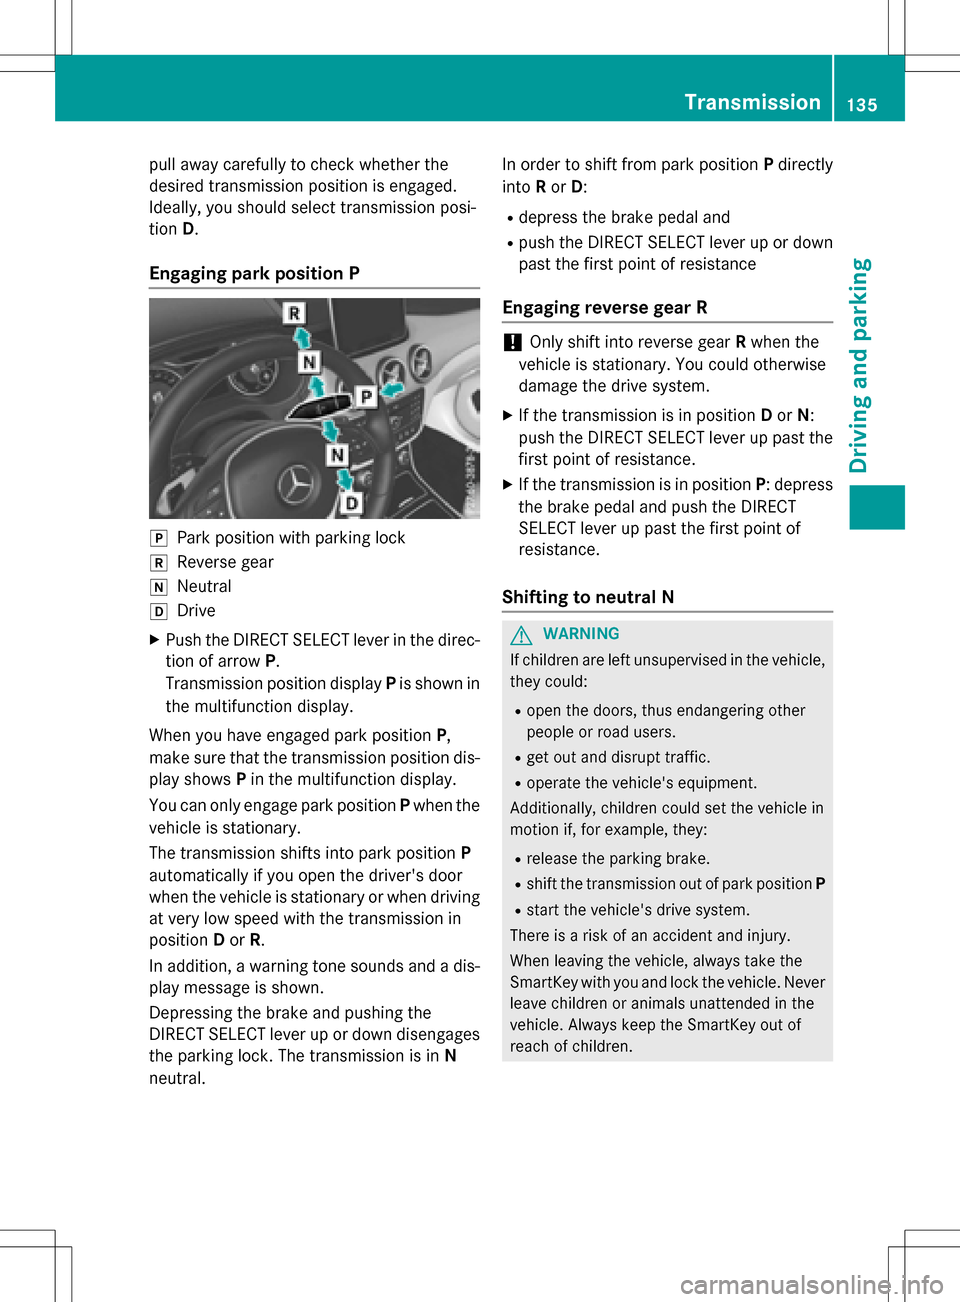
pull away carefully to check whether the
desired transmission position is engaged.
Ideally, you should select transmission posi-
tionD.
Engaging park position P
jPark position with parking lock
kReverse gear
iNeutral
hDrive
XPush the DIRECT SELECT lever in the direc-
tion of arrow P.
Transmission position display Pis shown in
the multifunction display.
When you have engaged park position P,
make sure that the transmission position dis-
play shows Pin the multifunction display.
You can only engage park position Pwhen the
vehicle is stationary.
The transmission shifts into park position P
automatically if you open the driver's door
when the vehicle is stationary or when driving
at very low speed with the transmission in
position Dor R.
In addition, a warning tone sounds and a dis-
play message is shown.
Depressing the brake and pushing the
DIRECT SELECT lever up or down disengages
the parking lock. The transmission is in N
neutral. In order to shift from park position
Pdirectly
into Ror D:
Rdepress the brake pedal and
Rpush the DIRECT SELECT lever up or down
past the first point of resistance
Engaging reverse gear R
!Only shift into reverse gear Rwhen the
vehicle is stationary. You could otherwise
damage the drive system.
XIf the transmission is in position Dor N:
push the DIRECT SELECT lever up past the
first point of resistance.
XIf the transmission is in position P: depress
the brake pedal and push the DIRECT
SELECT lever up past the first point of
resistance.
Shifting to neutral N
GWARNING
If children are left unsupervised in the vehicle,
they could:
Ropen the doors, thus endangering other
people or road users.
Rget out and disrupt traffic.
Roperate the vehicle's equipment.
Additionally, children could set the vehicle in
motion if, for example, they:
Rrelease the parking brake.
Rshift the transmission out of park position P
Rstart the vehicle's drive system.
There is a risk of an accident and injury.
When leaving the vehicle, always take the
SmartKey with you and lock the vehicle. Never
leave children or animals unattended in the
vehicle. Always keep the SmartKey out of
reach of children.
Transmission135
Driving and parking
Z
Page 142 of 342

If you change between radar-based and man-
ual recuperation, the following levels are acti-
vated depending on the selection via the
steering wheel paddle shifters:
:Steering
wheel paddle
shifter -selects D-(maximum
recuperation)
; Steering
wheel paddle
shifter +selects D+(overrun)
In particular, the function of the radar sensors
can be impaired in the case of:
Rthere is dirt on the sensors or anything else
covering the sensors
Rthere is snow or heavy rain
Rthere is interference by other radar sources
Rthere are strong radar reflections, for
example in parking garages
Ra narrow vehicle traveling in front, e.g. a
motorbike
Ra vehicle traveling in front on a different line
relative to the center of your vehicle
Following damage to the front end of the vehi-
cle, have the radar sensor settings and oper-
ation checked at a qualified specialist work-
shop immediately. This also applies to colli-
sions at slow speeds where there is no visible
damage to the front of the vehicle.
If the radar sensors are not available, the sys-
tem switches automatically to level Dwith
moderate recuperation. Have the radar sen-
sors checked at a qualified specialist work-
shop immediately.
Automatic adjustment of recuperation
on downhill gradients
The vehicle can detect steep downhill gradi-
ents. To reduce acceleration downhill and to
charge the high-voltage battery, recuperation
is increased steplessly. This is comparable to
the engine brake in a combustion engine
when you downshift a gear on a downhill gra-
dient. Automatic adjustment of recuperation on
downhill gradients is available in level
D
AUTO
or on vehicles without steering wheel paddle
shifters in levelD.
Intelligent recuperation
The vehicle uses the map and camera data of
Traffic Sign Assist in addition to the sensors
of COLLISION PREVENTION ASSIST PLUS
during radar-based recuperation (D
AUTO). The
rate of recuperation is then automatically
adjusted to the current traffic situation, tak-
ing the current and future maximum speed
into account.
High-voltage battery
Important safety notes
GDANGER
The vehicle's high-voltage electrical system is under high voltage. If you modify components
in the vehicle's high-voltage electrical system
or touch damaged components, you may be
electrocuted. The components in the vehi-
cle's high-voltage electrical system may be
damaged in an accident, although the damage
is not visible. There is a risk of fatal injury.
Following an accident, do not touch any high-
voltage components and never modify the
vehicle's high-voltage electrical system. Have
the vehicle towed away after an accident and
the vehicle's high-voltage electrical system
checked by a qualified specialist workshop.
GWARNING
In the event of a vehicle fire, the internal pres- sure of the high-voltage battery can exceed a
critical value. In this case flammable gas
escapes through a ventilation valve on the
underbody. The gas can ignite. There is a risk
of injury.
Leave the danger zone immediately. Secure
the danger area at a suitable distance, whilst
observing legal requirements.
140High-voltage battery
Driving and parking