2016 MERCEDES-BENZ B-Class ELECTRIC lock
[x] Cancel search: lockPage 120 of 342

the front-passenger side as well. The indi-
cator lamp in theábutton goes out.
RIf you change the settings of the climate
control system, the climate status display
appears for approximately three seconds
at the bottom of the screen in the Audio/
COMAND display (see separate operating
instructions). You will see the current set-
tings of the various climate control func-
tions.
You can choose between various drive pro-
grams with the program selector button
(
Ypage 137).
If you have selected drive program E+:
Rthe cooling output is reduced when cooling
Rheat output is reduced when heating
Rthe time for which the rear window
defroster will run is reduced
If you have selected drive program Eor S, the
current climate settings are maintained.
Operating the climate control sys-
tems
Activating/deactivating climate con-
trol
General notes
When the climate control is switched off, the
air supply and air circulation are also
switched off. The windows could fog up.
Therefore, switch off climate control only
briefly
Dual-zone automatic climate control
XTurn the SmartKey to position 2in the igni-
tion lock (
Ypage 131).
XTo activate: press theÃbutton.
The indicator lamp in the Ãbutton lights
up. Airflow and air distribution are set to
automatic mode.
or
XPress the ^button.
The indicator lamp in the ^button goes
out. The previously selected settings are
restored.
XTo deactivate: press the^button.
The indicator lamp in the ^button lights
up.
iActivate climate control primarily using
the à button.
Switching cooling with air dehumidi-
fication on/off
General notes
If you deactivate the "Cooling with air-dehu-
midification" function, the air inside the vehi- cle will not be cooled. The air inside the vehi-
cle will also not be dehumidified. The win-
dows can fog up more quickly. Therefore, only
deactivate the "Cooling with air-dehumidifi-
cation" function briefly.
The "Cooling with air-dehumidification" func-
tion is operational when the vehicle is ready
to drive. The air inside the vehicle is cooled
and dehumidified according to the tempera-
ture selected.
Condensation may drip from the underside of
the vehicle when it is in cooling mode. This is
normal and not a sign that there is a malfunc- tion.
118Operating the climate control systems
Climate control
Page 122 of 342
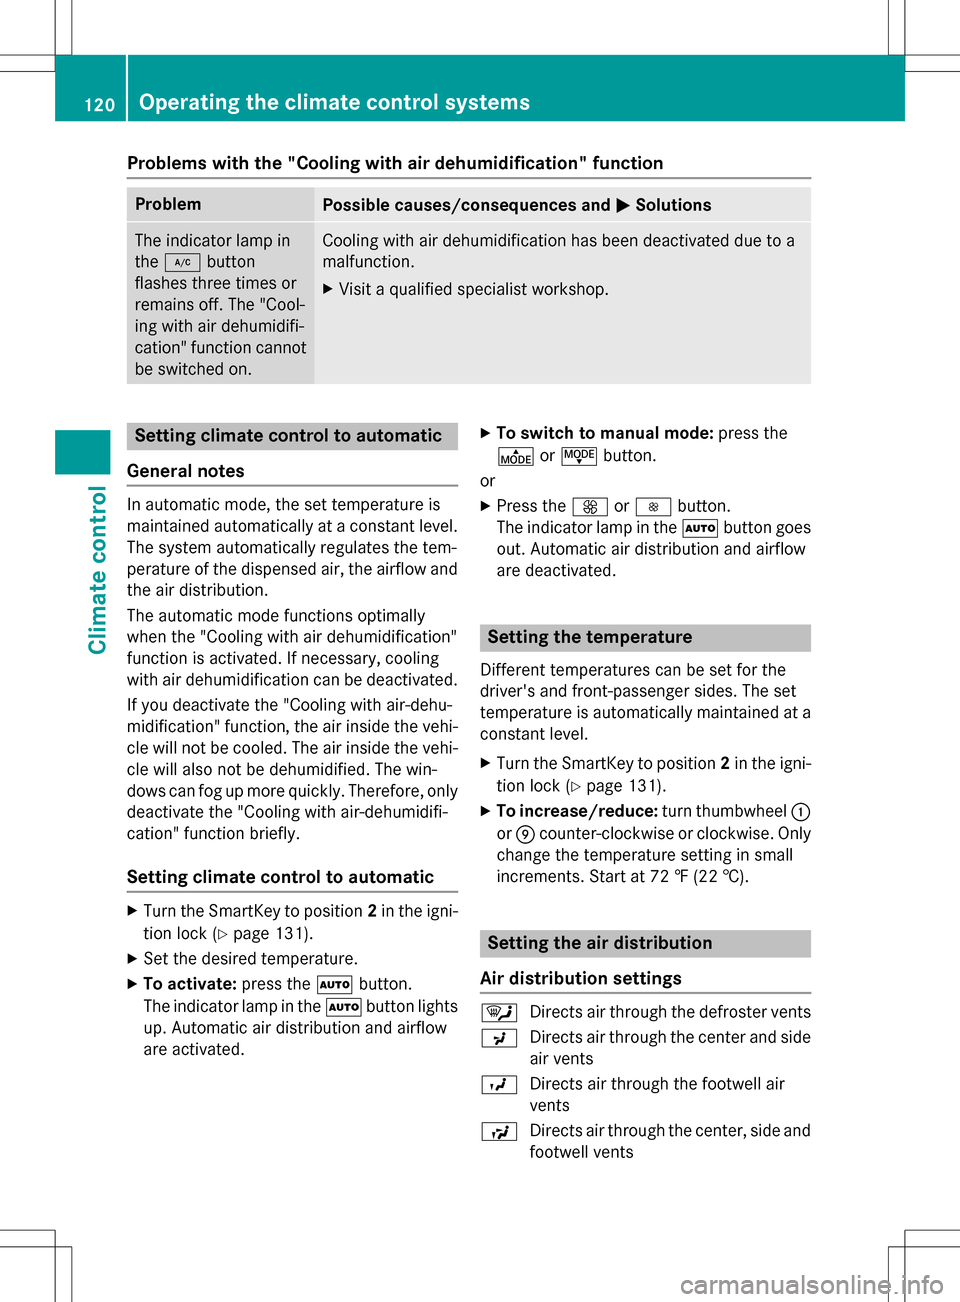
Problems with the "Cooling with air dehumidification" function
ProblemPossible causes/consequences andMSolutions
The indicator lamp in
the¿ button
flashes three times or
remains off. The "Cool-
ing with air dehumidifi-
cation" function cannot
be switched on.Cooling with air dehumidification has been deactivated due to a
malfunction.
XVisit a qualified specialist workshop.
Setting climate control to automatic
General notes
In automatic mode, the set temperature is
maintained automatically at a constant level.
The system automatically regulates the tem-
perature of the dispensed air, the airflow and
the air distribution.
The automatic mode functions optimally
when the "Cooling with air dehumidification"
function is activated. If necessary, cooling
with air dehumidification can be deactivated.
If you deactivate the "Cooling with air-dehu-
midification" function, the air inside the vehi-
cle will not be cooled. The air inside the vehi-
cle will also not be dehumidified. The win-
dows can fog up more quickly. Therefore, only
deactivate the "Cooling with air-dehumidifi-
cation" function briefly.
Setting climate control to automatic
XTurn the SmartKey to position 2in the igni-
tion lock (
Ypage 131).
XSet the desired temperature.
XTo activate: press theÃbutton.
The indicator lamp in the Ãbutton lights
up. Automatic air distribution and airflow
are activated.
XTo switch to manual mode: press the
É orË button.
or
XPress the KorI button.
The indicator lamp in the Ãbutton goes
out. Automatic air distribution and airflow
are deactivated.
Setting the temperature
Different temperatures can be set for the
driver's and front-passenger sides. The set
temperature is automatically maintained at a
constant level.
XTurn the SmartKey to position 2in the igni-
tion lock (
Ypage 131).
XTo increase/reduce: turn thumbwheel:
or E counter-clockwise or clockwise. Only
change the temperature setting in small
increments. Start at 72 ‡ (22 †).
Setting the air distribution
Air distribution settings
¯ Directs air through the defroster vents
P Directs air through the center and side
air vents
O Directs air through the footwell air
vents
S Directs air through the center, side and
footwell vents
120Operating the climate control systems
Climate control
Page 123 of 342

bDirects air through the defroster, cen-
ter and side air vents
a Directs air through the defroster and
footwell vents
_ Directs air through the defroster, cen-
ter, side and footwell vents
iRegardless of the air distribution setting,
airflow is always directed through the side
air vents. The side air vents can only be
closed if the adjusters are turned clockwise until they engage.
Setting the air distribution
XTurn the SmartKey to position 2in the igni-
tion lock (
Ypage 131).
XPress the ÉorË button repeatedly
until the desired symbol appears in the dis-
play.
Setting the airflow
XTurn the SmartKey to position 2in the igni-
tion lock (
Ypage 131).
XTo increase/reduce: press theKor
I button.
Switching the ZONE function on/off
XTo activate: press theábutton.
The indicator lamp in the ábutton lights
up.
The temperature setting for the driver's
side is not adopted for the front-passenger
side.
XTo deactivate: press theábutton.
The indicator lamp in the ábutton goes
out.
The temperature setting for the driver's
side is adopted for the front-passenger
side.
Defrosting the windshield
General notes
You can use this function to defrost the wind-
shield or to defrost the inside of the wind-
shield and the side windows.
iYou should only select the "Windshield
defrosting" function until the windshield is
clear again.
Activating/deactivating the defrosting
function for the windshield
XTurn the SmartKey to position 2in the igni-
tion lock (
Ypage 131).
XTo activate: press the¬button.
The indicator lamp in the ¬button lights
up.
The climate control system switches to the
following functions:
Rhigh airflow
Rhigh temperature
Rair distribution to the windshield and
front side windows
Rair-recirculation mode off
Vehicles with windshield heating: the
windshield heating is switched on using the "Windshield defrosting" function.
iThe "Windshield defrosting" function
automatically sets the blower output to the optimum defrosting effect. As a result, the
airflow may increase or decrease automat-
ically after the ¬button is pressed.
iYou can adjust the blower output man-
ually while the "Windshield defrosting"
function is in operation:
Press the óorô button.
XTo deactivate: press the¬button.
The indicator lamp in the ¬button goes
out. The previously selected settings are
restored. Air-recirculation mode remains
deactivated.
or
Operating the climate control systems121
Climate control
Page 124 of 342

XPress theÃbutton.
The indicator lamp in the ¬button goes
out. Airflow and air distribution are set to
automatic mode.
or
XTurn temperature control :orE counter-
clockwise or clockwise (
Ypage 117).
MAX COOL maximum cooling
The MAX COOL function is only available in
vehicles for the USA.
The MAX COOL function only works when the vehicle is ready to drive.
XTo activate: press theÙbutton.
The indicator lamp in the button lights up.
XTo deactivate: press theÙbutton.
The indicator lamp goes out. The previously
selected settings are restored.
When you activate MAX COOL, climate con-
trol switches to the following functions:
Rmaximum cooling
Rmaximum airflow
Rair-recirculation mode on
Defrosting the windows
Windows fogged up on the inside
XActivate the ¿"Cooling with air dehu-
midification" function.
XActivate automatic mode Ã.
XIf the windows continue to fog up, activate
the¬ "Windshield defrosting" function.
iYou should only select this setting until
the windshield is clear again.
Windows fogged up on the outside
XActivate the windshield wipers.
XSet the air distribution to PorO.
iYou should only select this setting until
the windshield is clear again.
Rear window defroster
General notes
The rear window defroster has a high current draw. You should therefore switch it off as
soon as the rear window is clear. Otherwise,
the rear window defroster switches off auto-
matically after several minutes.
If the battery voltage is too low, the rear win-
dow defroster may switch off.
Switching on/off
XTurn the SmartKey to position 2in the igni-
tion lock (
Ypage 131).
XPress the ¤button.
The indicator lamp in the ¤button lights
up or goes out.
122Operating the climate control systems
Climate control
Page 125 of 342
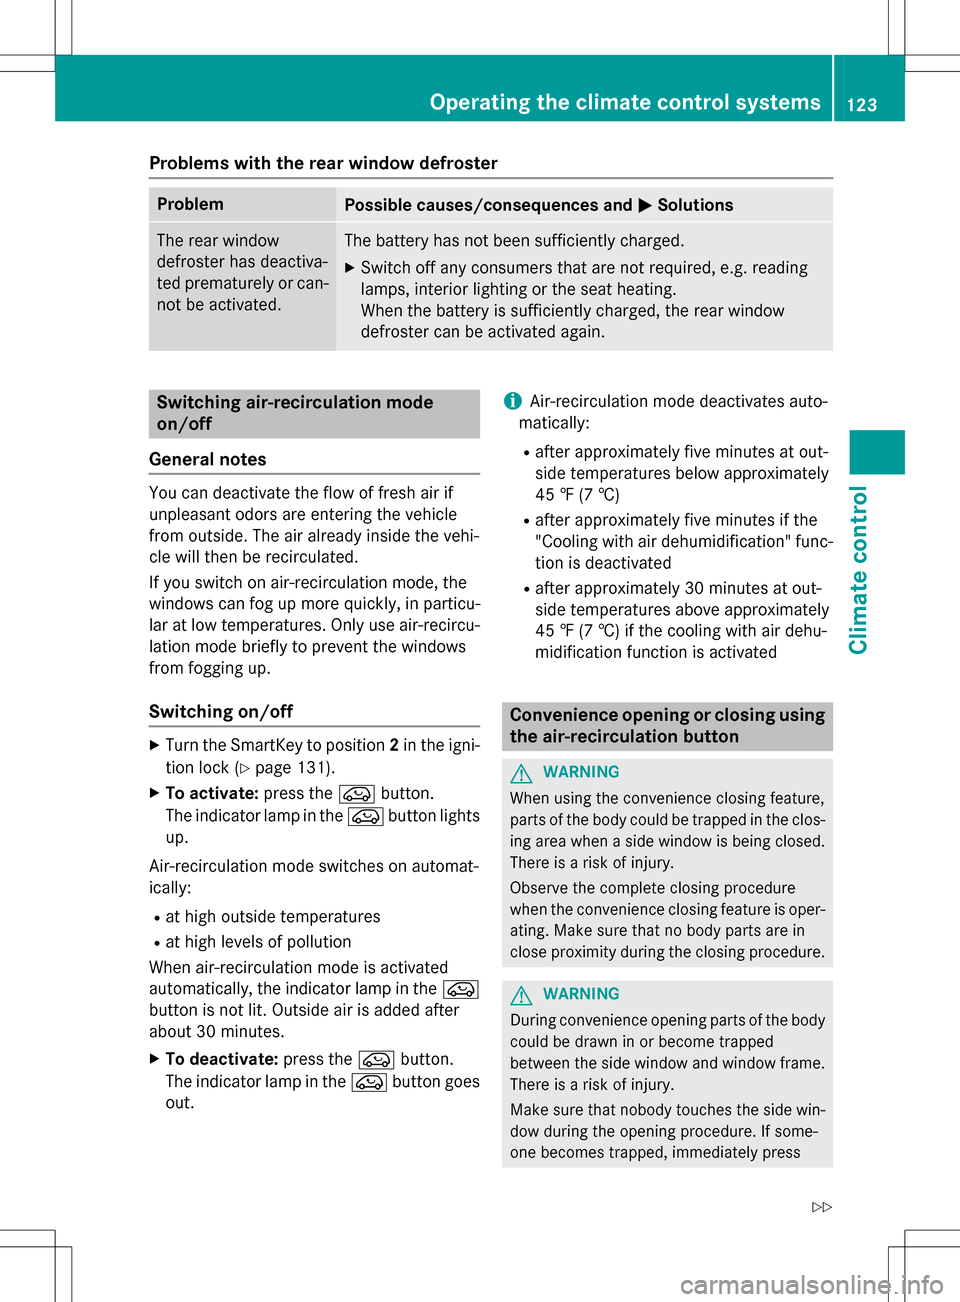
Problems with the rear window defroster
ProblemPossible causes/consequences andMSolutions
The rear window
defroster has deactiva-
ted prematurely or can-
not be activated.The battery has not been sufficiently charged.
XSwitch off any consumers that are not required, e.g. reading
lamps, interior lighting or the seat heating.
When the battery is sufficiently charged, the rear window
defroster can be activated again.
Switching air-recirculation mode
on/off
General notes
You can deactivate the flow of fresh air if
unpleasant odors are entering the vehicle
from outside. The air already inside the vehi-
cle will then be recirculated.
If you switch on air-recirculation mode, the
windows can fog up more quickly, in particu-
lar at low temperatures. Only use air-recircu-
lation mode briefly to prevent the windows
from fogging up.
Switching on/off
XTurn the SmartKey to position 2in the igni-
tion lock (
Ypage 131).
XTo activate: press theebutton.
The indicator lamp in the ebutton lights
up.
Air-recirculation mode switches on automat-
ically:
Rat high outside temperatures
Rat high levels of pollution
When air-recirculation mode is activated
automatically, the indicator lamp in the e
button is not lit. Outside air is added after
about 30 minutes.
XTo deactivate: press theebutton.
The indicator lamp in the ebutton goes
out.
iAir-recirculation mode deactivates auto-
matically:
Rafter approximately five minutes at out-
side temperatures below approximately
45 ‡ (7 †)
Rafter approximately five minutes if the
"Cooling with air dehumidification" func-
tion is deactivated
Rafter approximately 30 minutes at out-
side temperatures above approximately
45 ‡ (7 †) if the cooling with air dehu-
midification function is activated
Convenience opening or closing using
the air-recirculation button
GWARNING
When using the convenience closing feature,
parts of the body could be trapped in the clos-
ing area when a side window is being closed.
There is a risk of injury.
Observe the complete closing procedure
when the convenience closing feature is oper-
ating. Make sure that no body parts are in
close proximity during the closing procedure.
GWARNING
During convenience opening parts of the body could be drawn in or become trapped
between the side window and window frame.
There is a risk of injury.
Make sure that nobody touches the side win-
dow during the opening procedure. If some-
one becomes trapped, immediately press
Operating the climate control systems123
Climate control
Z
Page 126 of 342
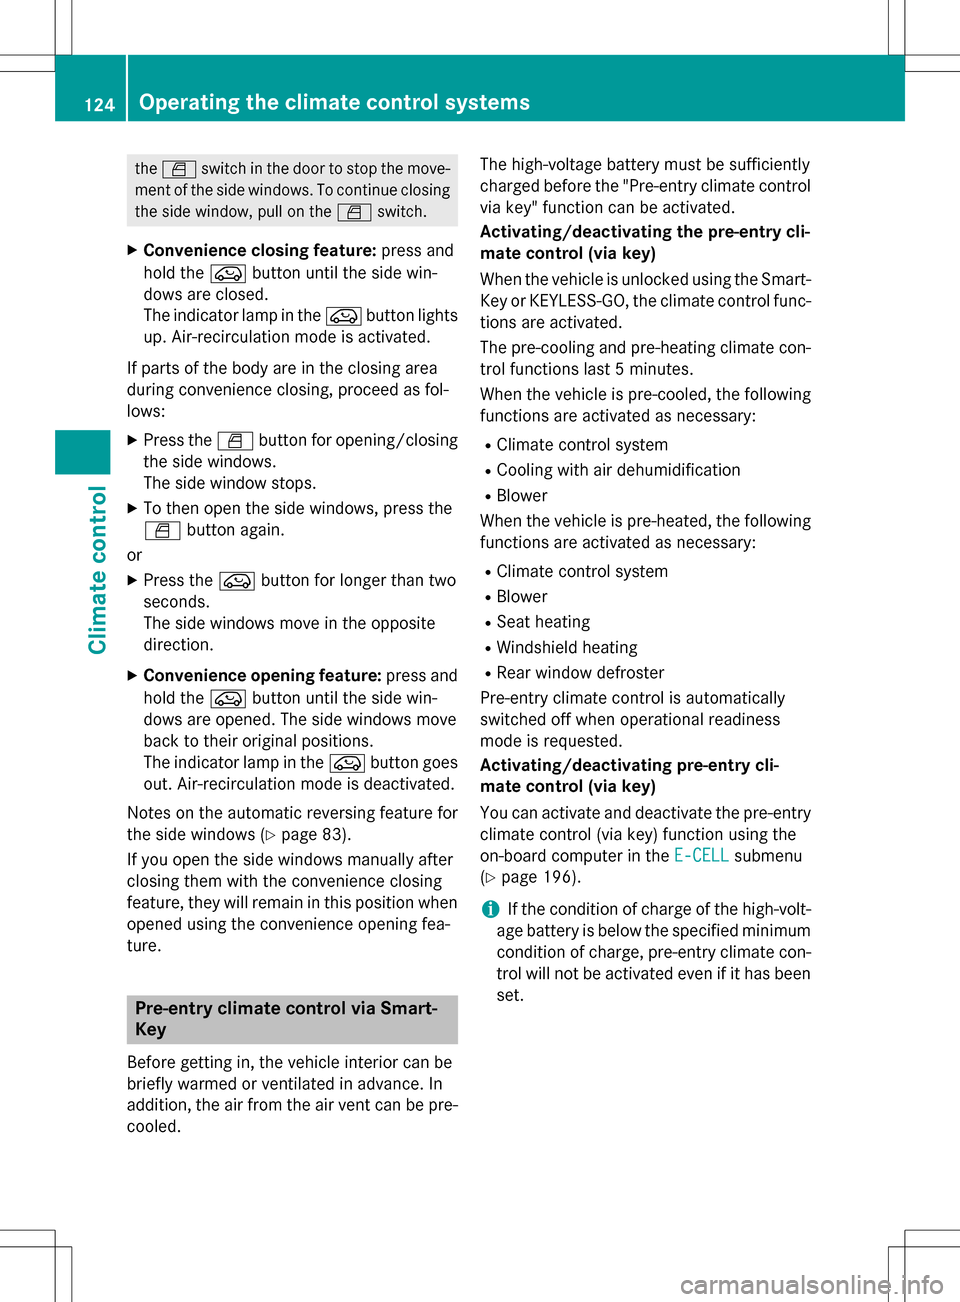
theW switch in the door to stop the move-
ment of the side windows. To continue closing
the side window, pull on the Wswitch.
XConvenience closing feature: press and
hold the ebutton until the side win-
dows are closed.
The indicator lamp in the ebutton lights
up. Air-recirculation mode is activated.
If parts of the body are in the closing area
during convenience closing, proceed as fol-
lows:
XPress the Wbutton for opening/closing
the side windows.
The side window stops.
XTo then open the side windows, press the
W button again.
or
XPress the ebutton for longer than two
seconds.
The side windows move in the opposite
direction.
XConvenience opening feature: press and
hold the ebutton until the side win-
dows are opened. The side windows move
back to their original positions.
The indicator lamp in the ebutton goes
out. Air-recirculation mode is deactivated.
Notes on the automatic reversing feature for
the side windows (
Ypage 83).
If you open the side windows manually after
closing them with the convenience closing
feature, they will remain in this position when
opened using the convenie nce opening fea-
ture.
Pre-entry climate control via Smart-
Key
Before getting in, the vehicle interior can be
briefly warmed or ventilated in advance. In
addition, the air from the air vent can be pre-
cooled. The high-voltage battery must be sufficiently
charged before the "Pre-entry climate control
via key" function can be activated.
Activating/deactivating the pre-entry cli-
mate control (via key)
When the vehicle is unlocked using the Smart-
Key or KEYLESS-GO, the climate control func-
tions are activated.
The pre-cooling and pre-heating climate con-
trol functions last 5 minutes.
When the vehicle is pre-cooled, the following functions are activated as necessary:
RClimate control system
RCooling with air dehumidification
RBlower
When the vehicle is pre-heated, the following
functions are activated as necessary:
RClimate control system
RBlower
RSeat heating
RWindshield heating
RRear window defroster
Pre-entry climate control is automatically
switched off when operational readiness
mode is requested.
Activating/deactivating pre-entry cli-
mate control (via key)
You can activate and deactivate the pre-entry
climate control (via key) function using the
on-board comp uter in theE-CELL
submenu
(
Ypage 196).
iIf the condition of charge of the high-volt-
age battery is below the specified minimum
condition of charge, pre-entry climate con-
trol will not be activated even if it has been
set.
124Operating the climate control systems
Climate control
Page 128 of 342
To activate/deactivate "Immediate pre-
entry climate control"
XPress button:in the center console.
The blue or red indicator lamp in the button
lights up or goes out.
The colors of the indicator lamps in the button have the following meanings:
Re dH eating activated
Blue Cooling activated
Yellow Pre-entry climate control at depar- ture is preselected
Air vents
Important safety notes
GWARNING
Very hot or very cold air can flow from the air
vents. This could result in burns or frostbite in
the immediate vicinity of the air vents. There
is a risk of injury.
Make sure that all vehicle occupants always
maintain a sufficient distance to the air out-
lets. If necessary, redirect the airflow to
another area of the vehicle interior.
In order to ensure the direct flow of fresh air
through the air vents into the vehicle interior,
please observe the following notes:
Rkeep the air inlet between the windshield
and the hood free of blockages, such as ice, snow or leaves.
Rnever cover the air vents or air intake grillesin the vehicle interior.
iFor optimal climate control in the vehicle,
open the air vents completely and set the
adjusters to the central position.
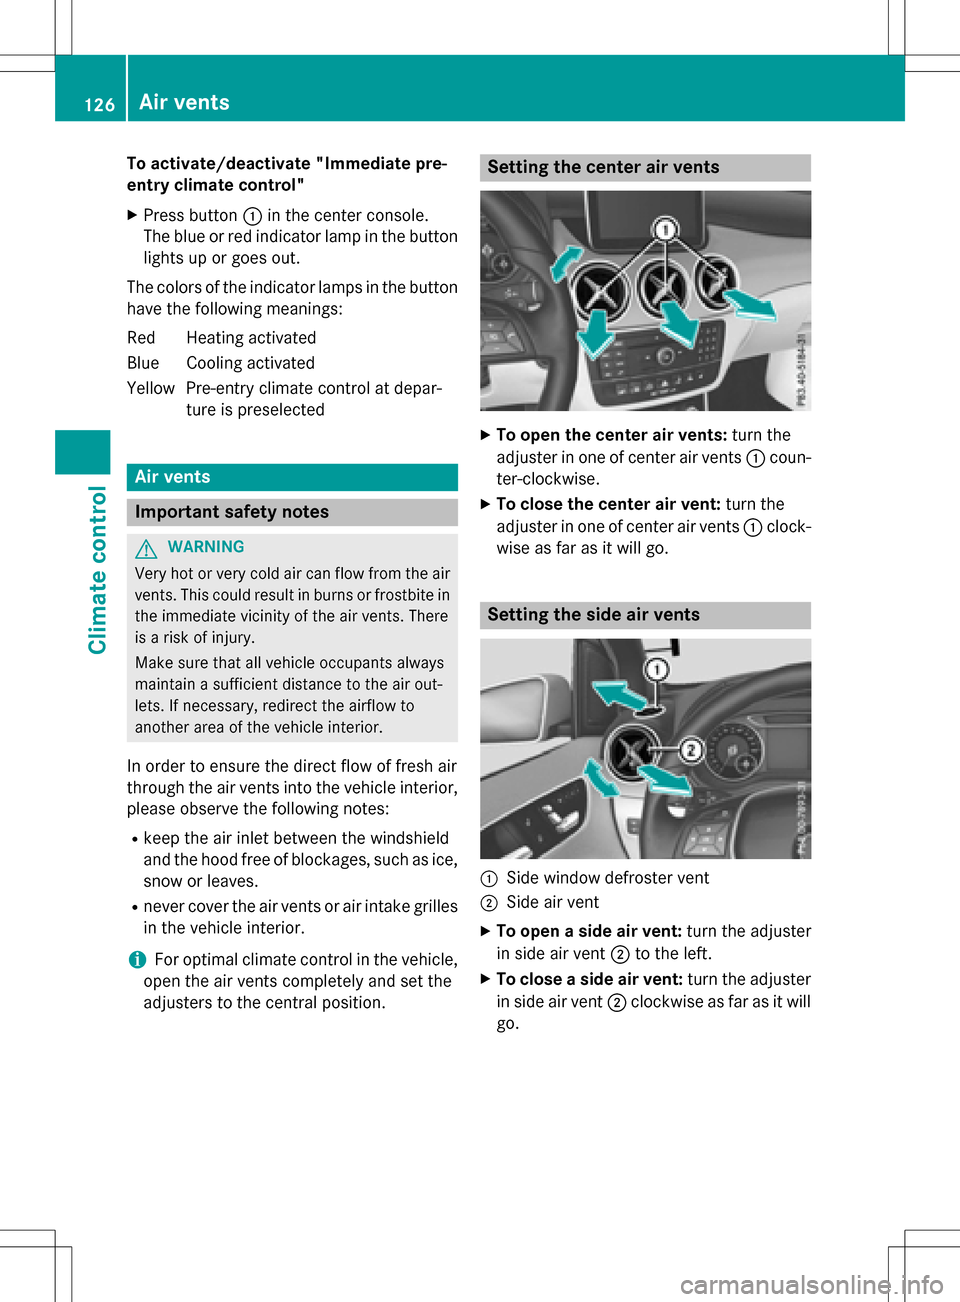
Setting the center air vents
XTo open the center air vents: turn the
adjuster in one of center air vents :coun-
ter-clockwise.
XTo close the center air vent: turn the
adjuster in one of center air vents :clock-
wise as far as it will go.
Setting the side air vents
:Side window defroster vent
;Side air vent
XTo open a side air vent: turn the adjuster
in side air vent ;to the left.
XTo close a side air vent: turn the adjuster
in side air vent ;clockwise as far as it will
go.
126Air vents
Climate control
Page 133 of 342
Rin transmission positionN
Rduring and after ESP stability control
If you do not make an additional effort to
apply the brake yourself, the braking effect
may not be sufficient. If necessary, counter-
act the reduced regenerative braking effect
by applying the brake yourself.
Before commencing your journey, ensure that the charging cable required for charging the
high-voltage battery is in the vehicle.
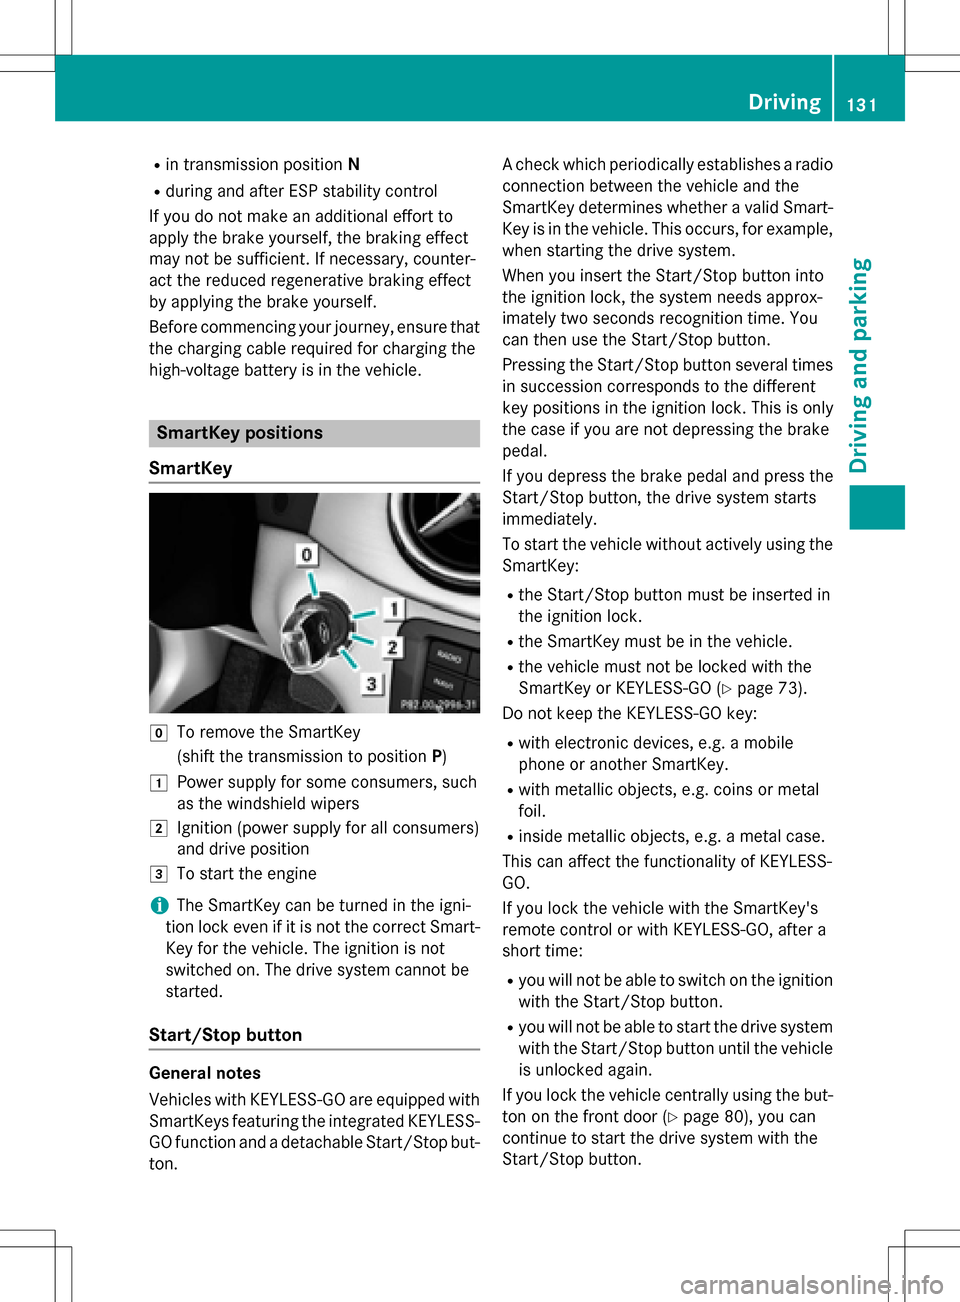
SmartKey positions
SmartKey
gTo remove the SmartKey
(shift the transmission to position P)
1Power supply for some consumers, such
as the windshield wipers
2Ignition (power supply for all consumers)
and drive position
3To start the engine
iThe SmartKey can be turned in the igni-
tion lock even if it is not the correct Smart- Key for the vehicle. The ignition is not
switched on. The drive system cannot be
started.
Start/Stop button
General notes
Vehicles with KEYLESS-GO are equipped with
SmartKeys featuring the integrated KEYLESS-GO function and a detachable Start/Stop but-
ton. A check which periodically establishes a radio
connection between the vehicle and the
SmartKey determines whether a valid Smart-
Key is in the vehicle. This occurs, for example,
when starting the drive system.
When you insert the Start/Stop button into
the ignition lock, the system needs approx-
imately two seconds recognition time. You
can then use the Start/Stop button.
Pressing the Start/Stop button several times
in succession corresponds to the different
key positions in the ignition lock. This is only
the case if you are not depressing the brake
pedal.
If you depress the brake pedal and press the
Start/Stop button, the drive system starts
immediately.
To start the vehicle without actively using the
SmartKey:
Rthe Start/Stop button must be inserted in
the ignition lock.
Rthe SmartKey must be in the vehicle.
Rthe vehicle must not be locked with the
SmartKey or KEYLESS-GO (
Ypage 73).
Do not keep the KEYLESS-GO key:
Rwith electronic devices, e.g. a mobile
phone or another SmartKey.
Rwith metallic objects, e.g. coins or metal
foil.
Rinside metallic objects, e.g. a metal case.
This can affect the functionality of KEYLESS-
GO.
If you lock the vehicle with the SmartKey's
remote control or with KEYLESS-GO, after a
short time:
Ryou will not be able to switch on the ignition
with the Start/Stop button.
Ryou will not be able to start the drive system
with the Start/Stop button until the vehicle is unlocked again.
If you lock the vehicle centrally using the but-
ton on the front door (
Ypage 80), you can
continue to start the drive system with the
Start/Stop button.
Driving131
Driving and parking
Z