2016 MERCEDES-BENZ B-Class ELECTRIC instrument cluster
[x] Cancel search: instrument clusterPage 161 of 342

Do not depress the brake pedal continuously
while the vehicle is in motion, e.g. causing the
brakes to rub by constantly applying light
pressure to the pedal. This results in exces-
sive and premature wear to the brake pads.
Heavy and light loads
GWARNING
If you rest your foot on the brake pedal while
driving, the braking system can overheat. This increases the stopping distance and can even
cause the braking system to fail. There is a
risk of an accident.
Never use the brake pedal as a footrest. Never
depress the brake pedal and the accelerator
pedal at the same time.
!Depressing the brake pedal constantly
results in excessive and premature wear to
the brake pads.
If the brakes have been subjected to a heavy
load, do not stop the vehicle immediately.
Drive on for a short while. This allows the air-
flow to cool the brakes more quickly.
Wet roads
If you have driven for a long time in heavy rain
without braking, there may be a delayed reac-
tion from the brakes when braking for the first
time. This may also occur after the vehicle has
been washed or driven through deep water.
You have to depress the brake pedal more
firmly. Maintain a greater distance from the
vehicle in front.
After driving on a wet road or having the vehi-
cle washed, brake firmly while paying atten-
tion to the traffic conditions. This will warm up
the brake discs, thereby drying them more
quickly and protecting them against corro-
sion.
Limited braking performance on salt-
treated roads
If you drive on salted roads, a layer of salt
residue may form on the brake discs and brake pads. This can result in a significantly
longer braking distance.
RIn order to prevent any salt build-up, apply
the brakes occasionally while paying atten-
tion to the traffic conditions.
RCarefully depress the brake pedal and the
beginning and end of a journey.
RMaintain a greater distance to the vehicle
ahead.
Servicing the brakes
!The brake fluid level may be too low, if:
Rif the red brake warning lamp lights up in
the instrument cluster and
Ryou hear a warning tone while the engineis running
Observe additional warning messages in
the multifunction display.
The brake fluid level may be too low due to
brake pad wear or leaking brake lines.
Have the brake system checked immedi-
ately. Consult a qualified specialist work-
shop to arrange this.
!A function or performance test should
only be carried out on a 2-axle dynamom-
eter. If you wish to operate the vehicle on
such a dynamometer, please consult a
qualified specialist workshop in advance.
You could otherwise damage the drive train
or the brake system.
!As the ESP®system operates automati-
cally, the engine and the ignition must be
switched off (the SmartKey must be in posi-
tion 0or 1in the ignition lock) if:
Rthe electric parking brake is tested on a
brake dynamometer (for a maximum of
ten second s)
Rthe vehicle is towed with the front axle
raised.
Braking triggered automatically by ESP
®
may seriously damage the brake system.
Driving tips159
Driving and parking
Z
Page 172 of 342

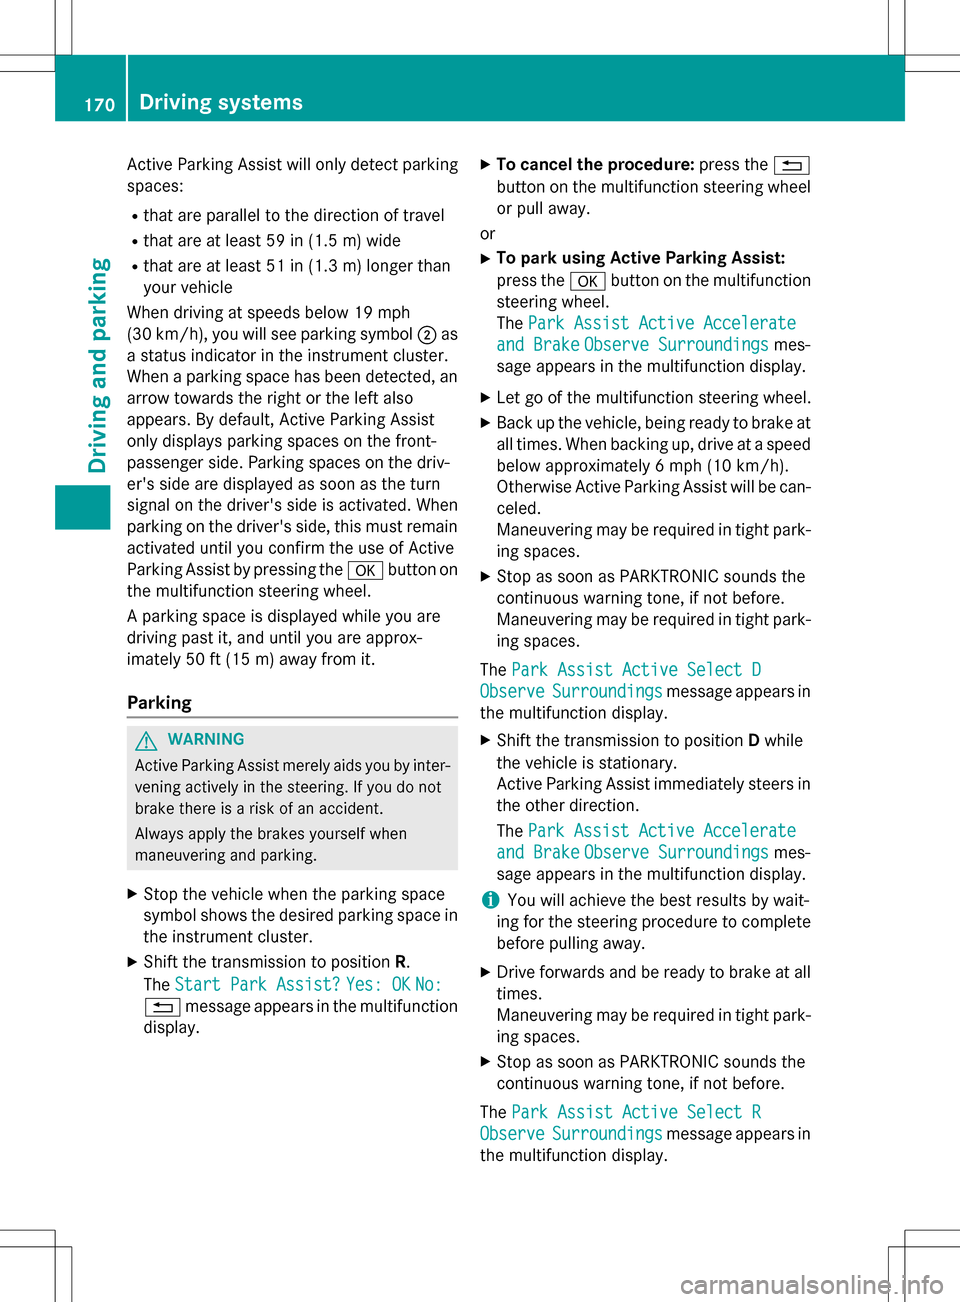
Active Parking Assist will only detect parking
spaces:
Rthat are parallel to the direction of travel
Rthat are at least 59 in (1.5 m) wide
Rthat are at least 51 in (1.3m) longer than
your vehicle
When driving at speeds below 19 mph
(30 km/h), you will see parking symbol ;as
a status indicator in the instrument cluster.
When a parking space has been detected, an
arrow towards the right or the left also
appears. By default, Active Parking Assist
only displays parking spaces on the front-
passenger side. Parking spaces on the driv-
er's side are displayed as soon as the turn
signal on the driver's side is activated. When
parking on the driver's side, this must remain
activated until you confirm the use of Active
Parking Assist by pressing the abutton on
the multifunction steering wheel.
A parking space is displayed while you are
driving past it, and until you are approx-
imately 50 ft (15 m) away from it.
Parking
GWARNING
Active Parking Assist merely aids you by inter- vening actively in the steering. If you do not
brake there is a risk of an accident.
Always apply the brakes yourself when
maneuvering and parking.
XStop the vehicle when the parking space
symbol shows the desired parking space in
the instrument cluster.
XShift the transmission to position R.
The Start Park Assist?
Yes: OKNo:
% message appears in the multifunction
display.
XTo cancel the procedure: press the%
button on the multifunction steering wheel or pull away.
or
XTo park using Active Parking Assist:
press the abutton on the multifunction
steering wheel.
The Park Assist Active Accelerate
and BrakeObserve Surroundingsmes-
sage appears in the multifunction display.
XLet go of the multifunction steering wheel.
XBack up the vehicle, being ready to brake at
all times. When backing up, drive at a speed
below approximately 6 mph (10 km/h).
Otherwise Active Parking Assist will be can-
celed.
Maneuvering may be required in tight park- ing spaces.
XStop as soon as PARKTRONIC sounds the
continuous warning tone, if not before.
Maneuvering may be required in tight park-ing spaces.
The Park Assist Active Select D
ObserveSurroundingsmessage appears in
the multifunction display.
XShift the transmission to position Dwhile
the vehicle is stationary.
Active Parking Assist immediately steers in
the other direction.
The Park Assist Active Accelerate
and BrakeObserve Surroundingsmes-
sage appears in the multifunction display.
iYou will achieve the best results by wait-
ing for the steering procedure to complete
before pulling away.
XDrive forwards and be ready to brake at all
times.
Maneuvering may be required in tight park-
ing spaces.
XStop as soon as PARKTRONIC sounds the
continuous warning tone, if not before.
The Park Assist Active Select R
ObserveSurroundingsmessage appears in
the multifunction display.
170Driving systems
Driving and parking
Page 183 of 342

Useful information............................182
Important safety notes .....................182
Displays and operation .....................182
Menus and submenus ......................186
Display messages ............................. 200
Warning and indicator lamps in the
instrument cluster ............................229
181
On-board computer and displays
Page 184 of 342

Useful information
i
This Operator's Manual describes all
models and all standard and optional equip-
ment of your vehicle available at the time of
publication of the Operator's Manual.
Country-specific differences are possible.
Please note that your vehicle may not be
equipped with all features described. This
also applies to safety-related systems and
functions.
iRead the information on qualified special-
ist workshops (
Ypage 26).
Important safety notes
GWARNING
If you operate information systems and com-
munication equipment integrated in the vehi-
cle while driving, you will be distracted from
traffic conditions. You could also lose control
of the vehicle. There is a risk of an accident.
Only operate the equipment when the traffic
situation permits. If you are not sure that this
is possible, park the vehicle paying attention
to traffic conditions and operate the equip-
ment when the vehicle is stationary.
You must observe the legal requirements for
the country in which you are currently driving
when operating the on-board computer.
GWARNING
If the instrument cluster has failed or mal-
functioned, you may not recognize function
restrictions in systems relevant to safety. The
operating safety of your vehicle may be
impaired. There is a risk of an accident.
Drive on carefully. Have the vehicle checked
at a qualified specialist workshop immedi-
ately.
The on-board computer only shows messages
or warnings from certain systems in the mul-
tifunction display. You should therefore make sure your vehicle is operating safely at all
times.
If the operating safety of your vehicle is
impaired, pull over as soon as it is safe to do
so. Contact a qualified specialist workshop.
For an overview, see the instrument panel
illustration (
Ypage 31).
Displays and operation
Instrument cluster lighting
The light sensor in the instrument cluster
automatically controls the brightness of the
multifunction display. In daylight, the displays
in the instrument cluster are not illuminated.
The lighting in the instrument cluster, in the
displays and the controls in the vehicle inte-
rior can be adjusted using the brightness con-
trol knob.
The brightness control knob is located on the
bottom left of the instrument cluster
(
Ypage 31).
XTurn the brightness control knob clockwise
or counter-clockwise.
If the light switch is set to the
Ã,Tor
L position, the brightness is dependent
upon the brightness of the ambient light.
READY indicator
When the drive system is started and the
vehicle is ready to drive, READY indicator :
appears in the multifunction display. This indi-
cates that the vehicle is operational.
182Displays and operation
On-board computer and displays
Page 186 of 342

The braking performance of the electric
motor using recuperative braking is, in some
operating modes, either reduced or not effec-
tive:
Rwhen the condition of charge of the high-
voltage battery increases
Rif the high-voltage battery is not yet at a
normal operating temperature
Rwhen driving close to the maximum speed
Rwhen the vehicle is almost stationary
Rin transmission positionN
Rduring and after ESP stability control
If necessary, counteract the reduced regen-
erative braking effect by applying the brake
yourself.
Condition of charge display
Condition of charge display :shows the
condition of charge of the high-voltage bat-
tery.
The charge value is shown as a percentage in
the Energy Flow
menu in the instrument
cluster (
Ypage 187).
iThe Energy Flowmenu can also be dis-
played in the COMAND/Audio display.
The condition of charge of the high-voltage
battery has dropped into the reserve range if
the drive system is running and:
Rthe DriveBatteryReserveLevelmes-
sage appears in the display
Rthe indicator lamp in the instrument cluster lights up Charge the high-voltage battery from a con-
dition of charge of less than 20% at:
Ran electrical outlet
Ra charging station
The braking performance of the electric
motor using recuperative braking is, in some
operating modes, either reduced or not effec-
tive:
Rwhen the condition of charge of the high-
voltage battery increases
Rif the high-voltage battery is not yet at a
normal operating temperature
Rwhen the vehicle is almost stationary
Rin transmission position N
Rduring and after ESP stability control
If you do not make an additional effort to
apply the brake yourself, the braking effect
may not be sufficient. If necessary, counter-
act the reduced regenerative braking effect
by applying the brake yourself.
Operating the on-board computer
Overview
:Multifunction display
;Vehicles with Audio 20: switches on
voice-operated control for navigation (see
manufacturer's operating instructions)
184Displays and operation
On-board computer and displays
Page 196 of 342

XStart the drive system.
XPress the=or; button on the steer-
ing wheel to select the DriveAssist
menu.
XPress9or: to select ESP.
XPressato confirm.
The current selection appears.
XTo activate/deactivate: press thea
button again.
ESP
®is deactivated if the åwarning
lamp in the instrument cluster lights up
continuously when the drive system is run-
ning.
If the ÷ andå warning lamps light up
continuously, ESP
®is not available due to a
malfunction.
Observe the information on warning lamps
(
Ypage 235).
Observe the information on display messages
(
Ypage 201).
Activating/deactivating COLLISION
PREVENTION ASSIST PLUS
XPress the =or; button on the steer-
ing wheel to select the DriveAssist
menu.
XPress the9or: button to select
Collision Prevent. Assist
.
XPress ato confirm.
The current selection appears.
XTo activate/deactivate: press thea
button again.
When COLLISION PREVENTION ASSIST
PLUS is deactivated, the æsymbol
appears in the multifunction display in the
assistance graphic display.
For further information about COLLISION
PREVENTION ASSIST PLUS, see (
Ypage 63).
Activating/deactivating ATTENTION
ASSIST
XPress the =or; button on the steer-
ing wheel to select the DriveAssist
menu.
XPress the9or: button to select
Attention Assist
.
XPress ato confirm.
The current selection appears.
XPress ato confirm.
XPress the :or9 button to set Off,
Standard
or Sensitive.
XPress the abutton to save the setting.
When ATTENTION ASSIST is deactivated,
the é symbol appears in the multifunc-
tion display in the assistance graphics dis-
play.
For further information about ATTENTION
ASSIST, see (
Ypage 176).
Activating/deactivating Blind Spot
Assist
XPress the =or; button on the steer-
ing wheel to select the DriveAssist
menu.
XPress the9or: button to select
Blind Spot Assist
.
XPress ato confirm.
The current selection appears.
XTo activate/deactivate: press thea
button again.
For further information about Blind Spot
Assist, see (
Ypage 177).
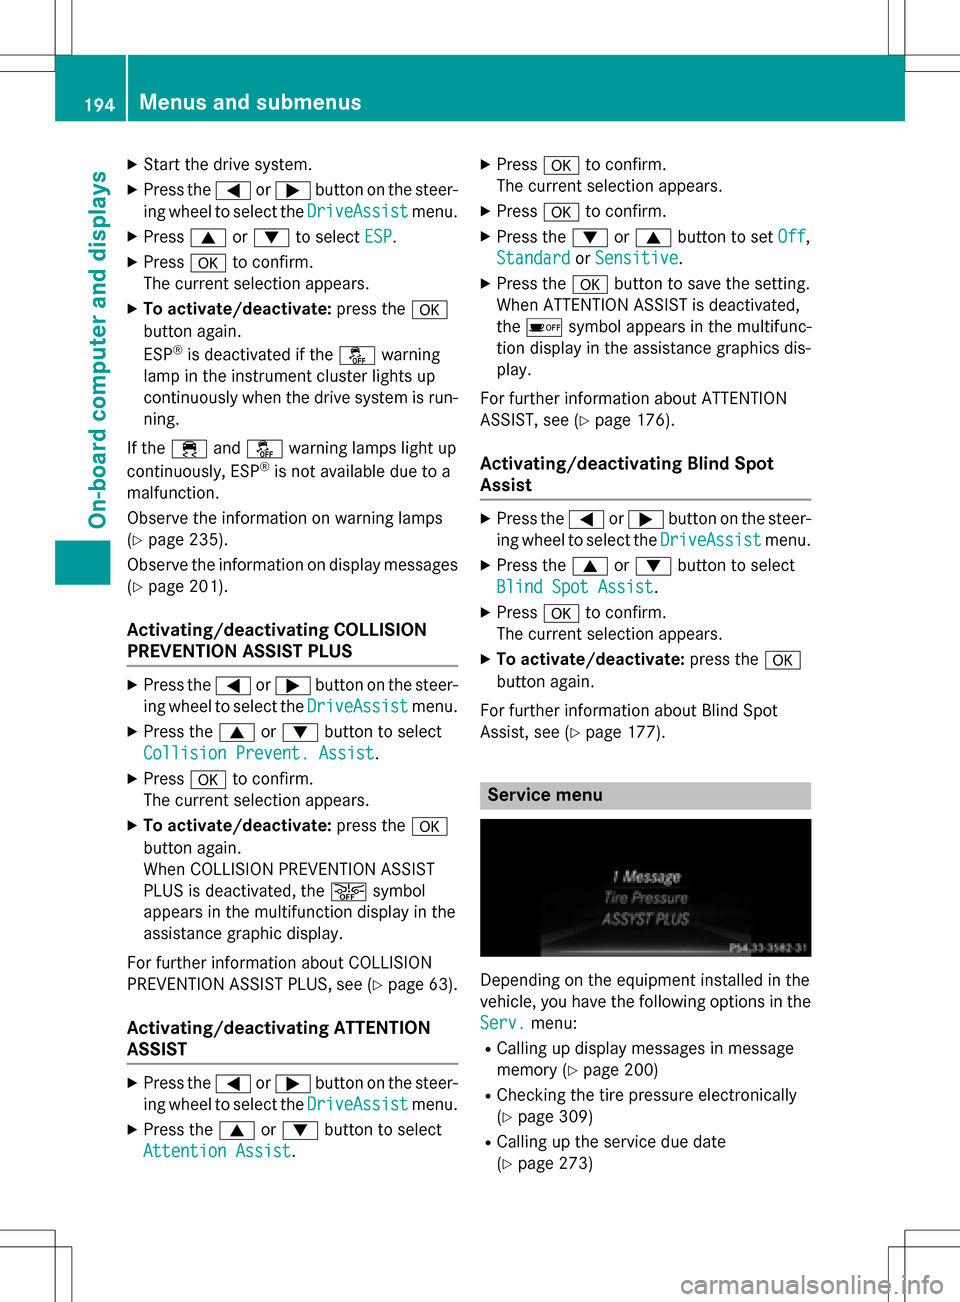
Service menu
Depending on the equipment installed in the
vehicle, you have the following options in the
Serv.
menu:
RCalling up display messages in message
memory (
Ypage 200)
RChecking the tire pressure electronically
(
Ypage 309)
RCalling up the service due date
(
Ypage 273)
194Menus and submenus
On-board computer and displays
Page 197 of 342

Settings menu
Introduction
Depending on the equipment installed in the
vehicle, in the Sett.
menu you have the fol-
lowing options:
RChanging the E-CELL settings
RChanging the instrument cluster settings
RChanging the light settings
RChanging the vehicle settings
RRestoring the factory settings
E‑CELL menu
Departure time
In the E-CELL
menu you can choose to cool
down or heat the vehicle interior for a prede- fined departure time.
If you have engaged Pand the charging cable
is connected, the on-board computer dis-
plays:
Rthe expected charge time of the high-volt-
age battery or
Rthe RANGE PLUS condition of charge for
the departure time set
Changing the departure time
XPress the =or; button on the steer-
ing wheel to select the Settings
menu.
XPress9or: on the steering wheel
to select the E‑CELL
menu.
XPress9or: to select Depart.
Time.
XPressato confirm.
You will see the selected setting.
XPress the :or9 button to select A,B
or Change C.
XPress ato confirm.
XPress =or; to select Depart.
Time Hours.
XPress the 9or: button to set the
hour.
XPress =or; to select Depart.
Time Minutes.
XPress9or: to set the minutes.
XPress ato confirm.
After changing from one menu to another,
the departure time setting is stored.
Selecting the departure time
XPress the =or; button on the steer-
ing wheel to select the Settings
menu.
XPress9or: on the steering wheel
to select the E‑CELL
menu.
XPress9or: to select Depart.
Time.
XPressato confirm.
XPress the :or9 button to select
one of the three departure times or Timer
Off(no timer active).
XPressato confirm.
Charging with RANGE PLUS
If you have engaged Pand the charging cable
is connected, the on-board computer dis-
plays:
Rthe expected charge time of the high-volt-
age battery or
Rthe RANGE PLUS condition of charge for
the departure time set
RANGE PLUS charges when:
Ryou have activated RANGE PLUS via the
center console prior to charging and
Rthe high-voltage battery is fully charged
If charging is not complete by departure time,
the maximum range will notbe available.
Menus and submenus195
On-board computer and displays
Z
Page 199 of 342

Example: changing the charge current
:
Setting the maximum charge current
iThis menu is not available in some coun-
tries. In this case, the maximum charge
current for the power socket is limited to a
fixed level, depending on the country con-
cerned.
XPress the =or; button on the steer-
ing wheel to select the Sett.
menu.
XUse9 or: to select the E-CELL
submenu.
XPressato confirm.
XPress 9or: to select Maximum
Charge Current:.
XPressato confirm.
XPress 9or: in the submenu to
select desired maximum charge cur-
rent :.
XPress the abutton on the multifunction
steering wheel to confirm.
The high-voltage battery is charged with
the selected maximum charge current.
Instrument cluster
Selecting the distance unit
The Display Unit Speed-/Odometer:
function allows you to choose whether cer-
tain displays appear in kilometers or miles in
the multifunction display.
XPress the =or; button on the steer-
ing wheel to select the Sett.
menu.
XPress the:or9 button to select the
Instrument Cluster
submenu.
XPress ato confirm.
XPress the :or9 button to select the
Display Unit Speed-/Odometer
func-
tion.
You will see the selected setting: km
or
miles
.
XPress the abutton to save the setting.
The selected unit of measurement for dis-
tance applies to:
Rdigital speedometer in the Tripmenu
ROdometer and the trip odometer
RTrip computer
Rcurrent energy consumption and approxi-
mate range
RNavigation instructions in the Navimenu
RCruise Control
RASSYST PLUS service interval display
Switching the additional speedometer
on/off
If the additional speedometer is switched on,
the speed is shown in the status area of the
multifunction display instead of the outside
temperature.
The speed display is inverse to the speedom-
eter.
XPress the =or; button on the steer-
ing wheel to select the Sett.
menu.
XPress the:or9 button to select the
Instrument Cluster
submenu.
XPress ato confirm.
XPress the :or9 button to select the
Speedometer [km/h]
or Speedometer
[mph]function.
You will see the selected setting: On
orOff.
XPress the abutton to save the setting.
Selecting permanent display
The Permanent Display:
function allows
you to choose whether the multifunction dis-
play always shows the outside temperature or
the speed.
The speed display is inverse to the speedom-
eter.
Menus and submenus197
On-board computer and displays
Z