Page 337 of 660
3375-2. Setup
5
Lexus Display Audio system
NX200t_OM_USA_OM78081U
Setup menu
“Setup” screen: “MENU” button “Setup”
Change the settings for operation
sounds, screen animation, etc.
( P. 3 3 8 )
Adjust the settings for voice guid-
ance volume and voice recognition
prompts. ( P. 3 4 1 )
Change the settings for registering,
removing, connecting and discon-
necting Bluetooth
® devices.
( P. 374, 375, 376, 377)
Change the settings for FM radio, iPod, etc. ( P. 3 4 5 )
Change the settings for vehicle customization. ( P. 6 1 4 )
Change the settings for phone sound, phonebook, etc. ( P. 3 9 3 )
The Lexus Display Audio system can be adjusted to the desired settings.
Display “Setup” screen
1
2
3
4
5
6
Page 338 of 660
3385-2. Setup
NX200t_OM_USA_OM78081U
General settings
“General Settings” screen: “MENU” button “Setup” “General”
Change language.
The selectable languages may differ
depending on the model or region.
Set the beep sound on/off.
Change the button color.
Change the startup image and
screen off image. ( P. 3 3 9 )
Set the animation effect on/off.
Delete personal data ( P. 3 4 0 )
Update program versions.
For details, contact your Lexus dealer.
Update gracenote database versions.
For details, contact your Lexus dealer.
Display the open source license.
Settings are available for adjusting the operation sounds, screen animation,
etc.
Screen for general settings
1
2
3
4
5
6
7
8
9
Page 339 of 660

3395-2. Setup
5
Lexus Display Audio system
NX200t_OM_USA_OM78081U
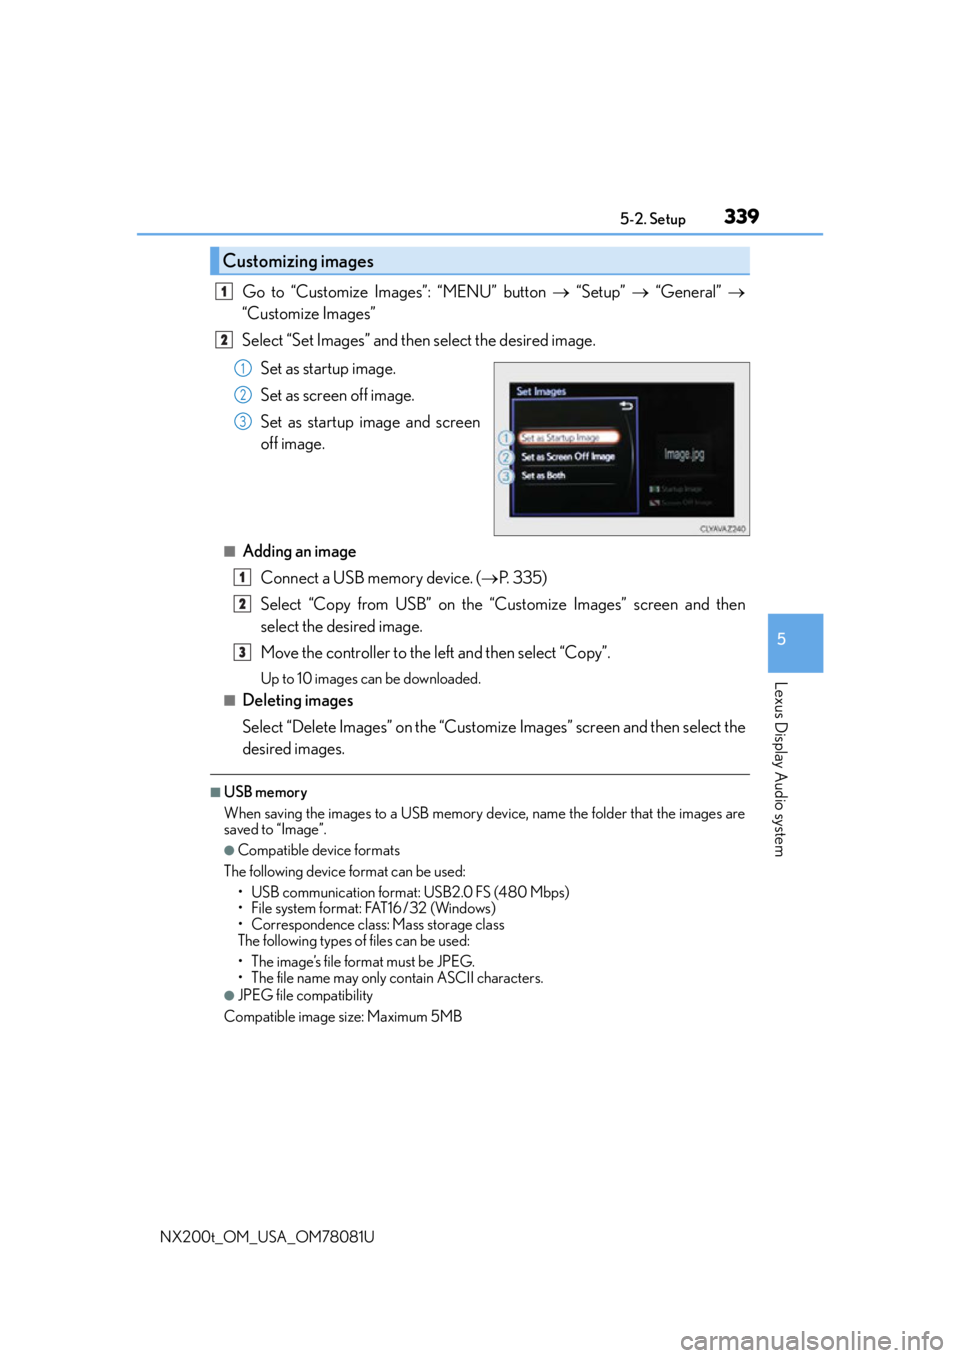
Go to “Customize Images”: “MENU” button “Setup” “General”
“Customize Images”
Select “Set Images” and then select the desired image.
Set as startup image.
Set as screen off image.
Set as startup image and screen
off image.
■Adding an imageConnect a USB memory device. ( P. 335)
Select “Copy from USB” on the “Customize Images” screen and then
select the desired image.
Move the controller to the left and then select “Copy”.
Up to 10 images can be downloaded.
■Deleting images
Select “Delete Images” on the “Customize Images” screen and then select the
desired images.
■USB memory
When saving the images to a USB memory device, name the folder that the images are
saved to “Image”.
●Compatible device formats
The following device format can be used: • USB communication format: USB2.0 FS (480 Mbps)
• File system format: FAT16/32 (Windows)
• Correspondence class: Mass storage class
The following types of files can be used:
• The image’s file format must be JPEG.
• The file name may only contain ASCII characters.
●JPEG file compatibility
Compatible image size: Maximum 5MB
Customizing images
1
2
1
2
3
1
2
3
Page 341 of 660
3415-2. Setup
5
Lexus Display Audio system
NX200t_OM_USA_OM78081U
Voice settings
Go to “Voice Settings”: “MENU” button “Setup” “Voice”
Adjust the voice guidance volume
setting.
Set the voice recognition prompts
on/off.
■Return to the default settings
Move the controller to the left and select “Default”.
You can adjust the guidance volume setting.
1
2
Page 342 of 660

3425-2. Setup
NX200t_OM_USA_OM78081U
Display settings
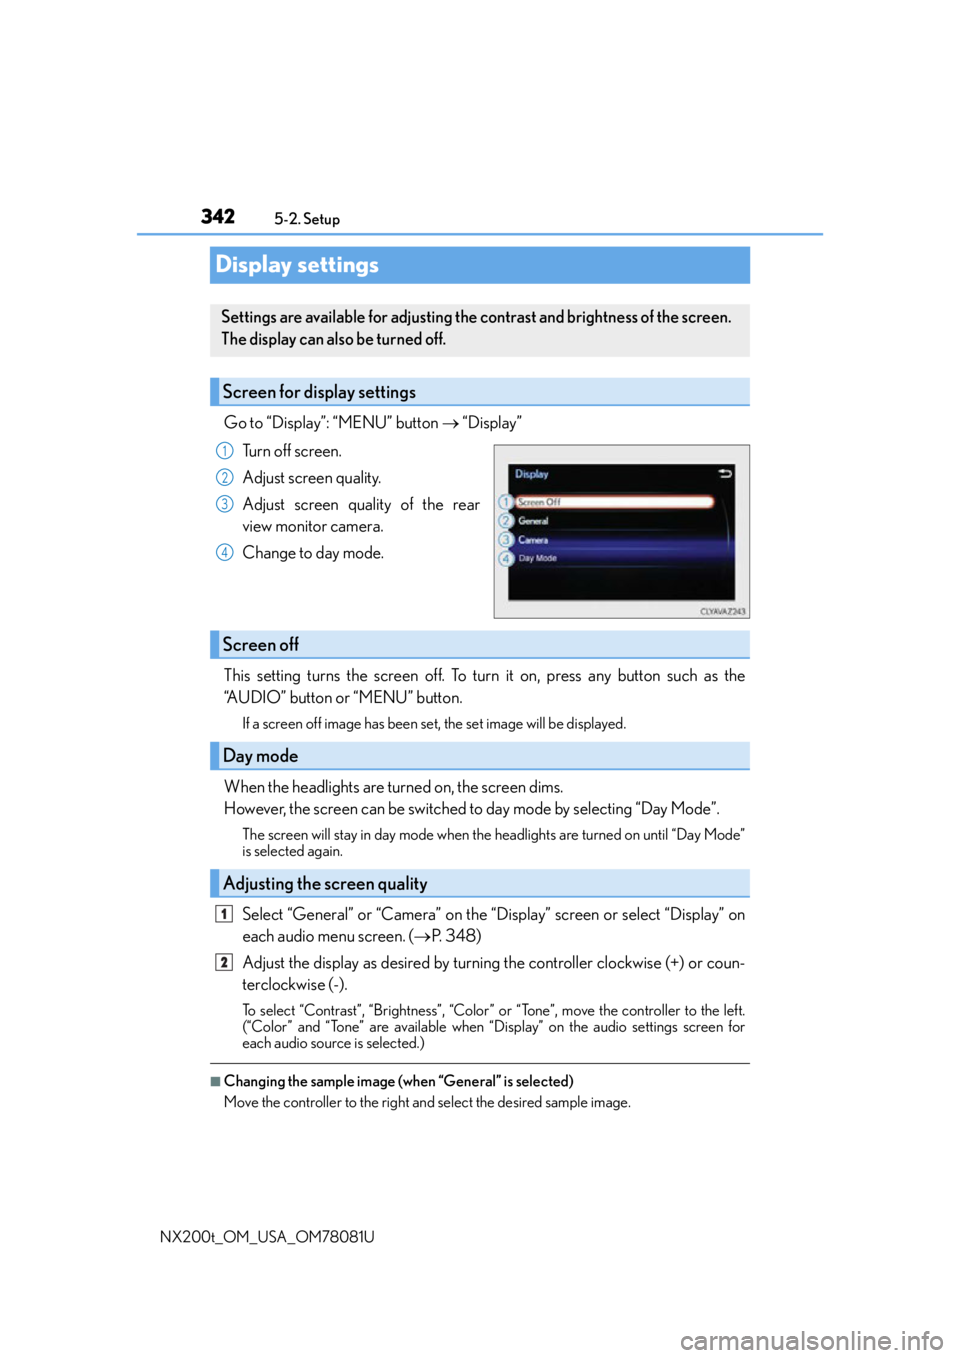
Go to “Display”: “MENU” button “Display”
Turn off screen.
Adjust screen quality.
Adjust screen quality of the rear
view monitor camera.
Change to day mode.
This setting turns the screen off. To turn it on, press any button such as the
“AUDIO” button or “MENU” button.
If a screen off image has been set, the set image will be displayed.
When the headlights are turned on, the screen dims.
However, the screen can be switched to day mode by selecting “Day Mode”.
The screen will stay in day mode when the headlights are turned on until “Day Mode”
is selected again.
Select “General” or “Camera” on the “Display” screen or select “Display” on
each audio menu screen. ( P. 3 4 8 )
Adjust the display as desired by turning the controller clockwise (+) or coun-
terclockwise (-).
To select “Contrast”, “Brightness”, “Color” or “Tone”, move the controller to the left.
(“Color” and “Tone” are available when “Display” on the audio settings screen for
each audio source is selected.)
■Changing the sample image (when “General” is selected)
Move the controller to the right and select the desired sample image.
Settings are available for adjusting the contrast and brightness of the screen.
The display can also be turned off.
Screen for display settings
1
2
3
4
Screen off
Day mode
Adjusting the screen quality
1
2
Page 343 of 660
3435-3. Using the audio system
5
Lexus Display Audio system
NX200t_OM_USA_OM78081U
Selecting the audio source
Press the “AUDIO” button to display the “Source” screen.
If the “Source” screen is not displayed, press the button again.
Select the desired audio source.
The audio source can be selected by pressing the “RADIO” or “MEDIA” button.
Press the “MODE” switch when the audio system is turned on. The audio source
changes each time the “MODE” switch is pressed.
■Rearranging the list
The listing order of the sour ce list can be rearranged.
Move the controller to the left while on the “Source” screen.
Select “Audio Source Select”.
Select an item you wish to move and th en select where to move the item to.
Switching between audio sources, such as the radio and CD, is explained in
this section.
Changing audio source
Using the steering wheel switches to change audio sources
1
2
1
2
3
Page 345 of 660
3455-3. Using the audio system
5
Lexus Display Audio system
NX200t_OM_USA_OM78081U
Audio settings
Go to “Audio Settings”: “MENU” button “Setup” “Audio”
Change radio settings ( P. 3 4 5 )
Change iPod settings ( P. 3 4 6 )
Change A/V settings ( P. 3 4 6 )
Change the cover art settings
( P. 3 4 7 )
Change USB settings ( P. 3 4 7 )
To change radio settings, select “Radio Settings” on the “Audio Settings” screen
or radio menu screen. ( P. 3 4 8 )
Set the displaying RBDS text mes-
sage on/off
Change the number of radio presets
Screen for audio settings
1
2
3
4
5
Changing radio settings
1
2
Page 347 of 660
3475-3. Using the audio system
5
Lexus Display Audio system
NX200t_OM_USA_OM78081U
To change the cover art settings, select “Cover Art Settings” on the “Audio Set-
tings” screen, CD or MP3/WMA/AAC disc menu screen. (P. 3 4 8 )
Select to set the cover art display of
the DISC mode on/off.
Select to set the cover art display of
the USB mode on/off.
Change the priority of the
Gracenote database of the USB
mode.
Select to set the cover art display of
the iPod mode on/off.
Change the priority of the Gracenote database of the iPod mode.
To change USB settings, select “USB Settings” on the “Audio Settings” screen or
USB menu screen. ( P. 3 4 8 )
Change the cover art settings
( P. 3 4 7 )
Changing the cover art settings
1
2
3
4
Changing USB settings
5
1