2016 KIA Soul EV change time
[x] Cancel search: change timePage 228 of 524
![KIA Soul EV 2016 2.G Owners Manual Features of your vehicle
158
4
Delete Selection
Press the key Set [
Del.Sel] through the TUNE knob
or key.
Songs within My Music are selected
and deleted.
➀ Select the songs you wish to
delete fro KIA Soul EV 2016 2.G Owners Manual Features of your vehicle
158
4
Delete Selection
Press the key Set [
Del.Sel] through the TUNE knob
or key.
Songs within My Music are selected
and deleted.
➀ Select the songs you wish to
delete fro](/manual-img/2/2980/w960_2980-227.png)
Features of your vehicle
158
4
Delete Selection
Press the key Set [
Del.Sel] through the TUNE knob
or key.
Songs within My Music are selected
and deleted.
➀ Select the songs you wish to
delete from the list.
➁ After selecting, press key
and select the delete menu.
My Music
Even if memory is available, a
maximum of 6,000 songs can be
stored.
The same song can be copied up to 1,000 times.
Memory info can be checked in the System menu of Setup.
AUX
AUX is used to play external MEDIA
currently connected with the AUX
terminal.
AUX mode will automatically start
when an external device is connect-
ed with the AUX terminal.
If an external device is connected,
you can also press the key to
change to AUX mode.
❈ AUX mode cannot be started
unless there is an external device
connected to the AUX terminal.
AUX
Fully insert the AUX cable into the
AUX terminal for use.
MEDIA
MENU
6
MENU
Page 256 of 524
Features of your vehicle
186
4
SYSTEM CONTROLLERS
AND FUNCTIONS
❈ Display and settings may differ
depending on the selected audio.
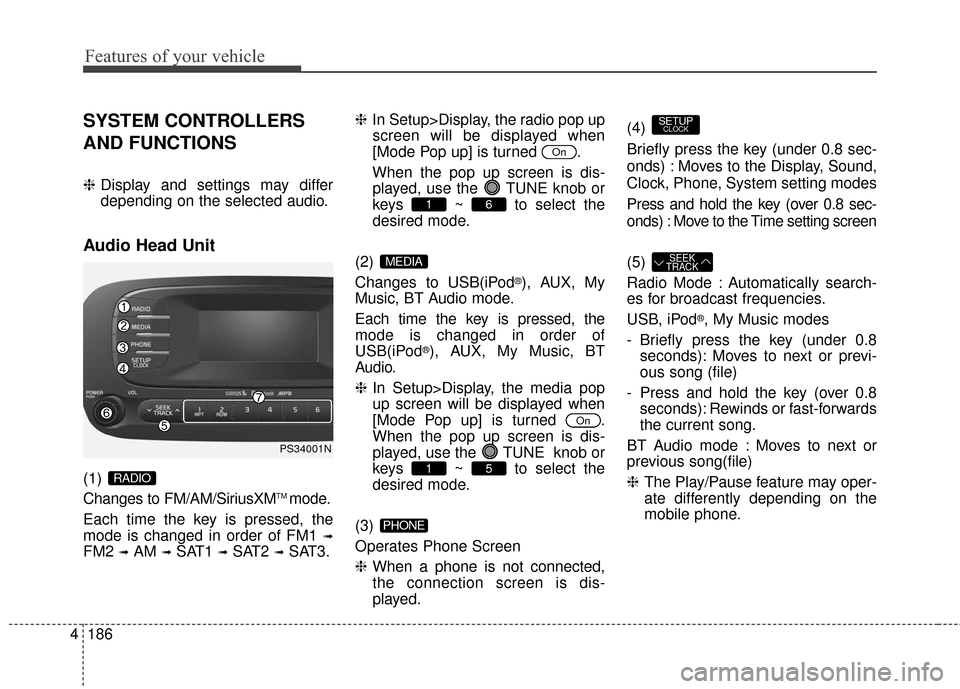
Audio Head Unit
(1)
Changes to FM/AM/SiriusXMTM mode.
Each time the key is pressed, the
mode is changed in order of FM1
➟
FM2 ➟AM ➟SAT1 ➟SAT2 ➟SAT3. ❈
In Setup>Display, the radio pop up
screen will be displayed when
[Mode Pop up] is turned .
When the pop up screen is dis- played, use the TUNE knob or
keys ~ to select the
desired mode.
(2)
Changes to USB(iPod
®), AUX, My
Music, BT Audio mode.
Each time the key is pressed, the
mode is changed in order of
USB(iPod
®), AUX, My Music, BT
Audio.
❈ In Setup>Display, the media pop
up screen will be displayed when
[Mode Pop up] is turned .
When the pop up screen is dis-
played, use the TUNE knob or
keys ~ to select the
desired mode.
(3)
Operates Phone Screen
❈ When a phone is not connected,
the connection screen is dis-
played. (4)
Briefly press the key (under 0.8 sec-
onds) : Moves to the Display, Sound,
Clock, Phone, System setting modes
Press and hold the key (over 0.8 sec-
onds) : Move to the Time setting screen
(5)
Radio Mode : Automatically search-
es for broadcast frequencies.
USB, iPod
®, My Music modes
- Briefly press the key (under 0.8 seconds): Moves to next or previ-
ous song (file)
- Press and hold the key (over 0.8 seconds): Rewinds or fast-forwards
the current song.
BT Audio mode : Moves to next or
previous song(file)
❈ The Play/Pause feature may oper-
ate differently depending on the
mobile phone.
SEEK
TRACK
SETUPCLOCK
PHONE
51
On
MEDIA
61
On
RADIO
PS34001N
Page 274 of 524
![KIA Soul EV 2016 2.G Owners Manual Features of your vehicle
204
4
Delete Selection
Press the key Set [
Del.Sel] through the TUNE knob
or key.
Songs within My Music are selected
and deleted.
➀ Select the songs you wish to
delete fro KIA Soul EV 2016 2.G Owners Manual Features of your vehicle
204
4
Delete Selection
Press the key Set [
Del.Sel] through the TUNE knob
or key.
Songs within My Music are selected
and deleted.
➀ Select the songs you wish to
delete fro](/manual-img/2/2980/w960_2980-273.png)
Features of your vehicle
204
4
Delete Selection
Press the key Set [
Del.Sel] through the TUNE knob
or key.
Songs within My Music are selected
and deleted.
➀ Select the songs you wish to
delete from the list.
➁ After selecting, press key
and select the delete menu.
My Music
Even if memory is available, a
maximum of 6,000 songs can be
stored.
The same song can be copied up to 1,000 times.
Memory info can be checked in the System menu of Setup.
AUX
AUX is used to play external MEDIA
currently connected with the AUX
terminal.
AUX mode will automatically start
when an external device is connect-
ed with the AUX terminal.
If an external device is connected,
you can also press the key to
change to AUX mode.
❈ AUX mode cannot be started
unless there is an external device
connected to the AUX terminal.
AUX
Fully insert the AUX cable into the
AUX terminal for use.
MEDIA
MENU
6
MENU
Page 277 of 524
4207
Features of your vehicle
PHONE(IF EQUIPPED)
Before using the Bluetooth®Wireless
Technology phone features
Bluetooth®Wireless
Technology phone, you must first
pair and connect the
Bluetooth®
Wireless Technology mobile phone.
connected, it is not possible to
enter Phone mode. Once a phone
is paired or connected, the guid-
ance screen will be displayed.
tion (IGN/ACC ON), the
Bluetooth®
Wireless Technology phone will be
automatically connected. Even if
you are outside, the
Bluetooth®
Wireless Technology phone will be
automatically connected once you
are in the vicinity of the vehicle. If
you do not want automatic
Bluetooth®Wireless Technology
phone connection, set the
Bluetooth®Wireless Technology
power to OFF
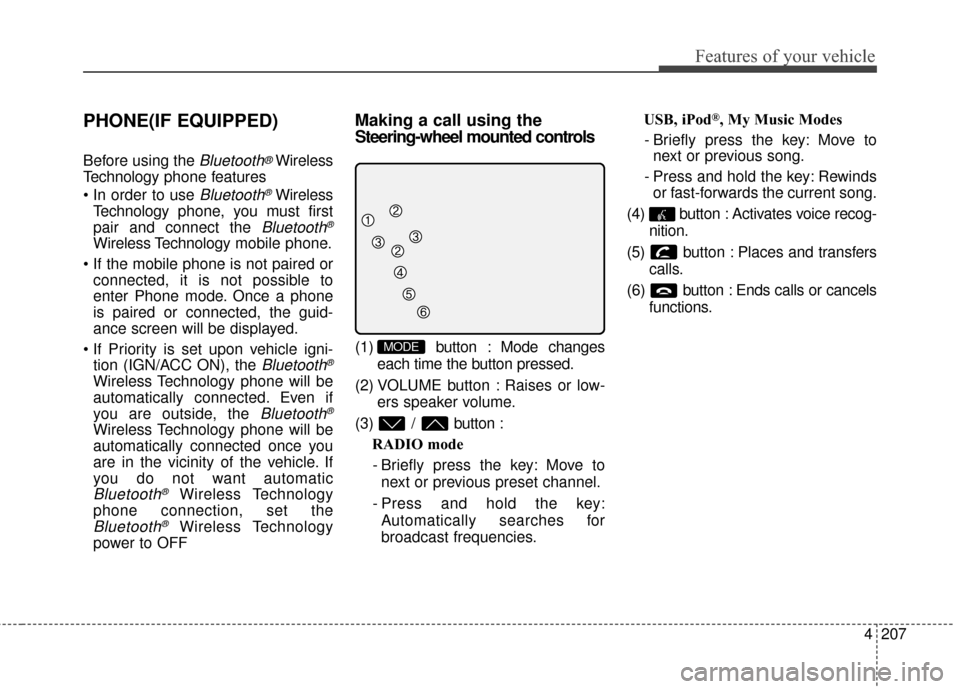
Making a call using the
Steering-wheel mounted controls
(1) button : Mode changes
each time the button pressed.
(2) VOLUME button : Raises or low- ers speaker volume.
(3) / button : RADIO mode
- Briefly press the key: Move to next or previous preset channel.
- Press and hold the key: Automatically searches for
broadcast frequencies. USB, iPod
®, My Music Modes
- Briefly press the key: Move to next or previous song.
- Press and hold the key: Rewinds or fast-forwards the current song.
(4) button : Activates voice recog- nition.
(5) button : Places and transfers calls.
(6) button : Ends calls or cancels functions.
MODE
Page 305 of 524
55
Driving your vehicle
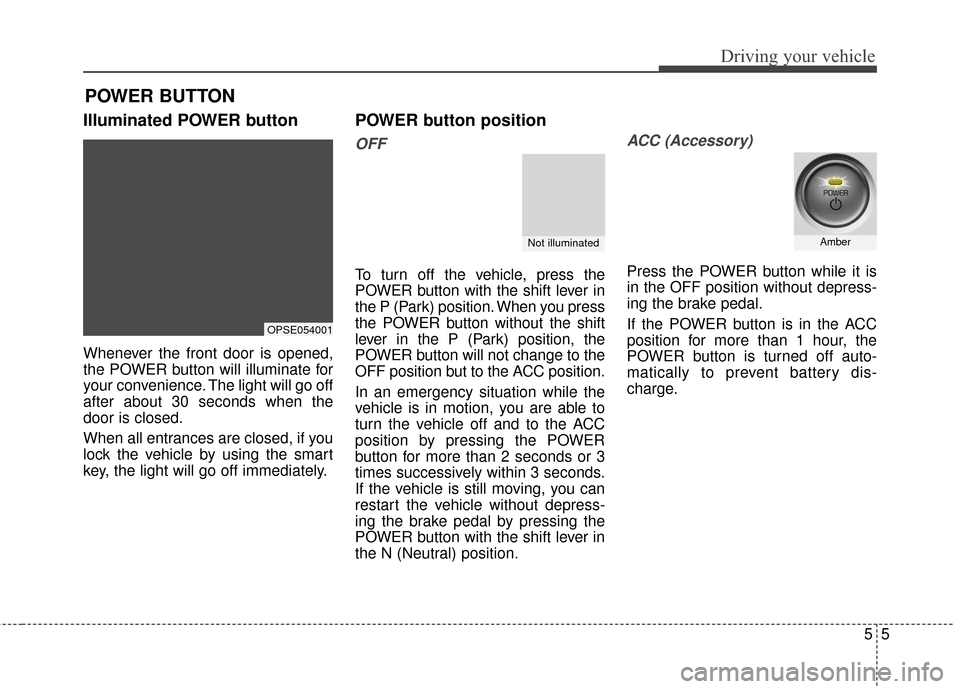
Illuminated POWER button
Whenever the front door is opened,
the POWER button will illuminate for
your convenience. The light will go off
after about 30 seconds when the
door is closed.
When all entrances are closed, if you
lock the vehicle by using the smart
key, the light will go off immediately.
POWER button position
OFF
To turn off the vehicle, press the
POWER button with the shift lever in
the P (Park) position. When you press
the POWER button without the shift
lever in the P (Park) position, the
POWER button will not change to the
OFF position but to the ACC position.
In an emergency situation while the
vehicle is in motion, you are able to
turn the vehicle off and to the ACC
position by pressing the POWER
button for more than 2 seconds or 3
times successively within 3 seconds.
If the vehicle is still moving, you can
restart the vehicle without depress-
ing the brake pedal by pressing the
POWER button with the shift lever in
the N (Neutral) position.
ACC (Accessory)
Press the POWER button while it is
in the OFF position without depress-
ing the brake pedal.
If the POWER button is in the ACC
position for more than 1 hour, the
POWER button is turned off auto-
matically to prevent battery dis-
charge.
POWER BUTTON
OPSE054001
Not illuminatedAmber
Page 306 of 524
Driving your vehicle
65
ON
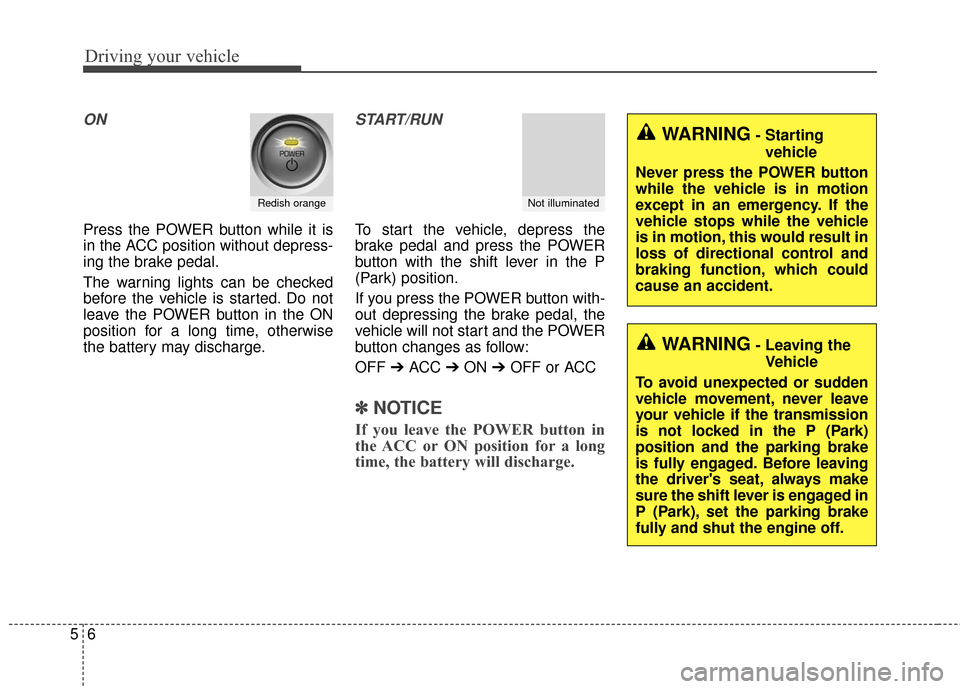
Press the POWER button while it is
in the ACC position without depress-
ing the brake pedal.
The warning lights can be checked
before the vehicle is started. Do not
leave the POWER button in the ON
position for a long time, otherwise
the battery may discharge.
START/RUN
To start the vehicle, depress the
brake pedal and press the POWER
button with the shift lever in the P
(Park) position.
If you press the POWER button with-
out depressing the brake pedal, the
vehicle will not start and the POWER
button changes as follow:
OFF ➔ACC ➔ON ➔OFF or ACC
✽ ✽
NOTICE
If you leave the POWER button in
the ACC or ON position for a long
time, the battery will discharge.
Redish orangeNot illuminated
WARNING- Starting
vehicle
Never press the POWER button
while the vehicle is in motion
except in an emergency. If the
vehicle stops while the vehicle
is in motion, this would result in
loss of directional control and
braking function, which could
cause an accident.
WARNING- Leaving the Vehicle
To avoid unexpected or sudden
vehicle movement, never leave
your vehicle if the transmission
is not locked in the P (Park)
position and the parking brake
is fully engaged. Before leaving
the driver's seat, always make
sure the shift lever is engaged in
P (Park), set the parking brake
fully and shut the engine off.
Page 334 of 524
Driving your vehicle
34
5
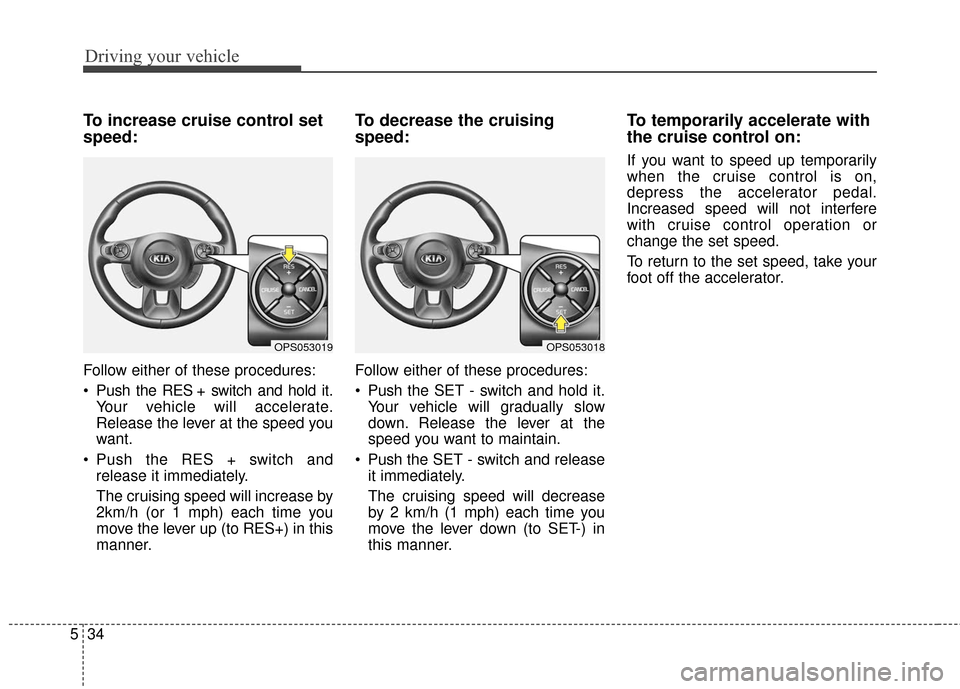
To increase cruise control set
speed:
Follow either of these procedures:
Push the RES + switch and hold it.
Your vehicle will accelerate.
Release the lever at the speed you
want.
Push the RES + switch and release it immediately.
The cruising speed will increase by
2km/h (or 1 mph) each time you
move the lever up (to RES+) in this
manner.
To decrease the cruising
speed:
Follow either of these procedures:
Push the SET - switch and hold it.Your vehicle will gradually slow
down. Release the lever at the
speed you want to maintain.
Push the SET - switch and release it immediately.
The cruising speed will decrease
by 2 km/h (1 mph) each time you
move the lever down (to SET-) in
this manner.
To temporarily accelerate with
the cruise control on:
If you want to speed up temporarily
when the cruise control is on,
depress the accelerator pedal.
Increased speed will not interfere
with cruise control operation or
change the set speed.
To return to the set speed, take your
foot off the accelerator.
OPS053019OPS053018
Page 462 of 524
I5
Index
LCD Display . . . . . . . . . . . . . . . . . . . . . . . . . . . . . . . . . 4-46A/V Mode. . . . . . . . . . . . . . . . . . . . . . . . . . . . . . . . . 4-48
EV information mode. . . . . . . . . . . . . . . . . . . . . . . . 4-47
LCD Modes . . . . . . . . . . . . . . . . . . . . . . . . . . . . . . . 4-46
Service Mode . . . . . . . . . . . . . . . . . . . . . . . . . . . . . . 4-48
User Settings Mode . . . . . . . . . . . . . . . . . . . . . . . . . 4-49
Warning Messages . . . . . . . . . . . . . . . . . . . . . . . . . . 4-51
Light bulbs . . . . . . . . . . . . . . . . . . . . . . . . . . . . . . . . . . 7-59\
Front light replacement . . . . . . . . . . . . . . . . . . . . . . 7-59
High mounted stop light bulb replacement . . . . . . . 7-66
Interior light bulb replacement. . . . . . . . . . . . . . . . . 7-68
License plate light bulb replacement . . . . . . . . . . . . 7-67
Rear combination light bulb replacement . . . . . . . . 7-64
Side repeater light bulb replacement . . . . . . . . . . . . 7-64
Lighting. . . . . . . . . . . . . . . . . . . . . . . . . . . . . . . . . . . . \
. 4-81 Abnormal lamp operation . . . . . . . . . . . . . . . . . . . . 4-82
Abnormal lamp operation due to stabilization ofelectric control system . . . . . . . . . . . . . . . . . . . . . . 4-82
Battery saver function . . . . . . . . . . . . . . . . . . . . . . . 4-81
Daytime running light . . . . . . . . . . . . . . . . . . . . . . . 4-81
Front fog light . . . . . . . . . . . . . . . . . . . . . . . . . . . . . 4-86
Headlamp escort . . . . . . . . . . . . . . . . . . . . . . . . . . . . 4-81
High beam operation . . . . . . . . . . . . . . . . . . . . . . . . 4-84
Lighting control . . . . . . . . . . . . . . . . . . . . . . . . . . . . 4-82
Turn signals and lane change signals . . . . . . . . . . . . 4-85
Luggage volume . . . . . . . . . . . . . . . . . . . . . . . . . . . . . . . 8-3 Maintenance services . . . . . . . . . . . . . . . . . . . . . . . . . . . 7-3
Owner maintenance precautions . . . . . . . . . . . . . . . . 7-4
Owner’s responsibility . . . . . . . . . . . . . . . . . . . . . . . . 7-3
Mirrors . . . . . . . . . . . . . . . . . . . . . . . . . . . . . . . . . . . . \
. 4-35 Inside rearview mirror . . . . . . . . . . . . . . . . . . . . . . . 4-35
Outside rearview mirror . . . . . . . . . . . . . . . . . . . . . . 4-36
Motor number . . . . . . . . . . . . . . . . . . . . . . . . . . . . . . . . . 8-8
Motor room compartment. . . . . . . . . . . . . . . . . . . . . . . . 2-6
Owner maintenance . . . . . . . . . . . . . . . . . . . . . . . . . . . . 7-5 Owner maintenance schedule. . . . . . . . . . . . . . . . . . . 7-6
Panoramic sunroof . . . . . . . . . . . . . . . . . . . . . . . . . . . . 4-24 Resetting the sunroof . . . . . . . . . . . . . . . . . . . . . . . . . . . . 4-28
Sliding the sunroof . . . . . . . . . . . . . . . . . . . . . . . . . . 4-25
Sunroof open warning . . . . . . . . . . . . . . . . . . . . . . . 4-25
Sunshade. . . . . . . . . . . . . . . . . . . . . . . . . . . . . . . . . . 4-27\
Tilting the sunroof . . . . . . . . . . . . . . . . . . . . . . . . . . 4-26
Parking assist system . . . . . . . . . . . . . . . . . . . . . . . . . . 4-76 Non-operational conditions of parking assist system . . 4-77
Operation of the parking assist system . . . . . . . . . . 4-76
Self-diagnosis . . . . . . . . . . . . . . . . . . . . . . . . . . . . . . 4-78
M
O
P
L