Page 33 of 62

www.KuTechVideos")
CENTER PA NEL
31*IF EQUIPPED
A LWAYS CHECK THE OWNER’S MANUAL FOR COMPLETE OPERATING INFORMATION AND SAFETY WARNINGS.
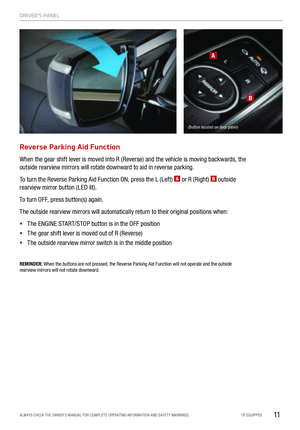
(Button located on center panel below the gear shift)
www.KuTechVideos.com/kh13/2016
SURROUND VIEW
MONITORING (SVM)
SYSTEM VIDEO
To view a video on your
mobile device, snap this
QR Code or visit the listed
website. Refer to page 2
for more information.
REMINDER: The SVM camera is equipped with
an optical lens to provide a wider range of vision
and may appear different from the actual distance.
Also, the Surround View Monitoring system is only a
supplemental device. Drivers should not rely solely
on the SVM information when parking and backing
up. Drivers should always pay attention and directly
check the left/right and r ea r.
Surround View Monitoring (SVM) System\f
The Surround View Monitoring (SVM) System is a parking
support system that shows the areas around the front, rear, left
and right sides of the vehicle via four cameras displayed onto
the navigation screen.
Press
A to turn the SVM system ON/OFF.
§ When OFF: The camera view will automatically display
on the navigation screen when the vehicle is shifted into
Reverse. The camera view will turn off when the vehicle is
shifted out of Reverse
§ When ON: The camera view will display on the navigation
screen in both Drive and Reverse. In Drive, the camera
view will continue to display until the vehicle is traveling
at speeds above approximately 13 mph. If you keep the
SVM system on, the camera view will reappear on the
navigation screen whenever the vehicle speed drops below
approximately 13 mph
When in Drive & Neutral: When in Reverse:
A
Displays the front side and SVM images
simultaneously on the screen
Displays the front side image on the screen
Displays the front side and left side images
simultaneously on the screen
Displays the front side and right side images
simultaneously on the screen
Displays the rear view and AVM images
simultaneously on the screen
Displays the rear side image on the screen
Displays the rear and left side images
simultaneously on the screen
Displays the rear and right side images
simultaneously on the screen
Camera View Modes – To change camera view modes, use the touch screen or rotate the controller and
push to select the mode.
29319_Text.indd 3111/6/15 10:23 AM
Page 34 of 62
CENTER PA NEL
*IF EQUIPPED 32
Front Blind Spot Monitoring System*
The Front Blind Spot Monitoring System is a supplementary system that presents a live image on the
navigation display of what is currently in front of the vehicle.
Press the Front Blind Spot Monitoring button
A to activate the Front Blind Spot Monitoring system.
The system will operate when the gear shift is in the N (Neutral) or (D) Drive position and the vehicle
is traveling at speeds less than approximately 6 mph.
A
REMINDER: The Front Blind Spot Monitoring System is not a substitute for proper and safe driving procedures. Always drive
safely and use caution.
(Button located on center panel below the gear shift)
29319_Text.indd 3211/6/15 10:23 AM
Page 35 of 62

While the ENGINE")
CENTER PA NEL
33*IF EQUIPPED
A LWAYS CHECK THE OWNER’S MANUAL FOR COMPLETE OPERATING INFORMATION AND SAFETY WARNINGS.
(Button located on center panel below the gear shift)
While the ENGINE START/STOP button is in the ACC/ON position,
press the power rear curtain button A to raise/lower curtain.
REMINDER: Raising or lowering the rear curtain by hand may cause motor failure.
Power Rear Curtain
www.KuTechVideos.com/kh13/2016
POWER REAR
CURTA IN & REAR
SIDE-WINDOW
CURTA INS VIDEO
To view a video on
your mobile device,
snap this QR Code or
visit the listed website.
Refer to page 2 for
more information.
Quick Tips
- The power rear curtain will lower automatically
when the gear shift is moved into the R (Reverse)
position and raise automatically when the gear
shift is moved from R (Reverse) into P (Park)
- When the gear shift is moved into D (Drive)
and the vehicle is traveling at speeds greater
than 12 mph, the power rear curtain will unfold
automatically
A
(Button located on rear passenger’s control system)
A
29319_Text.indd 3311/6/15 10:24 AM
Page 36 of 62

S E AT I N G
*IF EQUIPPED 34
Seat Warmers / Ventilated Seats
Quick \fip
With the seat warmer switch in the ON position,
the heating system in the seat turns OFF or ON
automatically depending on the seat temperature.
www.KuTechVideos.com/kh13/2016
SE AT WARMERS AND
VENTILATED SE AT S
VIDEO
To view a video on
your mobile device,
snap this QR Code or
visit the listed website.
Refer to page 2 for
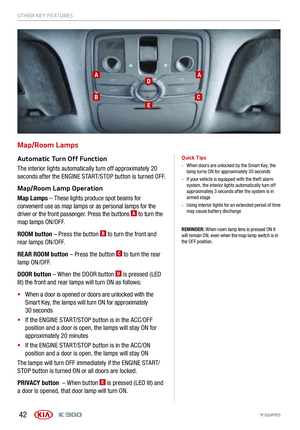
more information.Front Seats
Seat Warmers – Press button
A once for high setting (3
LEDs lit). Press button twice for medium setting (2 LEDs lit).
Press a third time for low setting (1 LED lit) and again to
turn O F F.
Ventilated Seats – Press button
B once for high setting (3
LEDs lit). Press twice for medium setting (2 LEDs lit). Press a
third time for low setting (1 LED lit) and again to turn O F F.
\bear Seats
Seat Warmers – Press top of button
C once for high setting
(3 LEDs lit). Press button twice for medium setting (2 LEDs
lit). Press a third time for low setting (1 LED lit) and again to
turn O F F.
Ventilated Seats* – Press bottom of button
D once for high
setting (3 LEDs lit). Press twice for medium setting (2 LEDs
lit). Press a third time for low setting (1 LED lit) and again to
turn O F F.
D
D
C
C
A
B
REMINDER: Use extreme caution when using the
seat warmers to avoid burns. Refer to the Owner’s
Manual for more information.
(Rear Passenger Controls are located in the middle of the rear seat) (Buttons are located on the door panel)
29319_Text.indd 3411/6/15 10:24 AM
Page 37 of 62

S E AT I N G
35*IF EQUIPPED
A LWAYS CHECK THE OWNER’S MANUAL FOR COMPLETE OPERATING INFORMATION AND SAFETY WARNINGS.
Move/press controls to adjust headrest, seat forward/backward position, seat cushion length, seatback
angle or lumbar support.
Headrest Height Adjustment*: Move button
A up/down to adjust headrest height
Seatback Angle Adjustment: Move button
B forward/backward to adjust seatback angle
Seat Sliding, Seat Height and Cushion Length* Adjustments:
§ Move button
C forward/backward to slide seat
§ Move front part of button
D up/down to raise/lower front part of seat
§ Move back part of button
E up/down to raise/lower back part of seat
§ Move button
F forward/backward to increase/decrease cushion length*
Lumbar Support Adjustment:
§ Press
G to increase support
§ Press
H to decrease support
§ Press
I to move lumbar support up/down
Power Adjustable Driver’s \feat
A
B
ED
F
C
GH
I
I
(Buttons located on left side of seat cushion)
(Controls located on door panel)
Power Height Adjustment* – To adjust the height, move
the seat control button A up/down.
Manual Tilt Adjustment – To adjust the headrest forward/
backward, tilt the lower part of the headrest at a slight angle.
Power Front \feat Headrest Adjust\bent*
29319_Text.indd 3511/6/15 10:24 AM
Page 38 of 62

S E AT I N G
*IF EQUIPPED 36
Power Reclining Rear Seats*
The rear seats can be adjusted by using the control switches
located on the door.
Seatback & Seat Slide Adjustment:
§ Move the button
C forward/backward to adjust the
seatback position
§ Move the button
D forward/backward to adjust the
seat position
Easy Access (AUTO) Button – When opening the rear door, the
rear seats will automatically move rearward to provide
easier access for passengers. Press the AUTO button
E on
the door panel to turn the system ON (LED is lit) and OFF (LED
not lit).
REMINDERS:
- Keep hands and other objects away from seat
mechanisms while the seat is in motion
- Do not adjust the seat while wearing seat belts
- Do not operate the rear power seat while the child
seat is installed
- Do not operate two or more power seat control
switches at the same time. Doing so may result
in power seat motor or electrical component
malfunction
C
D
E
(Controls located on door panel)
The integrated system stores into memory the position of
the driver’s seat, outside rearview mirrors, Head-Up Display
( H UD)*, and steering wheel positions. To store positions into
memor y, �rst place the gear shift into P (Park) while the
ENGINE START/STOP button is in the ON position. Then:
1. Adjust the driver’s seat, outside rearview mirrors, Head-
Up Display (HUD)* settings and steering wheel positions
2. Press the SET button
A on the control panel. System will
beep once
3. Press one of the memory buttons 1 or 2
B within 5
seconds. The system will beep twice when memory has
been stored
Driver Position \femory System
(Buttons located on driver door panel)
B
A
29319_Text.indd 3611/6/15 10:25 AM
Page 39 of 62

S E AT I N G
37*IF EQUIPPED
A LWAYS CHECK THE OWNER’S MANUAL FOR COMPLETE OPERATING INFORMATION AND SAFETY WARNINGS.
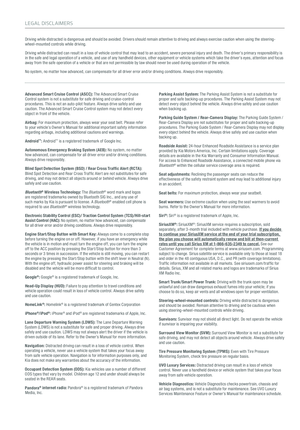
Rear Passenger’s Control System
The rear passenger’s control system lets users adjust the rear
and front seat controls, rear audio control and climate control.
Rear Seat Ad\fustment
To activate or deactivate the system, press the REAR LOCK
button
A on the rear armrest console.
To control the rear seat lumbar suppor t *, press the L (left
seat)
B or R (right seat) C button.
To adjust the lumbar support, move the lever
D:
§ To the LEFT to increase
§ To the RIGHT to decrease
§ UP to move the support position higher
§ DOWN to move lower
Qui\bk Tip
Users can also activate/deactivate the rear
passenger control system through the navigation
system. Press the CLIMATE button on the center
panel and deselect the Rear Climate option. If
the rear climate controls have been deactivated
through navigation system, they must be activated
the same way.
DF
E
G
C
B
A
Front Passenger Seat Ad\fustment
To adjust the angle of the front passenger’s seat from the
rear seat control system or the buttons on front seatback,
press the top/bottom of button
F to angle the front
seatback forward/backward.
To adjust the position of front passenger’s seat from
the rear seat control system or the buttons on the front
seatback, press the top/bottom of button
G to move the
seat forward/backward.
REMINDER: The front passenger seat adjustments F G only operate when seat is not occupied.
Easy Access (AUTO) – When opening the rear door, the rear seats will automatically move rearward to
provide easier access for passengers.
Press the AUTO button
E on the door panel to turn the system ON (LED is lit) or OFF (LED not lit).
(Buttons located on left side of
front passenger seatback)
F
G
29319_Text.indd 3711/6/15 10:25 AM
Page 40 of 62

OTHER KEY FEATURES
*IF EQUIPPED 38
Smart Power Trunk
The Smart Trunk automatically unlocks and opens the trunk
hands-free when the Smart Key fob is detected near the rear
of the vehicle.
When the Smart Key fob is on your person and you are within
close proximity to the rear of the vehicle, the hazard lights
will blink and a chime will sound for approximately three
seconds to alert you that the Smart Trunk is about to open.
The alert system will blink and chime two additional times
before the Smart Trunk opens.
The Smart Trunk feature is OFF by default. To enable the
Smart Trunk, go to User Settings in the LCD instrument
cluster modes and select Smart Trunk.Quick Tip
The Smart Trunk can be deactivated with the Smart
Key by pressing any button on the key fob.
REMINDERS: - The Smart Trunk feature will not operate within
15 seconds after the doors are closed and locked
or if the Smart Key is within 60 inches from the
front door handles
- Doors must be closed and locked for the Smart
Trunk to operate
- The Smart Key must be outside of the vehicle for
the Smart Trunk to operate
For more information on Smart Trunk operation, please
refer to the Owner’s Manual.
29319_Text.indd 3811/6/15 10:25 AM