2016 JEEP CHEROKEE radio
[x] Cancel search: radioPage 77 of 236
Signing up is easy!Simply follow the steps above. Or, press the “Apps” button on
the touchscreen, then select the Uconnect registration app to “Register By Web” and
complete the process using your device or computer.
Why sign up for Uconnect Access? Here are just a few examples of things you’ll be able
to do:
• Know that help, if you need it, is only a button press away.
• Lock and unlock your vehicle doors from hundreds of miles away.
• Discover great, new places around you using Yelp.
• Dictate and send text messages by speaking out loud (all while keeping both hands on the wheel!)
• Enjoy the best in music and entertainment from around the world with apps like Pandora.
For further information please visit DriveUconnect.com.
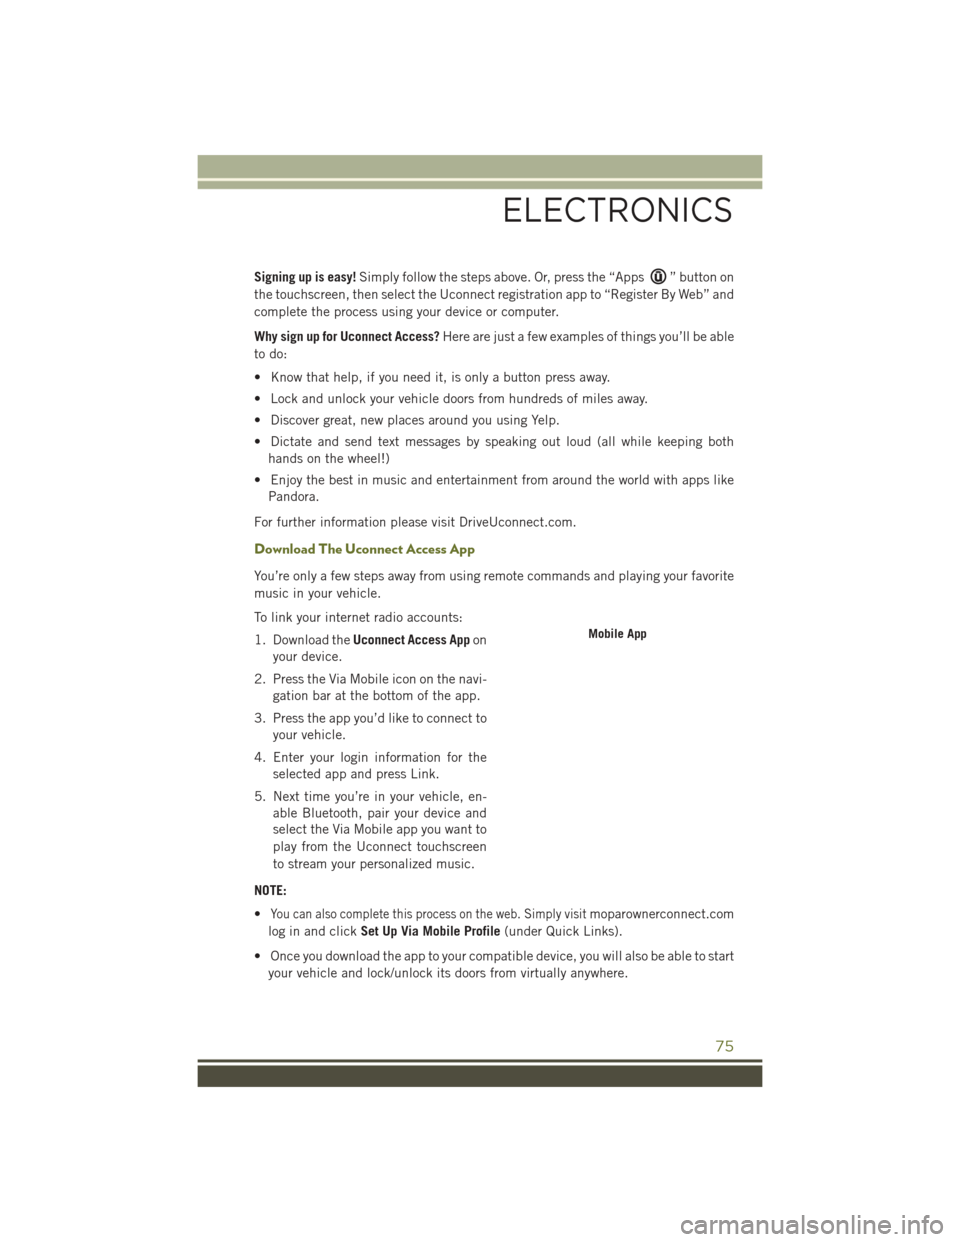
Download The Uconnect Access App
You’re only a few steps away from using remote commands and playing your favorite
music in your vehicle.
To link your internet radio accounts:
1. Download the Uconnect Access App on
your device.
2. Press the Via Mobile icon on the navi- gation bar at the bottom of the app.
3. Press the app you’d like to connect to your vehicle.
4. Enter your login information for the selected app and press Link.
5. Next time you’re in your vehicle, en- able Bluetooth, pair your device and
select the Via Mobile app you want to
play from the Uconnect touchscreen
to stream your personalized music.
NOTE:
•
You can also complete this process on the web. Simply visitmoparownerconnect.com
log in and click Set Up Via Mobile Profile (under Quick Links).
• Once you download the app to your compatible device, you will also be able to start your vehicle and lock/unlock its doors from virtually anywhere.
Mobile App
ELECTRONICS
75
Page 78 of 236
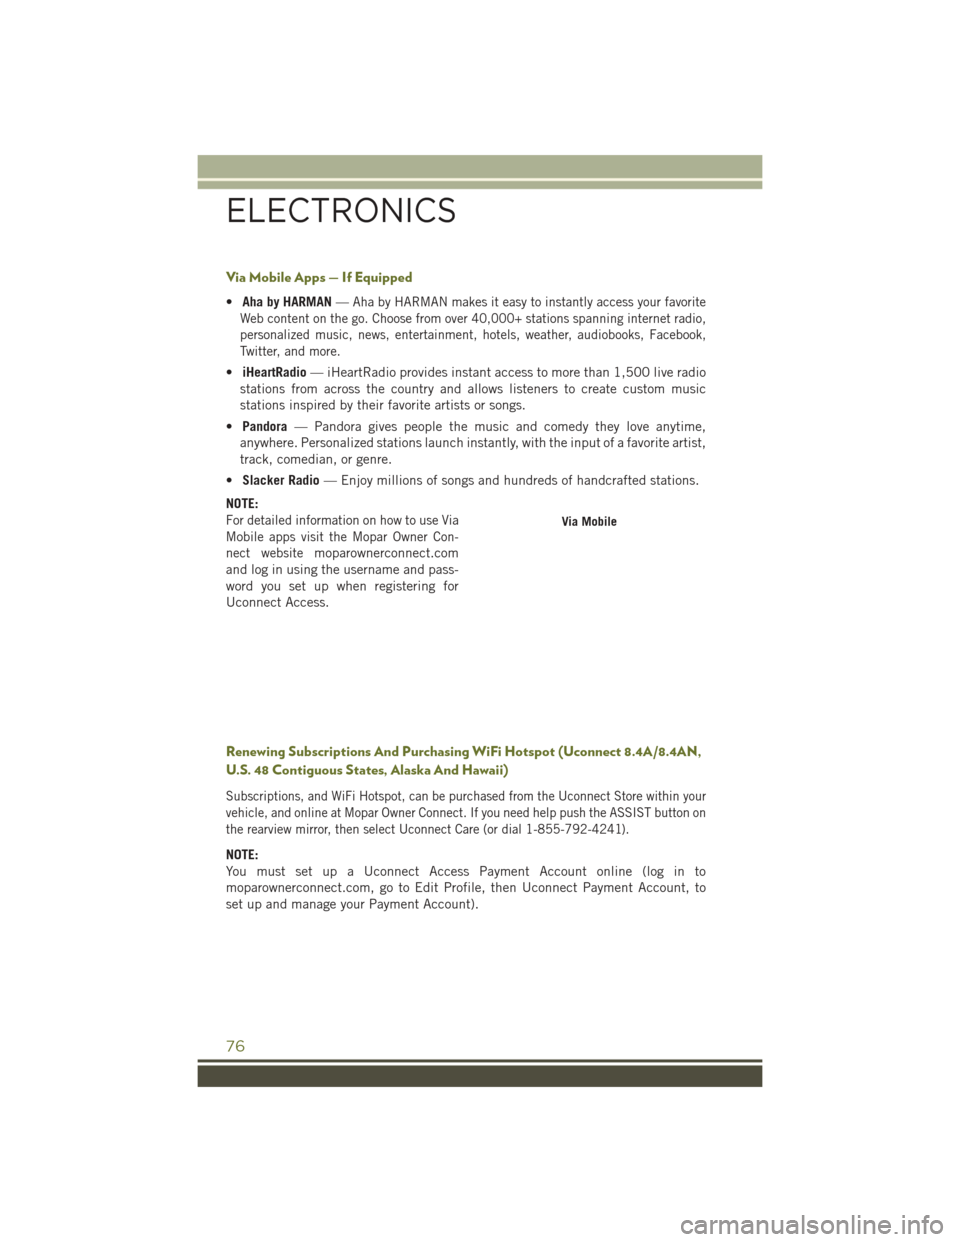
Via Mobile Apps — If Equipped
•Aha by HARMAN —Aha by HARMAN makes it easy to instantly access your favorite
Web content on the go. Choose from over 40,000+ stations spanning internet radio,
personalized music, news, entertainment, hotels, weather, audiobooks, Facebook,
Twitter, and more.
• iHeartRadio — iHeartRadio provides instant access to more than 1,500 live radio
stations from across the country and allows listeners to create custom music
stations inspired by their favorite artists or songs.
• Pandora — Pandora gives people the music and comedy they love anytime,
anywhere. Personalized stations launch instantly, with the input of a favorite artist,
track, comedian, or genre.
• Slacker Radio — Enjoy millions of songs and hundreds of handcrafted stations.
NOTE:
For detailed information on how to use Via
Mobile apps visit the Mopar Owner Con-
nect website
moparownerconnect.com
and log in using the username and pass-
word you set up when registering for
Uconnect Access.
Renewing Subscriptions And Purchasing WiFi Hotspot (Uconnect 8.4A/8.4AN,
U.S. 48 Contiguous States, Alaska And Hawaii)
Subscriptions, and WiFi Hotspot, can be purchased from the Uconnect Store within your
vehicle, and online at Mopar Owner Connect. If you need help push the ASSIST button on
the rearview mirror, then select Uconnect Care (or dial 1-855-792-4241).
NOTE:
You must set up a Uconnect Access Payment Account online (log in to
moparownerconnect.com, go to Edit Profile, then Uconnect Payment Account, to
set up and manage your Payment Account).
Via Mobile
ELECTRONICS
76
Page 79 of 236
Getting Started With Apps
Applications (Apps for short) in your Uconnect Access system are designed to deliver
the features and services that you want. There are two basic categories:
1.Built-In Features — use the 1X (voice/data) or 3G (data) network on your Uconnect
8.4A or 8.4AN radio.
2. Uconnect Access Via Mobile —
use the Uconnect Access App and your device's data
plan to access your personal Pandora, iHeartRadio, Aha and Slacker accounts from
the vehicle and control them using the touchscreen. Customer's data plan charges
will apply. Available on Uconnect 8.4A and 8.4AN Radios (if equipped).
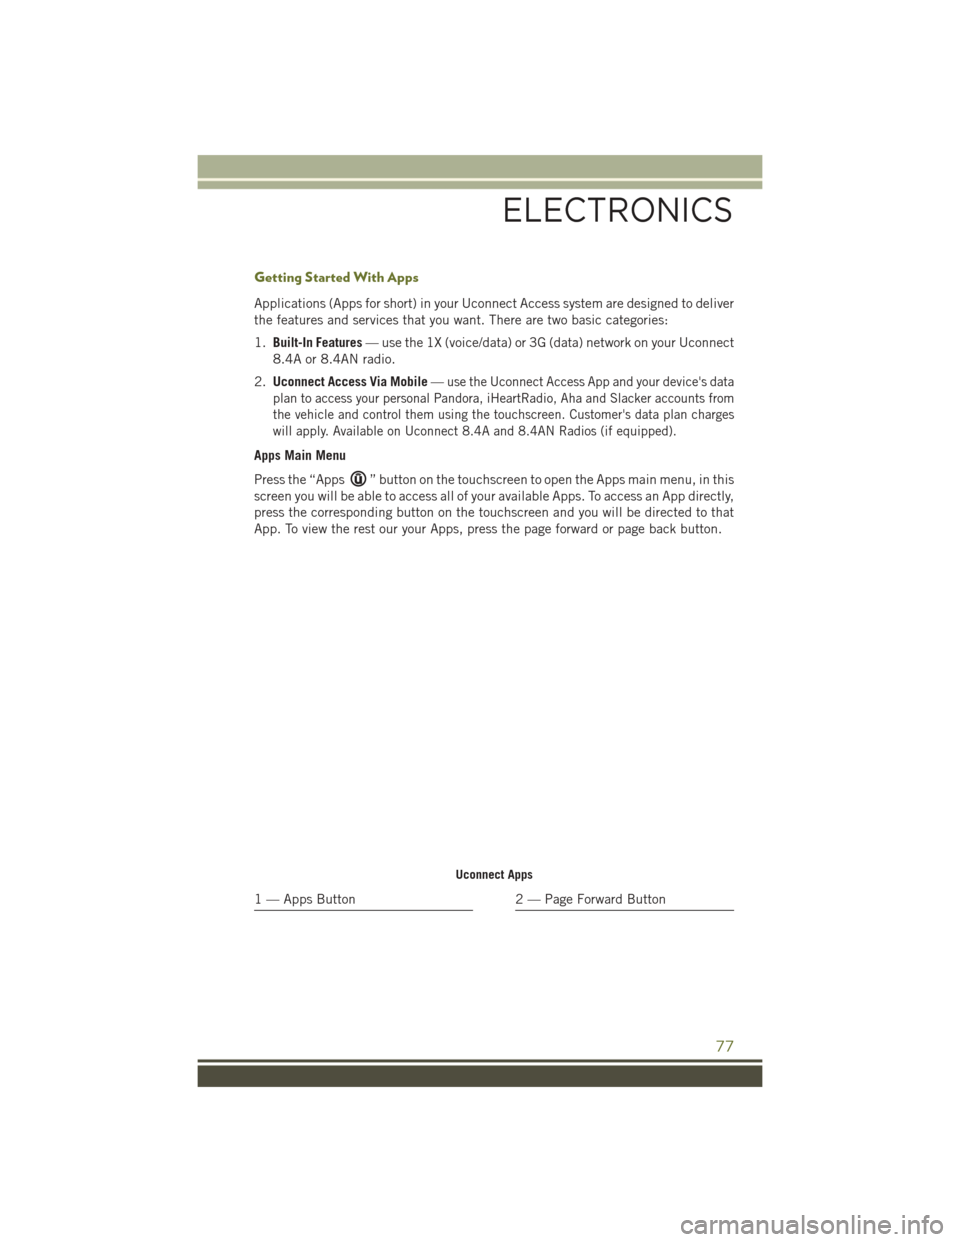
Apps Main Menu
Press the “Apps
” button on the touchscreen to open the Apps main menu, in this
screen you will be able to access all of your available Apps. To access an App directly,
press the corresponding button on the touchscreen and you will be directed to that
App. To view the rest our your Apps, press the page forward or page back button.
Uconnect Apps
1 — Apps Button2 — Page Forward Button
ELECTRONICS
77
Page 81 of 236
Built-In Features
WARNING!
• ALWAYS obey traffic laws and pay attention to the road. Some UconnectAccess services, including 9-1-1 and Assist, will NOT work without an operable
1X (voice/data) or 3G (data) network connection.
• ALWAYS drive safely with your hands on the steering wheel. You have full
responsibility and assume all risks related to the use of the Uconnect features
and applications in this vehicle. Only use Uconnect when it is safe to do so.
Failure to do so may result in an accident involving serious injury or death.
• Ignoring the rearview mirror light could mean you may not have 9-1-1 Call
service if needed. If the rearview mirror light is illuminated, have an authorized
dealer service the 9-1-1 Call system immediately.
• The Occupant Restraint Controller (ORC) turns on the Air Bag Warning Light on
the instrument panel if a malfunction is detected in any part of the airbag
system. If the Air Bag Warning Light is illuminated, the air bag system may not
be working properly and the 9-1-1 system may not send a signal to a 9-1-1
operator if an air bag is deployed. If the Air Bag Warning Light is illuminated,
have an authorized dealer service your vehicle immediately.
• If anyone in the vehicle could be in danger (e.g., fire or smoke is visible,
dangerous road conditions or location), do not wait for voice contact from a
9-1-1 operator. All occupants should exit the vehicle immediately and move to
a safe location.
• The 9-1-1 Call system is embedded into the vehicle’s electrical system. Do not
add aftermarket electrical equipment to the vehicle’s electrical system. This
may prevent your vehicle from sending a signal to initiate an emergency call. To
avoid interference that can cause the 9-1-1 Call system to fail, never add
aftermarket equipment (e.g., two-way mobile radio, CB radio, data recorder,
etc.) to your vehicle’s electrical system or modify the antennas on your vehicle.
• IF YOUR VEHICLE LOSES BATTERY POWER FOR ANY REASON (INCLUDING
DURING OR AFTER AN ACCIDENT), the Uconnect features, apps and ser-
vices, among others, will not operate.
NOTE:
Your vehicle may be transmitting data as authorized by the subscriber.
ELECTRONICS
79
Page 82 of 236
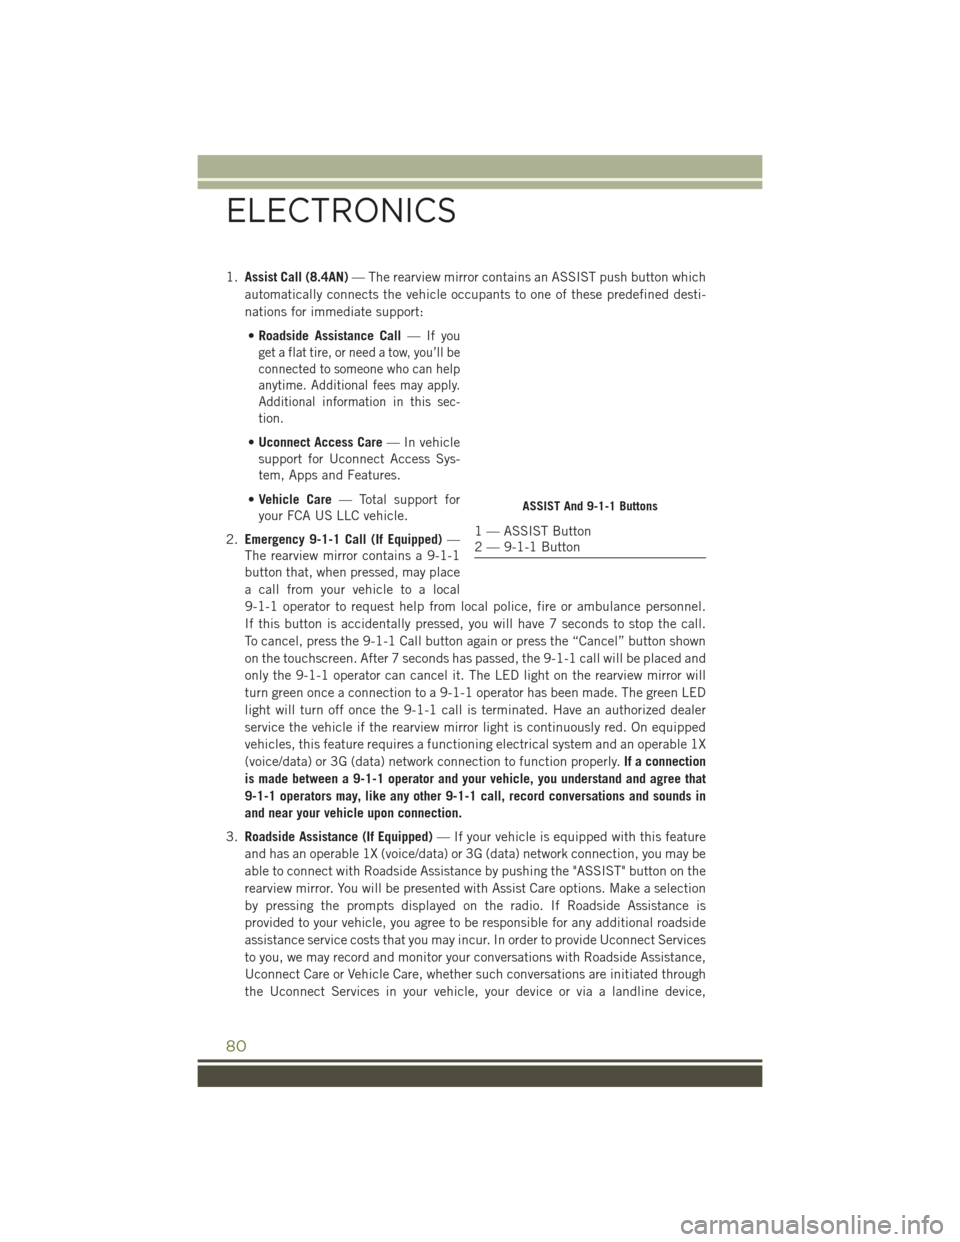
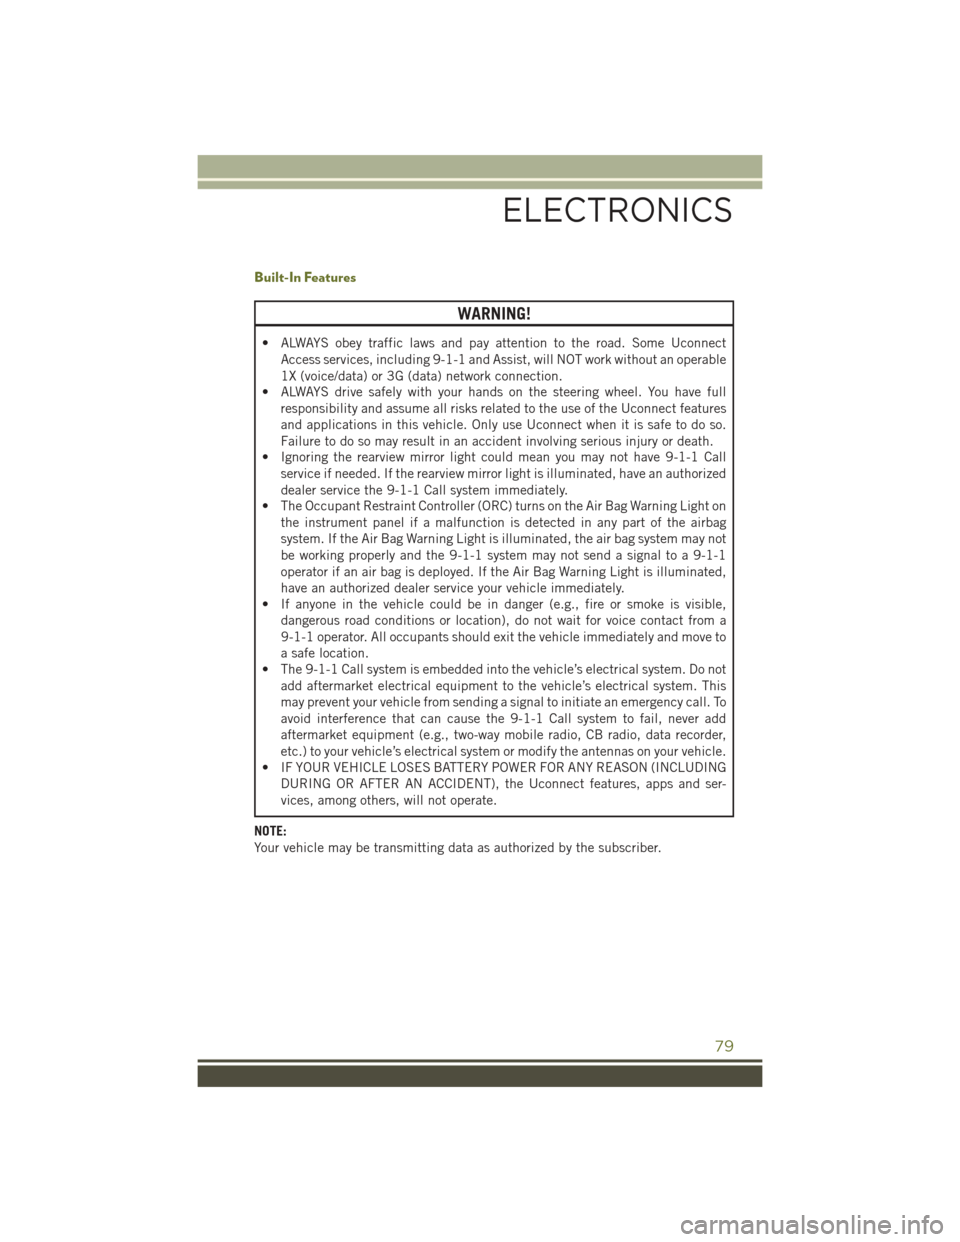
1.Assist Call (8.4AN) — The rearview mirror contains an ASSIST push button which
automatically connects the vehicle occupants to one of these predefined desti-
nations for immediate support:
• Roadside Assistance Call —
If you
get a flat tire, or need a tow, you’ll be
connected to someone who can help
anytime. Additional fees may apply.
Additional information in this sec-
tion.
• Uconnect Access Care — In vehicle
support for Uconnect Access Sys-
tem, Apps and Features.
• Vehicle Care — Total support for
your FCA US LLC vehicle.
2. Emergency 9-1-1 Call (If Equipped) —
The rearview mirror contains a 9-1-1
button that, when pressed, may place
a call from your vehicle to a local
9-1-1 operator to request help from local police, fire or ambulance personnel.
If this button is accidentally pressed, you will have 7 seconds to stop the call.
To cancel, press the 9-1-1 Call button again or press the “Cancel” button shown
on the touchscreen. After 7 seconds has passed, the 9-1-1 call will be placed and
only the 9-1-1 operator can cancel it. The LED light on the rearview mirror will
turn green once a connection to a 9-1-1 operator has been made. The green LED
light will turn off once the 9-1-1 call is terminated. Have an authorized dealer
service the vehicle if the rearview mirror light is continuously red. On equipped
vehicles, this feature requires a functioning electrical system and an operable 1X
(voice/data) or 3G (data) network connection to function properly. If a connection
is made between a 9-1-1 operator and your vehicle, you understand and agree that
9-1-1 operators may, like any other 9-1-1 call, record conversations and sounds in
and near your vehicle upon connection.
3. Roadside Assistance (If Equipped) — If your vehicle is equipped with this feature
and has an operable 1X (voice/data) or 3G (data) network connection, you may be
able to connect with Roadside Assistance by pushing the "ASSIST" button on the
rearview mirror. You will be presented with Assist Care options. Make a selection
by pressing the prompts displayed on the radio. If Roadside Assistance is
provided to your vehicle, you agree to be responsible for any additional roadside
assistance service costs that you may incur. In order to provide Uconnect Services
to you, we may record and monitor your conversations with Roadside Assistance,
Uconnect Care or Vehicle Care, whether such conversations are initiated through
the Uconnect Services in your vehicle, your device or via a landline device,
ASSIST And 9-1-1 Buttons
1 — ASSIST Button
2 — 9-1-1 Button
ELECTRONICS
80
Page 87 of 236
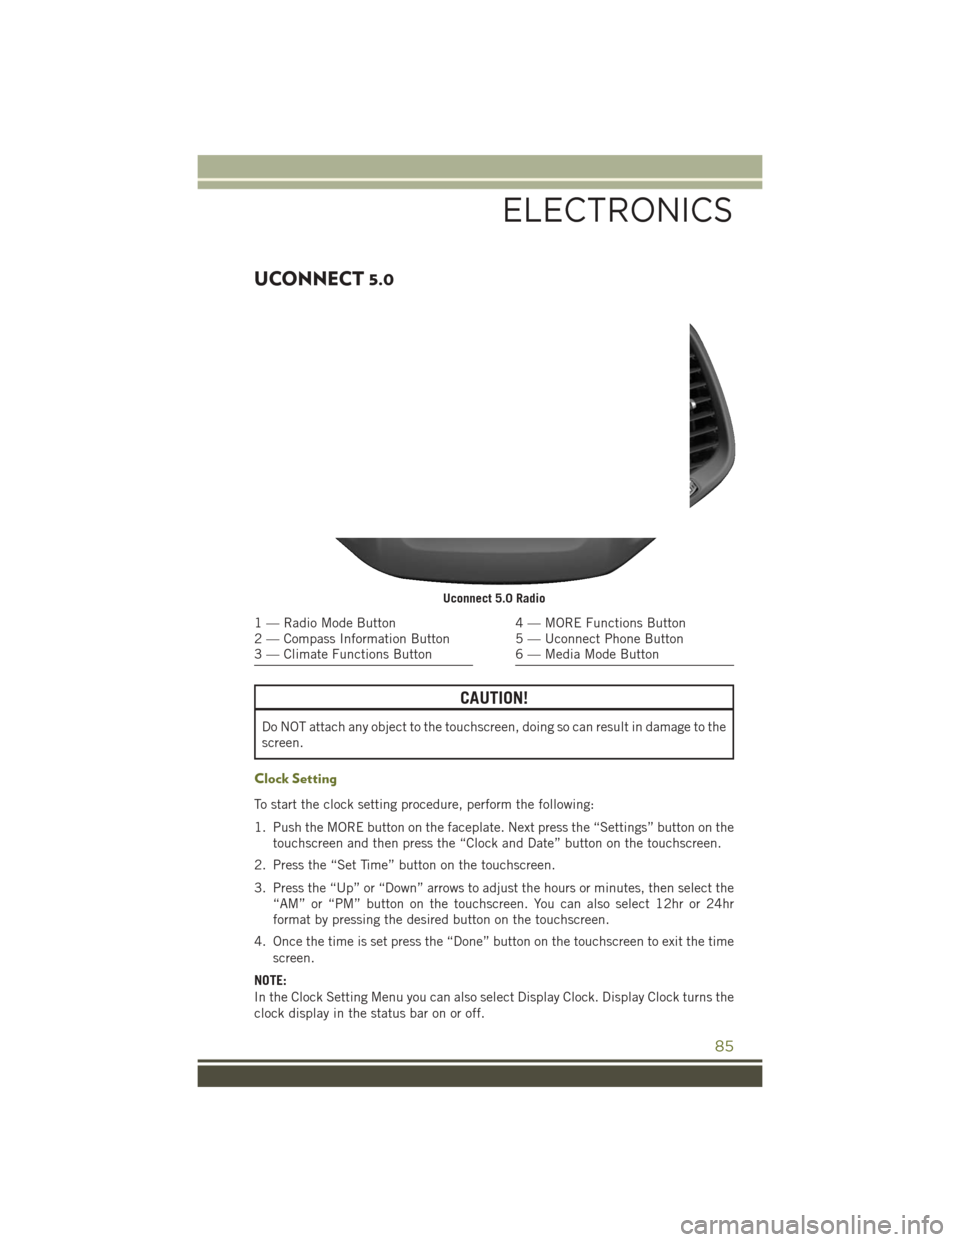
UCONNECT 5.0
CAUTION!
Do NOT attach any object to the touchscreen, doing so can result in damage to the
screen.
Clock Setting
To start the clock setting procedure, perform the following:
1. Push the MORE button on the faceplate. Next press the “Settings” button on thetouchscreen and then press the “Clock and Date” button on the touchscreen.
2. Press the “Set Time” button on the touchscreen.
3. Press the “Up” or “Down” arrows to adjust the hours or minutes, then select the “AM” or “PM” button on the touchscreen. You can also select 12hr or 24hr
format by pressing the desired button on the touchscreen.
4. Once the time is set press the “Done” button on the touchscreen to exit the time screen.
NOTE:
In the Clock Setting Menu you can also select Display Clock. Display Clock turns the
clock display in the status bar on or off.
Uconnect 5.0 Radio
1 — Radio Mode Button
2 — Compass Information Button
3 — Climate Functions Button4 — MORE Functions Button
5 — Uconnect Phone Button
6 — Media Mode Button
ELECTRONICS
85
Page 88 of 236
Equalizer, Balance And Fade
1. Push the MORE button on the faceplate.
2. Press the “Settings” button on the touchscreen.
3. Then scroll down and press the “Audio” button on the touchscreen to get to theAudio menu.
4. The Audio Menu shows the following options for you to customize your audio settings.
Equalizer
• Press the “Equalizer” button on the touchscreen to adjust the Bass, Mid and Treble. Use the “+” or “–” button on the touchscreen to adjust the equalizer to your
desired settings. Press the “Done” button on the touchscreen when finished.
Balance/Fade
• Press the “Balance/Fade” button on the touchscreen to adjust the sound from the speakers. Use the “arrow” button on the touchscreen to adjust the sound level
from the front and rear or right and left side speakers. Press the Center “C” button
on the touchscreen to reset the balance and fade to the factory setting. Press the
“Done” button on the touchscreen when finished.
Speed Adjustable
• Press the “Speed Adjusted Volume” button on the touchscreen to select between OFF, 1, 2 or 3. This will decrease the radio volume relative to a decrease in vehicle
speed. Press the “Done” button on the touchscreen when finished.
Loudness
• Press the “Loudness” button on the touchscreen to select the Loudness feature. When this feature is activated it improves sound quality at lower volumes.
ELECTRONICS
86
Page 89 of 236

Radio Operation
Seek Up/Down Buttons
• Press the up or down button to seek through radio stations in AM, FM or SXMbands.
• Hold either button to bypass stations without stopping.
Store Radio Presets Manually
The Radio stores up to 12 presets in each of the Radio modes. There are four visible
presets at the top of the radio screen. Pressing the “All” button on the touchscreen
on the radio home screen will display all of the preset stations for that mode.
To store a radio preset manually, follow the steps below:
1. Tune to the desired station
2. Press and hold the desired preset button on the touchscreen for more that two seconds or until you hear a confirmation beep.
Uconnect 5.0 Radio Screen
1 — Radio Station Presets
2 — Show All Presets
3 — Seek Up
4 — Audio Settings5 — Station Info
6 — Direct Tune
7 — Radio Band
8 — Seek Down
ELECTRONICS
87