2016 HYUNDAI VELOSTER TURBO door lock
[x] Cancel search: door lockPage 14 of 406
Your vehicle at a glance
2 2
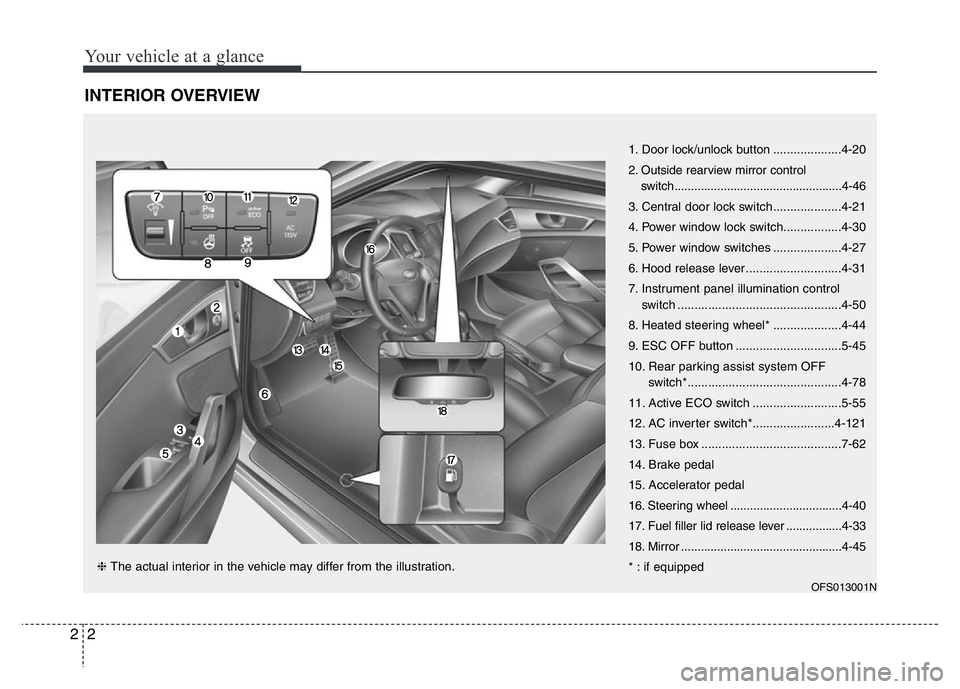
INTERIOR OVERVIEW
OFS013001N
1. Door lock/unlock button ....................4-20
2. Outside rearview mirror control
switch...................................................4-46
3. Central door lock switch....................4-21
4. Power window lock switch.................4-30
5. Power window switches ....................4-27
6. Hood release lever ............................4-31
7. Instrument panel illumination control
switch ................................................4-50
8. Heated steering wheel* ....................4-44
9. ESC OFF button ...............................5-45
10. Rear parking assist system OFF
switch*.............................................4-78
11. Active ECO switch ..........................5-55
12. AC inverter switch*........................4-121
13. Fuse box .........................................7-62
14. Brake pedal
15. Accelerator pedal
16. Steering wheel ..................................4-40
17. Fuel filler lid release lever .................4-33
18. Mirror .................................................4-45
* : if equipped ❈ The actual interior in the vehicle may differ from the illustration.
Page 34 of 406
Safety features of your vehicle
18 3
Seat belts - Front passenger and rear
seat 3-point system with combination
locking retractor
To fasten your seat belt:
Combination retractor type seat belts are
installed in the rear seat positions to help
accommodate the installation of child
restraint systems. Although a combina-
tion retractor is also installed in the front
passenger seat position, it is strongly
recommended that children always be
seated in the rear seat. NEVER place
any infant restraint system in the front
seat of the vehicle.
This type of seat belt combines the fea-
tures of both an emergency locking
retractor seat belt and an automatic lock-
ing retractor seat belt. To fasten your seat
belt, pull it out of the retractor and insert
the metal tab into the buckle. There will
be an audible "click" when the tab locks
into the buckle. When not securing a
child restraint, the seat belt operates in
the same way as the driver's seat belt
(Emergency Locking Retractor Type). It
automatically adjusts to the proper length
only after the lap belt portion of the seat
belt is adjusted manually so that it fits
snugly around your hips.When the seat belt is fully extended from
the retractor to allow the installation of a
child restraint system, the seat belt oper-
ation changes to allow the belt to retract,
but not to extend (Automatic Locking
Retractor Type). Refer to “Using a child
restraint system” in this section.
✽NOTICE
Although the combination retractor
provides the same level of protection for
seated passengers in either emergency
or automatic locking modes, it is recom-
mended that seated passengers use the
emergency locking feature for improved
convenience. The automatic locking
function is intended to facilitate child
restraint installation. To convert from
the automatic locking feature to the
emergency locking operation mode,
allow the unbuckled seat belt to fully
retract.
B200A02NF
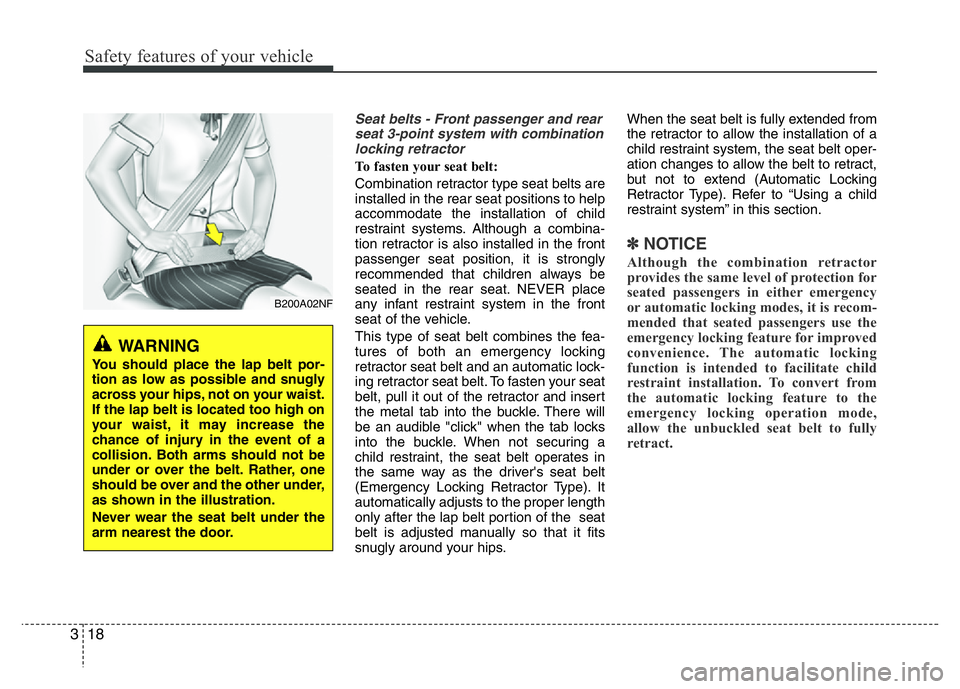
WARNING
You should place the lap belt por-
tion as low as possible and snugly
across your hips, not on your waist.
If the lap belt is located too high on
your waist, it may increase the
chance of injury in the event of a
collision. Both arms should not be
under or over the belt. Rather, one
should be over and the other under,
as shown in the illustration.
Never wear the seat belt under the
arm nearest the door.
Page 53 of 406
337
Safety features of your vehicle
Air bag warning light
The purpose of the air bag warning light
in your instrument panel is to alert you of
a potential problem with your air bag -
Supplemental Restraint System (SRS).When the ignition switch is turned ON,
the warning light should illuminate for
approximately 6 seconds, then go off.
Have the system checked if:
• The light does not turn on briefly when
you turn the ignition ON.
• The light stays on after illuminating for
approximately 6 seconds.
• The light comes on while the vehicle is
in motion.
• The light blinks when the ignition
switch is in the ON position.
WARNING
• Extreme Hazard! Do not use a
rearward facing child restraint on
a seat protected by an air bag in
front of it!
• Never put a child restraint in the
front passenger’s seat. If the front
passenger air bag inflates, it
would cause serious or fatal
injuries.
• When children are seated in the
rear outboard seats of vehicle
equipped with side and/or curtain
air bags, be sure to install the
child restraint system as far away
from the door side as possible,
and securely lock the child
restraint system in position.
Inflation of side and/or curtain air
bags could cause serious injury
or death to an infant or child.
W7-147
Page 69 of 406
353
Safety features of your vehicle
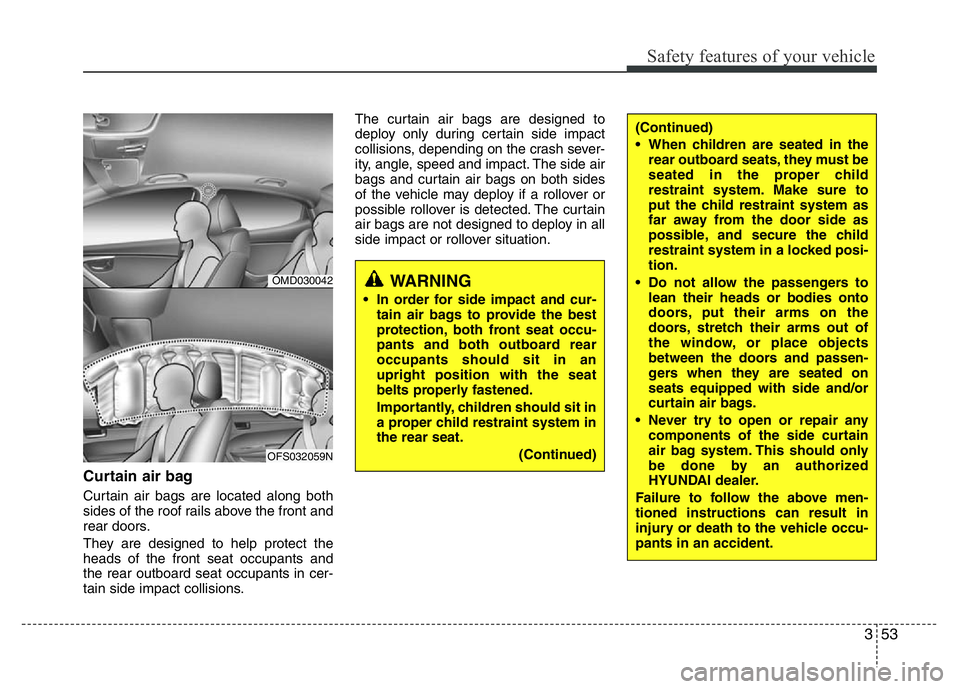
Curtain air bag
Curtain air bags are located along both
sides of the roof rails above the front and
rear doors.
They are designed to help protect the
heads of the front seat occupants and
the rear outboard seat occupants in cer-
tain side impact collisions.The curtain air bags are designed to
deploy only during certain side impact
collisions, depending on the crash sever-
ity, angle, speed and impact. The side air
bags and curtain air bags on both sides
of the vehicle may deploy if a rollover or
possible rollover is detected. The curtain
air bags are not designed to deploy in all
side impact or rollover situation.
WARNING
• In order for side impact and cur-
tain air bags to provide the best
protection, both front seat occu-
pants and both outboard rear
occupants should sit in an
upright position with the seat
belts properly fastened.
Importantly, children should sit in
a proper child restraint system in
the rear seat.
(Continued)
(Continued)
• When children are seated in the
rear outboard seats, they must be
seated in the proper child
restraint system. Make sure to
put the child restraint system as
far away from the door side as
possible, and secure the child
restraint system in a locked posi-
tion.
• Do not allow the passengers to
lean their heads or bodies onto
doors, put their arms on the
doors, stretch their arms out of
the window, or place objects
between the doors and passen-
gers when they are seated on
seats equipped with side and/or
curtain air bags.
• Never try to open or repair any
components of the side curtain
air bag system. This should only
be done by an authorized
HYUNDAI dealer.
Failure to follow the above men-
tioned instructions can result in
injury or death to the vehicle occu-
pants in an accident.
OMD030042
OFS032059N
Page 78 of 406
4
Keys / 4-3
Smart key / 4-6
Remote keyless entry / 4-12
Theft-alarm system / 4-15
Door locks / 4-19
Tailgate / 4-24
Windows / 4-27
Hood / 4-31
Fuel filler lid / 4-33
Sunroof / 4-36
Steering wheel / 4-40
Mirrors / 4-45
Instrument cluster / 4-48
Rear parking assist system / 4-78
Rear view camera / 4-82
Hazard warning flasher / 4-82
Lighting / 4-83
Wipers and washers / 4-88
Interior light / 4-91
Defroster / 4-94
Manual climate control system / 4-95
Automatic climate control system / 4-104
Features of your vehicle
Page 80 of 406
43
Features of your vehicle
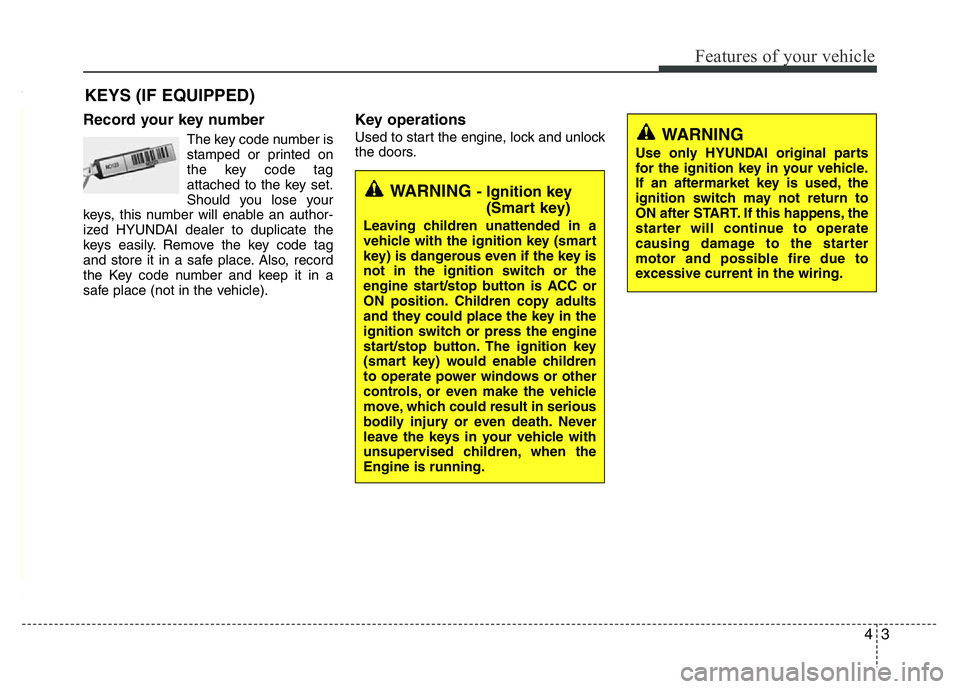
Record your key number
The key code number is
stamped or printed on
the key code tag
attached to the key set.
Should you lose your
keys, this number will enable an author-
ized HYUNDAI dealer to duplicate the
keys easily. Remove the key code tag
and store it in a safe place. Also, record
the Key code number and keep it in a
safe place (not in the vehicle).
Key operations
Used to start the engine, lock and unlock
the doors.
KEYS (IF EQUIPPED)
WARNING - Ignition key
(Smart key)
Leaving children unattended in a
vehicle with the ignition key (smart
key) is dangerous even if the key is
not in the ignition switch or the
engine start/stop button is ACC or
ON position. Children copy adults
and they could place the key in the
ignition switch or press the engine
start/stop button. The ignition key
(smart key) would enable children
to operate power windows or other
controls, or even make the vehicle
move, which could result in serious
bodily injury or even death. Never
leave the keys in your vehicle with
unsupervised children, when the
Engine is running.
WARNING
Use only HYUNDAI original parts
for the ignition key in your vehicle.
If an aftermarket key is used, the
ignition switch may not return to
ON after START. If this happens, the
starter will continue to operate
causing damage to the starter
motor and possible fire due to
excessive current in the wiring.
Page 83 of 406

Features of your vehicle
6 4
Smart key function
1. Door lock
2. Door unlock
3. Tailgate unlock
4. Panic
With a smart key, you can lock or unlock
a door (and tailgate) and even start the
engine without inserting the key.
Refer to the following for more details.
Locking
Using the door handle button
1. Close all doors, engine hood and tail-
gate.
2. Press the button of the outside door
handle.
3. The hazard warning lights will blink
and the chime will sound once.
4. Make sure that doors are locked by
checking the door lock button inside
the vehicle or pulling the outside door
handle.
✽NOTICE
• The button will only operate when the
smart key is within 0.7~1m (28~40in.)
from the outside door handle.
• Even though you press the outside
door handle button, the doors will not
lock and the chime will sound for 3
seconds if any of following occur:
- The smart key is in the vehicle.
- The engine start/stop button is in
ACC or ON position.
- Any door except the tailgate is open.
SMART KEY (IF EQUIPPED)
OYF049213
WARNING- Smart key
Leaving children unattended in a
vehicle with the smart key is dan-
gerous. Children copy adults and
they could press the engine
start/stop button. It would enable
children to operate power windows
or other controls, or even make the
vehicle move, which could result in
serious bodily injury or even death.
Never leave the keys in your vehicle
with unsupervised children.
OFS040008
Page 84 of 406

47
Features of your vehicle
Using the button on the smart key
1 Close all doors, engine hood and tail-
gate.
2. Press the lock button(1).
3. The hazard warning lights will blink
and the chime will sound once.
4. Make sure that doors are locked by
checking the door lock button inside or
pulling the outside door handle.Unlocking
Using the door handle
1. Press the button of the driver's outside
door handle.
2. The driver’s door will unlock. The haz-
ard warning lights will blink and the
chime will sound two times.
3. Press the button once more within 4
seconds.
4. All doors will unlock and the hazard
warning lights will blink and the chime
will sound two times.
❈If you press the button of the front pas-
senger’s outside door handle while
carrying the smart key, all doors will
unlock. (if equipped)
✽NOTICE
• The button will only operate when the
smart key is within 0.7~1m (28~40in.)
from the outside door handle.
• When the smart key is recognized in
the area of 0.7~1m (28~40in.) from the
front outside door handle, other peo-
ple can also open the doors.
• After unlocking the driver’s door or
all doors, the door(s) will lock auto-
matically unless the door is opened.
Using the button on the smart key
1. Press the unlock button (2) of the
smart key.
2. The driver’s door will unlock. The haz-
ard warning lights will blink and the
chime will sound two times.
3. Press the unlock button (2) once more
within 4 seconds.
4. All doors will unlock. The hazard warn-
ing lights will blink and the chime will
sound two times.
✽NOTICE
After pressing the button, the doors will
lock automatically unless any door is
opened.