Page 606 of 708

7-42
Maintenance
When you do not use the vehicle for a long time in a low tempera-
ture area, disconnect the battery
and keep it indoors.
Always charge the battery fully to prevent battery case damage
in low temperature areas.
For best battery service
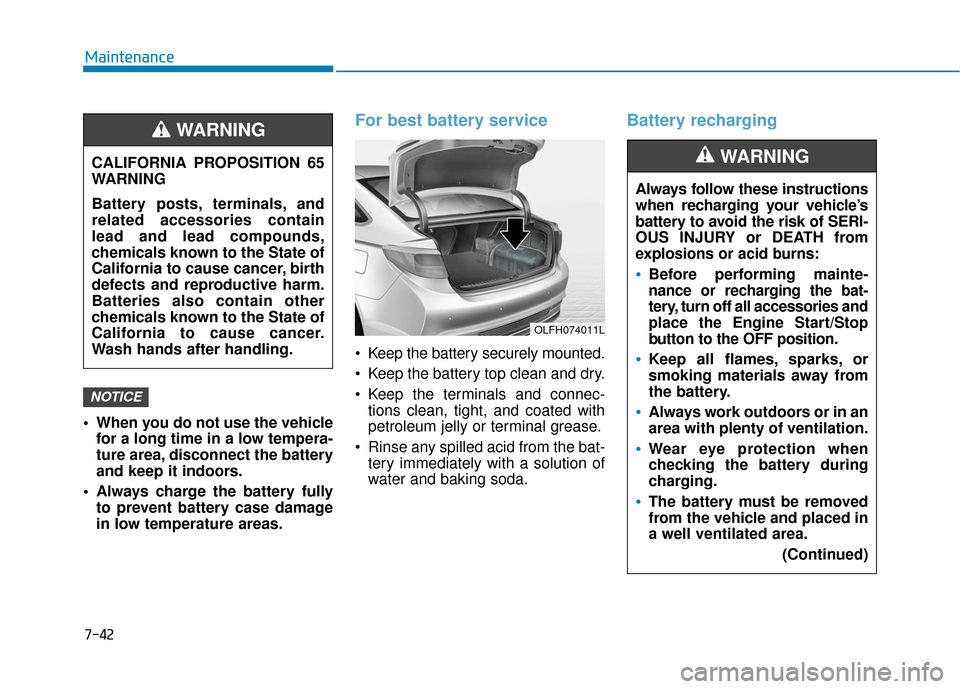
Keep the battery securely mounted.
Keep the battery top clean and dry.
Keep the terminals and connec-tions clean, tight, and coated with
petroleum jelly or terminal grease.
Rinse any spilled acid from the bat- tery immediately with a solution of
water and baking soda.
Battery recharging
NOTICE
CALIFORNIA PROPOSITION 65
WARNING
Battery posts, terminals, and
related accessories contain
lead and lead compounds,
chemicals known to the State of
California to cause cancer, birth
defects and reproductive harm.
Batteries also contain other
chemicals known to the State of
California to cause cancer.
Wash hands after handling.
WARNING
Always follow these instructions
when recharging your vehicle’s
battery to avoid the risk of SERI-
OUS INJURY or DEATH from
explosions or acid burns:
Before performing mainte-
nance or recharging the bat-
tery, turn off all accessories and
place the Engine Start/Stop
button to the OFF position.
Keep all flames, sparks, or
smoking materials away from
the battery.
Always work outdoors or in an
area with plenty of ventilation.
Wear eye protection when
checking the battery during
charging.
The battery must be removed
from the vehicle and placed in
a well ventilated area.
(Continued)
WARNING
OLFH074011L
Page 607 of 708

7-43
7
Maintenance
By jump starting
After a jump start from a good bat-
tery, drive the vehicle for 20-30 min-
utes before it is shutoff. The vehicle
may not restart if you shut it off
before the battery had a chance to
adequately recharge. See “Jump
Starting” in chapter 6 for more infor-
mation on jump starting procedures.
Information
An inappropriately dis-posed battery can be
harmful to the environ-
ment and human health.
Dispose the battery according to
your local law(s) or regulation.
Reset features
Some items need to be reset after
the battery has been discharged or
the battery has been disconnected.
See chapter 3 for:
Power Windows
Trip Computer
Climate Control System
Clock
Audio System
Sunroof
i
(Continued)
Watch the battery during
charging, and stop or reduce
the charging rate if the battery
cells begin boiling violently.
The negative battery cable
must be removed first and
installed last when the battery
is disconnected. Disconnect
the battery charger in the fol-
lowing order:
(1) Turn off the battery charger main switch.
(2) Unhook the negative
clamp from the negative
battery terminal.
(3) Unhook the positive clamp from the positive battery
terminal.
Always use a genuine HYUNDAI
approved battery when you
replace the battery.
Page 620 of 708

7-56
Maintenance
Pneumatic tire
A mechanical device made of rubber,
chemicals, fabric and steel or other
materials, that, when mounted on an
automotive wheel, provides the trac-
tion and contains the gas or fluid that
sustains the load.
Production options weight
The combined weight of installed
regular production options weighing
over 5 lb.(2.3 kg) in excess of the
standard items which they replace,
not previously considered in curb
weight or accessory weight, includ-
ing heavy duty brakes, ride levelers,
roof rack, heavy duty battery, and
special trim.
Recommended InflationPressure
Vehicle manufacturer’s recommend-
ed tire inflation pressure as shown
on the tire placard.
Radial Ply Tire
A pneumatic tire in which the ply
cords that extend to the beads are
laid at 90 degrees to the centerline of
the tread.
Rim
A metal support for a tire and upon
which the tire beads are seated.
Sidewall
The portion of a tire between the
tread and the bead.
Speed Rating
An alphanumeric code assigned to a
tire indicating the maximum speed at
which a tire can operate.
Traction
The friction between the tire and the
road surface. The amount of grip pro-
vided.
Tread
The portion of a tire that comes into
contact with the road.
Treadwear Indicators
Narrow bands, sometimes called
"wear bars," that show across the
tread of a tire when only 1/16 inch of
tread remains.
UTQGS
Uniform Tire Quality Grading
Standards is a tire information sys-
tem that provides consumers with
ratings for a tire’s traction, tempera-
ture and treadwear. Ratings are
determined by tire manufacturers
using government testing proce-
dures. The ratings are molded into
the sidewall of the tire.
Vehicle Capacity Weight
The number of designated seating
positions multiplied by 150 lbs. (68
kg) plus the rated cargo and luggage
load.
Page 624 of 708

7-60
Maintenance
F
FU
U S
SE
E S
S
A vehicle’s electrical system is pro-
tected from electrical overload dam-
age by fuses.
This vehicle has 2 (or 3) fuse panels,
one located in the driver’s side panel
bolster, the other in the engine com-
partment near the battery.
If any of your vehicle’s lights, acces-
sories, or controls do not work, check
the appropriate circuit fuse. If a fuse
has blown, the element inside the
fuse will be melted or broken.
If the electrical system does not
work, first check the driver’s side
fuse panel. Before replacing a blown
fuse, turn the engine and all switches
off, and then disconnect the negative
battery cable. Always replace a
blown fuse with one of the same rat-
ing.
If the replacement fuse blows, this
indicates an electrical problem. Avoid
using the system involved and imme-
diately consult an authorized
HYUNDAI dealer.Information
Three kinds of fuses are used: blade
type for lower amperage rating, car-
tridge type, and fusible link for higher
amperage ratings.
i
Normal
■
Blade type
■ Cartridge type Blown
Normal Blown
Normal Blown
OLF074075
Do not use a screwdriver or any
other metal object to remove
fuses because it may cause a
short circuit and damage the
system.
CAUTION
NEVER replace a fuse with any-
thing but another fuse of the
same rating.
A higher capacity fuse could
cause damage and possibly
cause a fire.
Do not install a wire or alu-
minum foil instead of the
proper fuse - even as a tem-
porary repair. It may cause
extensive wiring damage and
possibly a fire.
WARNING
Normal Blown
■ Multi fuse
Page 627 of 708
7-63
7
Maintenance
Main fuse
If the main fuse is blown, it must be
removed as follows:
1. Turn off the engine.
2. Disconnect the negative batterycable.
3. Remove the fuse panel cover by pressing the tab and pulling it up.
4. Remove the nuts shown in the pic- ture above.
5. Replace the fuse with a new one of the same rating.
6. Reinstall in the reverse order of removal.
Information
If the main fuse is blown, consult an
authorized HYUNDAI dealer.
Multi fuse
If the multi fuse is blown, it must be
removed as follows:
1. Turn off the engine.
2. Disconnect the negative battery
cable.
3. Remove the fuse panel cover by pressing the tab and pulling it up.
4. Remove the nuts shown in the pic- ture above.
5. Replace the fuse with a new one of the same rating.
6. Reinstall in the reverse order of removal.
Information
If the multi fuse is blown, consult an
authorized HYUNDAI dealer.
i
i
OLF074025OLF074026
Page 629 of 708

7-65
7
Maintenance
Instrument panel fuse panel
Fuse Name Fuse rating Protected Component
SAFETY WINDOW LH25ADriver Safety Power Window Module
P/SEAT PASS30APassenger Seat Manual Switch
P/WDW LH20APower Window Main Switch, Rear Power Window Module LH
P/WDW RH25APower Window Main Switch, Rear Power Window Module RH, Passenger Door Module, Passenger
Power Window Switch
DR LOCK20ADoor Lock Relay, Door Unlock Relay, ICM Relay Box (Two Turn Unlock Relay)
S/HEATER FRT25AFront Air Ventilation Seat Module, Front Seat Warmer Module
BRAKE SWITCH10AStop Lamp Switch, Immobilizer Module, Smart Key Control Module8MODULE7.5ABCM, Smart Key Control Module
SAFETY POWER WINDOW RH25APassenger Safety Power Window Module
BATTERY
MANAGEMENT10ABMS Control Module
SMART KEY15ASmart Key Control Module
TRUNK10ATrunk Lid Relay, Fuel Filler Door & Trunk Lid Switch
7MODULE10ADriver/Passenger Door Module, Rear Parking Assist Sensor, Electric Parking Brake Module, Digital
Clock, Blind Spot Detection Radar
INTERIOR LAMP10AGlove Box Lamp, Foot Lamp IND., Driver/Passenger Foot Lamp, Front Vanity Lamp Switch LH/RH,
Overhead Console Lamp, Room Lamp, Rear Personal Lamp LH/RH, Trunk Room Lamp,
Driver/Passenger Door Lamp
2MEMORY7.5AElectro Chromic Mirror
P/SEAT DRV30ADriver Seat Manual Switch, Driver IMS Module
CLUSTER10AInstrument Cluster
Page 635 of 708
7-71
7
Maintenance
Fuse Name Fuse rating Protected Component
FUSE
1TCU10APCM
1OPCU10AElectric Oil Pump Unit
EWP10AElectric Water Pump
BATTERY C/FAN15AE/R Junction Block (RLY. 5 (Battery C/FAN))
1ECU20APCM
IGN COIL20AIgnition Coil #1/#2/#3/#4
AMS10ABattery Sensor
Page 638 of 708
7-74
Maintenance
1. Open the hood.
2. Disconnect the negative battery cable.
3. Remove the headlamp bulb cover by turning it counterclockwise.
4. Disconnect the headlamp bulb socket-connector.
5. Unsnap the headlamp bulb retain- ing wire by pressing the end and
pushing it upward.
6. Remove the bulb from the head- lamp assembly.
7. Install a new headlamp bulb and snap the headlamp bulb retaining
wire into position by aligning the
wire with the groove on the bulb. 8. Connect the headlamp bulb sock-
et-connector.
9. Install the headlamp bulb cover by turning it clockwise.
Information
The headlamp aiming should be
adjusted after an accident or after the
headlamp assembly is reinstalled at an
authorized HYUNDAI dealer.
i
OLFH074030L
High beam Low beam