2016 Hyundai Santa Fe fuse
[x] Cancel search: fusePage 7 of 759

1
2
3
4
5
6
7
8I
IntroductionHow to use this manual / Fuel requirements / Vehicle break-in process / Vehicle handling instructions /Vehicle data collection and event data recorders
Your vehicle at a glance
Exterior overview / Interior overview / Instrument panel overview / Engi\
ne compartment
Safety features of your vehicle
Seats / Seat belts / Child restraint system / Air bag
Features of your vehicleKeys / Door locks / Tailgate / Windows / Hood / Fuel filler lid / Panoramic sunroof / Steering wheel / Mirrors
/ Instrument cluster / Lighting / Wipers & Washers / Climate control system / Multimedia system / Etc.
Driving your vehicleBefore driving / Engine start/stop button / Transaxle / All Wheel Drive (AWD) / Brake system / Cruise con-
trol system / Blind Spot Detection System / Active ECO system / Winter driving / Vehicle load limit / Etc.
What to do in an emergencyRoad warning / Emergency while driving / Emergency starting / Engine overheat / TPMS / Flat tire / Towing / Etc.
MaintenanceEngine compartment / Maintenance service / Engine oil / Engine coolant /\
Brake fluid / Washer fluid /
Parking brake / Air cleaner / Wiper blades / Battery / Tire and wheels / Fuses / Light bulbs / Etc.
Specifications, Consumer information and Reporting safety defects
Index
table of contents
Page 17 of 759
Your vehicle at a glance
42
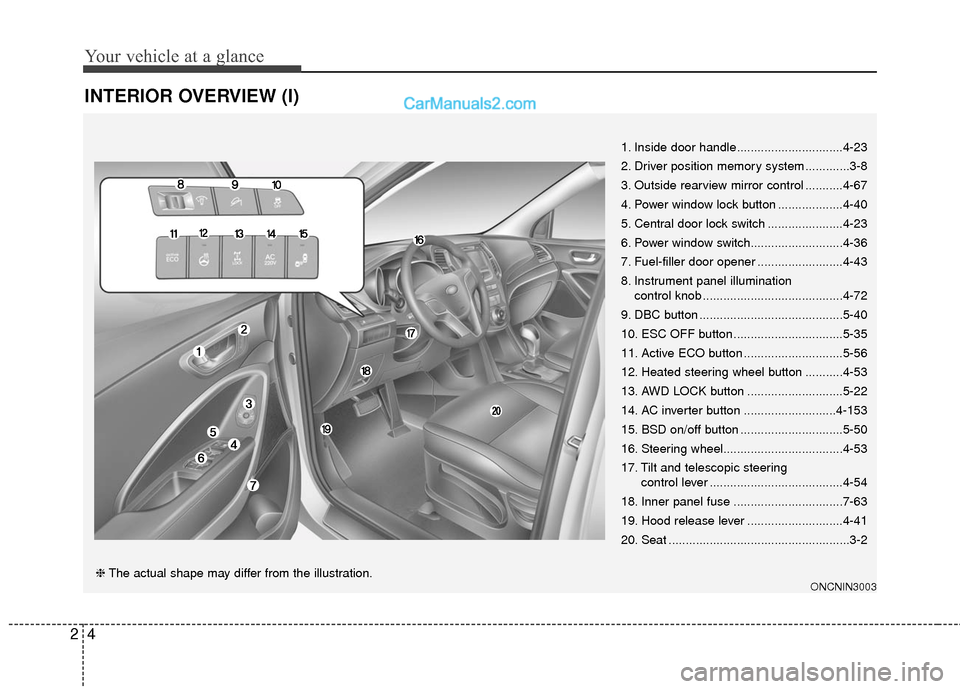
INTERIOR OVERVIEW (I)
1. Inside door handle...............................4-23
2. Driver position memory system .............3-8
3. Outside rearview mirror control ...........4-67
4. Power window lock button ...................4-40
5. Central door lock switch ......................4-23
6. Power window switch...........................4-36
7. Fuel-filler door opener .........................4-43
8. Instrument panel illumination control knob .........................................4-72
9. DBC button ..........................................5-40
10. ESC OFF button ................................5-35
11. Active ECO button .............................5-56
12. Heated steering wheel button ...........4-53
13. AWD LOCK button ............................5-22
14. AC inverter button ...........................4-153
15. BSD on/off button ..............................5-50
16. Steering wheel...................................4-53
17. Tilt and telescopic steering control lever .......................................4-54
18. Inner panel fuse ................................7-63
19. Hood release lever ............................4-41
20. Seat .....................................................3-2
ONCNIN3003❈ The actual shape may differ from the illustration.
Page 20 of 759
27
Your vehicle at a glance
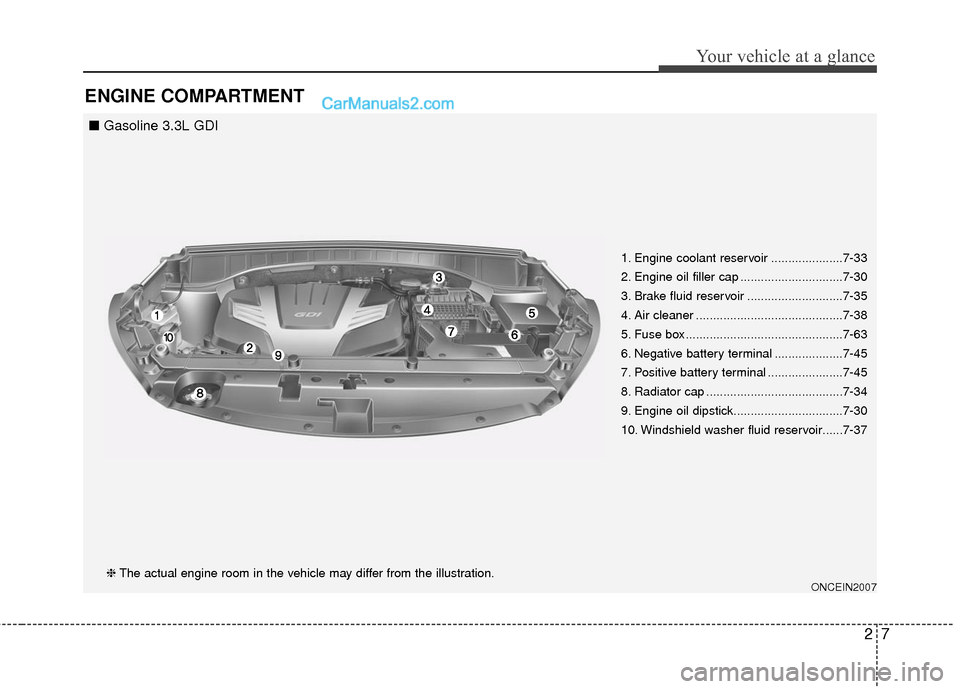
ENGINE COMPARTMENT
1. Engine coolant reservoir .....................7-33
2. Engine oil filler cap ..............................7-30
3. Brake fluid reservoir ............................7-35
4. Air cleaner ...........................................7-38
5. Fuse box..............................................7-63
6. Negative battery terminal ....................7-45
7. Positive battery terminal ......................7-45
8. Radiator cap ........................................7-34
9. Engine oil dipstick................................7-30
10. Windshield washer fluid reservoir......7-37
ONCEIN2007❈The actual engine room in the vehicle may differ from the illustration.
■ Gasoline 3.3L GDI
Page 76 of 759

Safety features of your vehicle
56
3
Occupant classification systemYour vehicle is equipped with an
occupant classification system in the
front passenger's seat.
The occupant classification system
is designed to detect the presence of
a properly-seated front passenger
and determine if the passenger's
front air bag should be enabled (may
inflate) or not. The driver's front air
bag is not affected or controlled by
the occupant classification system.(Continued)
If the SRS air bag warning light
" " does not illuminate, or
continuously remains on after
illuminating for about 6 sec-
onds or blinks when the igni-
tion switch is turned to the ON
position, or after the engine is
started, comes on while driv-
ing, the SRS is not working
properly. If this occurs, have
your vehicle immediately
inspected by an authorized
HYUNDAI dealer.
Before you replace a fuse or disconnect a battery terminal,
turn the ignition switch to the
LOCK position and remove
the ignition key for ignition
key, and turn the engine
start/stop button to the OFF
position for smart key. Never
remove or replace the air bag
related fuse(s) when the igni-
tion switch is in the ON posi-
tion. Failure to heed this warn-
ing will cause the SRS air bag
warning light to illuminate.
OANNSA2003/OANNSA2002/OANNSA2004
■ Type B
■Type A
■ Type C
Page 127 of 759
Features of your vehicle
30
4
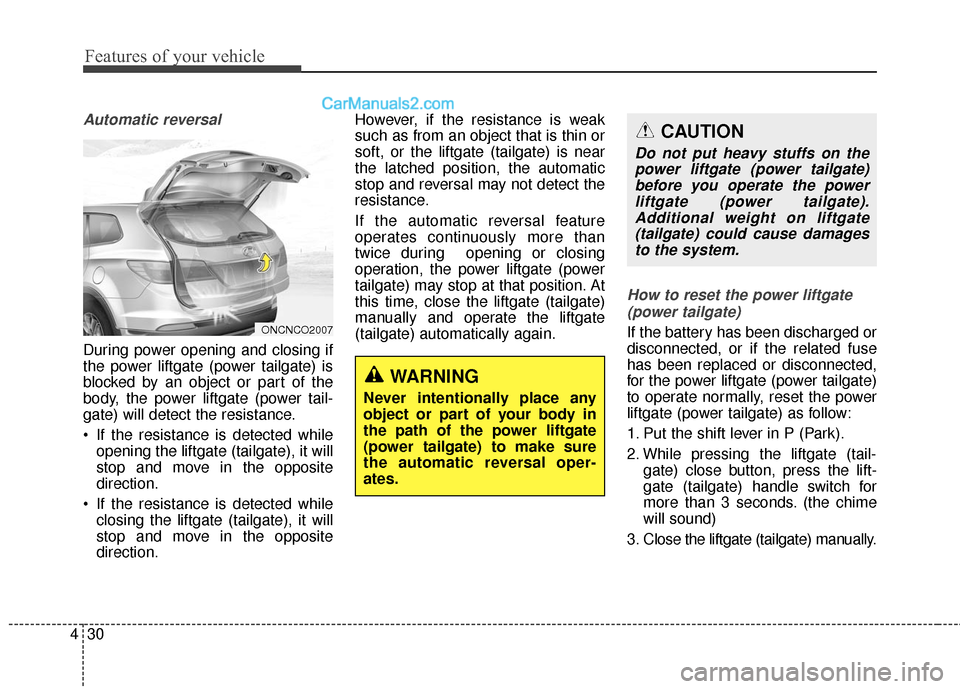
Automatic reversal
During power opening and closing if
the power liftgate (power tailgate) is
blocked by an object or part of the
body, the power liftgate (power tail-
gate) will detect the resistance.
If the resistance is detected while
opening the liftgate (tailgate), it will
stop and move in the opposite
direction.
If the resistance is detected while closing the liftgate (tailgate), it will
stop and move in the opposite
direction. However, if the resistance is weak
such as from an object that is thin or
soft, or the liftgate (tailgate) is near
the latched position, the automatic
stop and reversal may not detect the
resistance.
If the automatic reversal feature
operates continuously more than
twice during opening or closing
operation, the power liftgate (power
tailgate) may stop at that position. At
this time, close the liftgate (tailgate)
manually and operate the liftgate
(tailgate) automatically again.
How to reset the power liftgate
(power tailgate)
If the battery has been discharged or
disconnected, or if the related fuse
has been replaced or disconnected,
for the power liftgate (power tailgate)
to operate normally, reset the power
liftgate (power tailgate) as follow:
1. Put the shift lever in P (Park).
2. While pressing the liftgate (tail- gate) close button, press the lift-
gate (tailgate) handle switch for
more than 3 seconds. (the chime
will sound)
3. Close the liftgate (tailgate) manually.
WARNING
Never intentionally place any
object or part of your body in
the path of the power liftgate
(power tailgate) to make sure
the automatic reversal oper-
ates.
ONCNCO2007
CAUTION
Do not put heavy stuffs on the power liftgate (power tailgate)before you operate the powerliftgate (power tailgate).Additional weight on liftgate(tailgate) could cause damagesto the system.
Page 137 of 759
Features of your vehicle
40
4
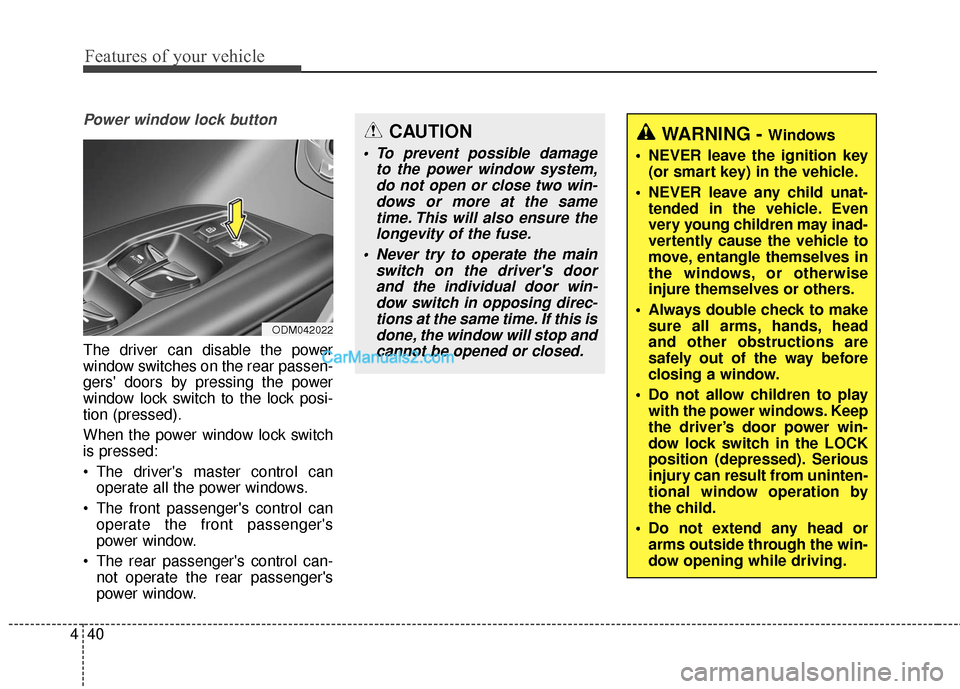
Power window lock button
The driver can disable the power
window switches on the rear passen-
gers' doors by pressing the power
window lock switch to the lock posi-
tion (pressed).
When the power window lock switch
is pressed:
The driver's master control can
operate all the power windows.
The front passenger's control can operate the front passenger's
power window.
The rear passenger's control can- not operate the rear passenger's
power window.
CAUTION
To prevent possible damage to the power window system,do not open or close two win-dows or more at the sametime. This will also ensure thelongevity of the fuse.
Never try to operate the main switch on the driver's doorand the individual door win-dow switch in opposing direc-tions at the same time. If this isdone, the window will stop andcannot be opened or closed.
WARNING - Windows
NEVER leave the ignition key (or smart key) in the vehicle.
NEVER leave any child unat- tended in the vehicle. Even
very young children may inad-
vertently cause the vehicle to
move, entangle themselves in
the windows, or otherwise
injure themselves or others.
Always double check to make sure all arms, hands, head
and other obstructions are
safely out of the way before
closing a window.
Do not allow children to play with the power windows. Keep
the driver’s door power win-
dow lock switch in the LOCK
position (depressed). Serious
injury can result from uninten-
tional window operation by
the child.
Do not extend any head or arms outside through the win-
dow opening while driving.
ODM042022
Page 149 of 759
Features of your vehicle
52
4
Resetting the sunroof
Sunroof needs to be reset if (in the
followings)
- Battery is discharged or discon-
nected or the related fuse has been
replaced or disconnected.
- The one-touch sliding function of the sunroof does not normally oper-
ate.
1.Turn the ignition switch to the ON position.
2.Close the sunshade and sunroof completely if opened.
3.Release the sunroof control lever.
4.Push the sunroof control lever for- ward in the direction of close
(about 10 seconds) until the sun-
roof moves a little. Then, release
the lever. 5.Push the sunroof control lever for-
ward in the direction of close, until
the sunroof operates as follows
again:
The sunshade and sunroof glass
slide open → The sunroof glass
slide close → The sunshade close
Then, release the lever.
When this is complete, the sunroof
system has been reset.
✽ ✽ NOTICE
If you do not reset the sunroof, it
may not work properly.
Page 175 of 759

Features of your vehicle
78
4
Service Mode
Service Interval
Service in
It calculates and displays when you
need a scheduled maintenance
service (mileage or days).
If the remaining mileage or time
reaches 900 mi. (1,500 km) or 30
days, "Service in" message is dis-
played for several seconds each time
you set the ignition switch or Engine
Start/Stop Button to the ON position. Service required
If you do not have your vehicle serv-
iced according to the already inputted
service interval, “Service required”
message is displayed for several sec-
onds each time you set the ignition
switch or Engine Start/Stop Button to
the ON position (The mileage and
time changes to "---").
To reset the service interval to the
mileage and days you inputted before:
- Press the SELECT/RESET button
for more than 1 second. Service in OFF
If the service interval is not set,
“Service in OFF” message is dis-
played on the LCD display.
✽ ✽
NOTICE
If any of the following conditions
occurs, the mileage and days may be
incorrect.
- The battery cable is disconnected.
- The fuse switch is turned off.
- The battery is discharged.
OANNDI2066/OANNDI2070
■
Type A
■Type BODMEDI2067/ODMEDI2071
■
Type A
■Type BODMEDI2068/ODMEDI2072
■
Type A
■Type B