Page 7 of 759

1
2
3
4
5
6
7
8I
IntroductionHow to use this manual / Fuel requirements / Vehicle break-in process / Vehicle handling instructions /Vehicle data collection and event data recorders
Your vehicle at a glance
Exterior overview / Interior overview / Instrument panel overview / Engi\
ne compartment
Safety features of your vehicle
Seats / Seat belts / Child restraint system / Air bag
Features of your vehicleKeys / Door locks / Tailgate / Windows / Hood / Fuel filler lid / Panoramic sunroof / Steering wheel / Mirrors
/ Instrument cluster / Lighting / Wipers & Washers / Climate control system / Multimedia system / Etc.
Driving your vehicleBefore driving / Engine start/stop button / Transaxle / All Wheel Drive (AWD) / Brake system / Cruise con-
trol system / Blind Spot Detection System / Active ECO system / Winter driving / Vehicle load limit / Etc.
What to do in an emergencyRoad warning / Emergency while driving / Emergency starting / Engine overheat / TPMS / Flat tire / Towing / Etc.
MaintenanceEngine compartment / Maintenance service / Engine oil / Engine coolant /\
Brake fluid / Washer fluid /
Parking brake / Air cleaner / Wiper blades / Battery / Tire and wheels / Fuses / Light bulbs / Etc.
Specifications, Consumer information and Reporting safety defects
Index
table of contents
Page 16 of 759
23
Your vehicle at a glance
1. Antenna .............................................4-161
2. Defroster............................................4-124
3. Parking assist system........................4-105
4. Fuel filler door .....................................4-43
5. Towing hook.........................................6-31
6. Rear combination lamp .......................7-79
7. Rear window wiper blade ....................7-44
8. High mounted stop lamp .....................7-81
9. Rearview camera ..............................4-109
ONCEIN2002❈The actual shape may differ from the illustration.
■ Rear view
Page 31 of 759
311
Safety features of your vehicle
Adjusting the height up and down
To raise the headrest :
1. Pull it up to the desired position (1).
To lower the headrest :
1. Push and hold the release button(2) on the headrest support
2. Lower the headrest to the desired position (3).
Removal and installation
To remove the headrest:
1. Recline the seatback (2) with therecline lever or switch (1).
2. Raise headrest as far as it can go.
ONCESA2016
ONCNSA3150
ONCNSA3152
■
Type A
■ Type B
OYFH034205
CAUTION
If you recline the seatback
towards the front with the head-rest and seat cushion raised,the headrest may come in con-tact with the sunvisor or otherparts of the vehicle.
Page 43 of 759
323
Safety features of your vehicle
4.Pull on the seatback folding lever,then fold the seat toward the front
of the vehicle. When you return the
seatback to its upright position,
always be sure it has locked into
position by pushing on the top of
the seatback.
5.To use the rear seat, lift and pull the seatback backward by pulling
on the folding lever (2nd row) or
strap (3rd row).
Pull the seatback firmly until it
clicks into place.
Make sure the seatback is locked
in place.
6.Return the rear seat belt to the proper position.■ 2nd row seat
■3rd row seat
OANNSA2026/ONCESA2100/OANNSA2027/ONCESA2102
Page 44 of 759
Safety features of your vehicle
24
3
2nd row seat folding
(from outside, if equipped)
Pull the 2nd row seat back folding
lever out.
The 2nd row seat back will be folded.
If you pull the left side lever (1) out,
left side seat back and center seat
back will be folded.
If you pull the right side lever (2) out,
right side seat back will be folded.
To fold down the rear center seat-back (for 2nd row seat)
1. Lower the rear headrests to the lowest position.
2. Push the center seatback folding lever up, then fold the seat toward
the front of the vehicle.
When you return the seatback to its
upright position, always be sure it
has locked into position by pushing
on the top of the seatback.
ONCDSA3116
WARNING - Rear seat folding
Do not fold the rear seats (2nd &
3rd row seats), if passengers,
pets or luggage are in the rear
seats.
It may cause injury or damage
to passengers, pets or luggage.
ONCESA2104
Page 52 of 759
Safety features of your vehicle
32
3
When using the rear center seat belt,
the buckle with the “CENTER” mark
must be used. To release the seat belt:
The seat belt is released by pressing
the release button (1) in the locking
buckle. When it is released, the belt
should automatically draw back into
the retractor.
If this does not happen, check the
belt to be sure it is not twisted, then
try again.
Stowing the rear seat belt
The rear seat belt buckles can be
stowed in the pocket between the
rear seatback and cushion when
not in use.
B210A01NF-1/HODM032034
OXM039030
■ 2nd row seat
■3rd row seat (if equipped)
ODM032051
Page 65 of 759

345
Safety features of your vehicle
When the seat belt is allowed to
retract to its fully stowed position,
the retractor will automatically
switch from the “Automatic lock-
ing” mode to the emergency lock
mode for normal adult usage.
WARNING - Automatic
locking mode
The lap/shoulder belt automati-
cally returns to the “emergency
lock mode” whenever the belt is
allowed to retract fully.
Therefore, the preceding seven
steps must be followed each
time a child restraint is installed.
If the retractor is not in the
Automatic Locking mode, the
child restraint can move when
your vehicle turns or stops sud-
denly. A child can be seriously
injured or killed if the child
restraint is not properly
anchored to the car, including
setting the retractor to the
Automatic Locking mode.
ONCESA2021/ONCESA2112/ONCESA2111
■7-seater■6-seater
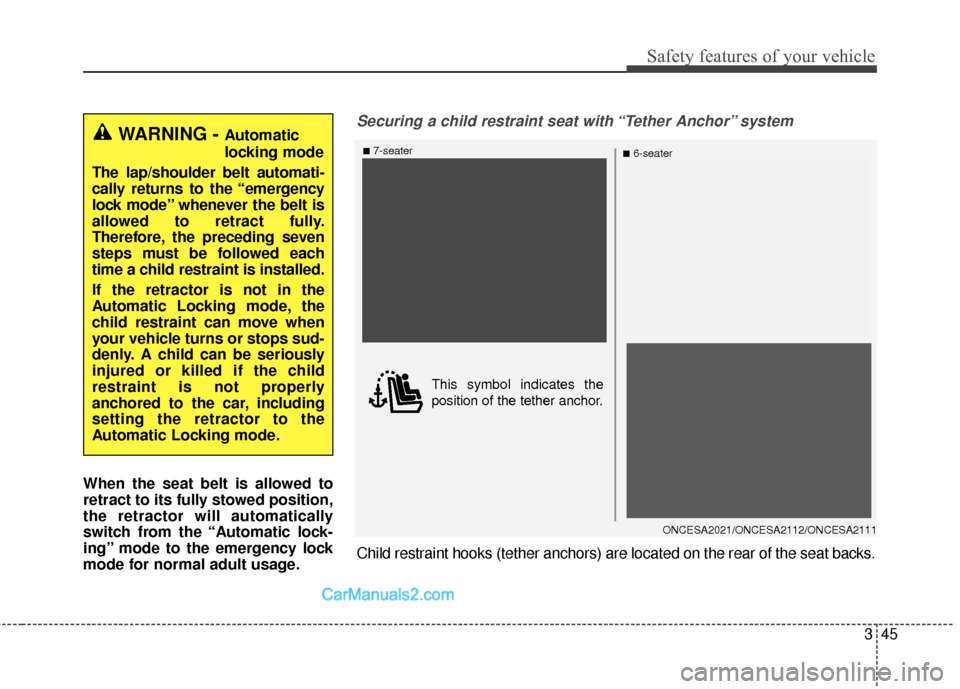
Securing a child restraint seat with “Tether Anchor” system
This symbol indicates the
position of the tether anchor.
Child restraint hooks (tether anchors) are located on the rear of the seat backs.
Page 77 of 759

357
Safety features of your vehicle
Main components of occupant
classification system
A detection device located withinthe front passenger seat cushion.
Electronic system to determine whether the front passenger air
bag system should be activated or
deactivated.
An indicator light located on the instrument panel which illuminates
the words PASSENGER AIR BAG
"OFF" indicating the front passen-
ger air bag system is deactivated.
The instrument panel air bag indi- cator light is interconnected with
the occupant classification system.
If the front passenger seat is occu-
pied by a person that the system
determines to be of adult size, and
he/she sits properly (sitting upright
with the seatback in an upright posi-
tion, centered on the seat cushion
with their seat belt on, legs comfort-
ably extended and their feet on the
floor), the PASSENGER AIR BAG
"OFF" indicator will be turned off and
the front passenger's air bag will be
able to inflate, if necessary, in frontal
crashes. You will find the PASSENGER AIR
BAG "OFF" indicator on the center
facia panel. This system detects the
conditions 1~4 in the following table
and activates or deactivates the front
passenger air bag based on these
conditions.
Always be sure that you and all vehi-
cle occupants are seated and
restrained properly (sitting upright
with the seat in an upright position,
centered on the seat cushion, with
the person's legs comfortably
extended, feet on the floor, and wear-
ing the safety belt properly) for the
most effective protection by the air
bag and the safety belt.
The OCS may not function proper-
ly if the passenger takes actions
which can affect the classification
system. These include:
(1) Failing to sit in an upright posi- tion.
(2) Leaning against the door or center console.
(3) Sitting towards the sides or the front of the seat.
(4) Putting legs on the dashboard or resting them on other loca-
tions which reduce the passen-
ger weight on the front seat.
(5) Improperly wearing the safety belt.
(6) Reclining the seat back.
(7) Wearing a thick cloth like ski wear or hip protection wear.
(8) Put on the seat an additional thick cushion.