2016 Hyundai Santa Fe high beam
[x] Cancel search: high beamPage 100 of 699
Mirrors . . . . . . . . . . . . . . . . . . . . . . . . . . . . . . . . . . 4-58
• Inside rearview mirror . . . . . . . . . . . . . . . . . . . . . . . . 4-58
• Outside rearview mirror . . . . . . . . . . . . . . . . . . . . . . . 4-62
Instrument cluster . . . . . . . . . . . . . . . . . . . . . . . . . 4-66
• Instrument Cluster Control . . . . . . . . . . . . . . . . . . . . 4-68
• LCD Display Control . . . . . . . . . . . . . . . . . . . . . . . . . 4-69
• Gauges . . . . . . . . . . . . . . . . . . . . . . . . . . . . . . . . . . . . . 4-69
• Transaxle Shift Indicator . . . . . . . . . . . . . . . . . . . . . . 4-74
LCD display . . . . . . . . . . . . . . . . . . . . . . . . . . . . . . 4-76
• LCD Modes . . . . . . . . . . . . . . . . . . . . . . . . . . . . . . . . . 4-76
• Service Mode . . . . . . . . . . . . . . . . . . . . . . . . . . . . . . . . 4-77
• User Settings Mode . . . . . . . . . . . . . . . . . . . . . . . . . . . 4-78
• A/V Mode . . . . . . . . . . . . . . . . . . . . . . . . . . . . . . . . . . . 4-80
• Turn By Turn Mode. . . . . . . . . . . . . . . . . . . . . . . . . . . 4-81
• Warning Messages . . . . . . . . . . . . . . . . . . . . . . . . . . . . 4-81
Trip computer . . . . . . . . . . . . . . . . . . . . . . . . . . . . . 4-88
• Overview. . . . . . . . . . . . . . . . . . . . . . . . . . . . . . . . . . . . 4-88
• Trip A/B . . . . . . . . . . . . . . . . . . . . . . . . . . . . . . . . . . . . 4-89
• Fuel Economy . . . . . . . . . . . . . . . . . . . . . . . . . . . . . . . 4-90
Warning and indicator lights . . . . . . . . . . . . . . . . 4-93
• Warning lights . . . . . . . . . . . . . . . . . . . . . . . . . . . . . . . 4-93
• Indicator Lights . . . . . . . . . . . . . . . . . . . . . . . . . . . . . 4-103
Rear parking assist system . . . . . . . . . . . . . . . . . 4-109
• Operation . . . . . . . . . . . . . . . . . . . . . . . . . . . . . . . . . . 4-109
• Non-operational conditions . . . . . . . . . . . . . . . . . . . 4-110• Self-diagnosis . . . . . . . . . . . . . . . . . . . . . . . . . . . . . . . 4-112
Parking assist system . . . . . . . . . . . . . . . . . . . . . . 4-113
• Operation . . . . . . . . . . . . . . . . . . . . . . . . . . . . . . . . . . 4-114
• Non-operational conditions . . . . . . . . . . . . . . . . . . . 4-116
• Self-diagnosis . . . . . . . . . . . . . . . . . . . . . . . . . . . . . . . 4-118
Smart parking assist system(SPAS) . . . . . . . . . . 4-119
• Operation . . . . . . . . . . . . . . . . . . . . . . . . . . . . . . . . . . 4-120
• Non-operational conditions . . . . . . . . . . . . . . . . . . . 4-120
• How the system works . . . . . . . . . . . . . . . . . . . . . . . 4-123
• Additional instructions . . . . . . . . . . . . . . . . . . . . . . . 4-130
• System malfunction . . . . . . . . . . . . . . . . . . . . . . . . . . 4-130
Rearview camera . . . . . . . . . . . . . . . . . . . . . . . . . 4-131
Hazard warning flasher . . . . . . . . . . . . . . . . . . . . 4-132
Lighting . . . . . . . . . . . . . . . . . . . . . . . . . . . . . . . . . 4-133
• Battery saver function. . . . . . . . . . . . . . . . . . . . . . . . 4-133
• Headlamp escort function. . . . . . . . . . . . . . . . . . . . . 4-133
• Smart cornering light . . . . . . . . . . . . . . . . . . . . . . . . 4-133
• Lighting control . . . . . . . . . . . . . . . . . . . . . . . . . . . . . 4-134
• Traffic direction change . . . . . . . . . . . . . . . . . . . . . . 4-136
• High - beam operation . . . . . . . . . . . . . . . . . . . . . . . 4-137
• Turn signals and lane change signals . . . . . . . . . . . 4-138
• Front fog light . . . . . . . . . . . . . . . . . . . . . . . . . . . . . . 4-139
• Rear fog light . . . . . . . . . . . . . . . . . . . . . . . . . . . . . . . 4-140
• Daytime running light . . . . . . . . . . . . . . . . . . . . . . . . 4-140
• Headlight levelling device . . . . . . . . . . . . . . . . . . . . . 4-141
4
Page 203 of 699
4105
Features of your vehicle
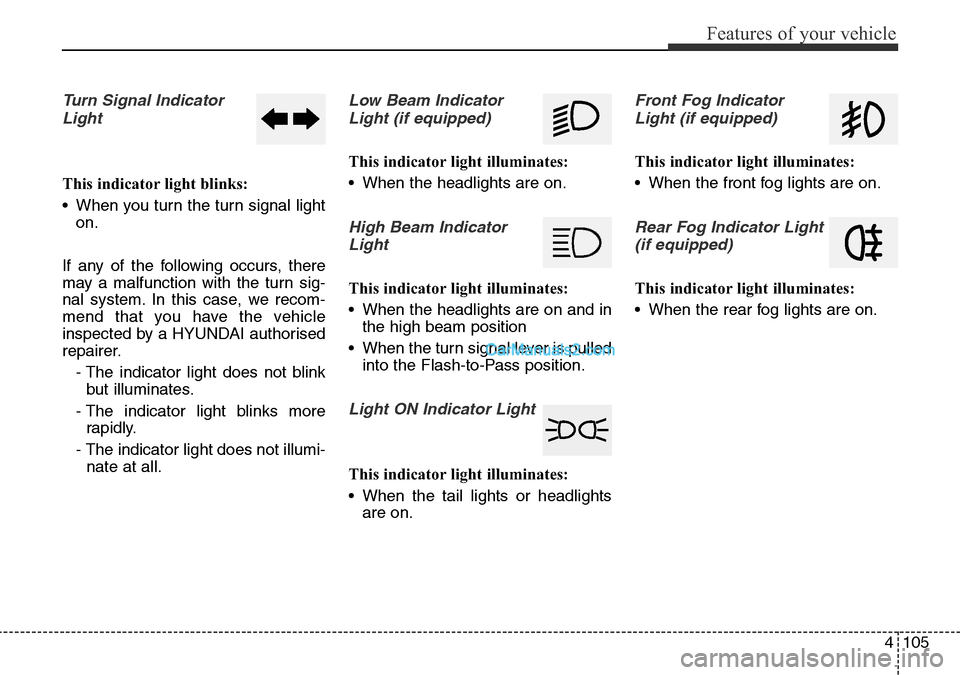
Turn Signal Indicator
Light
This indicator light blinks:
• When you turn the turn signal light
on.
If any of the following occurs, there
may a malfunction with the turn sig-
nal system. In this case, we recom-
mend that you have the vehicle
inspected by a HYUNDAI authorised
repairer.
- The indicator light does not blink
but illuminates.
- The indicator light blinks more
rapidly.
- The indicator light does not illumi-
nate at all.
Low Beam Indicator
Light (if equipped)
This indicator light illuminates:
• When the headlights are on.
High Beam Indicator
Light
This indicator light illuminates:
• When the headlights are on and in
the high beam position
• When the turn signal lever is pulled
into the Flash-to-Pass position.
Light ON Indicator Light
This indicator light illuminates:
• When the tail lights or headlights
are on.
Front Fog Indicator
Light (if equipped)
This indicator light illuminates:
• When the front fog lights are on.
Rear Fog Indicator Light
(if equipped)
This indicator light illuminates:
• When the rear fog lights are on.
Page 235 of 699
4137
Features of your vehicle
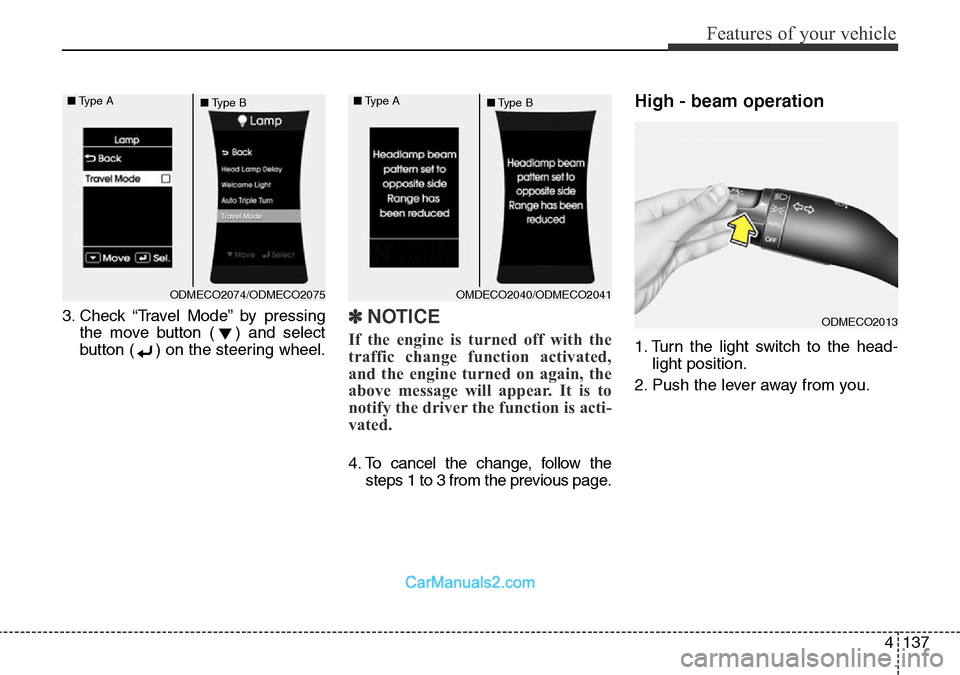
3. Check “Travel Mode” by pressing
the move button ( ) and select
button ( ) on the steering wheel.✽NOTICE
If the engine is turned off with the
traffic change function activated,
and the engine turned on again, the
above message will appear. It is to
notify the driver the function is acti-
vated.
4. To cancel the change, follow the
steps 1 to 3 from the previous page.
High - beam operation
1. Turn the light switch to the head-
light position.
2. Push the lever away from you.
ODMECO2013
ODMECO2074/ODMECO2075 ■Type A
■Type BOMDECO2040/ODMECO2041 ■Type A
■Type B
Page 236 of 699
Features of your vehicle
138 4
✽NOTICE
• The high-beam indicator will light
when the headlight high beams are
switched on.
• To prevent the battery from being
discharged, do not leave the lights
on for a prolonged time whilst the
engine is not running.
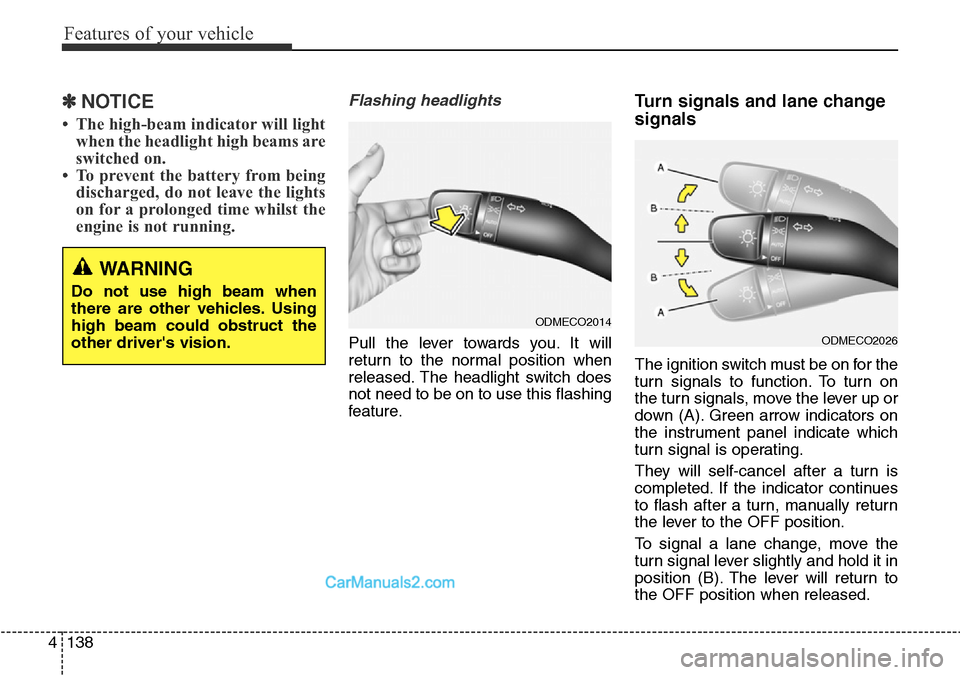
Flashing headlights
Pull the lever towards you. It will
return to the normal position when
released. The headlight switch does
not need to be on to use this flashing
feature.
Turn signals and lane change
signals
The ignition switch must be on for the
turn signals to function. To turn on
the turn signals, move the lever up or
down (A). Green arrow indicators on
the instrument panel indicate which
turn signal is operating.
They will self-cancel after a turn is
completed. If the indicator continues
to flash after a turn, manually return
the lever to the OFF position.
To signal a lane change, move the
turn signal lever slightly and hold it in
position (B). The lever will return to
the OFF position when released.
ODMECO2026
ODMECO2014
WARNING
Do not use high beam when
there are other vehicles. Using
high beam could obstruct the
other driver's vision.
Page 239 of 699
4141
Features of your vehicle
Headlight levelling device
(if equipped)
Manual type
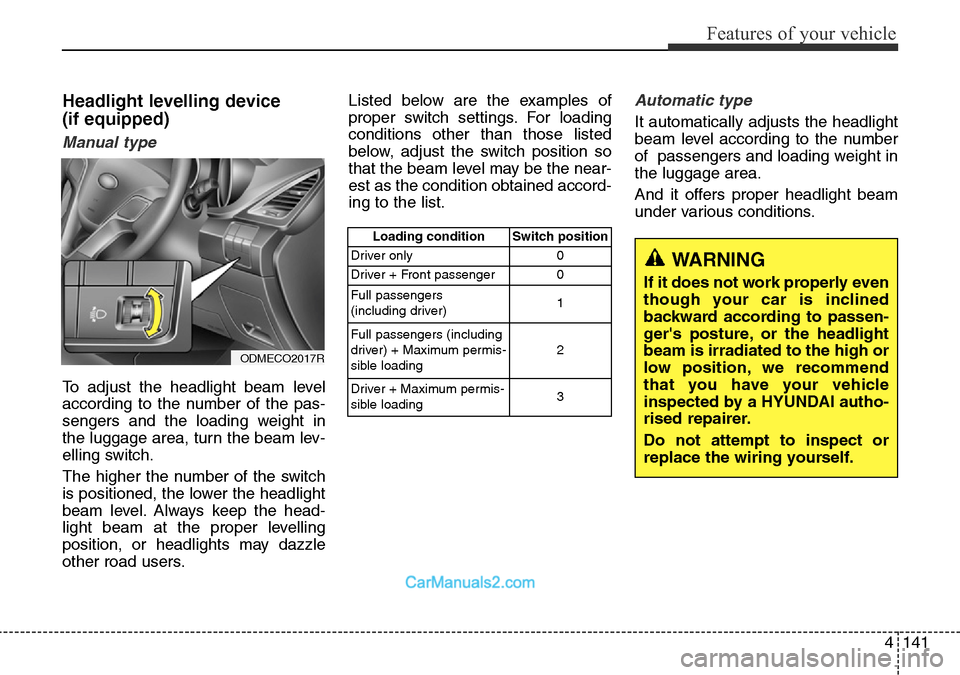
To adjust the headlight beam level
according to the number of the pas-
sengers and the loading weight in
the luggage area, turn the beam lev-
elling switch.
The higher the number of the switch
is positioned, the lower the headlight
beam level. Always keep the head-
light beam at the proper levelling
position, or headlights may dazzle
other road users.Listed below are the examples of
proper switch settings. For loading
conditions other than those listed
below, adjust the switch position so
that the beam level may be the near-
est as the condition obtained accord-
ing to the list.
Automatic type
It automatically adjusts the headlight
beam level according to the number
of passengers and loading weight in
the luggage area.
And it offers proper headlight beam
under various conditions.
ODMECO2017R
Loading condition Switch position
Driver only 0
Driver + Front passenger 0
Full passengers
(including driver)1
Full passengers (including
driver) + Maximum permis-
sible loading2
Driver + Maximum permis-
sible loading 3
WARNING
If it does not work properly even
though your car is inclined
backward according to passen-
ger's posture, or the headlight
beam is irradiated to the high or
low position, we recommend
that you have your vehicle
inspected by a HYUNDAI autho-
rised repairer.
Do not attempt to inspect or
replace the wiring yourself.
Page 665 of 699
Maintenance
68 7
5. Install the new bulb-socket into the
housing by aligning the tabs on
the socket with the slots in the
housing. Push the socket into the
housing and turn the socket clock-
wise.
6. Connect the power connector to
the socket.
7. Reinstall the front bumper under
cover.Headlamp (HID type), position
(LED), turn signal, and front fog
lamp bulb, daytime running,
cornering lamp replacement
If the light bulb does not operate, we
recommend that the system be
checked by a HYUNDAI authorised
repairer.
✽NOTICE
HID lamps have superior perform-
ance vs. halogen bulbs. HID lamps
are estimated by the manufacturer
to last twice as long or longer than
halogen bulbs depending on their
frequency of use. They will probably
require replacement at some point
in the life of the vehicle. Cycling the
headlamps on and off more than
typical use will shorten HID lamps
life. HID lamps do not fail in the
same manner as halogen incandes-
cent lamps. If a headlamp goes out
after a period of operation but will
immediately relight when the head-
lamp switch is cycled it is likely the
HID lamp needs to be replaced. HID
lighting components are more com-
plex than conventional halogen
bulbs thus have higher replacement
cost.
WARNING - HID
Headlamp low beam
(if equipped)
Do not attempt to replace or
inspect the low beam (XENON
bulb) due to electric shock dan-
ger. If the low beam (XENON
bulb) is not working, if the light
bulb does not operate, we rec-
ommend that the system be
checked by a HYUNDAI autho-
rised repairer.
Page 666 of 699
769
Maintenance
Headlight and front fog light
aiming (for Europe)
Headlight aiming
Without AFLS
1. Inflate the tyres to the specified
pressure and remove any loads
from the vehicle except the driver,
spare tyre, and tools.
2. The vehicle should be placed on a
flat floor.
3. Draw vertical lines (Vertical lines
passing through respective head
lamp centres) and a horizontal line
(Horizontal line passing through
centre of head lamps) on the
screen.4. With the head lamp and battery in
normal condition, aim the head
lamps so the brightest portion falls
on the horizontal and vertical
lines.
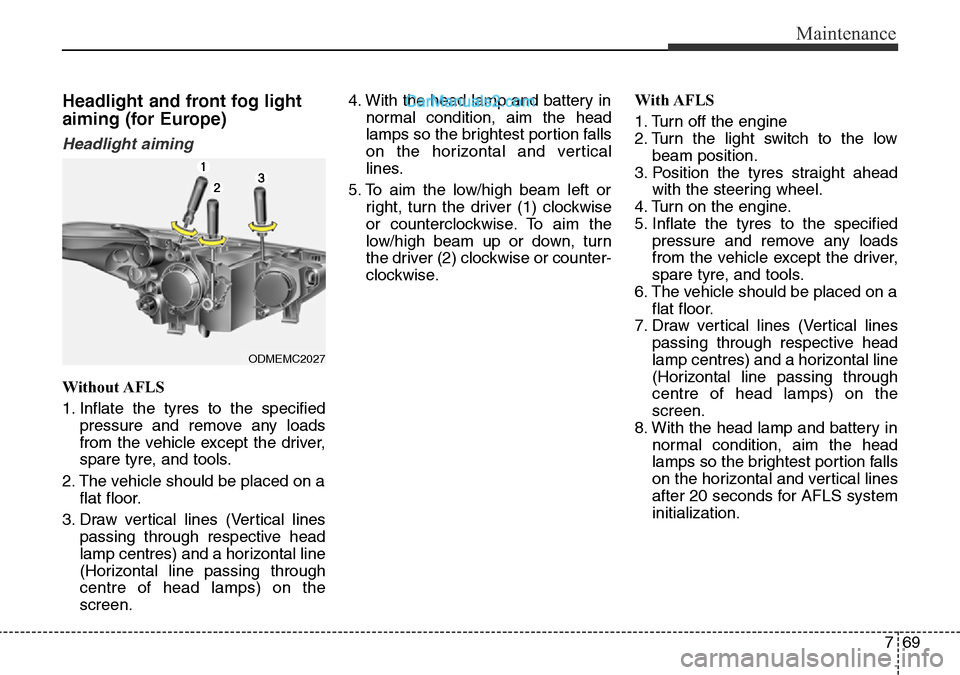
5. To aim the low/high beam left or
right, turn the driver (1) clockwise
or counterclockwise. To aim the
low/high beam up or down, turn
the driver (2) clockwise or counter-
clockwise.With AFLS
1. Turn off the engine
2. Turn the light switch to the low
beam position.
3. Position the tyres straight ahead
with the steering wheel.
4. Turn on the engine.
5. Inflate the tyres to the specified
pressure and remove any loads
from the vehicle except the driver,
spare tyre, and tools.
6. The vehicle should be placed on a
flat floor.
7. Draw vertical lines (Vertical lines
passing through respective head
lamp centres) and a horizontal line
(Horizontal line passing through
centre of head lamps) on the
screen.
8. With the head lamp and battery in
normal condition, aim the head
lamps so the brightest portion falls
on the horizontal and vertical lines
after 20 seconds for AFLS system
initialization.
ODMEMC2027
Page 667 of 699
Maintenance
70 7
9. To aim the low beam left or right,
turn the driver (1) clockwise or
counterclockwise. To aim the low
beam up or down, turn the driver
(2) clockwise or counterclockwise.
To aim the high beam up or down,
turn the driver (3) clockwise or
counterclockwise.Front fog light aiming
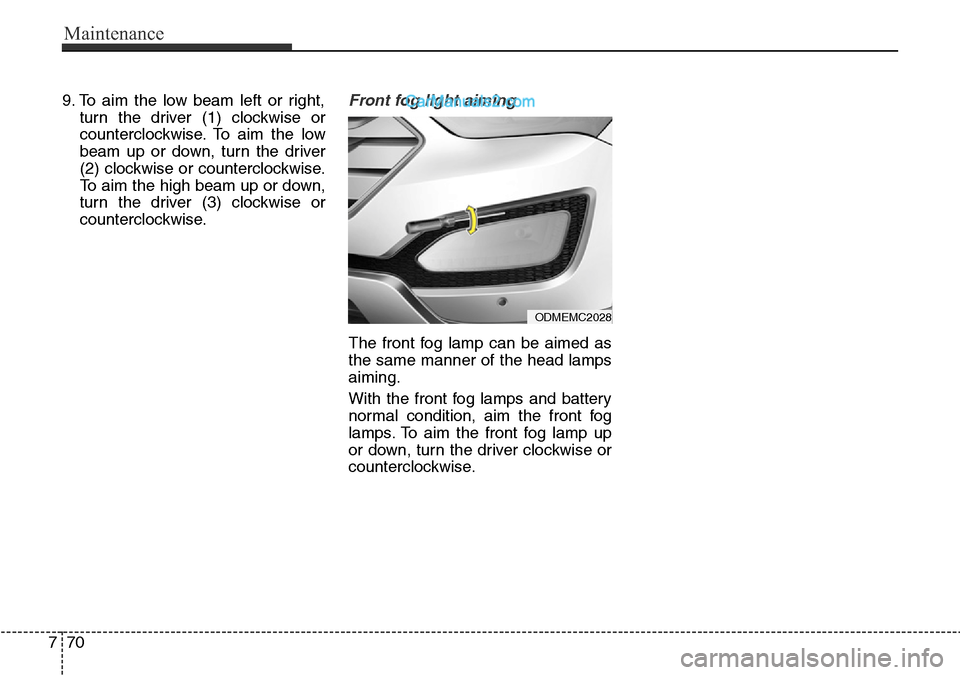
The front fog lamp can be aimed as
the same manner of the head lamps
aiming.
With the front fog lamps and battery
normal condition, aim the front fog
lamps. To aim the front fog lamp up
or down, turn the driver clockwise or
counterclockwise.
ODMEMC2028