Page 123 of 550
Features of your vehicle38
4omfort modeThe steering wheel becomes lighter. The
comfort mode is usually used when driv-
ing in downtown or parking the vehicle.
Also, the comfort mode helps weak peo-
ple to drive easily.
Sport modeThe steering wheel becomes heavier.
The sport mode is usually used when
driving in highway.
OLM043355
OLM043356
CAUTION
For your safety, if you press the
steering mode button whilst oper-ating the steering wheel, the LCDdisplay will change, but the steer-ing effort will not change immedi- ately. After operating the steeringwheel, the steering effort will change automatically to theselected mode.
Be careful when changing the steering mode whilst driving.
When the electronic power steer- ing is not working properly, theflex steering wheel will not work.
EL(FL) UK 4A.QXP 2/9/2015 9:04 PM Page 38
Page 124 of 550

439
Features of your vehicle
Inside rearview mirrorAdjust the rearview mirror to centre on
the view through the rear window. Make
this adjustment before you start driving.
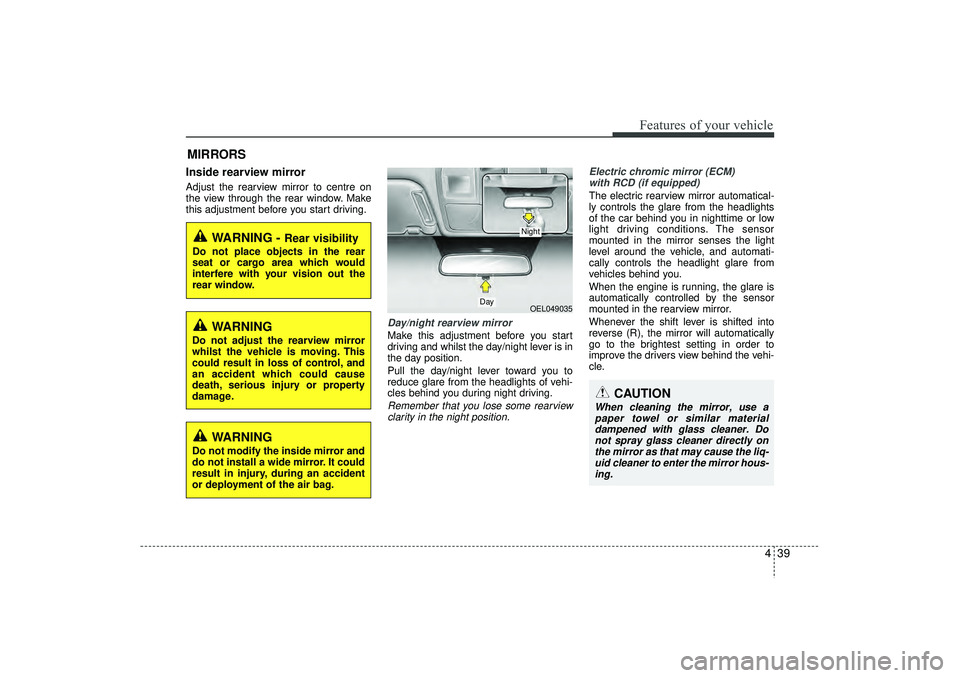
Day/night rearview mirror Make this adjustment before you start
driving and whilst the day/night lever is in
the day position.
Pull the day/night lever toward you to
reduce glare from the headlights of vehi-
cles behind you during night driving.Remember that you lose some rearviewclarity in the night position. Electric chromic mirror (ECM)
with RCD (if equipped)
The electric rearview mirror automatical-
ly controls the glare from the headlights
of the car behind you in nighttime or low
light driving conditions. The sensor
mounted in the mirror senses the light
level around the vehicle, and automati-
cally controls the headlight glare from
vehicles behind you.
When the engine is running, the glare is
automatically controlled by the sensor
mounted in the rearview mirror.
Whenever the shift lever is shifted into
reverse (R), the mirror will automatically
go to the brightest setting in order to
improve the drivers view behind the vehi-
cle.
MIRRORS
WARNING -
Rear visibility
Do not place objects in the rear
seat or cargo area which would
interfere with your vision out the
rear window.
OEL049035
CAUTION
When cleaning the mirror, use apaper towel or similar materialdampened with glass cleaner. Do not spray glass cleaner directly onthe mirror as that may cause the liq- uid cleaner to enter the mirror hous-ing.
Day
Night
WARNING
Do not adjust the rearview mirror
whilst the vehicle is moving. This
could result in loss of control, and
an accident which could cause
death, serious injury or property
damage.
WARNING
Do not modify the inside mirror and
do not install a wide mirror. It could
result in injury, during an accident
or deployment of the air bag.
EL(FL) UK 4A.QXP 2/9/2015 9:04 PM Page 39
Page 125 of 550

Features of your vehicle40
4To operate the electric rearview mirror
Press the ON/OFF button (1) to turn the
automatic dimming function on. The mir-
ror indicator light will illuminate.
Press the ON/OFF button to turn the
automatic dimming function off. The mir-
ror indicator light will turn off.
The mirror defaults to the ON position whenever the ignition switch is turned on.
Electric chromic mirror (ECM) withcompass1. Feature Control Button
2. Status Indicator LED
3. Rear Light Sensor
4. Display Window
Automatic dimming rear view mirror con-
trols automatically the glare of headlights
of the vehicle behind you when it turned
on by pressing and holding the button for
more than 3 but less than 6 seconds. It is
turned off by pressing and holding the
button for same time once more. 1. To operate Compass feature
Press and release the button, then the
vehicle's directional heading will be dis-
played. Pressing and releasing the button
again will turn off the display.
Heading display
- E : East
- W : West
- S : South
- N : North
ex) NE : North East
2. Calibration procedure
Press and hold the button for more than
9 but less than 12 seconds. When the
compass memory is cleared a "C" will
appear in the display.
- Driving the vehicle in a circle at less
than 5 mph (8km/h) 2 times or until the
compass heading appears.
- Driving in a circle in right-handed direc- tion and opposite direction are possible,
and if the calibration is completed, the
compass heading will appear.
- Keep driving in a circle until a compass heading appears.
OLM049036L
OEL044036
Indicator
Sensor
Rearview display
EL(FL) UK 4A.QXP 2/9/2015 9:04 PM Page 40
Page 131 of 550
Features of your vehicle46
4INSTRUMENT CLUSTER
1. Tachometer
2. Speedometer
3. Engine temperature gauge
4. Fuel gauge
5. Warning and indicator lights (if equipped)
6. Odometer/Trip computer (if equipped)
7. LCD display
OEL043308R/OEL044307R
* The actual cluster in the vehicle may differ
from the illustration.
For more details refer to the "Gauges" in
the next pages.
■
■Type A■
■Type B
EL(FL) UK 4A.QXP 2/9/2015 9:04 PM Page 46
Page 132 of 550
447
Features of your vehicle
Instrument panel illumination
(if equipped)When the vehicle’s parking lights or
headlights are on, press the illumination
control button to adjust the instrument
panel illumination intensity. The brightness of the instrument panel
illumination is displayed.
If the brightness reaches to the maxi- mum or minimum level, an alarm will
sound.
LCD Display Control (if equipped)The LCD display modes can be changed
by using the control buttons on the crash
pad.
(1) : MODE button for changing
modes
(2) : SELECT/RESET button
❈ For the LCD modes, refer to “LCD
Display” in this chapter.
OLM049052R
OEL043306/OLM043401E
■
Type A
■Type B
OEL043702/Q
WARNING
Never adjust the instrument cluster
whilst driving. This could result in
loss of control and lead to an acci-
dent that may cause death, serious
injury, or property damage.
EL(FL) UK 4A.QXP 2/9/2015 9:04 PM Page 47
Page 134 of 550
449
Features of your vehicle
Tachometer The tachometer indicates the approxi-
mate number of engine revolutions per
minute (rpm).
Use the tachometer to select the correct
shift points and to prevent lugging and/or
over-revving the engine.The tachometer pointer may move slight-
ly when the ignition switch is in ACC or
ON position with the engine OFF. This
movement is normal and will not affect
the accuracy of the tachometer once the
engine is running.
Engine temperature gauge This gauge shows the temperature of the
engine coolant when the ignition switch
is ON.
Do not continue driving with an overheat-
ed engine. If your vehicle overheats, refer
to “If the engine overheats” in section 6.
CAUTION
Do not operate the engine within
the tachometer's RED ZONE. Thismay cause severe engine damage.
OEL049311
ODMEMM2352
■ Type A■Type B
OEL049305/Q/OEL049306/Q
Diesel ■
Type B
Petrol
Diesel
■ Type A
Petrol
EL(FL) UK 4A.QXP 2/9/2015 9:04 PM Page 49
Page 135 of 550

Features of your vehicle50
4
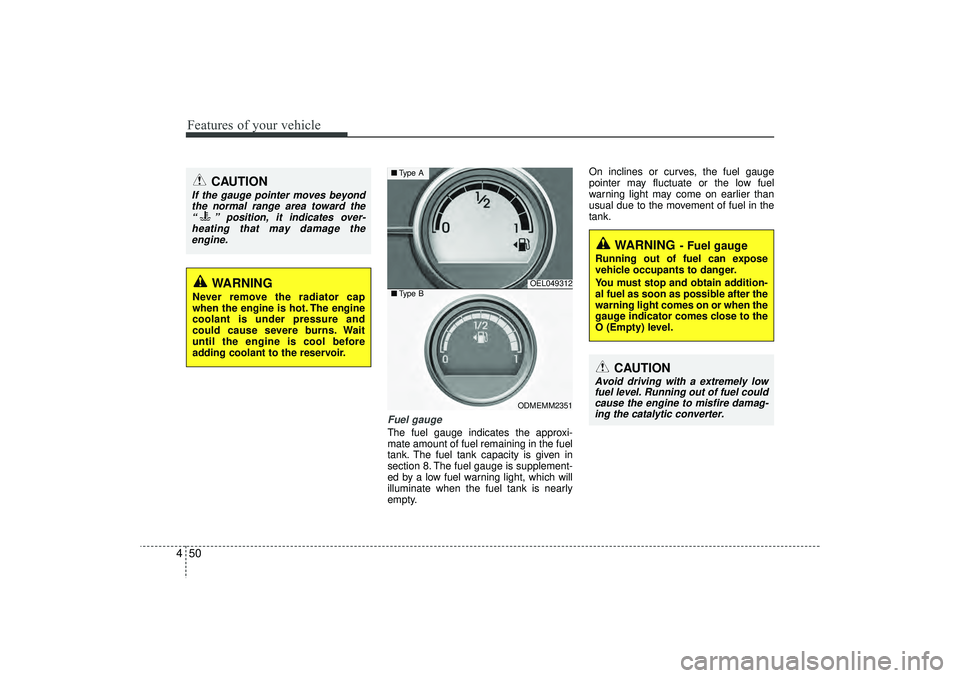
Fuel gaugeThe fuel gauge indicates the approxi-
mate amount of fuel remaining in the fuel
tank. The fuel tank capacity is given in
section 8. The fuel gauge is supplement-
ed by a low fuel warning light, which will
illuminate when the fuel tank is nearly
empty. On inclines or curves, the fuel gauge
pointer may fluctuate or the low fuel
warning light may come on earlier than
usual due to the movement of fuel in the
tank.
WARNING
Never remove the radiator cap
when the engine is hot. The engine
coolant is under pressure and
could cause severe burns. Wait
until the engine is cool before
adding coolant to the reservoir.
CAUTION
If the gauge pointer moves beyond
the normal range area toward the “ ” position, it indicates over-heating that may damage theengine.
OEL049312
ODMEMM2351
■ Type A■Type B
WARNING
- Fuel gauge
Running out of fuel can expose
vehicle occupants to danger.
You must stop and obtain addition-
al fuel as soon as possible after the
warning light comes on or when the
gauge indicator comes close to the
O (Empty) level.
CAUTION
Avoid driving with a extremely low
fuel level. Running out of fuel couldcause the engine to misfire damag-ing the catalytic converter.
EL(FL) UK 4A.QXP 2/9/2015 9:04 PM Page 50
Page 136 of 550

451
Features of your vehicle
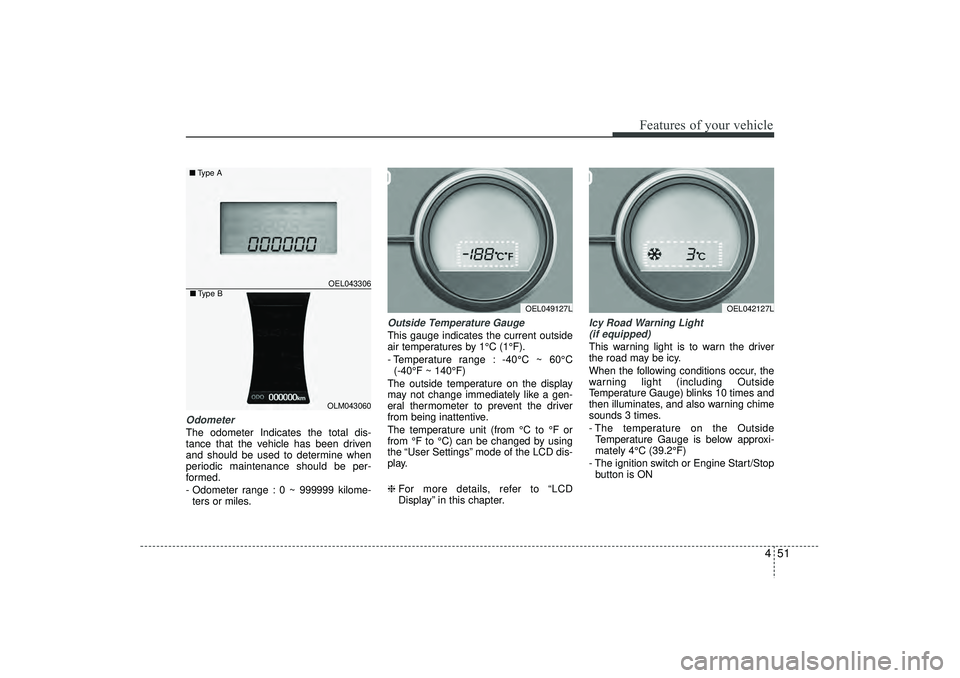
OdometerThe odometer Indicates the total dis-
tance that the vehicle has been driven
and should be used to determine when
periodic maintenance should be per-
formed.
- Odometer range : 0 ~ 999999 kilome-ters or miles.
Outside Temperature GaugeThis gauge indicates the current outside
air temperatures by 1°C (1°F).
- Temperature range : -40°C ~ 60°C (-40°F ~ 140°F)
The outside temperature on the display
may not change immediately like a gen-
eral thermometer to prevent the driver
from being inattentive.
The temperature unit (from °C to °F or
from °F to °C) can be changed by using
the “User Settings” mode of the LCD dis-
play.
❈ For more details, refer to “LCD
Display” in this chapter.
Icy Road Warning Light
(if equipped)This warning light is to warn the driver
the road may be icy.
When the following conditions occur, the
warning light (including Outside
Temperature Gauge) blinks 10 times and
then illuminates, and also warning chime
sounds 3 times.
- The temperature on the Outside Temperature Gauge is below approxi-
mately 4°C (39.2°F)
- The ignition switch or Engine Start/Stop button is ON
OEL049127L
OEL043306
■ Type A
OEL042127L
OLM043060
■Type B
EL(FL) UK 4A.QXP 2/9/2015 9:04 PM Page 51