2016 Hyundai Elantra lock
[x] Cancel search: lockPage 54 of 498

Safety features of your vehicle
36 3
Installing a child restraint system
by lap/shoulder belt
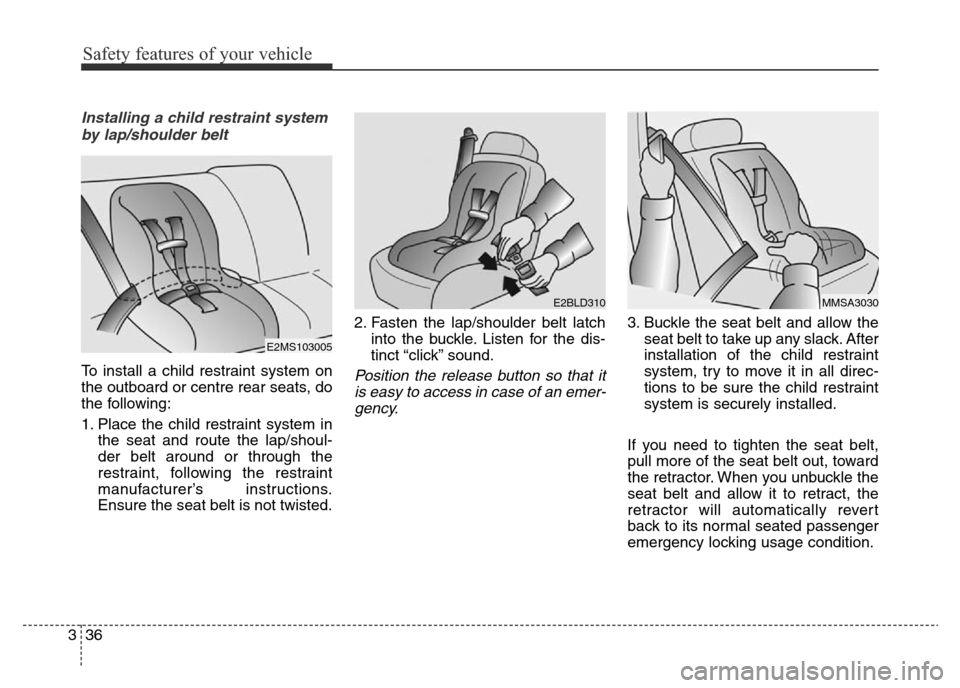
To install a child restraint system on
the outboard or centre rear seats, do
the following:
1. Place the child restraint system in
the seat and route the lap/shoul-
der belt around or through the
restraint, following the restraint
manufacturer’s instructions.
Ensure the seat belt is not twisted.2. Fasten the lap/shoulder belt latch
into the buckle. Listen for the dis-
tinct “click” sound.Position the release button so that it
is easy to access in case of an emer-
gency.
3. Buckle the seat belt and allow the
seat belt to take up any slack. After
installation of the child restraint
system, try to move it in all direc-
tions to be sure the child restraint
system is securely installed.
If you need to tighten the seat belt,
pull more of the seat belt out, toward
the retractor. When you unbuckle the
seat belt and allow it to retract, the
retractor will automatically revert
back to its normal seated passenger
emergency locking usage condition.
MMSA3030E2BLD310
E2MS103005
Page 63 of 498

345
Safety features of your vehicle
Air bag warning and indicator
Air bag warning light
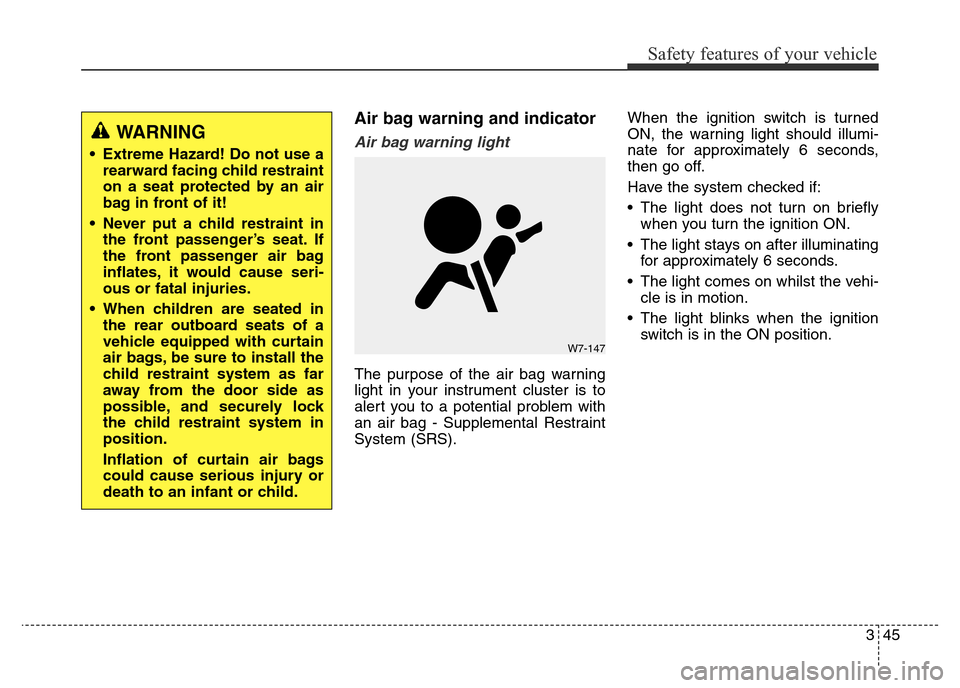
The purpose of the air bag warning
light in your instrument cluster is to
alert you to a potential problem with
an air bag - Supplemental Restraint
System (SRS).When the ignition switch is turned
ON, the warning light should illumi-
nate for approximately 6 seconds,
then go off.
Have the system checked if:
• The light does not turn on briefly
when you turn the ignition ON.
• The light stays on after illuminating
for approximately 6 seconds.
• The light comes on whilst the vehi-
cle is in motion.
• The light blinks when the ignition
switch is in the ON position.
WARNING
• Extreme Hazard! Do not use a
rearward facing child restraint
on a seat protected by an air
bag in front of it!
• Never put a child restraint in
the front passenger’s seat. If
the front passenger air bag
inflates, it would cause seri-
ous or fatal injuries.
• When children are seated in
the rear outboard seats of a
vehicle equipped with curtain
air bags, be sure to install the
child restraint system as far
away from the door side as
possible, and securely lock
the child restraint system in
position.
Inflation of curtain air bags
could cause serious injury or
death to an infant or child.
W7-147
Page 67 of 498

349
Safety features of your vehicle
Driver's and passenger's front air
bag (if equipped)
Your vehicle is equipped with a
Supplemental Restraint (Air Bag)
System and lap/shoulder belts at
both the driver and passenger seat-
ing positions.The indications of the system's pres-
ence are the letters "AIR BAG"
engraved on the air bag pad cover in
the steering wheel and the passen-
ger's side front panel pad above the
glove box.
The SRS consists of air bags
installed under the pad covers in the
centre of the steering wheel and the
passenger's side front panel above
the glove box.
The purpose of the SRS is to provide
the vehicle's driver and/or the front
passenger with additional protection
than that offered by the seat belt sys-
tem alone in case of a frontal impact
of sufficient severity.
OMD031033R
OMD031034R
■Driver’s front air bag
■Passenger’s front air bag
(Continued)
• The SRS can function only
when the ignition switch is in
the ON position.
• Before you replace a fuse or
disconnect a battery terminal,
turn the ignition switch to the
LOCK position and remove
the ignition key. Never remove
or replace the air bag related
fuse(s) when the ignition
switch is in the ON position.
Failure to heed this warning
will cause the SRS air bag
warning light to illuminate.
Page 72 of 498

Safety features of your vehicle
54 3
They are designed to help protect
the heads of the front seat occupants
and the rear outboard seat occu-
pants in certain side impact colli-
sions.
The curtain air bags are designed to
deploy only during certain side
impact collisions, depending on the
crash severity, angle, speed and
impact. The curtain air bags are not
designed to deploy in all side impact
situations, collisions from the front or
rear of the vehicle or in most rollover
situations.
WARNING
• In order for side impact and
curtain air bags to provide the
best protection, both front
seat occupants and both out-
board rear occupants should
sit in an upright position with
the seat belts properly fas-
tened.
Importantly, children should
sit in a proper child restraint
system in the rear seat.
• When children are seated in
the rear outboard seats, they
must be seated in the proper
child restraint system. Ensure
the child restraint system is
placed as far away from the
door side as possible, and
secure the child restraint sys-
tem in a locked position.
(Continued)
(Continued)
• Do not allow the passengers
to lean their heads or bodies
onto doors, put their arms on
the doors, stretch their arms
out of the window, or place
objects between the doors
and passengers when they
are seated on seats equipped
with side and/or curtain air
bags.
• Never try to open or repair any
components of the side cur-
tain air bag system. We rec-
ommend that the system be
serviced by an authorised
HYUNDAI dealer.
Failure to follow the above men-
tioned instructions can result in
injury or death to the vehicle
occupants in an accident.
Page 81 of 498

Features of your vehicle
Accessing your vehicle . . . . . . . . . . . . . . . . . . . . . . . 4-3
• Remote key . . . . . . . . . . . . . . . . . . . . . . . . . . . . . . . . . . . 4-3
• Smart key . . . . . . . . . . . . . . . . . . . . . . . . . . . . . . . . . . . . 4-7
• Immobiliser system . . . . . . . . . . . . . . . . . . . . . . . . . . . 4-12
Door locks . . . . . . . . . . . . . . . . . . . . . . . . . . . . . . . . 4-13
• Outside the vehicle . . . . . . . . . . . . . . . . . . . . . . . . . . . 4-13
• Inside the vehicle . . . . . . . . . . . . . . . . . . . . . . . . . . . . . 4-14
• Auto door lock/unlock features . . . . . . . . . . . . . . . . . 4-17
• Child-protector rear door locks . . . . . . . . . . . . . . . . . 4-17
Theft-alarm system . . . . . . . . . . . . . . . . . . . . . . . . 4-19
Boot . . . . . . . . . . . . . . . . . . . . . . . . . . . . . . . . . . . . . 4-20
Windows . . . . . . . . . . . . . . . . . . . . . . . . . . . . . . . . . 4-22
• Power windows . . . . . . . . . . . . . . . . . . . . . . . . . . . . . . 4-22
• Manual windows . . . . . . . . . . . . . . . . . . . . . . . . . . . . . 4-26
Bonnet.. . . . . . . . . . . . . . . . . . . . . . . . . . . . . . . . . . . 4-27
Fuel filler door . . . . . . . . . . . . . . . . . . . . . . . . . . . . 4-29
Sunroof . . . . . . . . . . . . . . . . . . . . . . . . . . . . . . . . . . 4-32
• Sunroof opening and closing . . . . . . . . . . . . . . . . . . . 4-32
• Sliding the sunroof . . . . . . . . . . . . . . . . . . . . . . . . . . . 4-32
• Tilting the sunroof . . . . . . . . . . . . . . . . . . . . . . . . . . . . 4-33
• Sunshade . . . . . . . . . . . . . . . . . . . . . . . . . . . . . . . . . . . 4-34
• Resetting the sunroof . . . . . . . . . . . . . . . . . . . . . . . . . 4-34
Steering wheel . . . . . . . . . . . . . . . . . . . . . . . . . . . . . 4-36
• Electric power steering (EPS) . . . . . . . . . . . . . . . . . . 4-36• Tilt steering / Telescope steering . . . . . . . . . . . . . . . . 4-37
• Heated steering wheel . . . . . . . . . . . . . . . . . . . . . . . . . 4-37
• Flex steering wheel . . . . . . . . . . . . . . . . . . . . . . . . . . . 4-38
• Horn . . . . . . . . . . . . . . . . . . . . . . . . . . . . . . . . . . . . . . . 4-40
Mirrors . . . . . . . . . . . . . . . . . . . . . . . . . . . . . . . . . . 4-40
• Inside rearview mirror . . . . . . . . . . . . . . . . . . . . . . . . 4-40
• Outside rearview mirror . . . . . . . . . . . . . . . . . . . . . . . 4-43
Instrument cluster . . . . . . . . . . . . . . . . . . . . . . . . . 4-46
• Instrument cluster control . . . . . . . . . . . . . . . . . . . . . 4-47
• Gauges . . . . . . . . . . . . . . . . . . . . . . . . . . . . . . . . . . . . . 4-48
• Transaxle shift indicator . . . . . . . . . . . . . . . . . . . . . . . 4-52
• Trip computer . . . . . . . . . . . . . . . . . . . . . . . . . . . . . . . 4-53
• User settings mode. . . . . . . . . . . . . . . . . . . . . . . . . . . . 4-57
• Warning messages . . . . . . . . . . . . . . . . . . . . . . . . . . . . 4-60
• Warning and indicator lights . . . . . . . . . . . . . . . . . . . 4-66
Light. . . . . . . . . . . . . . . . . . . . . . . . . . . . . . . . . . . . . 4-78
• Exterior lights . . . . . . . . . . . . . . . . . . . . . . . . . . . . . . . 4-78
• Interior lights . . . . . . . . . . . . . . . . . . . . . . . . . . . . . . . . 4-83
Wipers and washers . . . . . . . . . . . . . . . . . . . . . . . . 4-87
• Windscreen wipers . . . . . . . . . . . . . . . . . . . . . . . . . . . 4-87
• Windscreen washers . . . . . . . . . . . . . . . . . . . . . . . . . . 4-89
Defroster . . . . . . . . . . . . . . . . . . . . . . . . . . . . . . . . . 4-91
• Rear window defroster . . . . . . . . . . . . . . . . . . . . . . . . 4-91
Manual climate control system . . . . . . . . . . . . . . . 4-93
• Heating and air conditioning . . . . . . . . . . . . . . . . . . . 4-94
4
Page 82 of 498

• System operation . . . . . . . . . . . . . . . . . . . . . . . . . . . . . 4-99
• Climate control air filter . . . . . . . . . . . . . . . . . . . . . . 4-101
• Checking the amount of air conditioner refrigerant
and compressor lubricant. . . . . . . . . . . . . . . . . . . . 4-102
Automatic climate control system. . . . . . . . . . . . 4-103
• Automatic heating and air conditioning . . . . . . . . . 4-104
• Manual heating and air conditioning . . . . . . . . . . . 4-105
• Climate control air filter . . . . . . . . . . . . . . . . . . . . . . 4-110
• Checking the amount of air conditioner refrigerant
and compressor lubricant. . . . . . . . . . . . . . . . . . . . 4-111
Windscreen defrosting and defogging . . . . . . . . . 4-112
• Manual climate control system . . . . . . . . . . . . . . . . 4-112
• Automatic climate control system . . . . . . . . . . . . . . 4-113
• Defogging logic. . . . . . . . . . . . . . . . . . . . . . . . . . . . . . 4-114
Clean air . . . . . . . . . . . . . . . . . . . . . . . . . . . . . . . . 4-117
Storage compartment. . . . . . . . . . . . . . . . . . . . . . 4-118
• Centre console storage . . . . . . . . . . . . . . . . . . . . . . . 4-118
• Sliding armrest . . . . . . . . . . . . . . . . . . . . . . . . . . . . . 4-119
• Glove box . . . . . . . . . . . . . . . . . . . . . . . . . . . . . . . . . . 4-119
• Sunglass holder . . . . . . . . . . . . . . . . . . . . . . . . . . . . . 4-120
Interior features . . . . . . . . . . . . . . . . . . . . . . . . . . 4-121
• Clock and outside temperature . . . . . . . . . . . . . . . . 4-121
• Cigarette lighter. . . . . . . . . . . . . . . . . . . . . . . . . . . . . 4-122
• Ashtray . . . . . . . . . . . . . . . . . . . . . . . . . . . . . . . . . . . . 4-123
• Cup holder . . . . . . . . . . . . . . . . . . . . . . . . . . . . . . . . . 4-123• Sunvisor . . . . . . . . . . . . . . . . . . . . . . . . . . . . . . . . . . . 4-124
• Power outlet . . . . . . . . . . . . . . . . . . . . . . . . . . . . . . . . 4-125
• Aux, USB and iPod
®port . . . . . . . . . . . . . . . . . . . . . 4-126
• Clothes hanger . . . . . . . . . . . . . . . . . . . . . . . . . . . . . . 4-126
• Floor mat anchor(s). . . . . . . . . . . . . . . . . . . . . . . . . . 4-127
• Luggage net holder . . . . . . . . . . . . . . . . . . . . . . . . . . 4-127
Audio system . . . . . . . . . . . . . . . . . . . . . . . . . . . . . 4-129
• Antenna . . . . . . . . . . . . . . . . . . . . . . . . . . . . . . . . . . . 4-129
• Steering wheel audio control . . . . . . . . . . . . . . . . . . 4-130
• How vehicle audio works . . . . . . . . . . . . . . . . . . . . . 4-131
• Caring for disc . . . . . . . . . . . . . . . . . . . . . . . . . . . . . . 4-133
• CD Player . . . . . . . . . . . . . . . . . . . . . . . . . . . . 4-140, 4-166
4
Page 83 of 498

43
Features of your vehicle
Remote key
Your HYUNDAI uses a remote key,
which you can use to lock or unlock
a door (and boot) and even start the
engine.
1. Door Lock
2. Door Unlock
3. Boot Unlock
Locking
To lock :
1. Close all doors, bonnet and boot.
2. Press the Door Lock button (1) on
the remote key.
3. The doors will lock. The hazard
warning lights will blink.
4. Make sure the doors are locked by
checking the position of the door
lock button inside the vehicle.
Unlocking
To unlock:
1. Press the Door Unlock button (2)
on the remote key.
2. The doors will unlock. The hazard
warning lights will blink two times.
✽NOTICE
After unlocking the doors, the doors
will lock automatically after 30 sec-
onds unless a door is opened.
ACCESSING YOUR VEHICLE
OHG040006LWARNING
Do not leave the keys in your
vehicle with unsupervised chil-
dren. Unattended children
could place the key in the igni-
tion switch and may operate
power windows or other con-
trols, or even make the vehicle
move, which could result in
serious injury or death.
Page 84 of 498

Features of your vehicle
4 4
Boot unlocking
To unlock:
1. Press the Boot Unlock button (3)
on the remote key for more than
one second.
2. The hazard warning lights will
blink two times. Once the boot is
opened and then closed, the boot
will lock automatically.
✽NOTICE
• After unlocking the boot, the boot
will lock automatically.
• The word "HOLD" is written on
the button to inform you that you
must press and hold the button for
more than one second.
Start-up
For detailed information refer to “Key
Ignition Switch” in chapter 5.
Mechanical key
If the remote key does not operate
normally, you can lock or unlock the
door by using the mechanical key.
CAUTION
To prevent damaging the remote
key:
• Keep the remote key away
from water or any liquid. If the
remote key is inoperative due
to exposure to water or other
liquids, it will not be covered
by your manufacturer’s vehi-
cle warranty.
• Avoid dropping or throwing
the remote key.
• Protect the remote key from
extreme temperatures.
OYDDCO2231/OYDECO2231 ■Type A■Type B
OHG040001L ■Type C