2016 Hyundai Elantra charging
[x] Cancel search: chargingPage 315 of 498
511
Driving your vehicle
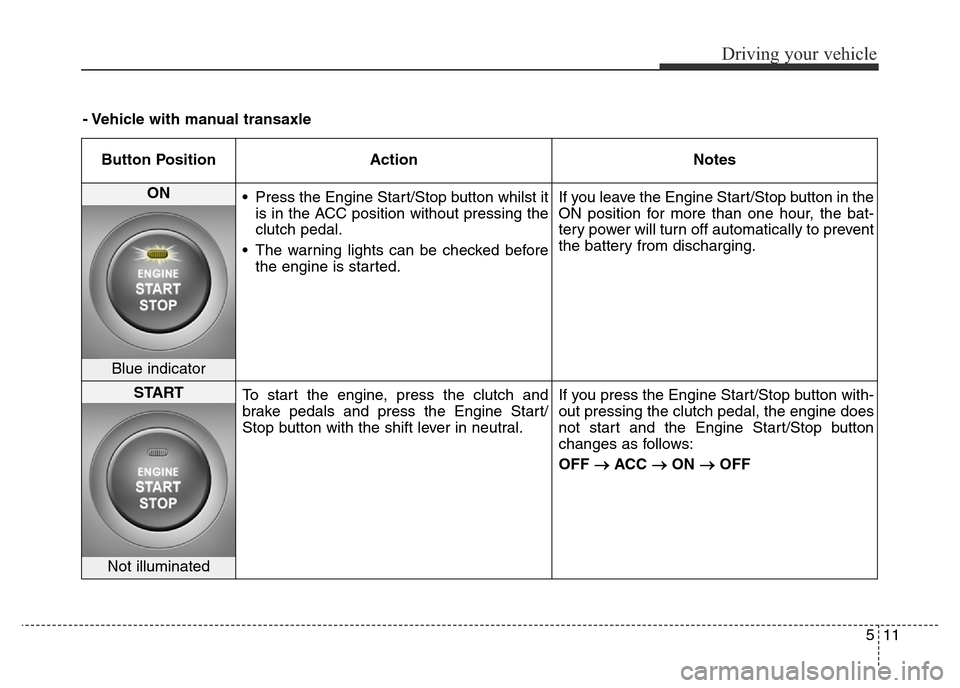
Button Position Action Notes
ON
• Press the Engine Start/Stop button whilst it
is in the ACC position without pressing the
clutch pedal.
• The warning lights can be checked before
the engine is started.If you leave the Engine Start/Stop button in the
ON position for more than one hour, the bat-
tery power will turn off automatically to prevent
the battery from discharging.
Blue indicator
START
To start the engine, press the clutch and
brake pedals and press the Engine Start/
Stop button with the shift lever in neutral.If you press the Engine Start/Stop button with-
out pressing the clutch pedal, the engine does
not start and the Engine Start/Stop button
changes as follows:
OFF
→ACC →ON →OFF
Not illuminated
- Vehicle with manual transaxle
Page 316 of 498
Driving your vehicle
12 5
Engine Stop/Start button positions
- Vehicle with automatic transaxle
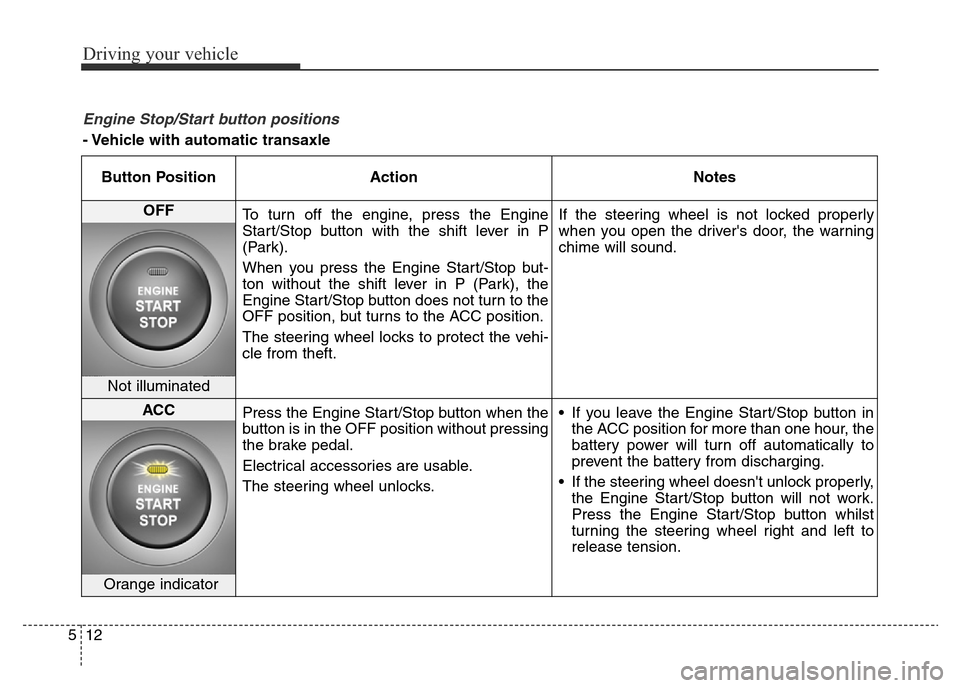
Button Position Action Notes
OFF
To turn off the engine, press the Engine
Start/Stop button with the shift lever in P
(Park).
When you press the Engine Start/Stop but-
ton without the shift lever in P (Park), the
Engine Start/Stop button does not turn to the
OFF position, but turns to the ACC position.
The steering wheel locks to protect the vehi-
cle from theft.If the steering wheel is not locked properly
when you open the driver's door, the warning
chime will sound.
Not illuminated
ACC
Press the Engine Start/Stop button when the
button is in the OFF position without pressing
the brake pedal.
Electrical accessories are usable.
The steering wheel unlocks.• If you leave the Engine Start/Stop button in
the ACC position for more than one hour, the
battery power will turn off automatically to
prevent the battery from discharging.
• If the steering wheel doesn't unlock properly,
the Engine Start/Stop button will not work.
Press the Engine Start/Stop button whilst
turning the steering wheel right and left to
release tension.
Orange indicator
Page 317 of 498
513
Driving your vehicle
- Vehicle with automatic transaxle
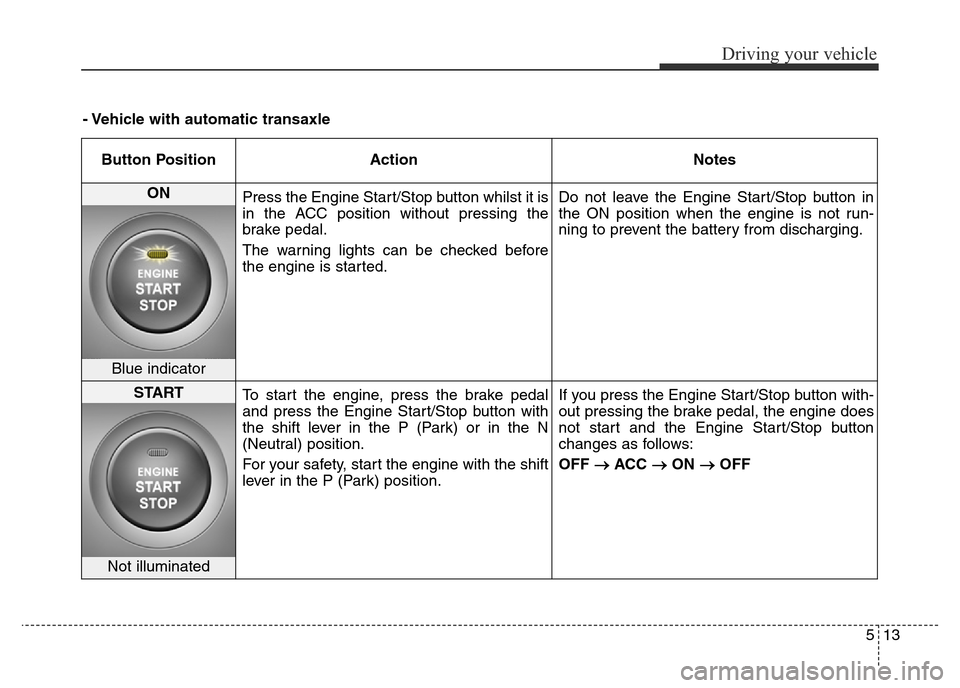
Button Position Action Notes
ON
Press the Engine Start/Stop button whilst it is
in the ACC position without pressing the
brake pedal.
The warning lights can be checked before
the engine is started.Do not leave the Engine Start/Stop button in
the ON position when the engine is not run-
ning to prevent the battery from discharging.
Blue indicator
START
To start the engine, press the brake pedal
and press the Engine Start/Stop button with
the shift lever in the P (Park) or in the N
(Neutral) position.
For your safety, start the engine with the shift
lever in the P (Park) position.If you press the Engine Start/Stop button with-
out pressing the brake pedal, the engine does
not start and the Engine Start/Stop button
changes as follows:
OFF
→ACC →ON →OFF
Not illuminated
Page 383 of 498
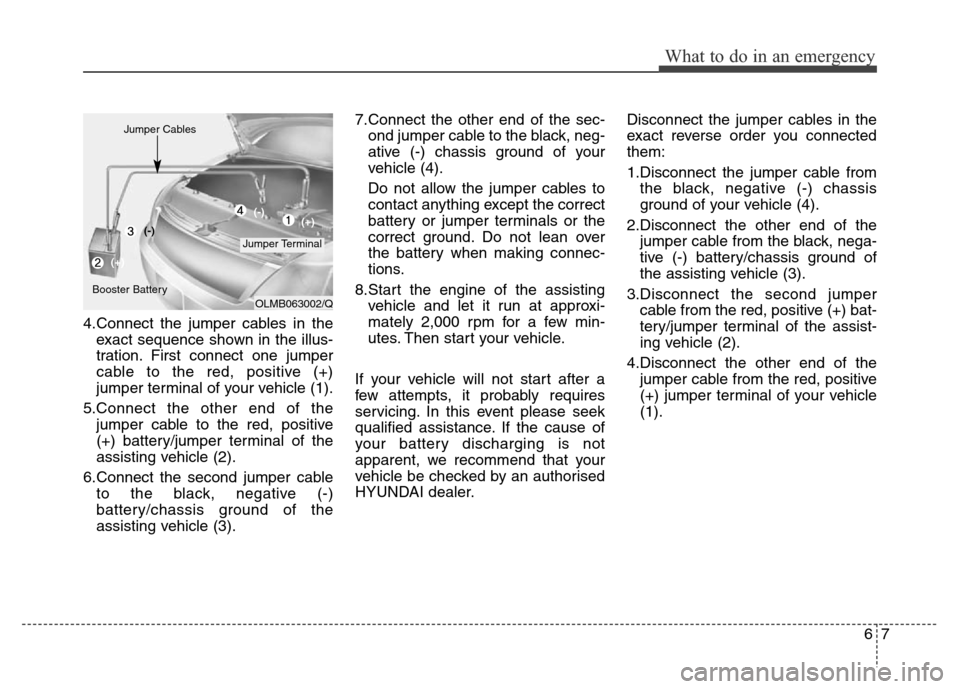
4.Connect the jumper cables in the
exact sequence shown in the illus-
tration. First connect one jumper
cable to the red, positive (+)
jumper terminal of your vehicle (1).
5.Connect the other end of the
jumper cable to the red, positive
(+) battery/jumper terminal of the
assisting vehicle (2).
6.Connect the second jumper cable
to the black, negative (-)
battery/chassis ground of the
assisting vehicle (3).7.Connect the other end of the sec-
ond jumper cable to the black, neg-
ative (-) chassis ground of your
vehicle (4).
Do not allow the jumper cables to
contact anything except the correct
battery or jumper terminals or the
correct ground. Do not lean over
the battery when making connec-
tions.
8.Start the engine of the assisting
vehicle and let it run at approxi-
mately 2,000 rpm for a few min-
utes. Then start your vehicle.
If your vehicle will not start after a
few attempts, it probably requires
servicing. In this event please seek
qualified assistance. If the cause of
your battery discharging is not
apparent, we recommend that your
vehicle be checked by an authorised
HYUNDAI dealer.Disconnect the jumper cables in the
exact reverse order you connected
them:
1.Disconnect the jumper cable from
the black, negative (-) chassis
ground of your vehicle (4).
2.Disconnect the other end of the
jumper cable from the black, nega-
tive (-) battery/chassis ground of
the assisting vehicle (3).
3.Disconnect the second jumper
cable from the red, positive (+) bat-
tery/jumper terminal of the assist-
ing vehicle (2).
4.Disconnect the other end of the
jumper cable from the red, positive
(+) jumper terminal of your vehicle
(1).
67
What to do in an emergency
OLMB063002/Q
Jumper Terminal Jumper Cables
Booster Battery(-)
(+)(+) (-)
Page 396 of 498
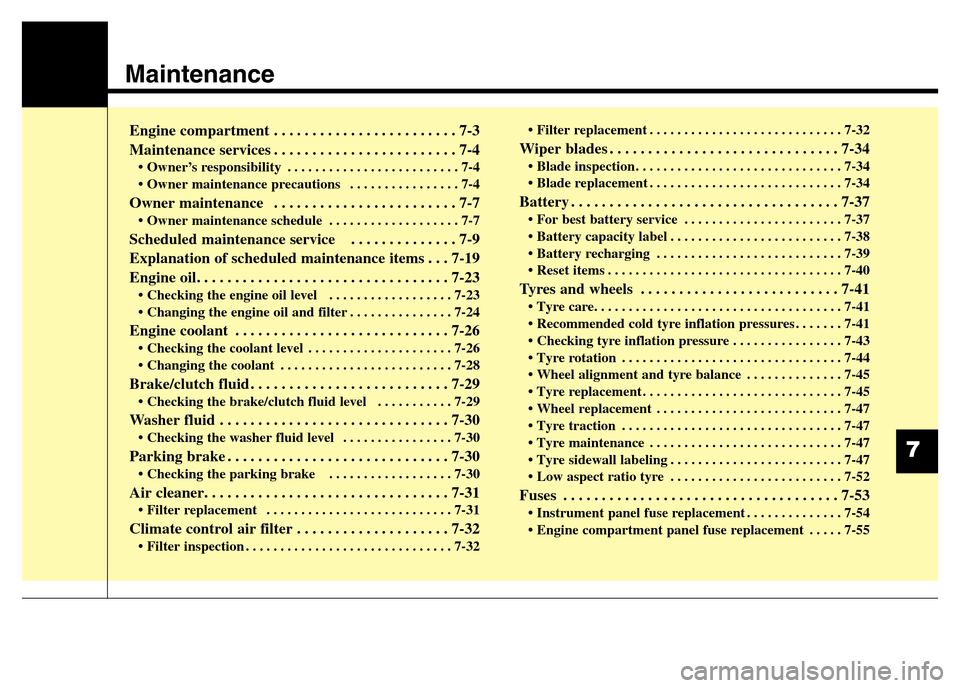
Maintenance
Engine compartment . . . . . . . . . . . . . . . . . . . . . . . . 7-3
Maintenance services . . . . . . . . . . . . . . . . . . . . . . . . 7-4
• Owner’s responsibility . . . . . . . . . . . . . . . . . . . . . . . . . 7-4
• Owner maintenance precautions . . . . . . . . . . . . . . . . 7-4
Owner maintenance . . . . . . . . . . . . . . . . . . . . . . . . 7-7
• Owner maintenance schedule . . . . . . . . . . . . . . . . . . . 7-7
Scheduled maintenance service . . . . . . . . . . . . . . 7-9
Explanation of scheduled maintenance items . . . 7-19
Engine oil. . . . . . . . . . . . . . . . . . . . . . . . . . . . . . . . . 7-23
• Checking the engine oil level . . . . . . . . . . . . . . . . . . 7-23
• Changing the engine oil and filter . . . . . . . . . . . . . . . 7-24
Engine coolant . . . . . . . . . . . . . . . . . . . . . . . . . . . . 7-26
• Checking the coolant level . . . . . . . . . . . . . . . . . . . . . 7-26
• Changing the coolant . . . . . . . . . . . . . . . . . . . . . . . . . 7-28
Brake/clutch fluid . . . . . . . . . . . . . . . . . . . . . . . . . . 7-29
• Checking the brake/clutch fluid level . . . . . . . . . . . 7-29
Washer fluid . . . . . . . . . . . . . . . . . . . . . . . . . . . . . . 7-30
• Checking the washer fluid level . . . . . . . . . . . . . . . . 7-30
Parking brake . . . . . . . . . . . . . . . . . . . . . . . . . . . . . 7-30
• Checking the parking brake . . . . . . . . . . . . . . . . . . 7-30
Air cleaner. . . . . . . . . . . . . . . . . . . . . . . . . . . . . . . . 7-31
• Filter replacement . . . . . . . . . . . . . . . . . . . . . . . . . . . 7-31
Climate control air filter . . . . . . . . . . . . . . . . . . . . 7-32
• Filter inspection . . . . . . . . . . . . . . . . . . . . . . . . . . . . . . 7-32• Filter replacement . . . . . . . . . . . . . . . . . . . . . . . . . . . . 7-32
Wiper blades . . . . . . . . . . . . . . . . . . . . . . . . . . . . . . 7-34
• Blade inspection . . . . . . . . . . . . . . . . . . . . . . . . . . . . . . 7-34
• Blade replacement . . . . . . . . . . . . . . . . . . . . . . . . . . . . 7-34
Battery . . . . . . . . . . . . . . . . . . . . . . . . . . . . . . . . . . . 7-37
• For best battery service . . . . . . . . . . . . . . . . . . . . . . . 7-37
• Battery capacity label . . . . . . . . . . . . . . . . . . . . . . . . . 7-38
• Battery recharging . . . . . . . . . . . . . . . . . . . . . . . . . . . 7-39
• Reset items . . . . . . . . . . . . . . . . . . . . . . . . . . . . . . . . . . 7-40
Tyres and wheels . . . . . . . . . . . . . . . . . . . . . . . . . . 7-41
• Tyre care. . . . . . . . . . . . . . . . . . . . . . . . . . . . . . . . . . . . 7-41
• Recommended cold tyre inflation pressures . . . . . . . 7-41
• Checking tyre inflation pressure . . . . . . . . . . . . . . . . 7-43
• Tyre rotation . . . . . . . . . . . . . . . . . . . . . . . . . . . . . . . . 7-44
• Wheel alignment and tyre balance . . . . . . . . . . . . . . 7-45
• Tyre replacement . . . . . . . . . . . . . . . . . . . . . . . . . . . . . 7-45
• Wheel replacement . . . . . . . . . . . . . . . . . . . . . . . . . . . 7-47
• Tyre traction . . . . . . . . . . . . . . . . . . . . . . . . . . . . . . . . 7-47
• Tyre maintenance . . . . . . . . . . . . . . . . . . . . . . . . . . . . 7-47
• Tyre sidewall labeling . . . . . . . . . . . . . . . . . . . . . . . . . 7-47
• Low aspect ratio tyre . . . . . . . . . . . . . . . . . . . . . . . . . 7-52
Fuses . . . . . . . . . . . . . . . . . . . . . . . . . . . . . . . . . . . . 7-53
• Instrument panel fuse replacement . . . . . . . . . . . . . . 7-54
• Engine compartment panel fuse replacement . . . . . 7-55
7
Page 432 of 498
737
Maintenance
BATTERY
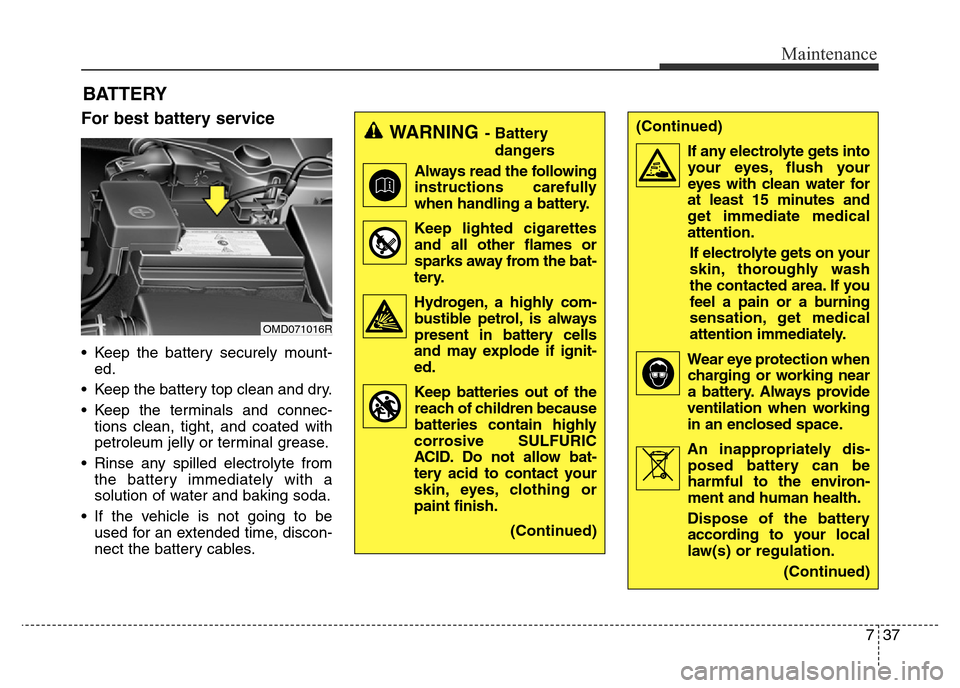
For best battery service
• Keep the battery securely mount-
ed.
• Keep the battery top clean and dry.
• Keep the terminals and connec-
tions clean, tight, and coated with
petroleum jelly or terminal grease.
• Rinse any spilled electrolyte from
the battery immediately with a
solution of water and baking soda.
• If the vehicle is not going to be
used for an extended time, discon-
nect the battery cables.
WARNING- Battery
dangers
Always read the following
instructions carefully
when handling a battery.
Keep lighted cigarettes
and all other flames or
sparks away from the bat-
tery.
Hydrogen, a highly com-
bustible petrol, is always
present in battery cells
and may explode if ignit-
ed.
Keep batteries out of the
reach of children because
batteries contain highly
corrosive SULFURIC
ACID. Do not allow bat-
tery acid to contact your
skin, eyes, clothing or
paint finish.
(Continued)
OMD071016R
(Continued)
If any electrolyte gets into
your eyes, flush your
eyes with clean water for
at least 15 minutes and
get immediate medical
attention.
If electrolyte gets on your
skin, thoroughly wash
the contacted area. If you
feel a pain or a burning
sensation, get medical
attention immediately.
Wear eye protection when
charging or working near
a battery. Always provide
ventilation when working
in an enclosed space.
An inappropriately dis-
posed battery can be
harmful to the environ-
ment and human health.
Dispose of the battery
according to your local
law(s) or regulation.
(Continued)
Page 434 of 498
739
Maintenance
Battery recharging
Your vehicle has a maintenance-free,
calcium-based battery.
• If the battery becomes discharged
in a short time (because, for exam-
ple, the headlights or interior lights
were left on whilst the vehicle was
not in use), recharge it by slow
charging (trickle) for 10 hours.
• If the battery gradually discharges
because of high electric load whilst
the vehicle is being used, recharge
it at 20-30A for two hours.WARNING- Recharging
battery
When recharging the battery,
observe the following precau-
tions:
• The battery must be removed
from the vehicle and placed in
an area with good ventilation.
• Do not allow cigarettes,
sparks, or flames near the bat-
tery.
• Watch the battery during
charging, and stop or reduce
the charging rate if the battery
cells begin gassing (boiling)
violently or if the temperature
of the electrolyte of any cell
exceeds 49°C.
• Wear eye protection when
checking the battery during
charging.
(Continued)(Continued)
• Disconnect the battery charg-
er in the following order.
1. Turn off the battery charger
main switch.
2. Unhook the negative clamp
from the negative battery ter-
minal.
3. Unhook the positive clamp
from the positive battery ter-
minal.
Page 435 of 498

Maintenance
40 7
Reset items
Items should be reset after the bat-
tery has been discharged or the bat-
tery has been disconnected.
• Auto up/down window (See sec-
tion 4)
• Sunroof (See section 4)
• Trip computer (See section 4)
• Climate control system
(See section 4)
• Clock (See section 4)
• Audio (See section 4)WARNING
• Before performing mainte-
nance or recharging the bat-
tery, turn off all accessories
and stop the engine.
• The negative battery cable
must be removed first and
installed last when the battery
is disconnected.