Page 156 of 498

Features of your vehicle
76 4
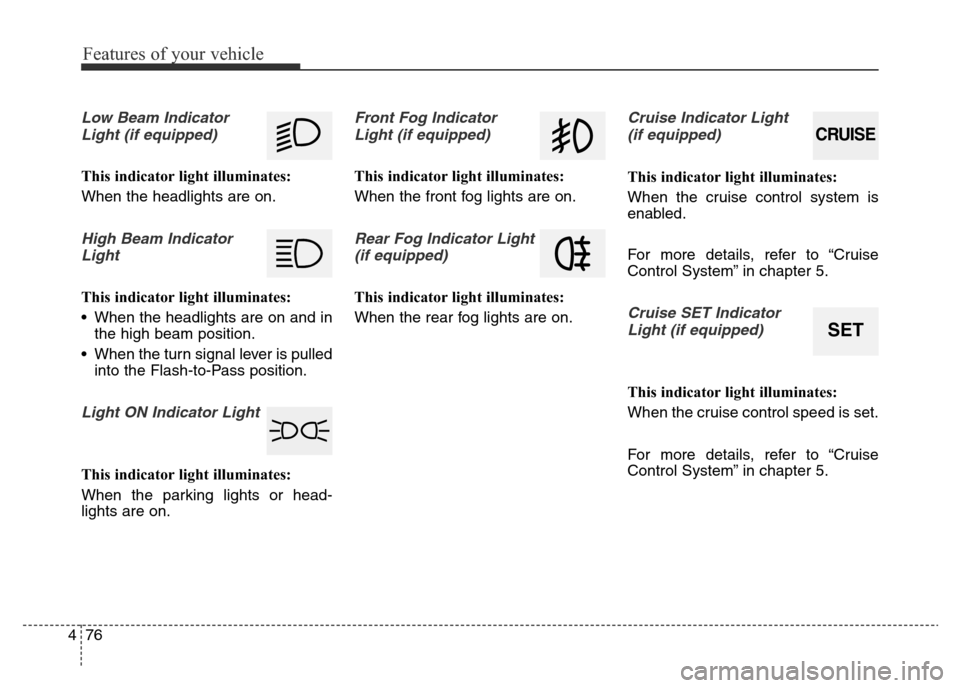
Low Beam Indicator
Light (if equipped)
This indicator light illuminates:
When the headlights are on.
High Beam Indicator
Light
This indicator light illuminates:
• When the headlights are on and in
the high beam position.
• When the turn signal lever is pulled
into the Flash-to-Pass position.
Light ON Indicator Light
This indicator light illuminates:
When the parking lights or head-
lights are on.
Front Fog Indicator
Light (if equipped)
This indicator light illuminates:
When the front fog lights are on.
Rear Fog Indicator Light
(if equipped)
This indicator light illuminates:
When the rear fog lights are on.
Cruise Indicator Light
(if equipped)
This indicator light illuminates:
When the cruise control system is
enabled.
For more details, refer to “Cruise
Control System” in chapter 5.
Cruise SET Indicator
Light (if equipped)
This indicator light illuminates:
When the cruise control speed is set.
For more details, refer to “Cruise
Control System” in chapter 5.
CRUISE
SET
Page 159 of 498

479
Features of your vehicle
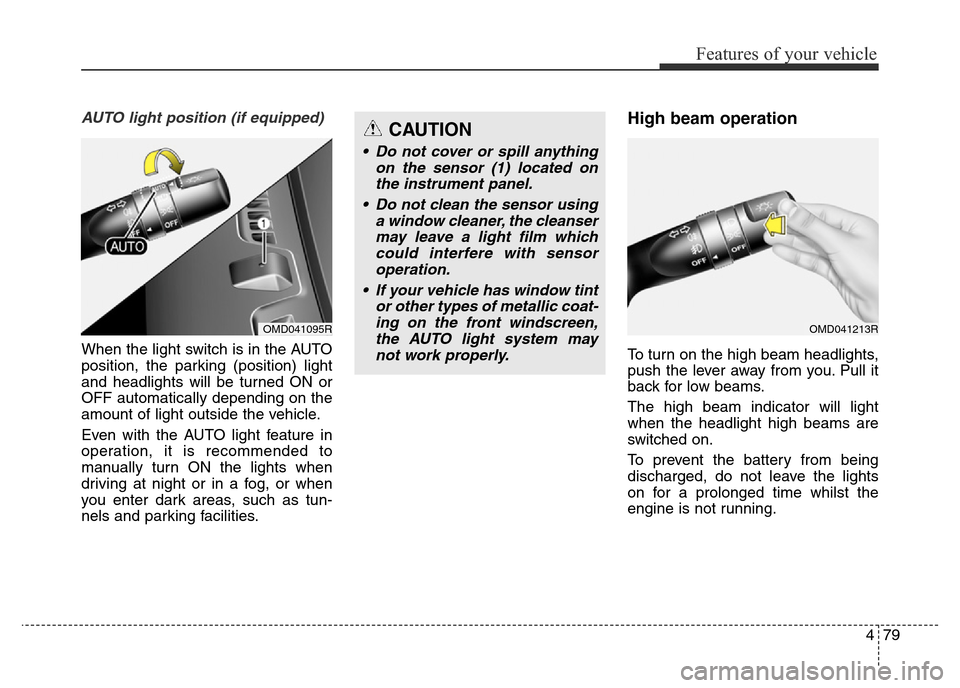
AUTO light position (if equipped)
When the light switch is in the AUTO
position, the parking (position) light
and headlights will be turned ON or
OFF automatically depending on the
amount of light outside the vehicle.
Even with the AUTO light feature in
operation, it is recommended to
manually turn ON the lights when
driving at night or in a fog, or when
you enter dark areas, such as tun-
nels and parking facilities.
High beam operation
To turn on the high beam headlights,
push the lever away from you. Pull it
back for low beams.
The high beam indicator will light
when the headlight high beams are
switched on.
To prevent the battery from being
discharged, do not leave the lights
on for a prolonged time whilst the
engine is not running.
CAUTION
• Do not cover or spill anything
on the sensor (1) located on
the instrument panel.
• Do not clean the sensor using
a window cleaner, the cleanser
may leave a light film which
could interfere with sensor
operation.
• If your vehicle has window tint
or other types of metallic coat-
ing on the front windscreen,
the AUTO light system may
not work properly.
OMD041095ROMD041213R
Page 463 of 498

Maintenance
68 7
Headlight (Low, HID type)
If the light bulb does not operate, we
recommend that the system be
checked by an authorised HYUNDAI
dealer.(Continued)
• Always handle them carefully,
and avoid scratches and abra-
sions. If the bulbs are lit, avoid
contact with liquids. Never
touch the glass with bare
hands. Residual oil may cause
the bulb to overheat and burst
when lit. A bulb should be
operated only when installed
in a headlight.
• If a bulb becomes damaged or
cracked, replace it immediate-
ly and carefully dispose of it.
• Wear eye protection when
changing a bulb. Allow the
bulb to cool down before han-
dling it.
WARNING- Halogen bulbs
• Halogen bulbs contain pres-
surised petrol that will pro-
duce flying pieces of glass if
broken.
(Continued)
OHD076046
WARNING - HID Headlight
low beam (if equipped)
Do not attempt to replace or
inspect the low beam (XENON
bulb) due to electric shock dan-
ger. If the low beam (XENON
bulb) is not working, we recom-
mend that the system be
checked by an authorised
HYUNDAI dealer.
Page 465 of 498

Maintenance
70 7
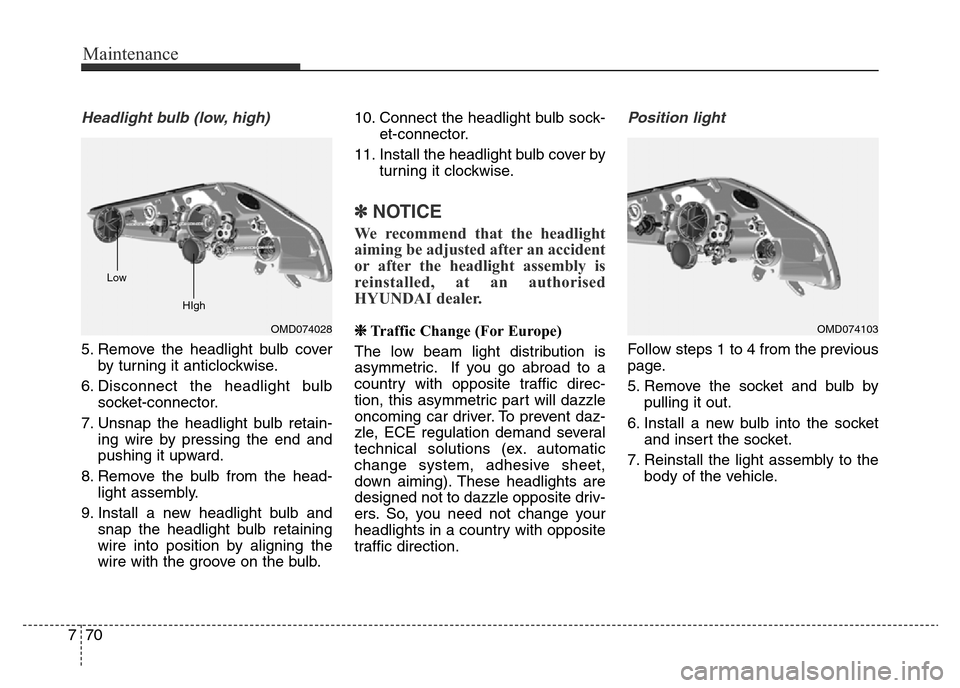
Headlight bulb (low, high)
5. Remove the headlight bulb cover
by turning it anticlockwise.
6. Disconnect the headlight bulb
socket-connector.
7. Unsnap the headlight bulb retain-
ing wire by pressing the end and
pushing it upward.
8. Remove the bulb from the head-
light assembly.
9. Install a new headlight bulb and
snap the headlight bulb retaining
wire into position by aligning the
wire with the groove on the bulb.10. Connect the headlight bulb sock-
et-connector.
11. Install the headlight bulb cover by
turning it clockwise.
✽NOTICE
We recommend that the headlight
aiming be adjusted after an accident
or after the headlight assembly is
reinstalled, at an authorised
HYUNDAI dealer.
❈Traffic Change (For Europe)
The low beam light distribution is
asymmetric. If you go abroad to a
country with opposite traffic direc-
tion, this asymmetric part will dazzle
oncoming car driver. To prevent daz-
zle, ECE regulation demand several
technical solutions (ex. automatic
change system, adhesive sheet,
down aiming). These headlights are
designed not to dazzle opposite driv-
ers. So, you need not change your
headlights in a country with opposite
traffic direction.
Position light
Follow steps 1 to 4 from the previous
page.
5. Remove the socket and bulb by
pulling it out.
6. Install a new bulb into the socket
and insert the socket.
7. Reinstall the light assembly to the
body of the vehicle.
OMD074103OMD074028 Low
HIgh
Page 468 of 498
773
Maintenance
4.With the headlight and battery in
normal condition, aim the head-
lights so the brightest portion falls
on the horizontal and vertical lines.
5.To aim the low beam left or right,
turn the driver clockwise or anti-
clockwise. To aim the low beam up
or down, turn the driver clockwise
or anticlockwise.
To aim the high beam up or down,
turn the driver clockwise or anti-
clockwise.Front fog light aiming
The front fog light can be aimed as
the same manner of the headlights
aiming.
With the front fog lights and battery
normal condition, aim the front fog
lights.
To aim the front fog light up or down,
turn the driver clockwise or anticlock-
wise.
OMD074061L
Page 469 of 498
Maintenance
74 7
Vehicle
ConditionH1 H2H3
W1 W2W3
With DRL*Without
DRL*With DRL*Without
DRL*
Without driverMFR 706 (27.8) 659 (25.9)
396 (15.6)
404 (15.9)1,318 (51.9)
1,076 (42.4)1480 (58.3) 1480 (58.3) PROJ. 703 (27.7) 660 (26) 1,314 (51.7)
HID 703 (27.7) 660 (26) 1,314 (51.7)
With driverMFR 699 (27.5) 652 (25.7)
389 (15.3)
397 (15.6)1,318 (51.9)
1480 (58.3) 1480 (58.3) PROJ. 699 (27.5) 653 (25.7) 1,314 (51.7)
HID 699 (27.5) 653 (25.7) 1,314 (51.7)
DRL : Daytime Running LightUnit: mm (in)
Aiming point
H1 : Height between the headlight bulb centre and ground (Low beam)
H2 : Height between the headlight bulb centre and ground (High beam)
H3 : Height between the fog light bulb centre and ground
W1 : Distance between the two headlight bulbs centres (Low beam)
W2 : Distance between the two headlight bulbs centres (High beam)
W3 : Distance between the two fog light bulbs centres
Page 470 of 498
775
Maintenance
Headlight low beam
1. Turn the low beam lights on and perform the following, without the driver on board.
2. The cut-off line should be projected in the cut-off line shown in the picture.
3. When aiming the low beam, vertical aiming should be adjusted after adjusting the horizontal aiming.
4. Adjust the headlight levelling device (if equipped) switch to the 0 position.
OMD051055L