2016 Hyundai Azera ECU
[x] Cancel search: ECUPage 327 of 521

Driving your vehicle
22
5
AUTO HOLD deactivating. Press
brake pedal
When the conversion from Auto Hold
to EPB is not working properly a
warning will sound and a message
will appear.
WARNING
To prevent unintentional
movement when stopped and
leaving the vehicle, do not use
the shift lever in place of the
parking brake. Set the parking
brake and make sure the shift
lever is securely positioned in
P (Park).
Never allow anyone who is unfamiliar with the vehicle to
touch the parking brake. If the
parking brake is released
unintentionally, serious injury
may occur.
All vehicles should always have the parking brake fully
engaged when parking to
avoid inadvertent movement
of the car which can injure
occupants or pedestrians.
CAUTION
Depress the brake pedal whenthe above message appears, forthe Auto Hold and EPB may notactivate.
CAUTION
A click sound may be heard while operating or releasingthe EPB, but these conditionsare normal and indicate thatthe EPB is functioning proper-ly.
When leaving your keys with a parking lot attendant or valet,make sure to inform him/herhow to operate the EPB.
The EPB may malfunction if you drive with the EPBapplied.
When you automatically release EPB by depressingthe accelerator pedal, depressit slowly.
OHG045236L
■Type A■Type B
Page 391 of 521

Driving your vehicle
86
5
Certification label
The certification label is located on
the driver's door sill at the center pillar.
This label shows the maximum allow-
able weight of the fully loaded vehi-
cle. This is called the GVWR (Gross
Vehicle Weight Rating). The GVWR
includes the weight of the vehicle, all
occupants, fuel and cargo.
This label also tells you the maxi-
mum weight that can be supported
by the front and rear axles, called
Gross Axle Weight Rating (GAWR). To find out the actual loads on your
front and rear axles, you need to go to
a weigh station and weigh your vehi-
cle. Your dealer can help you with this.
Be sure to spread out your load equal-
ly on both sides of the centerline.
The label will help you decide how
much cargo and installed equipment
your vehicle can carry.
If you carry items inside your vehicle -
like suitcases, tools, packages, or
anything else - they are moving as
fast as the vehicle. If you have to stop
or turn quickly, or if there is a crash,
the items will keep going and can
cause an injury if they strike the driv-
er or a passenger.
OBH059070
WARNING - Overloading
Never exceed the GVWR for your
vehicle, the GAWR for either the
front or rear axle and vehicle
capacity weight. Exceeding
these ratings can affect your
vehicle’s handling and braking
ability, and cause an accident.
WARNING - Overloading
Do not overload your vehicle.
Overloading your vehicle can
cause heat buildup in your vehi-
cle's tires and possible tire failure,
increased stopping distances and
poor vehicle handling-all of which
may result in a crash.
CAUTION
Overloading your vehicle may cause damage. Repairs wouldnot be covered by your warranty.Do not overload your vehicle.
WARNING - Loose cargo
Do not travel with unsecured
objects in the passenger com-
partment of your vehicle (e.g.
suit cases or unsecured child
seats). These items may strike
and injure occupants during a
sudden stop or crash.
Page 407 of 521

What to do in an emergency
14
6
Do not allow anyone to remain in
the vehicle while it is on the jack.
Make sure any children present are in a secure place away from
the road and from the vehicle to be
raised with the jack.
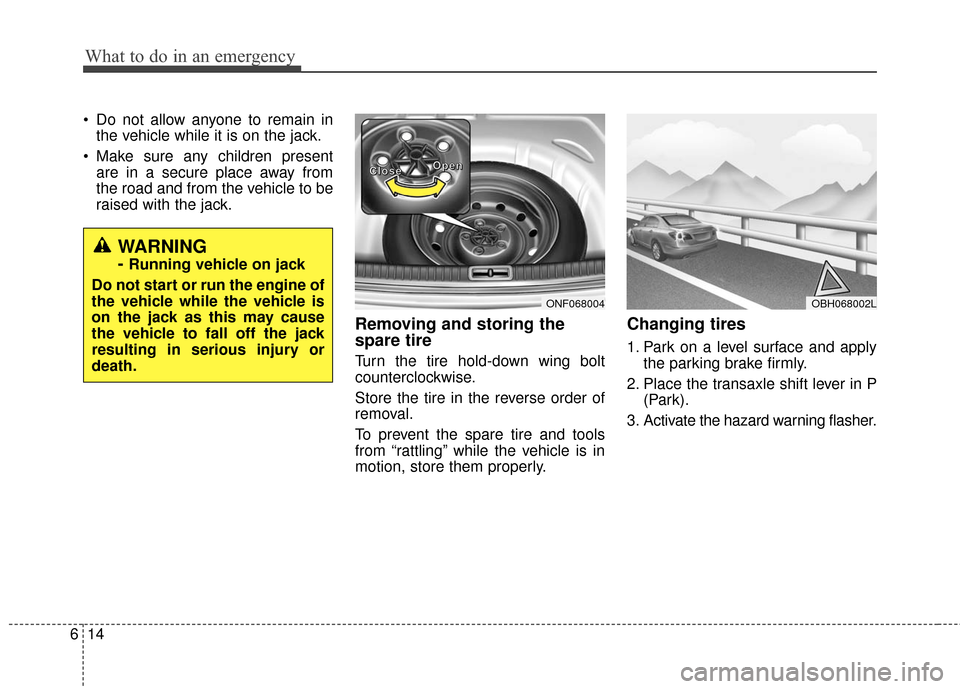
Removing and storing the
spare tire
Turn the tire hold-down wing bolt
counterclockwise.
Store the tire in the reverse order of
removal.
To prevent the spare tire and tools
from “rattling” while the vehicle is in
motion, store them properly.
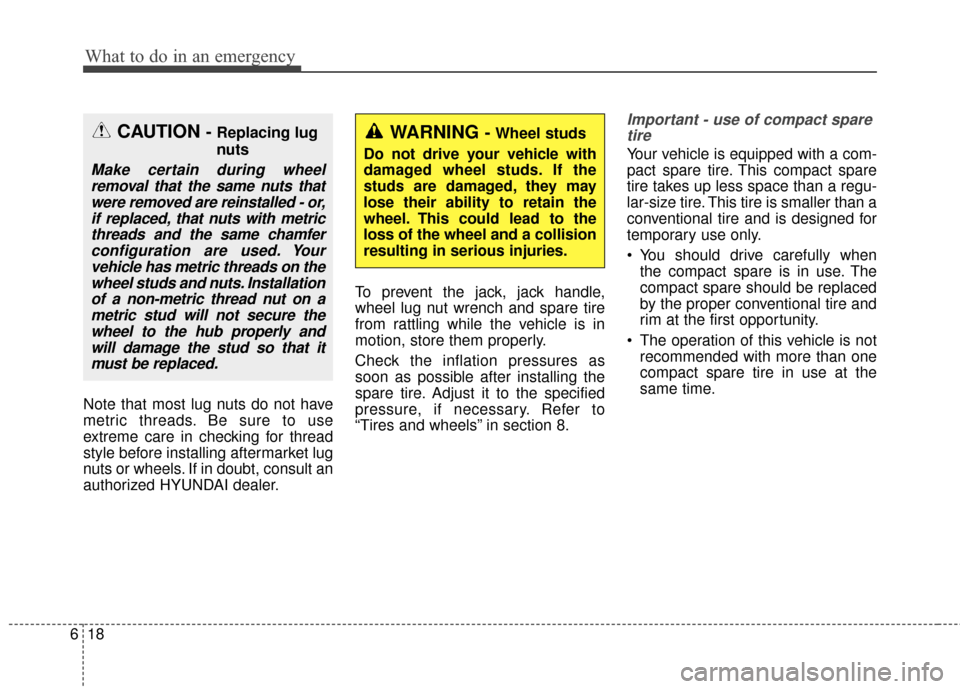
Changing tires
1. Park on a level surface and apply the parking brake firmly.
2. Place the transaxle shift lever in P (Park).
3. Activate the hazard warning flasher.
WARNING
- Running vehicle on jack
Do not start or run the engine of
the vehicle while the vehicle is
on the jack as this may cause
the vehicle to fall off the jack
resulting in serious injury or
death.
ONF068004
C
C
C
C
l
l
l
l
o
o
o
o
s
s
s
s
e
e
e
e O
O
O
O
p
p
p
p
e
e
e
e
n
n
n
nOBH068002L
Page 410 of 521

617
What to do in an emergency
11. To install the wheel, hold it on thestuds, put the wheel nuts on the
studs and tighten them finger
tight. The nuts should be installed
with their tappered small diame-
ter ends directed inward. Jiggle
the tire to be sure it is completely
seated, then tighten the nuts as
much as possible with your fin-
gers again.
12. Lower the vehicle to the ground by turning the wheel nut wrench
counterclockwise. Then position the wrench as shown in
the drawing and tighten the wheel
nuts. Be sure the socket is seated
completely over the nut. Do not stand
on the wrench handle or use an exten-
sion pipe over the wrench handle. Go
around the wheel tightening every nut
following the numerical sequence shown in the image until they are all
tight. Then double-check each nut for
tightness. After changing wheels, have
an authorized HYUNDAI dealer tight-
en the wheel nuts to their proper
torque as soon as possible.
Wheel nut tightening torque:
65~79 lb·ft (9~11 kg·m)
If you have a tire gauge, remove the
valve cap and check the air pressure.
If the pressure is lower than recom-
mended, drive slowly to the nearest
service station and inflate to the cor-
rect pressure. If it is too high, adjust
it until it is correct. Always reinstall
the valve cap after checking or
adjusting the tire pressure. If the cap
is not replaced, dust and dirt may get
into the tire valve and air may leak
from the tire. If you lose a valve cap,
buy another and install it as soon as
possible.
After you have changed the wheels,
always secure the flat tire in its place
and return the jack and tools to their
proper storage locations.
WARNING - Installing a
wheel
Make sure the wheel makes
good contact with the hub when
installed. If the contact of the
mounting surface between the
wheel and hub is not good, the
wheel nuts could come loose
and cause the loss of a wheel.
Loss of a wheel may result in
loss of control of the vehicle,
serious injury or death.
OHG060007L■Type B
■Type A
OHG061015A
Page 411 of 521

What to do in an emergency
18
6
Note that most lug nuts do not have
metric threads. Be sure to use
extreme care in checking for thread
style before installing aftermarket lug
nuts or wheels. If in doubt, consult an
authorized HYUNDAI dealer. To prevent the jack, jack handle,
wheel lug nut wrench and spare tire
from rattling while the vehicle is in
motion, store them properly.
Check the inflation pressures as
soon as possible after installing the
spare tire. Adjust it to the specified
pressure, if necessary. Refer to
“Tires and wheels” in section 8.
Important - use of compact spare
tire
Your vehicle is equipped with a com-
pact spare tire. This compact spare
tire takes up less space than a regu-
lar-size tire. This tire is smaller than a
conventional tire and is designed for
temporary use only.
You should drive carefully when the compact spare is in use. The
compact spare should be replaced
by the proper conventional tire and
rim at the first opportunity.
The operation of this vehicle is not recommended with more than one
compact spare tire in use at the
same time.
CAUTION - Replacing lug
nuts
Make certain during wheelremoval that the same nuts thatwere removed are reinstalled - or,if replaced, that nuts with metricthreads and the same chamferconfiguration are used. Yourvehicle has metric threads on thewheel studs and nuts. Installationof a non-metric thread nut on ametric stud will not secure thewheel to the hub properly andwill damage the stud so that itmust be replaced.
WARNING - Wheel studs
Do not drive your vehicle with
damaged wheel studs. If the
studs are damaged, they may
lose their ability to retain the
wheel. This could lead to the
loss of the wheel and a collision
resulting in serious injuries.
Page 415 of 521

What to do in an emergency
22
6
When towing your vehicle in an
emergency without wheel dollies :
1. Set the ignition switch in the ACC
position.
2. Place the shift lever in N (Neutral).
3. Release the parking brake.
Removable towing hook
(front, if equipped)
1. Open the trunk, and remove the towing hook from the tool case.
2. Remove the hole cover by press- ing the lower part of the cover on
the front bumper.
3. Install the towing hook by turning it clockwise into the hole until it is
fully secured.
4. Remove the towing hook and install the cover after use.
Emergency towing
If towing is necessary, we recom-
mend you to have it done by an
authorized HYUNDAI dealer or a
commercial tow truck service.
OHG065008N
OHG065009N■Rear
■Front
OHG065010
CAUTION - Towing gear
position
Always place the transaxle shiftlever in N (Neutral) when towingyour vehicle. Failure to place thetransaxle shift lever in N (Neutral)may cause internal damage tothe transaxle.
Page 416 of 521

623
What to do in an emergency
If towing service is not available in an
emergency, your vehicle may be
temporarily towed using a cable or
chain secured to the emergency tow-
ing hook under the front/rear of the
vehicle. Use extreme caution when
towing the vehicle. A driver must be
in the vehicle to steer it and operate
the brakes.
Towing in this manner may be done
only on hard-surfaced roads for a
short distance and at low speeds.
Also, the wheels, axles, power train,
steering and brakes must all be in
good condition.
Do not use the tow hooks to pull avehicle out of mud, sand or other
conditions from which the vehicle
cannot be driven out under its own
power.
Avoid towing a vehicle heavier than the vehicle doing the towing.
The drivers of both vehicles should communicate with each other fre-
quently. Attach a towing strap to the tow
hook.
Using a portion of the vehicle other than the tow hooks for towing may
damage the body of your vehicle.
Only use a cable or chain specifi- cally intended for use in towing vehi-
cles. Securely fasten the cable or
chain to the towing hook provided.
Before emergency towing, check that the hook is not broken or dam-
aged.
Fasten the towing cable or chain securely to the hook.
Do not jerk the hook. Apply steady and even force.
To avoid damaging the hook, do not pull from the side or at a verti-
cal angle. Always pull straight
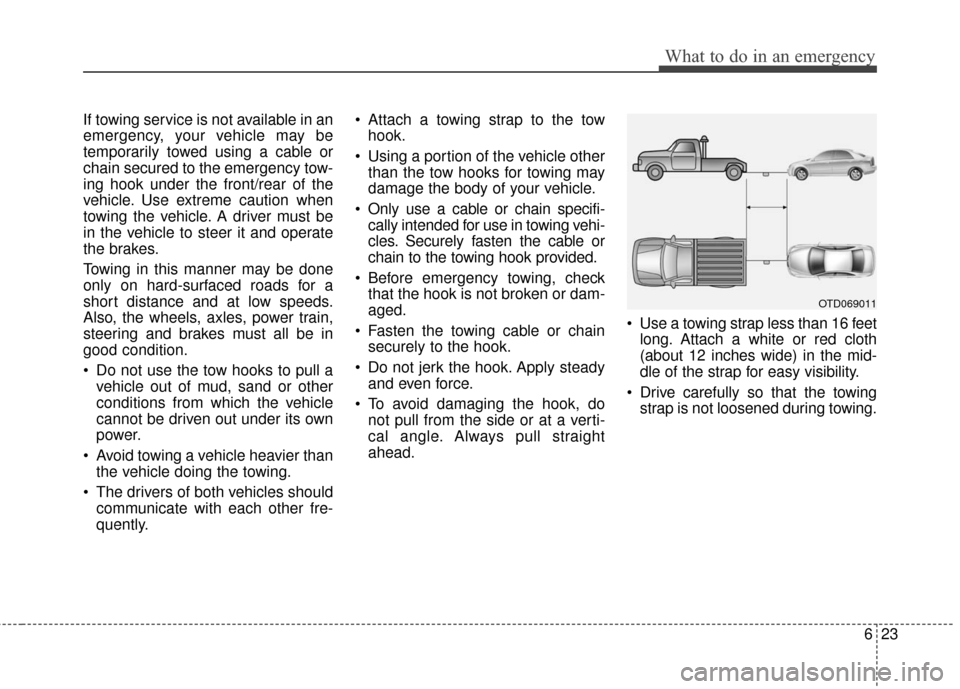
ahead. Use a towing strap less than 16 feet
long. Attach a white or red cloth
(about 12 inches wide) in the mid-
dle of the strap for easy visibility.
Drive carefully so that the towing strap is not loosened during towing.
OTD069011
Page 437 of 521

Maintenance
20
7
EXPLANATION OF SCHEDULED MAINTENANCE ITEMS
Engine oil and filter
The engine oil and filter should be
changed at the intervals specified in
the maintenance schedule. If the car
is being driven in severe conditions,
more frequent oil and filter changes
are required.
Drive belts
Inspect all drive belts for evidence of
cuts, cracks, excessive wear or oil
saturation and replace if necessary.
Fuel filter
A clogged filter can limit the speed at
which the vehicle may be driven,
damage the emission system and
cause multiple issues such as hard
starting. If an excessive amount of
foreign matter accumulates in the
fuel tank, the filter may require
replacement more frequently.
After installing a new filter, run the
engine for several minutes, and
check for leaks at the connections.
Fuel filters should be installed by an
authorized HYUNDAI dealer.
Fuel lines, fuel hoses and con-
nections
Check the fuel lines, fuel hoses and
connections for leakage and dam-
age. Have an authorized HYUNDAI
dealer replace any damaged or leak-
ing parts immediately.
Vapor hose and fuel filler cap
The vapor hose and fuel filler cap
should be inspected at those intervals
specified in the maintenance sched-
ule. Make sure that a new vapor hose
or fuel filler cap is correctly replaced.
Vacuum crankcase ventilation
hoses
Inspect the surface of hoses for evi-
dence of heat and/or mechanical
damage. Hard and brittle rubber,
cracking, tears, cuts, abrasions, and
excessive swelling indicate deterio-
ration. Particular attention should be
paid to examine those hose surfaces
nearest to high heat sources, such
as the exhaust manifold.
Inspect the hose routing to assure that
the hoses do not come in contact with
any heat source, sharp edges or mov-
ing component which might cause
heat damage or mechanical wear.
Inspect all hose connections, such as
clamps and couplings, to make sure
they are secure, and that no leaks are
present. Hoses should be replaced
immediately if there is any evidence of
deterioration or damage.