Page 6 of 250
5
Quick Reference GuideVoice Control Operation
Voice Portal Screen
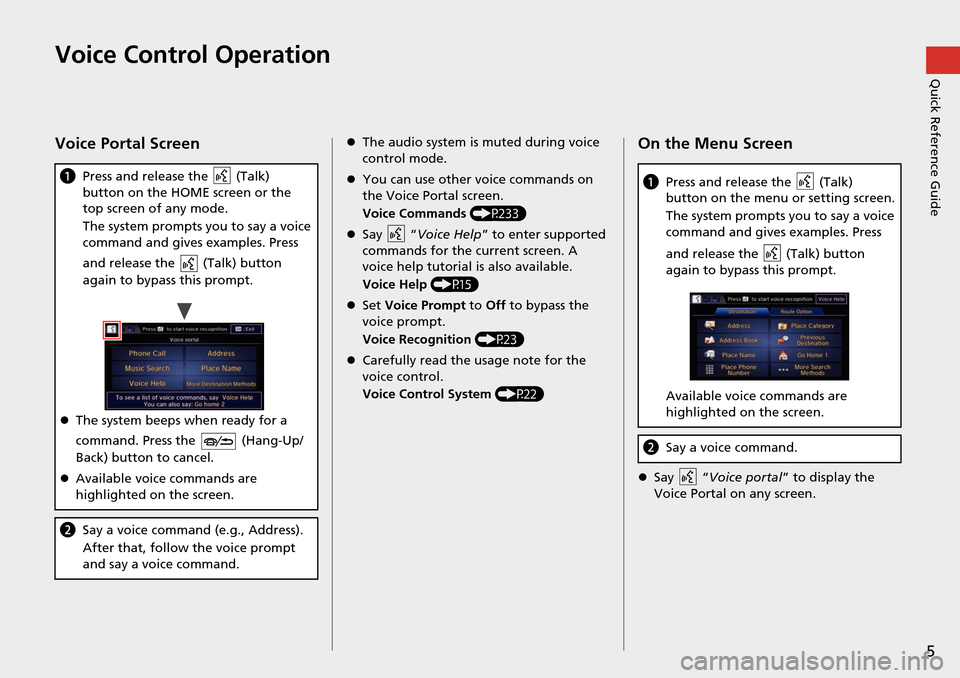
aPress and release the (Talk)
button on the HOME screen or the
top screen of any mode.
The system prompts you to say a voice
co mm
and and gives examples. Press
and release the (Talk) button
again to bypass this prompt.
The system beeps when ready for a
co
mm
and. Press the (Hang-Up/
Back) button to cancel.
Available voice commands are
highl
ighted on the screen.
bSay a voice command (e.g., Address).
After that, follow the voice prompt
and say a vo
ice command.
The audio system is muted during voice
control mode.
You can use other voice commands on
the Vo ice Po
rtal screen.
Voice Commands (P233)
Say “Voice Help
” to ent
er supported
commands for the current screen. A
voice h elp tu
torial is also available.
Voice Help (P15)
Set V
oice Prompt to Of
f to bypass the
voice prompt.
Voice Recognition (P23)
Carefully read the usage note for the
voice c ontro
l.
Voice Control System (P22)
On the Menu Screen
Say “Voice portal” to display the
Voice Portal on any screen.
a Press and release the (Talk)
button on the menu or setting screen.
The system prompts you to say a voice
com m
and and gives examples. Press
and release the (Talk) button
again to bypass this prompt.
Available voice commands are
hig h
lighted on the screen.
bSay a voice command.
Page 7 of 250
6
Quick Reference GuideTouchscreen Operation
You can operate the system using your finger on the touchscreen.
The touchscreen can be operated if you are wearing thin gloves, but it may be more diffic
ult for the system to respond.
Tap
Touch the screen lightly with your finger to select an item on the
screen.
Flick
Lightly sweep your finger side to side or up and down to scroll a list
or map.
Slide
Move your finger slowly across the screen to scroll the map.
Pinch In/Out
Open or close your fingers on the screen in a pinching motion to
zoom in or out of the map.
Page 15 of 250
14
Quick Reference GuideNavigation—Changing Route or Destination
You can alter your route by adding waypoints to visit, adding streets to avoid, or changing your destination during route guida nce.
Adding a Waypoint (“Pit Stop”)
You can add up to four waypoints along
your route. (P112)
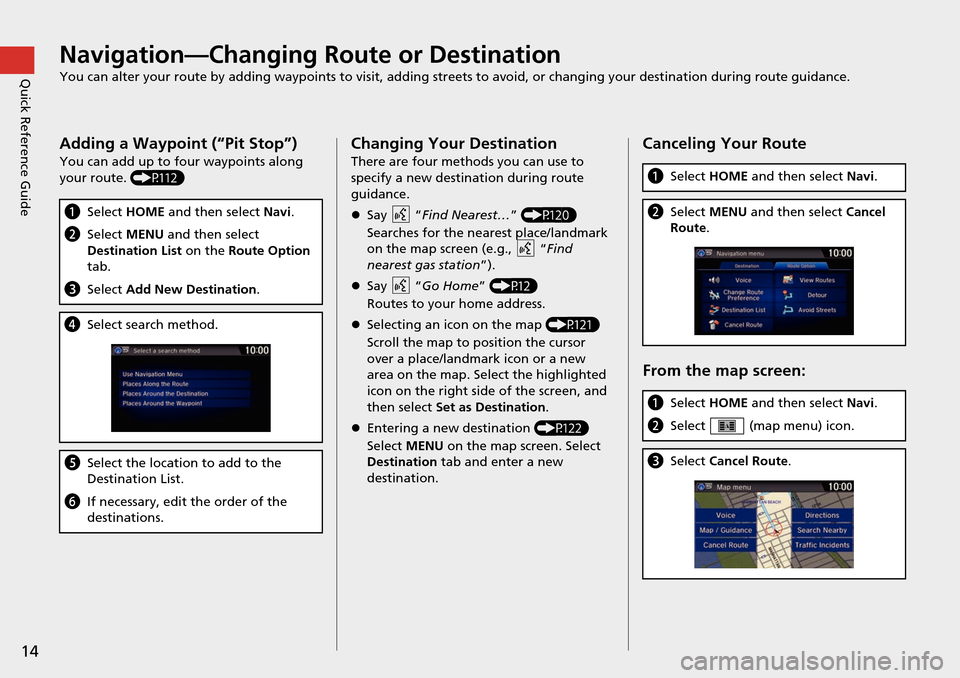
aSelect HOME and then select Navi.
bSelect MENU and then select
Destination List on the Route Option
tab.
c Select Add New Destination .
dSelect search method.
eSelect the location to add to the
Destination List.
fIf necessary, edit the order of the
destinations.
Changing Your Destination
There are four methods you can use to
specify a new destina tion during route
guidance.
Say “Find Nearest…
”
(P120)
Searches for the nearest place/landmark
o n
the map screen (e.g., “Find
nearest
gas station ”).
Say “
Go Home ”
(P12)
Routes to your home address.
Selecting an icon on the map (P121)
Scroll the map to position the cursor
o v
er a place/landmark icon or a new
area on the map. Select the highlighted
icon on the right side of the screen, and
then select Set as Destination .
Entering a new destination (P122)
Select MENU on the map screen. Selec
t
Destination tab and enter a new
destination.
Canceling Your Route
From the map screen:
a Select HOME and then select Navi.
bSelect MENU and then select Cancel
Route .
aSelect HOME and then select Navi.
bSelect (map menu) icon.
cSelect Cancel Route .
Page 26 of 250
25Continued
System Setup
Display Mode Settings
Turning Off the Display
Press the (Display mode) button for more than two seconds.
u Select HOME or
BACK, or press the (Display mode) button to turn on the
display.
Switching Display Mode Manually
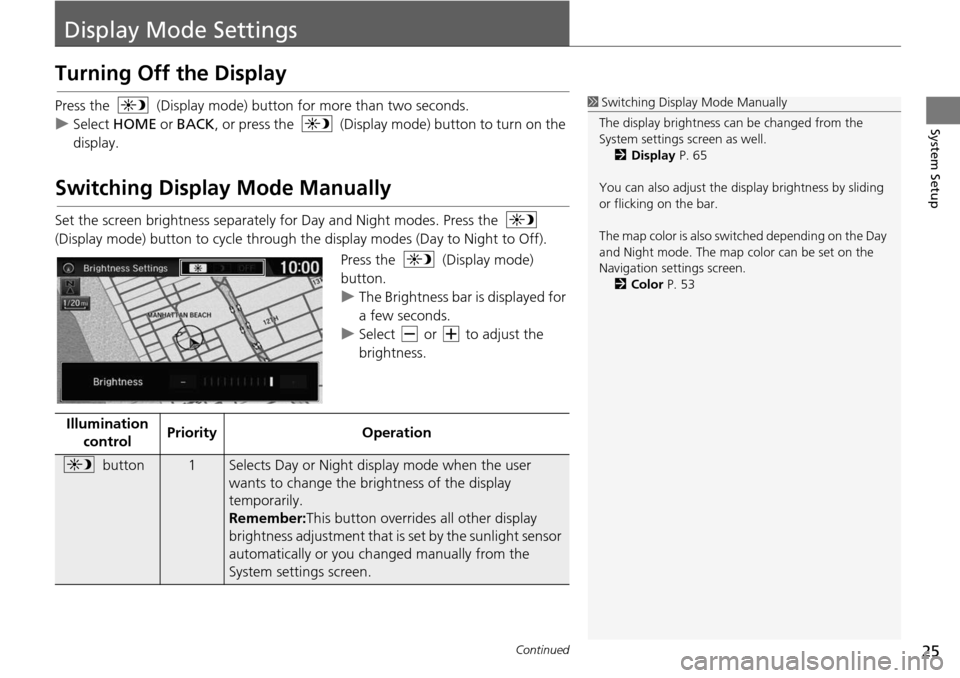
Set the screen brightness separately for Day and Night modes. Press the
(Display mode) button to cycle through th e display
modes (Day to Night to Off).
Press the (Display mode)
button.
u The Brightness bar is displayed for
a few second
s.
u Select or to adjust
the
brightness.
1 Switching Display Mode Manually
The display brightness ca n be changed from the
System settings screen as well. 2 Display P. 65
You can also adjust the display brightness by sliding
or flicking on the bar.
The map color is also switched depending on the Day
and Night mode. The map color can be set on the
Navigation settings screen. 2 Color P. 53
Illumination
control PriorityOperation
button1Selects Day or Night disp
lay mode when the user
wants to change the brightness of the display
temporarily.
Remember: This button overrides all other display
bri g
htness adjustment that is set by the sunlight sensor
automatically or you ch anged manually from the
System settings screen.
Page 27 of 250
uu Display Mode Settings u Switching Display Mode Manually
26
System SetupIllumination
controlPriorityOperation
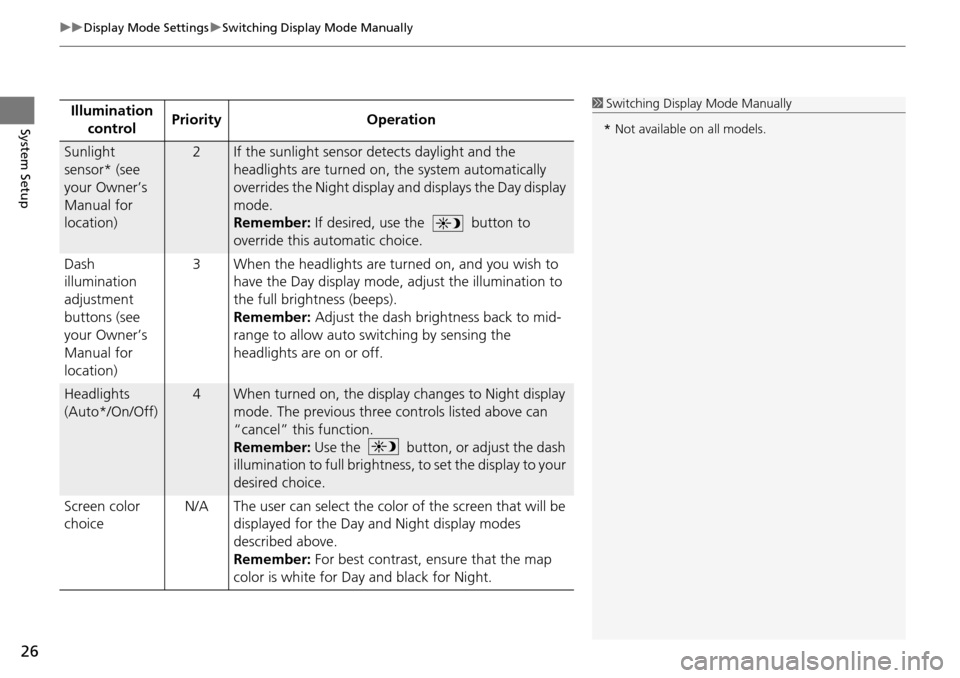
Sunlight
sensor* (see
your Owner’s
Manual for
location)2If the sunlight sensor detects daylight and the
headlights are turned on, the system automatically
overrides the Night display and displays the Day display
mode.
Remember: If desired, use the button to
override this automatic choice.
Dash
illuminatio
n
adjustment
buttons (see
your Owner’s
Manual for
location) 3
When the headlights are turn ed
on, and you wish to
have the Day display mode, ad just the illumination to
the full brightness (beeps).
Remember:
Adjust the dash brightness back to mid-
range to allow auto switching by sensing the
headlights are on or off.
Headlights
(Auto*/On/Off)
4When turned on, the displa y changes to Night display
mode. The previous three controls listed above can
“cancel” this function.
Remember: Use the button, or adjust the dash
illumination to full brightness , to set the display to your
d e
sired choice.
Screen color
ch oic
e N/A
The user can select the color of the screen that will be
di
splayed for the Day and Night display modes
described above.
Remember: For best contrast, ensure that the map
color is
white for Day and black for Night.
1 Switching Display Mode Manually
* Not available on all models.
Page 41 of 250
40
uu Routing u Unverified Routing
System Setup
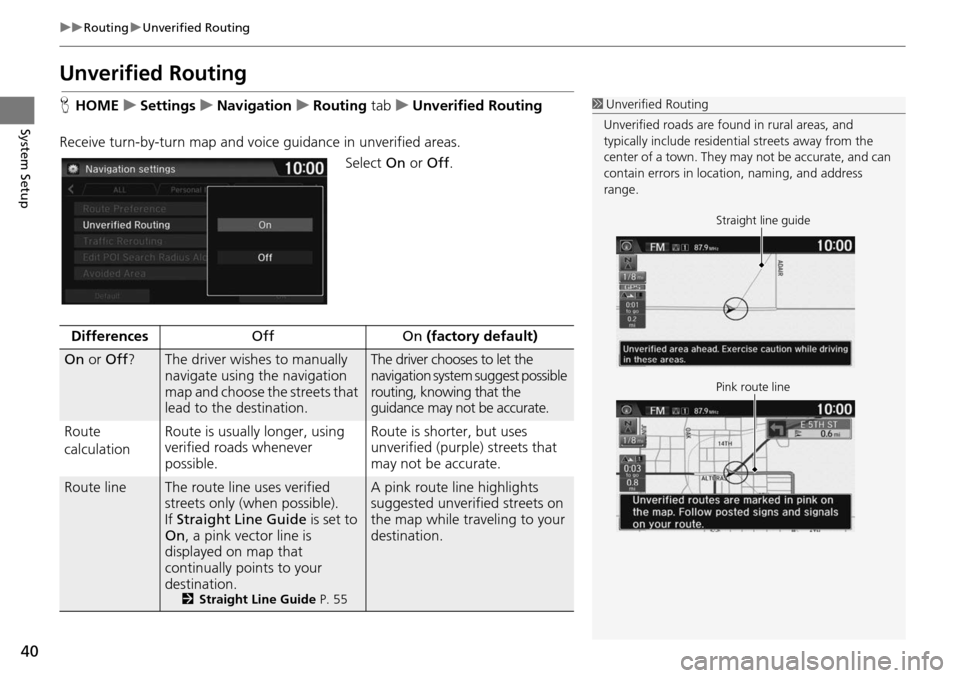
Unverified Routing
H HOME u Settings u Navigation u Routing tab u Unverified Routing
Receive turn-by-turn map
and voice guidance in unverified areas.
Select On or Off .
1Unverified Routing
Unverified roads are found in rural areas, and
typically include residentia l streets away from the
center of a town. They ma y not be accurate, and can
contain errors in locati on, naming, and address
range.
Straight line guide
Pink route line
DifferencesOffOn (factory default)
On or Off ?The driver wishes to manually
navigate using the navigation
map and choose the streets that
lead to the destination.The driver chooses to let the
navigation system suggest possible
routing, knowing that the
guidance may not be accurate.
Route
c a
lculation Route is usually longer, using
veri
fied roads whenever
possible.Route is shorter, but uses
unverified (purple) streets that
may not be accurate.
Route lineThe route line uses verified
streets only (when possible).
If Straight Line Guide is
set to
On , a pink vector line is
displayed on map that
continually points to your
destination.
2 Straight Line Guide P. 55
A pink route line highlights
suggested unverified streets on
the map while traveling to your
destination.
Page 44 of 250
43
uu Routing u Edit POI Search Radius Along Route
System Setup
Edit POI Search Ra dius Along Route
HHOME u Settings u Navigation u Routing tab u Edit POI Se arch Radius
Alon
g Route
Select the distance from your highlighted ro ute line (on eit
her side of your route)
that the system will search for a waypoint.
2Adding Waypoints P. 112
You can specify a different search dist ance for freeways and surface streets.
1.Select an option.
2. Select a search distance.
3. Select OK.
The following options
are available:
• On Freeways : 1, 2,
5, or 10 miles (1.6, 3, 8, or 16 km) can be set. Factory default
is 2 miles (3 km).
• On Surf ace Streets :
1/2, 1, 2, or 5 miles (800 m, 1.6, 3, or 8 km) can be set.
Factory default is 1/2 mile (800 m).
1 Edit POI Search Radius Along Route
The search distance does not affect the search range
used for the Find Nearest voice commands (e.g., say
“Find nearest gas station ”).
Page 64 of 250
63
System Setup
System Settings
HHOME u Settings u System
Select an item.
The following items are available:
• Home tab: Chan
ges the setting for the HOME screen.
Home Screen Edit Order : Changes the
position of icons on the HOME screen.
2Home Screen Edit Order P. 64
• Display tab: Adjusts the screen’s preferences and change the background color
of the menu screen.
2 Display Settings P. 65
• Sound/Beep tab: Changes the system sound and beep settings.
2 Sound and Beep Settings P. 67
• Voice Recog tab: Changes the setting for the vo ice control system and modifies
Song By Voice and phonebook voice commands.
2 Voice Recognition Settings P. 69
• Clock tab: Sets the automatic adjustment of the system clock for daylight saving
and international time zones.
2 Clock Adjustment P. 70
• Others tab: Sets other basic settings for the system.
2 Other Settings P. 76
1 System Settings
Select All tab to see the all items in a list.