2016 HONDA HR-V ECO mode
[x] Cancel search: ECO modePage 2 of 250
Contents
2System Setup P. 19Start-up 20 Voice Control System 22Display Mode Settings 25 Personal Information 27
Routing 38 Guidance 46 Map 49 System Settings 63
Display Settings 65 Sound and Beep Settings 67 Voice Recognition Settings 69Clock Adjustment 70
Other Settings 76 Data Reset 78
2Navigation P. 79Entering a Destination 80Calculating the Route 98Driving to Your Destination 100Map Menu 105
Changing Your Route 111 Changing Your Destination 120Resuming Your Trip 123
2Audio P. 125Audio System 126 Audio Remote Controls 128 Audio Settings 131 Playing FM/AM Radio 133
Playing SiriusXM® Rad io * 137 Playing a Disc 141 Playing an iPod 146Playing Pandora® 154
Playing a USB Flash Drive 157Playing Bluetooth® Audio 161Playing a Video Using the HDMI ® 165
2Bluetooth ® Hand sFreeLink® P. 167Bluetooth® HandsFreeLink® 168 Text/E-mail Message 192HondaLink Assist 195
2Other Features P. 197Trip Computer 198 Information Functions 199 Multi-View Rear Camera 202
2Troubleshooting P. 205Troubleshooting 206 Error Messages 214
2Reference Information P. 221System Initialization 222 System Limitations 224 Customer Assistance 226 Legal Information 229
2Voice Commands P. 233Voice Commands 234
Quick Reference GuideP. 2
System Setup P. 19
Navigation P. 79
Audio P. 125
Bluetooth® HandsFreeLink®P. 167
Other Features P. 197
TroubleshootingP. 205
Reference Information P. 221
Voice Commands P. 233
Index P. 245
Page 6 of 250
5
Quick Reference GuideVoice Control Operation
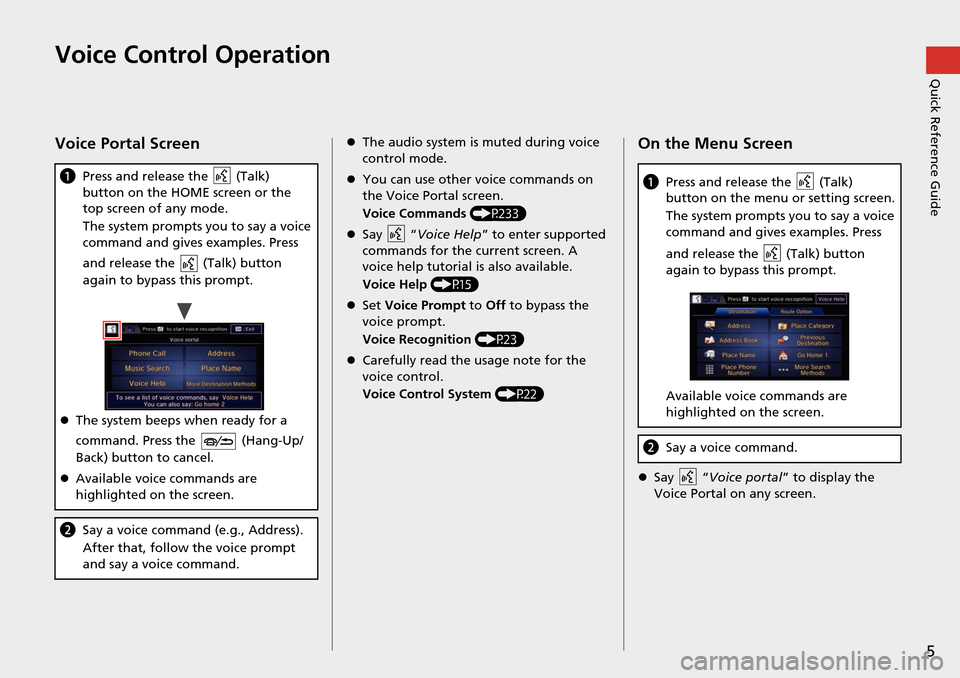
Voice Portal Screen
aPress and release the (Talk)
button on the HOME screen or the
top screen of any mode.
The system prompts you to say a voice
co mm
and and gives examples. Press
and release the (Talk) button
again to bypass this prompt.
The system beeps when ready for a
co
mm
and. Press the (Hang-Up/
Back) button to cancel.
Available voice commands are
highl
ighted on the screen.
bSay a voice command (e.g., Address).
After that, follow the voice prompt
and say a vo
ice command.
The audio system is muted during voice
control mode.
You can use other voice commands on
the Vo ice Po
rtal screen.
Voice Commands (P233)
Say “Voice Help
” to ent
er supported
commands for the current screen. A
voice h elp tu
torial is also available.
Voice Help (P15)
Set V
oice Prompt to Of
f to bypass the
voice prompt.
Voice Recognition (P23)
Carefully read the usage note for the
voice c ontro
l.
Voice Control System (P22)
On the Menu Screen
Say “Voice portal” to display the
Voice Portal on any screen.
a Press and release the (Talk)
button on the menu or setting screen.
The system prompts you to say a voice
com m
and and gives examples. Press
and release the (Talk) button
again to bypass this prompt.
Available voice commands are
hig h
lighted on the screen.
bSay a voice command.
Page 20 of 250
19
System Setup
This section describes the start-up procedure and the navigation and setup functions.
Start-up................................................... 20
Voice Control System ......................... .... 22
Command Input .................................... 22
Voice Recognition .................................. 23
Siri Eyes Free .......................................... 24
Display Mode Settings .......................
.... 25
Turning Off the Display .......................... 25
Switching Display Mode Manually .......... 25
Personal Information ..........................
.... 27
Address Book ......................................... 28
Home Addresses .................................... 33
PIN Numbers .......................................... 34
User Name ............................................. 35
Previous Destination ............................... 36
Category History .................................... 37 Routing
.........
.....................
.......................38
Route Preference ....................................39
Unverified Routing ..................................40
Traffic Rerouting .....................................42
Edit POI Search Radius Along Route ........43
Avoided Area ..........................................44
Guidance ......
.....................
.......................46
Map ............... ..................... .......................49
Showing Icons on the Map .....................51
Color ......................................................53
View (Map Orientation) ...........................54
3D Angle Adjustment .............................55
Straight Line Guide .................................55
Current Location .....................................56
Map Legend ...........................................57 Off-road Tracking ................................... 61
Correct Vehicle Position ......................... 62
System Settings ..................
....................
63
Display Settings ...................................... 65
Display ................................................... 65
Background Color .................................. 66
Sound and Beep Settings .......................
67
Voice Recognition Settings ....................69
Cl ock Adjustment .................................... 70
Clock Type ............................................. 71
Wallpaper Settings ................................. 72
Adjust Time............................................ 75
Resetting the Clock Settings ................... 75
Other Settings .....................
....................
76
Data Reset ........................... .................... 78
Page 21 of 250

20
System Setup
Start-up
The navigation system starts automatically when you set the power mode to
ACCESSORY or ON. At start-up, the follo wing Confirmation screen is displayed.
Select OK.
u The HOME screen is displayed.1Start-up
Do not use the smartphone while driving.
Avoid focusing on the scre en and drive safely
following the actual traffic restrictions.
If the navigation system lo ses power at any time, you
may need to press and hold the (Audio Power)
button for more than two seconds, or you may be
prompted for the 5-digit security code. 2 System Initialization P. 222
You can change the system language at any time. 2 Language P. 77
If you do not select OK on the Confirmation screen,
the HOME screen is displaye d after a certain period of
time.
OK on the Confirmation screen cannot be selected
by using a voice command.
If Remember Last Screen is set to On, the top
screen of the last mode is displayed after the HOME
screen. 2 Other Settings P. 76
U.S. models
Page 25 of 250
24
uu Voice Control System u Siri Eyes Free
System Setup
Siri Eyes Free
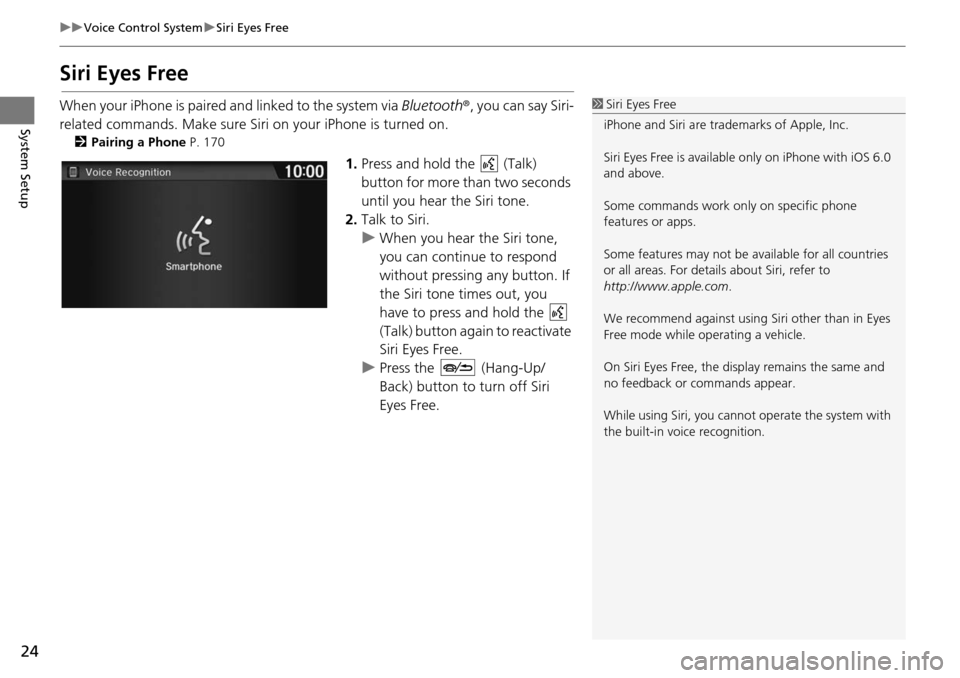
When your iPhone is paired and linked to the system via Bluetooth ®, you can say Siri-
related commands. Make sure Siri on your iPhone is turned on.
2Pairing a Phone P. 170
1. Press and hold the (Talk)
button for more than two seconds
until you hear the Siri tone.
2. Talk to Siri.
u When you hea
r the Siri tone,
you can continue to respond
without pressing any button. If
the Siri tone times out, you
have to press and hold the
(Talk) button again to reactivate
Siri Eye s
Free.
u Press the (Hang-Up/
Back) button to turn off Siri
Eye s
Free.
1Siri Eyes Free
iPhone and Siri are trademarks of Apple, Inc.
Siri Eyes Free is availabl e only on iPhone with iOS 6.0
and above.
Some commands work only on specific phone
features or apps.
Some features may not be available for all countries
or all areas. For detail s about Siri, refer to
http://www.apple.com .
We recommend against using Si ri other than in Eyes
Free mode while operating a vehicle.
On Siri Eyes Free, the display remains the same and
no feedback or commands appear.
While using Siri, you cannot operate the system with
the built-in voice recognition.
Page 26 of 250
25Continued
System Setup
Display Mode Settings
Turning Off the Display
Press the (Display mode) button for more than two seconds.
u Select HOME or
BACK, or press the (Display mode) button to turn on the
display.
Switching Display Mode Manually
Set the screen brightness separately for Day and Night modes. Press the
(Display mode) button to cycle through th e display
modes (Day to Night to Off).
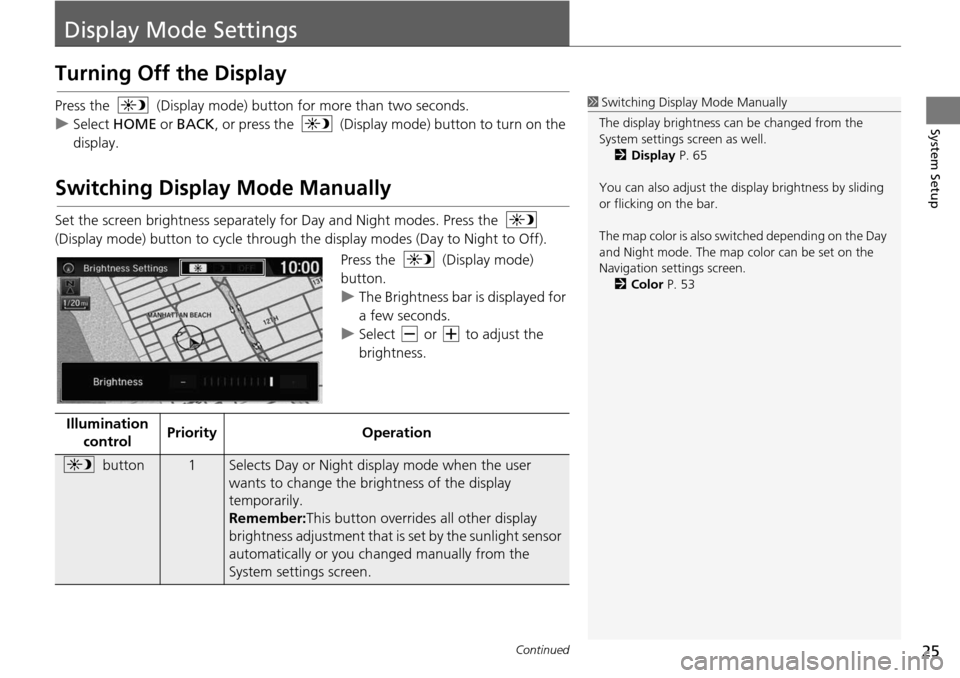
Press the (Display mode)
button.
u The Brightness bar is displayed for
a few second
s.
u Select or to adjust
the
brightness.
1 Switching Display Mode Manually
The display brightness ca n be changed from the
System settings screen as well. 2 Display P. 65
You can also adjust the display brightness by sliding
or flicking on the bar.
The map color is also switched depending on the Day
and Night mode. The map color can be set on the
Navigation settings screen. 2 Color P. 53
Illumination
control PriorityOperation
button1Selects Day or Night disp
lay mode when the user
wants to change the brightness of the display
temporarily.
Remember: This button overrides all other display
bri g
htness adjustment that is set by the sunlight sensor
automatically or you ch anged manually from the
System settings screen.
Page 73 of 250
72
uu Clock Adjustment u Wallpaper Settings
System Setup
Wallpaper Settings
Select, delete, and import wallpaper pictures for display on the screen.
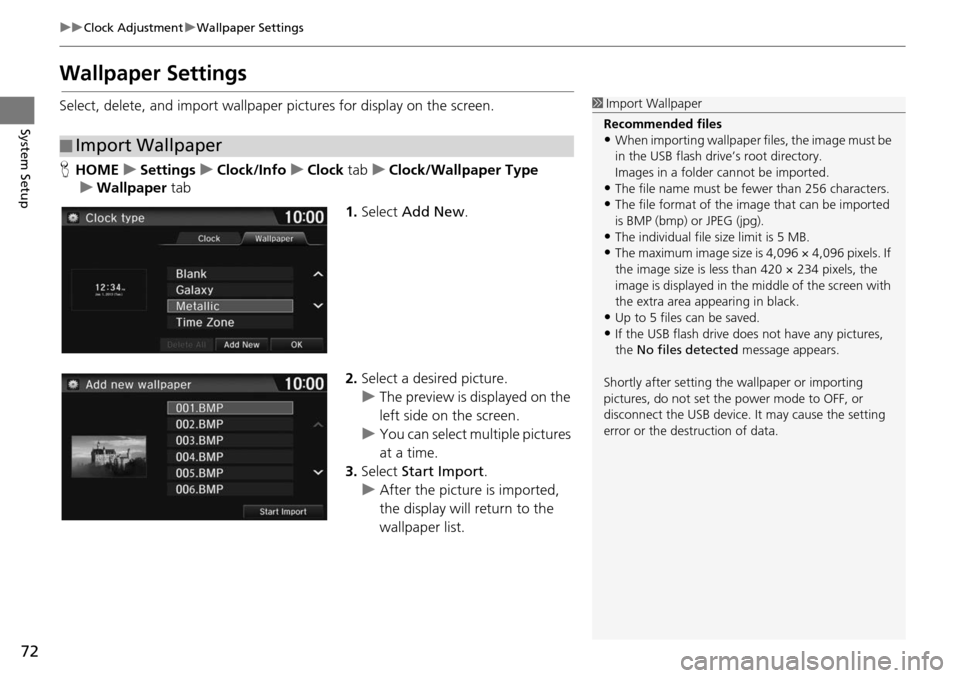
H HOME u Settings u Clock/Info u Clock tab u Clock/Wallpaper Type
u Wallpaper tab
1.Select Add New .
2. Select a desired picture.
u The preview is
displayed on the
left side on the screen.
u You can select multip
le pictures
at a time.
3. Select Start Im
port.
u After the picture is imported,
the display
will return to the
wallpaper list.
■ Import Wallpaper
1
Import Wallpaper
Recommended files
•When importing wallpaper files, the image must be
in the USB flash drive’s root directory.
Images in a folder cannot be imported.
•The file name must be fewer than 256 characters.•The file format of the im age that can be imported
is BMP (bmp) or JPEG (jpg).
•The individual file size limit is 5 MB.•The maximum image size is 4,096 × 4,096 pixels. If
the image size is less than 420 × 234 pixels, the
image is displayed in the middle of the screen with
the extra area appearing in black.
•Up to 5 files can be saved.
•If the USB flash drive doe s not have any pictures,
the No files detected message appears.
Shortly after setting th e wallpaper or importing
pictures, do not set the power mode to OFF, or
disconnect the USB device. It may cause the setting
error or the destruction of data.
Page 126 of 250
125
Audio
This section describes how to operate the audio system. You can play music from a wide
array of media sources, and control the audio system using the touchscreen, remote
control, or voice control.
Audio System........................................ 126
About Your Audio System .................... 126
Audio System Theft Protection ............. 127
Audio Remote Controls ......................
.. 128
Steering Wheel Controls ...................... 128
Audio Settings ....................................
.. 131
Adjusting the Sound ............................ 132
Playing FM/AM Radio .........................
.. 133
Selecting FM/AM Mode........................ 133
Audio Screen Control ........................... 134
Audio Menu ........................................ 135
Playing SiriusXM ® Rad i
o *.....................137
Selecting SiriusXM ® Mode ..................
.. 137
Audio Screen Control ........................... 138
Audio Menu ........................................ 139 SiriusXM
® Radio Serv ice
........................140
Playing a Disc ......................................... 141
Selecting Disc Mode ..............................141
Audio Screen Control............................142
Playing MP3/WMA/AAC Discs ...............143
Audio Menu .........................................144
Recommended Discs .............................145
Playing an iPod ......................................
146
Selecting iPod Mode .............................147
Audio Screen Control............................148
Audio Menu .........................................149
Searching for Music ..............................150
Song By Voice
TM (SBV) ...........................151
Playing Pandora® ................................... 154
Selecting Pandora ® Mode . .....................154 Audio Screen Control ........................... 155
Audio Menu......................................... 156
Playing a USB Flash Drive .....................
157
Selecting USB Mode ............................. 158
Audio Screen Control ........................... 159
Audio Menu......................................... 160
Playing Blue
tooth® Audio .................... 161
Selecting Bluetooth ® Audio Mode
........ 161
Switching to HFL Mode ........................ 162
Audio Screen Control ........................... 163
Audio Menu......................................... 164
Playing a Video Using the HDMI ®........ 165
Se
lecting HDMI ® M ode ........................ 166
* Not available on all models