2016 FORD TAURUS warning
[x] Cancel search: warningPage 66 of 424
ADJUSTING THE STEERING
WHEEL - VEHICLES WITH:
MANUAL ADJUSTABLE
STEERING COLUMN
WARNING
Do not adjust the steering wheel
when your vehicle is moving.
Note:
Make sure that you are sitting in the
correct position. See Sitting in the Correct
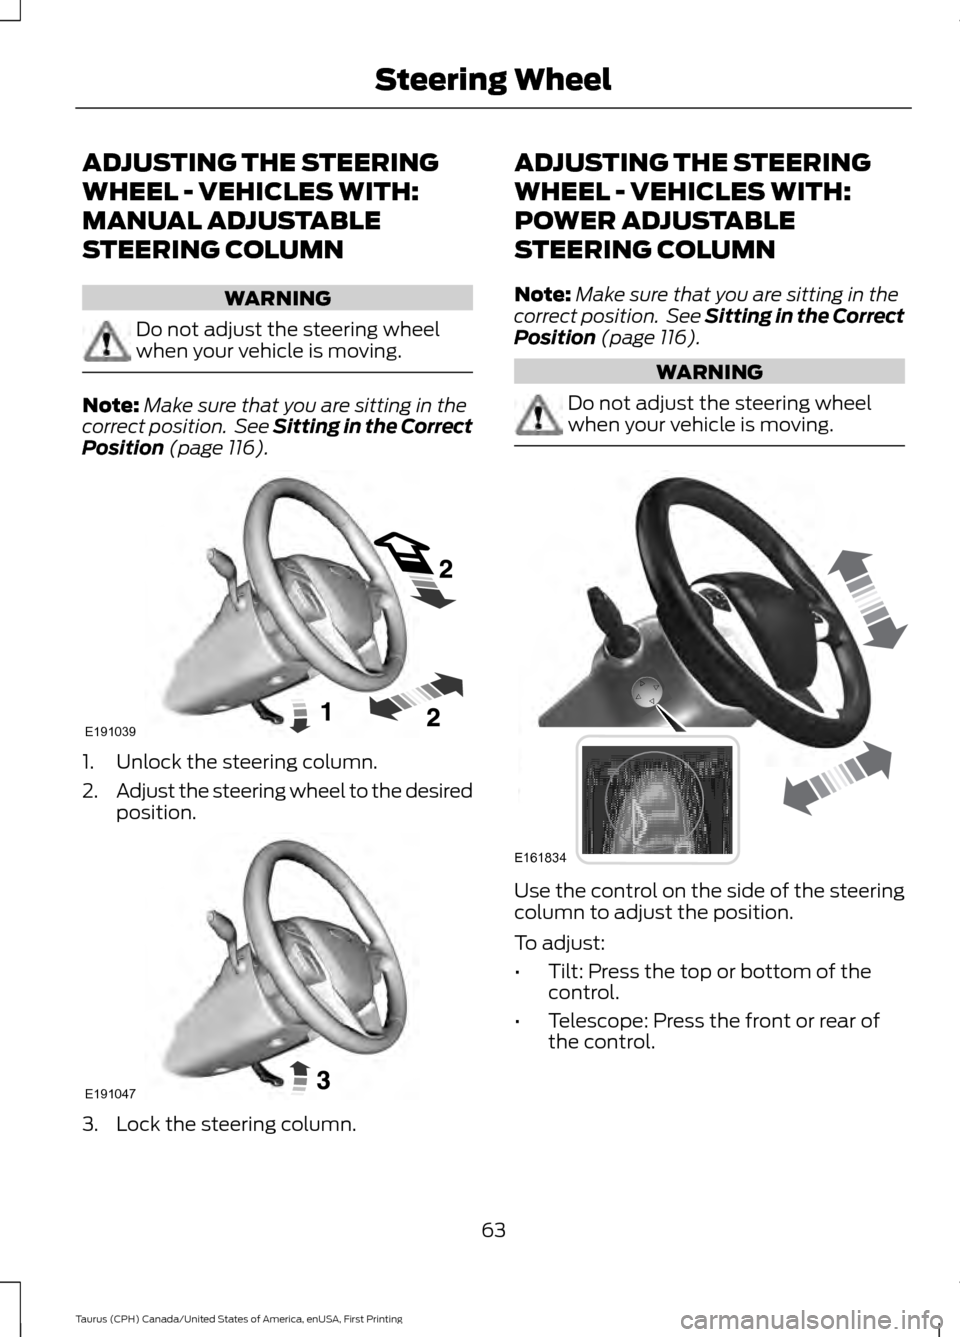
Position (page 116). 1. Unlock the steering column.
2.
Adjust the steering wheel to the desired
position. 3. Lock the steering column. ADJUSTING THE STEERING
WHEEL - VEHICLES WITH:
POWER ADJUSTABLE
STEERING COLUMN
Note:
Make sure that you are sitting in the
correct position. See Sitting in the Correct
Position
(page 116). WARNING
Do not adjust the steering wheel
when your vehicle is moving.
Use the control on the side of the steering
column to adjust the position.
To adjust:
•
Tilt: Press the top or bottom of the
control.
• Telescope: Press the front or rear of
the control.
63
Taurus (CPH) Canada/United States of America, enUSA, First Printing Steering WheelE191039 E191047 E161834
Page 69 of 424
ADJUSTING THE PEDALS
WARNING
Never use the controls while your
feet are on the accelerator and brake
pedals and the vehicle is moving.
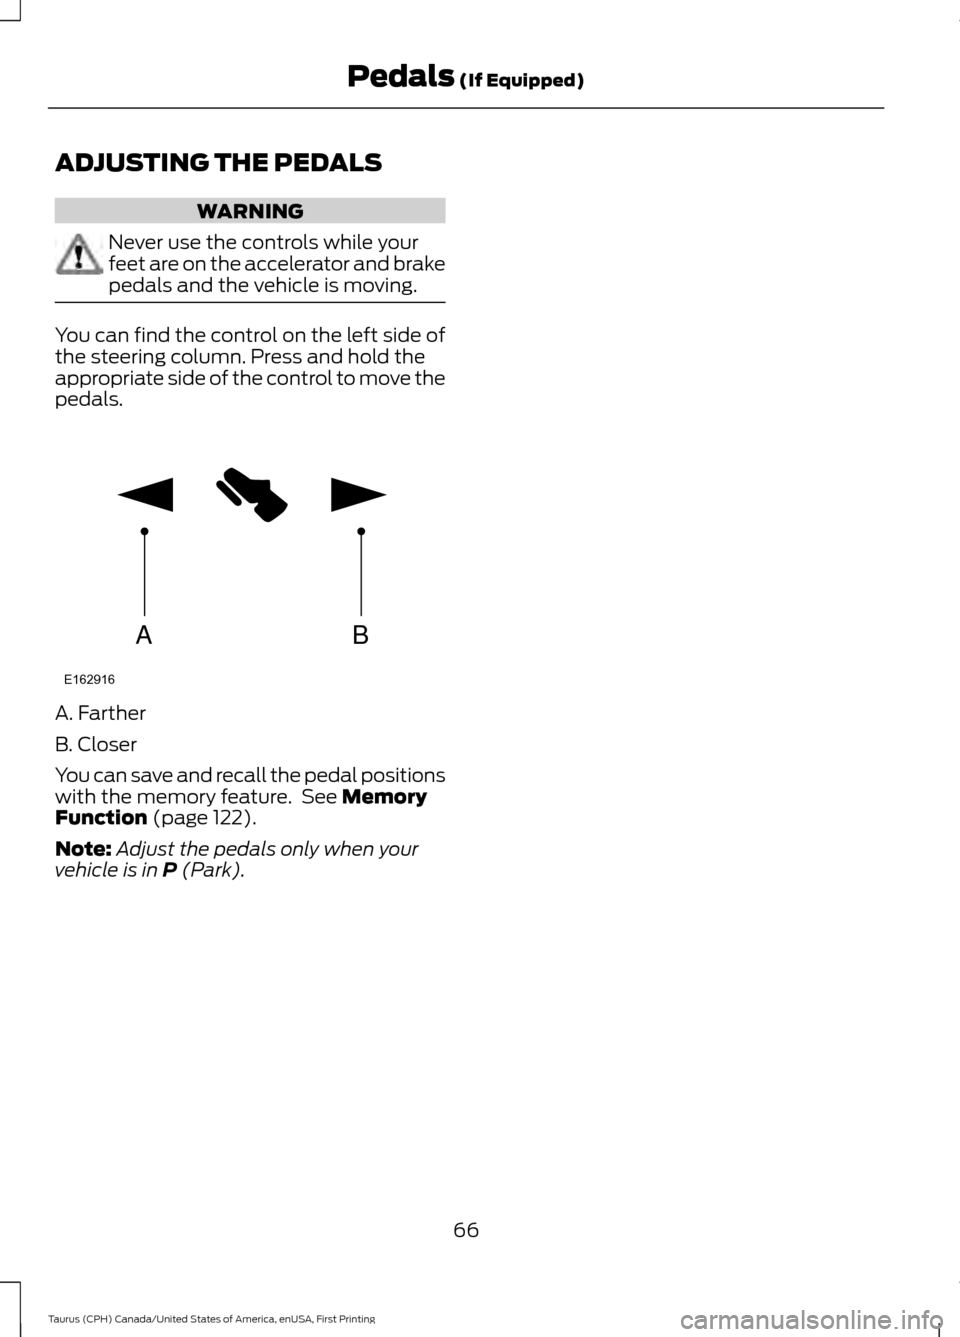
You can find the control on the left side of
the steering column. Press and hold the
appropriate side of the control to move the
pedals.
A. Farther
B. Closer
You can save and recall the pedal positions
with the memory feature. See Memory
Function (page 122).
Note: Adjust the pedals only when your
vehicle is in
P (Park).
66
Taurus (CPH) Canada/United States of America, enUSA, First Printing Pedals
(If Equipped)AB
E162916
Page 73 of 424

Headlamp Flasher
Slightly pull the lever toward you and
release it to flash the headlamps.
AUTOLAMPS
WARNING
The autolamps switch position may
not activate the headlamps in all low
visibility conditions, such as daytime
fog. Make sure the headlamps are
switched to auto or on, as appropriate,
during all low visibility conditions. Failure
to do so may result in a crash. When the lighting control is in the
autolamps position, the headlamps
automatically turn on in low light situations
or when the wipers activate. If equipped, the following also activate
when the lighting control is in the
autolamps position and you switch them
on in the information display:
•
Configurable daytime running lamps.
• Automatic high beam control.
• Adaptive headlamp control.
The headlamps remain on for a period of
time after you switch the ignition off. Use
the information display controls to adjust
the period of time that the headlamps
remain on. See Information Displays
(page 86).
Note: With the headlamps in the
autolamps position, you cannot switch the
high beam headlamps on until the
autolamps system turns the low beam
headlamps on.
Windshield Wiper Activated
Headlamps
The windshield wiper activated headlamps
turn on within 10 seconds when you switch
the windshield wipers on and the lighting
control is in the autolamps position. They
turn off approximately 60 seconds after
you switch the windshield wipers off.
The headlamps do not turn on by wiper
activation:
• During a mist wipe.
• When the wipers are on to clear washer
fluid during a wash condition.
• If the wipers are in intermittent mode.
Note: If you switch autolamps and
autowipers on, the headlamps will
automatically turn on when the windshield
wipers continuously operate.
70
Taurus (CPH) Canada/United States of America, enUSA, First Printing LightingE163268 E224686
A
Page 74 of 424
INSTRUMENT LIGHTING
DIMMER
Note:
If you disconnect and connect the
battery, or fully discharge and charge the
battery, the lighting level will switch to the
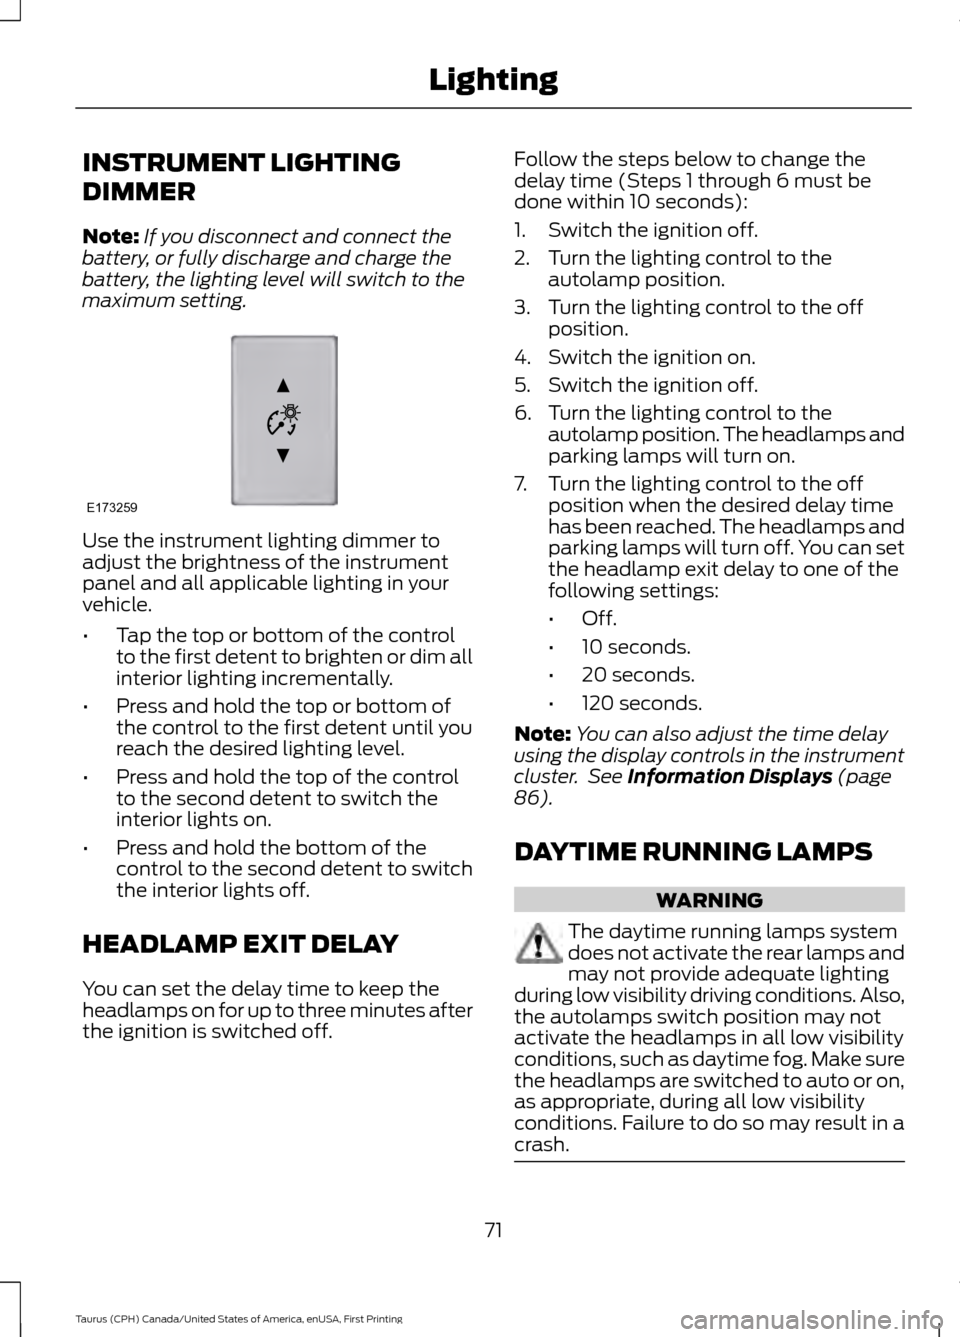
maximum setting. Use the instrument lighting dimmer to
adjust the brightness of the instrument
panel and all applicable lighting in your
vehicle.
•
Tap the top or bottom of the control
to the first detent to brighten or dim all
interior lighting incrementally.
• Press and hold the top or bottom of
the control to the first detent until you
reach the desired lighting level.
• Press and hold the top of the control
to the second detent to switch the
interior lights on.
• Press and hold the bottom of the
control to the second detent to switch
the interior lights off.
HEADLAMP EXIT DELAY
You can set the delay time to keep the
headlamps on for up to three minutes after
the ignition is switched off. Follow the steps below to change the
delay time (Steps 1 through 6 must be
done within 10 seconds):
1. Switch the ignition off.
2. Turn the lighting control to the
autolamp position.
3. Turn the lighting control to the off position.
4. Switch the ignition on.
5. Switch the ignition off.
6. Turn the lighting control to the autolamp position. The headlamps and
parking lamps will turn on.
7. Turn the lighting control to the off position when the desired delay time
has been reached. The headlamps and
parking lamps will turn off. You can set
the headlamp exit delay to one of the
following settings:
•Off.
• 10 seconds.
• 20 seconds.
• 120 seconds.
Note: You can also adjust the time delay
using the display controls in the instrument
cluster. See Information Displays (page
86).
DAYTIME RUNNING LAMPS WARNING
The daytime running lamps system
does not activate the rear lamps and
may not provide adequate lighting
during low visibility driving conditions. Also,
the autolamps switch position may not
activate the headlamps in all low visibility
conditions, such as daytime fog. Make sure
the headlamps are switched to auto or on,
as appropriate, during all low visibility
conditions. Failure to do so may result in a
crash. 71
Taurus (CPH) Canada/United States of America, enUSA, First Printing LightingE173259
Page 78 of 424
POWER WINDOWS
WARNINGS
Do not leave children unattended in
your vehicle and do not let them play
with the power windows. They may
seriously injure themselves. When closing the power windows,
you should verify they are free of
obstructions and make sure that
children and pets are not in the proximity
of the window openings. Note:
You may hear a pulsing noise when
just one of the windows is open. Lower the
opposite window slightly to reduce this
noise.
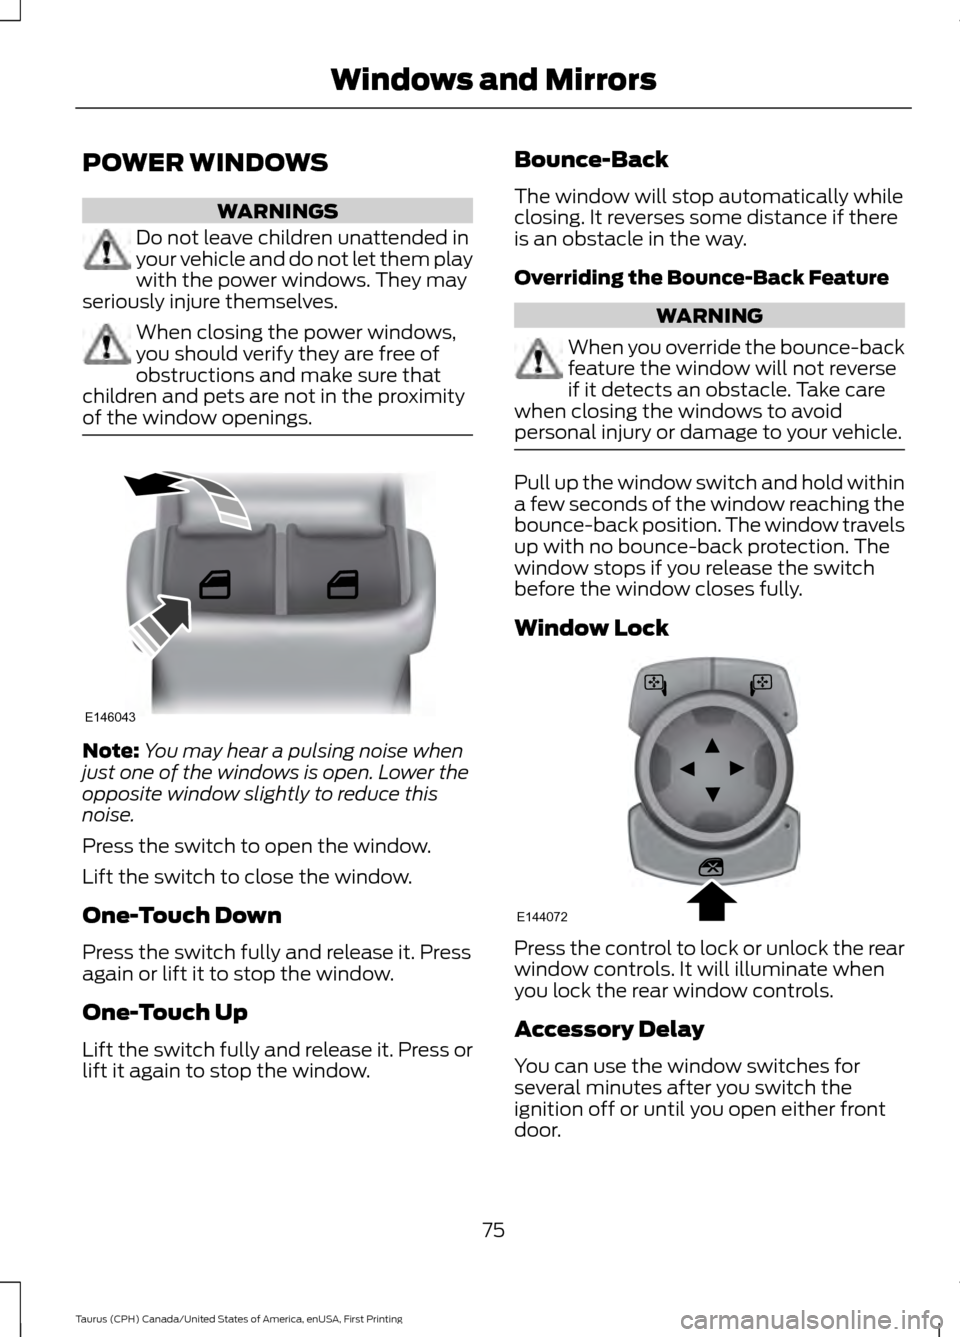
Press the switch to open the window.
Lift the switch to close the window.
One-Touch Down
Press the switch fully and release it. Press
again or lift it to stop the window.
One-Touch Up
Lift the switch fully and release it. Press or
lift it again to stop the window. Bounce-Back
The window will stop automatically while
closing. It reverses some distance if there
is an obstacle in the way.
Overriding the Bounce-Back Feature WARNING
When you override the bounce-back
feature the window will not reverse
if it detects an obstacle. Take care
when closing the windows to avoid
personal injury or damage to your vehicle. Pull up the window switch and hold within
a few seconds of the window reaching the
bounce-back position. The window travels
up with no bounce-back protection. The
window stops if you release the switch
before the window closes fully.
Window Lock
Press the control to lock or unlock the rear
window controls. It will illuminate when
you lock the rear window controls.
Accessory Delay
You can use the window switches for
several minutes after you switch the
ignition off or until you open either front
door.
75
Taurus (CPH) Canada/United States of America, enUSA, First Printing Windows and MirrorsE146043 E144072
Page 79 of 424

GLOBAL OPENING (If Equipped)
You can use the remote control to operate
the windows with the ignition off.
Note: You can enable or disable this feature
in the information display, or see an
authorized dealer. See
General
Information (page 86).
Note: To operate this feature, accessory
delay must not be active.
Opening the Windows
You can open the windows for a short time
after you unlock your vehicle with the
remote control. After you unlock your
vehicle, press and hold the remote control
unlock button to open the windows and
vent the moonroof. Release the button
once movement starts. Press the lock or
unlock button to stop movement.
Note: Only the front windows are operated
during global opening.
EXTERIOR MIRRORS
Power Exterior Mirrors WARNING
Do not adjust the mirrors when your
vehicle is moving. Left-hand mirror
A
Adjustment control
B
Right-hand mirror
C
To adjust a mirror:
1. Select the mirror you want to adjust. The control will illuminate.
2. Adjust the position of the mirror.
3. Press the mirror switch again.
Fold-Away Exterior Mirrors
Push the mirror toward the door window
glass. Make sure that you fully engage the
mirror in its support when returning it to its
original position.
Heated Exterior Mirrors
(If Equipped)
See Heated Windows and Mirrors (page
114
).
Memory Mirrors
(If Equipped)
You can save and recall the mirror
positions through the memory function.
See
Memory Function (page 122).
Auto-Dimming Feature
(If Equipped)
The driver ’s exterior mirror will
automatically dim when the interior
auto-dimming mirror is activated.
76
Taurus (CPH) Canada/United States of America, enUSA, First Printing Windows and MirrorsE144073
Page 80 of 424
Puddle Lamps (If Equipped)
The lamps on the bottom part of the mirror
housing light when you use your
transmitter to unlock the doors or when
you open a door.
Integrated Blind Spot Mirrors
(If
Equipped) WARNING
Objects in the blind spot mirror are
closer than they appear.
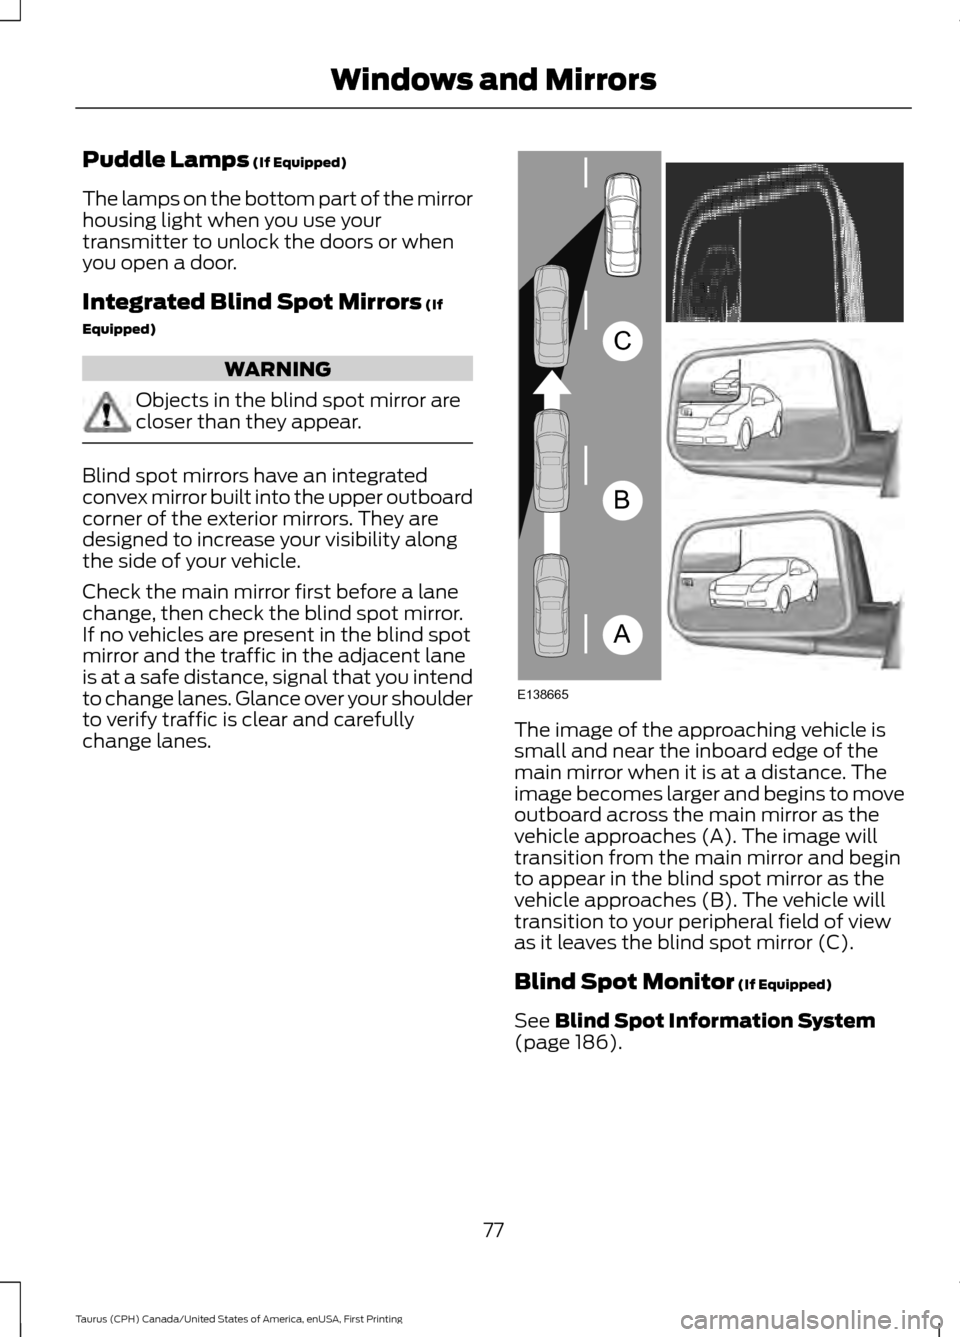
Blind spot mirrors have an integrated
convex mirror built into the upper outboard
corner of the exterior mirrors. They are
designed to increase your visibility along
the side of your vehicle.
Check the main mirror first before a lane
change, then check the blind spot mirror.
If no vehicles are present in the blind spot
mirror and the traffic in the adjacent lane
is at a safe distance, signal that you intend
to change lanes. Glance over your shoulder
to verify traffic is clear and carefully
change lanes.
The image of the approaching vehicle is
small and near the inboard edge of the
main mirror when it is at a distance. The
image becomes larger and begins to move
outboard across the main mirror as the
vehicle approaches (A). The image will
transition from the main mirror and begin
to appear in the blind spot mirror as the
vehicle approaches (B). The vehicle will
transition to your peripheral field of view
as it leaves the blind spot mirror (C).
Blind Spot Monitor
(If Equipped)
See
Blind Spot Information System
(page 186).
77
Taurus (CPH) Canada/United States of America, enUSA, First Printing Windows and MirrorsA
B
C
E138665
Page 81 of 424

INTERIOR MIRROR
WARNING
Do not adjust the mirror when your
vehicle is moving.
Note:
Do not clean the housing or glass of
any mirror with harsh abrasives, fuel or other
petroleum or ammonia-based cleaning
products.
You can adjust the interior mirror to your
preference. Some mirrors also have a
second pivot point. This lets you move the
mirror head up or down and from side to
side.
Pull the tab below the mirror toward you
to reduce glare at night.
Auto-Dimming Mirror (If Equipped)
Note: Do not block the sensors on the front
and back of the mirror. Mirror performance
may be affected. A rear center passenger or
raised rear center head restraint may also
block light from reaching the sensor.
The mirror will dim automatically to reduce
glare when bright lights are detected from
behind your vehicle. It will automatically
return to normal reflection when you select
reverse gear to make sure you have a clear
view when backing up. SUN VISORS Rotate the sun visor toward the side
window and extend it rearward for extra
shade.
Illuminated Vanity Mirror
Lift the cover to switch the lamp on.
SUN SHADES
(If Equipped)
Note: Do not try to move the sun shade
manually.
The power rear sun shade covers the rear
window of the vehicle.
78
Taurus (CPH) Canada/United States of America, enUSA, First Printing Windows and MirrorsE138666 E162197