2016 FORD SUPER DUTY homelink
[x] Cancel search: homelinkPage 130 of 510
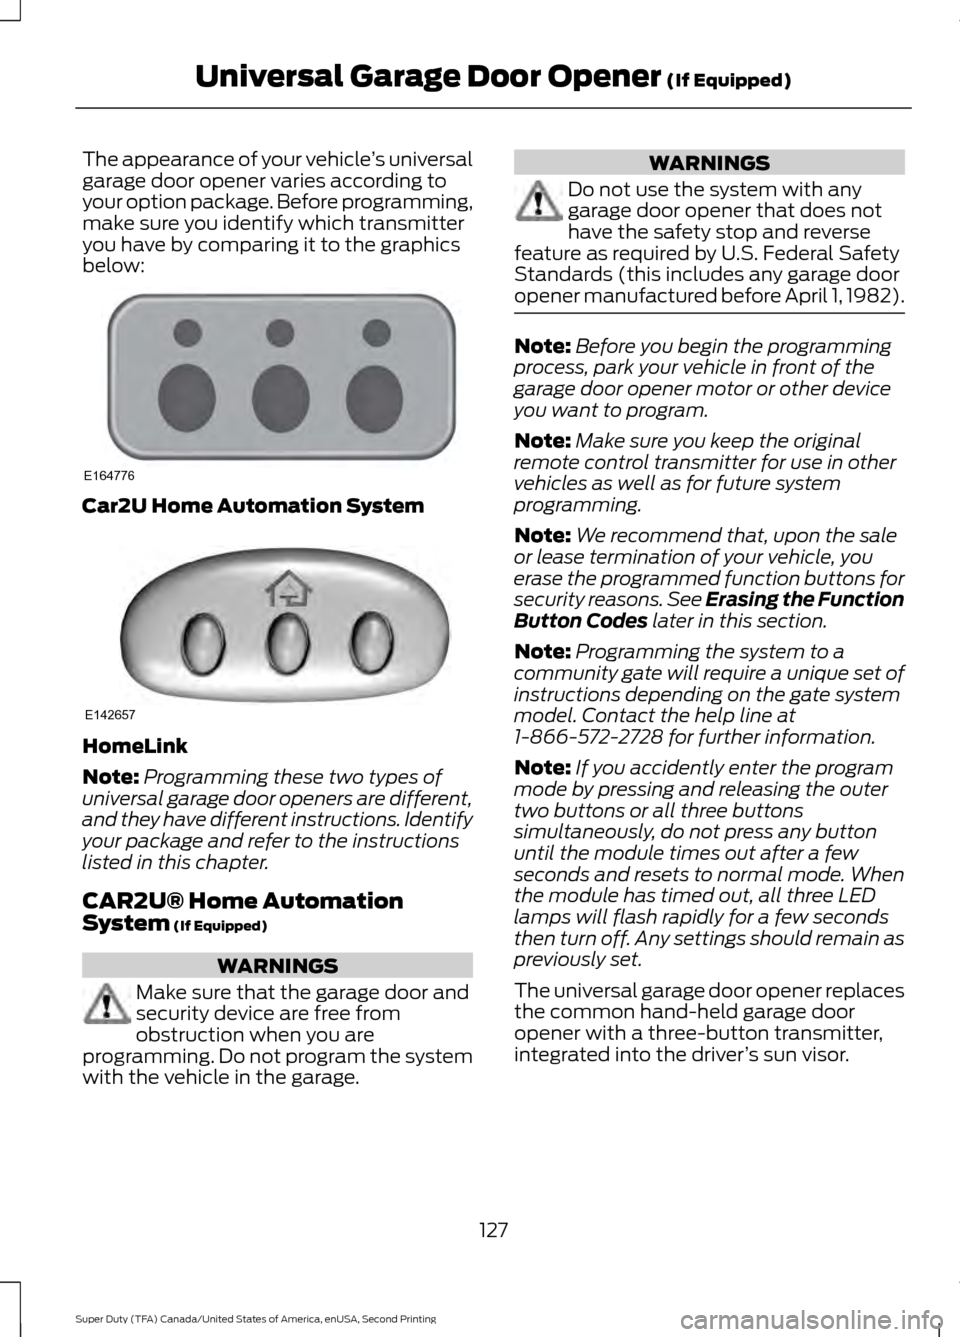
The appearance of your vehicle
’s universal
garage door opener varies according to
your option package. Before programming,
make sure you identify which transmitter
you have by comparing it to the graphics
below: Car2U Home Automation System
HomeLink
Note:
Programming these two types of
universal garage door openers are different,
and they have different instructions. Identify
your package and refer to the instructions
listed in this chapter.
CAR2U® Home Automation
System (If Equipped) WARNINGS
Make sure that the garage door and
security device are free from
obstruction when you are
programming. Do not program the system
with the vehicle in the garage. WARNINGS
Do not use the system with any
garage door opener that does not
have the safety stop and reverse
feature as required by U.S. Federal Safety
Standards (this includes any garage door
opener manufactured before April 1, 1982). Note:
Before you begin the programming
process, park your vehicle in front of the
garage door opener motor or other device
you want to program.
Note: Make sure you keep the original
remote control transmitter for use in other
vehicles as well as for future system
programming.
Note: We recommend that, upon the sale
or lease termination of your vehicle, you
erase the programmed function buttons for
security reasons. See Erasing the Function
Button Codes
later in this section.
Note: Programming the system to a
community gate will require a unique set of
instructions depending on the gate system
model. Contact the help line at
1-866-572-2728 for further information.
Note: If you accidently enter the program
mode by pressing and releasing the outer
two buttons or all three buttons
simultaneously, do not press any button
until the module times out after a few
seconds and resets to normal mode. When
the module has timed out, all three LED
lamps will flash rapidly for a few seconds
then turn off. Any settings should remain as
previously set.
The universal garage door opener replaces
the common hand-held garage door
opener with a three-button transmitter,
integrated into the driver ’s sun visor.
127
Super Duty (TFA) Canada/United States of America, enUSA, Second Printing Universal Garage Door Opener
(If Equipped)E164776 E142657
Page 133 of 510
The LED lamp above the selected button
will illuminate to confirm that the system
is responding to the button command.
Erasing the Function Button Codes
Note:
You cannot erase individual buttons.
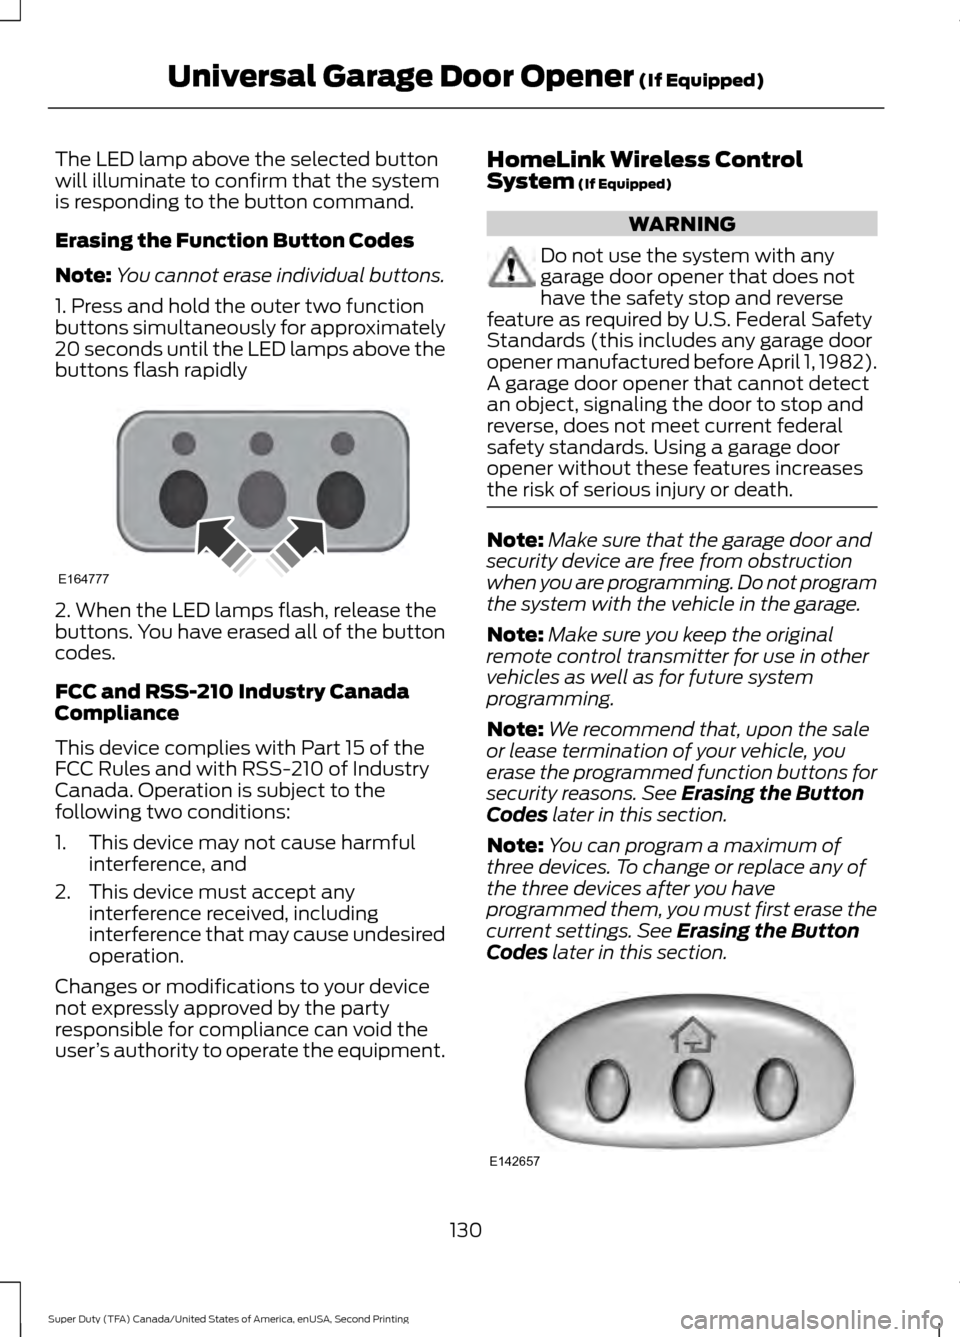
1. Press and hold the outer two function
buttons simultaneously for approximately
20 seconds until the LED lamps above the
buttons flash rapidly 2. When the LED lamps flash, release the
buttons. You have erased all of the button
codes.
FCC and RSS-210 Industry Canada
Compliance
This device complies with Part 15 of the
FCC Rules and with RSS-210 of Industry
Canada. Operation is subject to the
following two conditions:
1. This device may not cause harmful
interference, and
2. This device must accept any interference received, including
interference that may cause undesired
operation.
Changes or modifications to your device
not expressly approved by the party
responsible for compliance can void the
user ’s authority to operate the equipment. HomeLink Wireless Control
System (If Equipped) WARNING
Do not use the system with any
garage door opener that does not
have the safety stop and reverse
feature as required by U.S. Federal Safety
Standards (this includes any garage door
opener manufactured before April 1, 1982).
A garage door opener that cannot detect
an object, signaling the door to stop and
reverse, does not meet current federal
safety standards. Using a garage door
opener without these features increases
the risk of serious injury or death. Note:
Make sure that the garage door and
security device are free from obstruction
when you are programming. Do not program
the system with the vehicle in the garage.
Note: Make sure you keep the original
remote control transmitter for use in other
vehicles as well as for future system
programming.
Note: We recommend that, upon the sale
or lease termination of your vehicle, you
erase the programmed function buttons for
security reasons. See
Erasing the Button
Codes later in this section.
Note: You can program a maximum of
three devices. To change or replace any of
the three devices after you have
programmed them, you must first erase the
current settings. See
Erasing the Button
Codes later in this section. 130
Super Duty (TFA) Canada/United States of America, enUSA, Second Printing Universal Garage Door Opener
(If Equipped)E164777 E142657
Page 134 of 510
The universal garage door opener replaces
the common hand-held garage door
opener with a three-button transmitter,
integrated into the driver
’s sun visor.
The system includes two primary features,
a garage door opener and a platform for
remote activation of devices within the
home. This functionality allows you to
program garage door openers as well as
entry gate operators, security systems,
entry door locks and home or office
lighting.
You can find additional system information
online at www.homelink.com or by calling
the toll-free help line on 1-800-355-3515.
In-vehicle Programming
This process is to program your hand-held
transmitter and your in-vehicle HomeLink
button.
Note: Put a new battery in the hand-held
transmitter. This will ensure quicker training
and accurate transmission of the
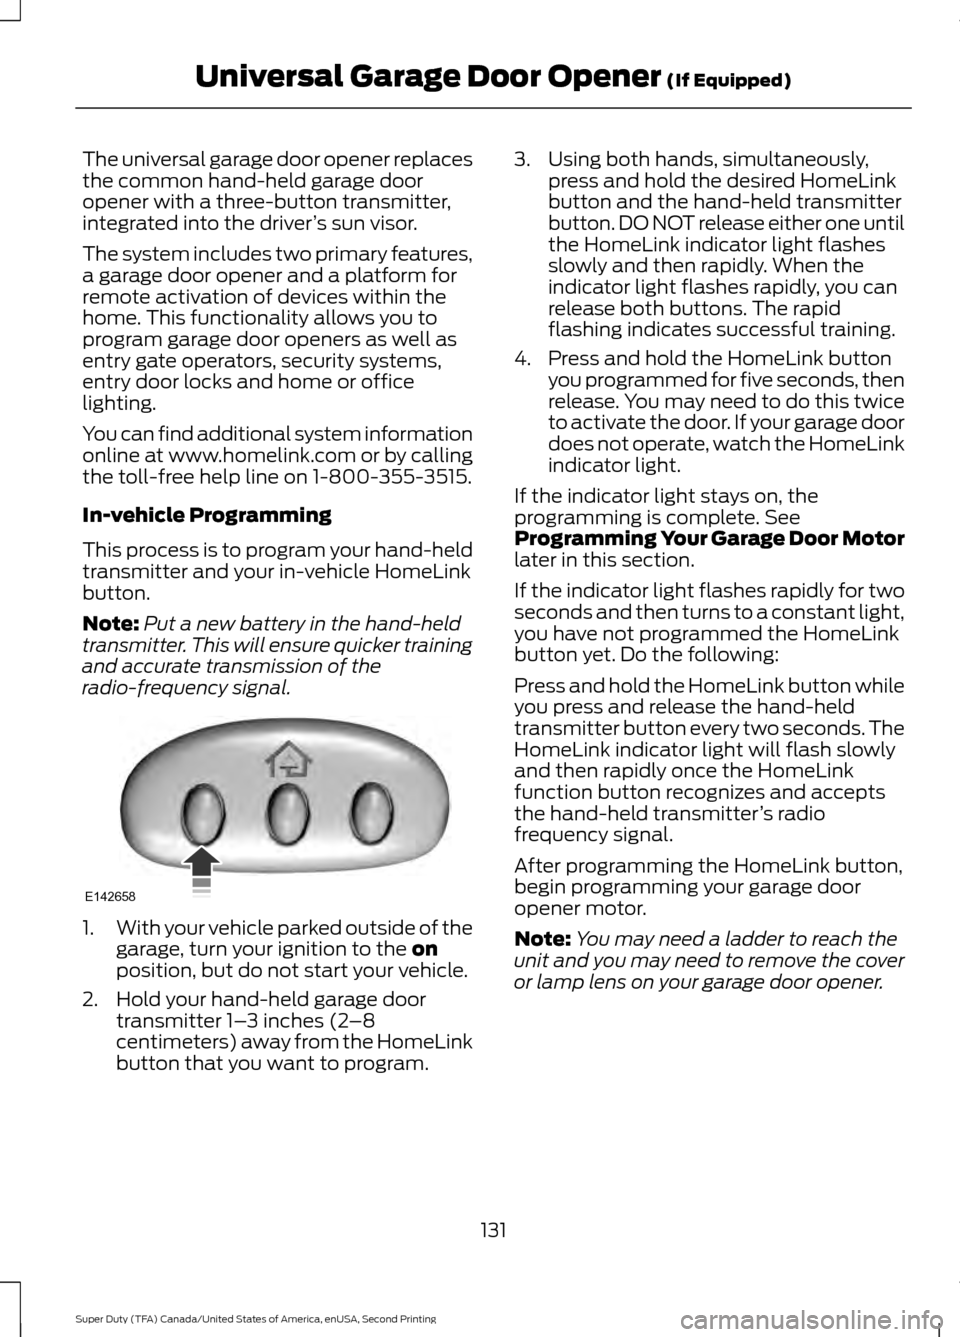
radio-frequency signal. 1.
With your vehicle parked outside of the
garage, turn your ignition to the on
position, but do not start your vehicle.
2. Hold your hand-held garage door transmitter 1– 3 inches (2–8
centimeters) away from the HomeLink
button that you want to program. 3. Using both hands, simultaneously,
press and hold the desired HomeLink
button and the hand-held transmitter
button. DO NOT release either one until
the HomeLink indicator light flashes
slowly and then rapidly. When the
indicator light flashes rapidly, you can
release both buttons. The rapid
flashing indicates successful training.
4. Press and hold the HomeLink button you programmed for five seconds, then
release. You may need to do this twice
to activate the door. If your garage door
does not operate, watch the HomeLink
indicator light.
If the indicator light stays on, the
programming is complete. See
Programming Your Garage Door Motor
later in this section.
If the indicator light flashes rapidly for two
seconds and then turns to a constant light,
you have not programmed the HomeLink
button yet. Do the following:
Press and hold the HomeLink button while
you press and release the hand-held
transmitter button every two seconds. The
HomeLink indicator light will flash slowly
and then rapidly once the HomeLink
function button recognizes and accepts
the hand-held transmitter ’s radio
frequency signal.
After programming the HomeLink button,
begin programming your garage door
opener motor.
Note: You may need a ladder to reach the
unit and you may need to remove the cover
or lamp lens on your garage door opener.
131
Super Duty (TFA) Canada/United States of America, enUSA, Second Printing Universal Garage Door Opener
(If Equipped)E142658
Page 135 of 510
To program additional buttons, repeat
Steps 1 – 4.
For questions or comments, please contact
HomeLink at www.homelink.com or
1-800-355-3515.
Programming Your Garage Door
Opener Motor
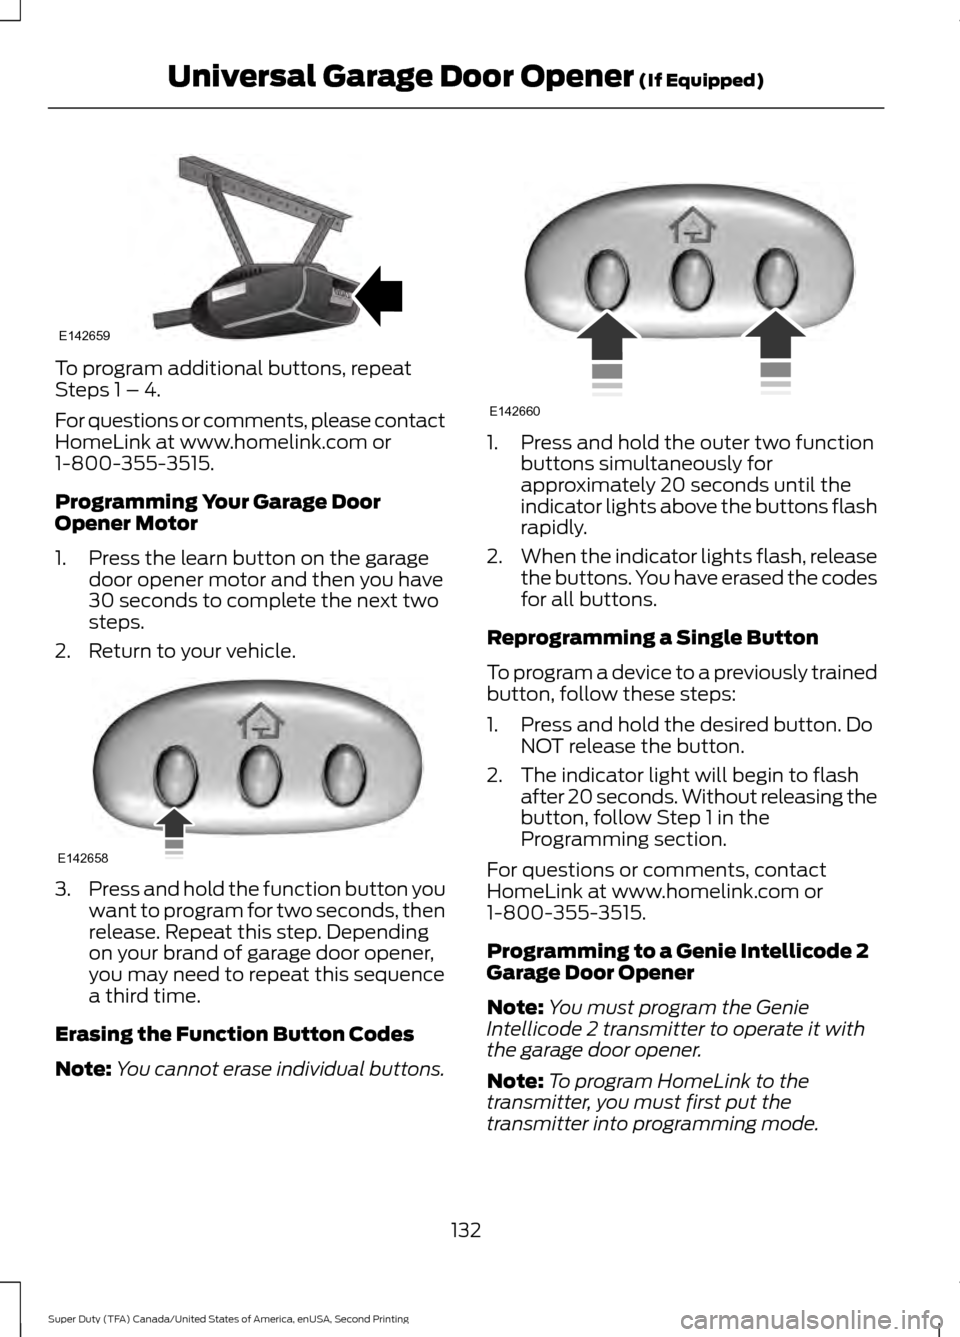
1. Press the learn button on the garage
door opener motor and then you have
30 seconds to complete the next two
steps.
2. Return to your vehicle. 3.
Press and hold the function button you
want to program for two seconds, then
release. Repeat this step. Depending
on your brand of garage door opener,
you may need to repeat this sequence
a third time.
Erasing the Function Button Codes
Note: You cannot erase individual buttons. 1. Press and hold the outer two function
buttons simultaneously for
approximately 20 seconds until the
indicator lights above the buttons flash
rapidly.
2. When the indicator lights flash, release
the buttons. You have erased the codes
for all buttons.
Reprogramming a Single Button
To program a device to a previously trained
button, follow these steps:
1. Press and hold the desired button. Do NOT release the button.
2. The indicator light will begin to flash after 20 seconds. Without releasing the
button, follow Step 1 in the
Programming section.
For questions or comments, contact
HomeLink at www.homelink.com or
1-800-355-3515.
Programming to a Genie Intellicode 2
Garage Door Opener
Note: You must program the Genie
Intellicode 2 transmitter to operate it with
the garage door opener.
Note: To program HomeLink to the
transmitter, you must first put the
transmitter into programming mode.
132
Super Duty (TFA) Canada/United States of America, enUSA, Second Printing Universal Garage Door Opener (If Equipped)E142659 E142658 E142660
Page 136 of 510
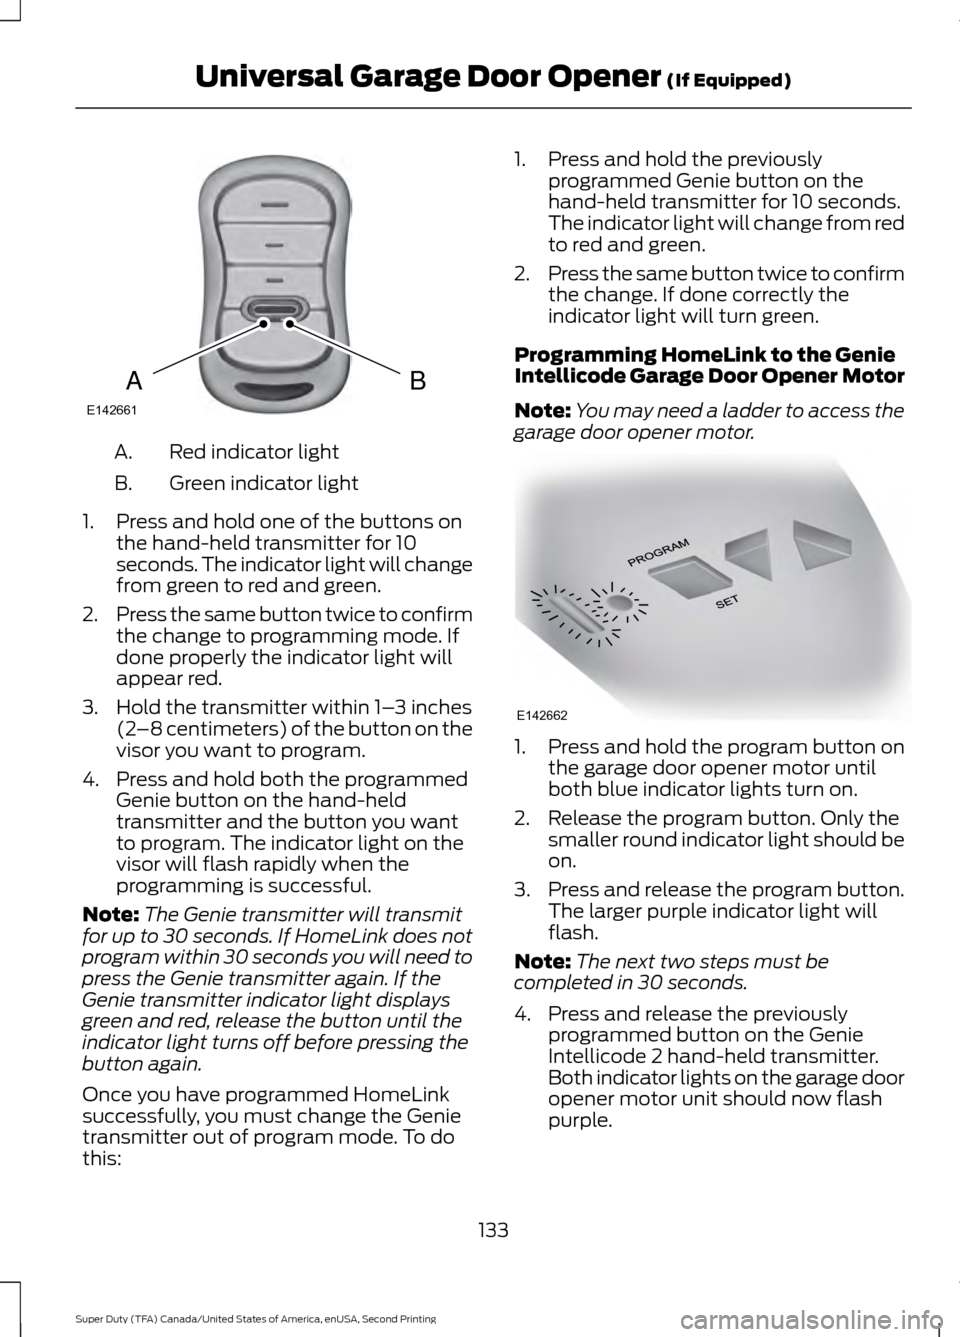
Red indicator light
A.
Green indicator light
B.
1. Press and hold one of the buttons on the hand-held transmitter for 10
seconds. The indicator light will change
from green to red and green.
2. Press the same button twice to confirm
the change to programming mode. If
done properly the indicator light will
appear red.
3. Hold the transmitter within 1– 3 inches
(2 –8 centimeters) of the button on the
visor you want to program.
4. Press and hold both the programmed Genie button on the hand-held
transmitter and the button you want
to program. The indicator light on the
visor will flash rapidly when the
programming is successful.
Note: The Genie transmitter will transmit
for up to 30 seconds. If HomeLink does not
program within 30 seconds you will need to
press the Genie transmitter again. If the
Genie transmitter indicator light displays
green and red, release the button until the
indicator light turns off before pressing the
button again.
Once you have programmed HomeLink
successfully, you must change the Genie
transmitter out of program mode. To do
this: 1. Press and hold the previously
programmed Genie button on the
hand-held transmitter for 10 seconds.
The indicator light will change from red
to red and green.
2. Press the same button twice to confirm
the change. If done correctly the
indicator light will turn green.
Programming HomeLink to the Genie
Intellicode Garage Door Opener Motor
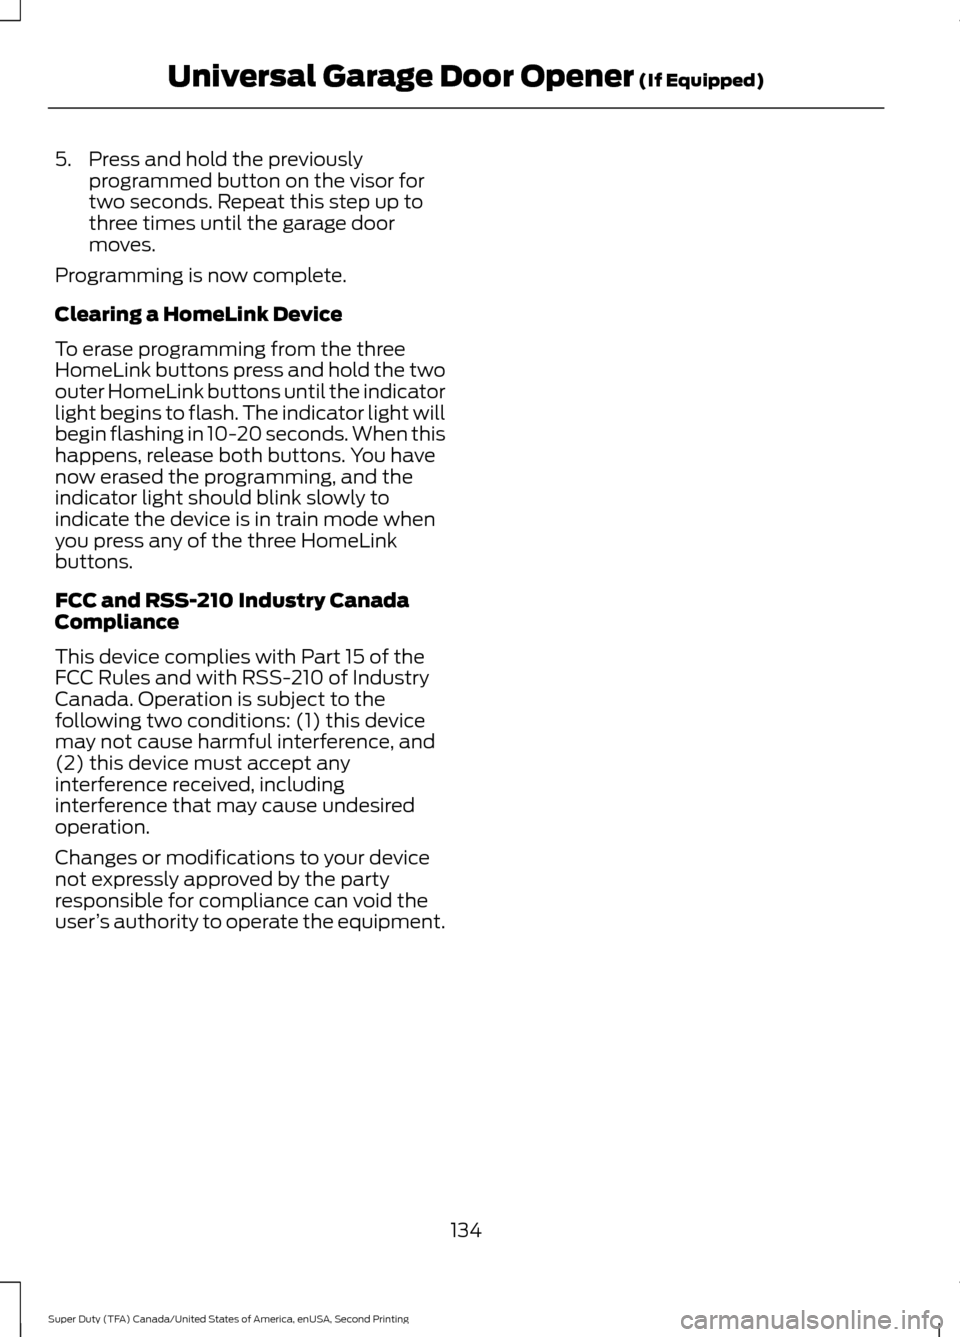
Note: You may need a ladder to access the
garage door opener motor. 1. Press and hold the program button on
the garage door opener motor until
both blue indicator lights turn on.
2. Release the program button. Only the smaller round indicator light should be
on.
3. Press and release the program button.
The larger purple indicator light will
flash.
Note: The next two steps must be
completed in 30 seconds.
4. Press and release the previously programmed button on the Genie
Intellicode 2 hand-held transmitter.
Both indicator lights on the garage door
opener motor unit should now flash
purple.
133
Super Duty (TFA) Canada/United States of America, enUSA, Second Printing Universal Garage Door Opener (If Equipped)BAE142661 E142662
Page 137 of 510
5. Press and hold the previously
programmed button on the visor for
two seconds. Repeat this step up to
three times until the garage door
moves.
Programming is now complete.
Clearing a HomeLink Device
To erase programming from the three
HomeLink buttons press and hold the two
outer HomeLink buttons until the indicator
light begins to flash. The indicator light will
begin flashing in 10-20 seconds. When this
happens, release both buttons. You have
now erased the programming, and the
indicator light should blink slowly to
indicate the device is in train mode when
you press any of the three HomeLink
buttons.
FCC and RSS-210 Industry Canada
Compliance
This device complies with Part 15 of the
FCC Rules and with RSS-210 of Industry
Canada. Operation is subject to the
following two conditions: (1) this device
may not cause harmful interference, and
(2) this device must accept any
interference received, including
interference that may cause undesired
operation.
Changes or modifications to your device
not expressly approved by the party
responsible for compliance can void the
user ’s authority to operate the equipment.
134
Super Duty (TFA) Canada/United States of America, enUSA, Second Printing Universal Garage Door Opener (If Equipped)
Page 508 of 510
Sun Visors.........................................................79
Illuminated Vanity Mirror................................... 79
Slide-on-rod........................................................... 79
Supplementary Restraints System.........36 Principle of Operation........................................ 36
Symbols Glossary.............................................7
SYNC™ Applications and Services.......347 911 Assist............................................................... 347
SYNC Services: Traffic, Directions & Information (TDI) (If Equipped, United
States Only)..................................................... 351
Vehicle Health Report (If Equipped, United States Only)................................................... 349
SYNC™ AppLink ™
.....................................355
SYNC Mobile Apps............................................ 355
SYNC™............................................................329 General Information......................................... 329
SYNC™ Troubleshooting..........................367
T
Tailgate Lock....................................................59
Tailgate Step...................................................60 Closing the step................................................... 60
Opening the step................................................. 60
Tailgate..............................................................59
Technical Specifications See: Capacities and Specifications............303
Terrain Response
...........................................175
Principle of Operation....................................... 175
The Better Business Bureau (BBB) Auto Line Program (U.S. Only)........................218
Tire Care
..........................................................267
Glossary of Tire Terminology........................ 268
Information About Uniform Tire Quality Grading.............................................................. 267
Information Contained on the Tire Sidewall........................................................... 269
Temperature A B C............................................ 268
Traction AA A B C............................................... 267
Treadwear............................................................. 267
Tire Pressure Monitoring System..........284 Changing Tires With a Tire Pressure
Monitoring System....................................... 286
Understanding Your Tire Pressure Monitoring System ...................................... 286
Tires See: Wheels and Tires..................................... 264Towing a Trailer.............................................190
Load Placement................................................. 190
Towing Points
...............................................202
Towing the Vehicle on Four Wheels
.........................................................204
Emergency Towing........................................... 204
Recreational Towing........................................ 204
Towing..............................................................190
Traction Control
............................................170
Principle of Operation....................................... 170
Trailer Sway Control
.....................................191
Transfer Case Fluid Check........................243
Transmission Code Designation...........306
Transmission..................................................149
Transmission See: Transmission.............................................. 149
Transporting the Vehicle...........................203
U
Under Hood Overview - 6.2L...................233
Under Hood Overview - 6.8L..................234
Universal Garage Door Opener................127 CAR2U® Home Automation System...........127
HomeLink Wireless Control System...........130
USB Port
.........................................................328
Using Cruise Control.....................................181
Switching Cruise Control Off.......................... 181
Switching Cruise Control On........................... 181
Using Four-Wheel Drive.............................156 4WD Indicator Lights......................................... 157
Driving Off-Road With Truck and Utility Vehicles............................................................. 160
Electronic Shift-On-the-Fly (ESOF) 4WD system............................................................... 156
How Your Vehicle Differs From Other Vehicles............................................................. 160
Manual Shift On Stop (MSOS) 4WD system............................................................... 156
Using a Manual Shift On Stop (MSOS) 4WD system..................................................... 157
Using the Electronic Shift on the Fly 4WD system............................................................... 159
Using Hill Descent Control........................175 Hill descent modes............................................. 175
Using MyKey With Remote Start Systems..........................................................54
Using Snow Chains
.....................................284
505
Super Duty (TFA) Canada/United States of America, enUSA, Second Printing Index