2016 FORD POLICE INTERCEPTOR SEDAN ECU
[x] Cancel search: ECUPage 30 of 358
The seatbelt pretensioners at the front
seating positions are designed to tighten
the seatbelts when activated. In frontal
and near-frontal impacts, the seatbelt
pretensioners may be activated alone or,
if the crash is of sufficient severity, together
with the front airbags. The seatbelt
pretensioners may activate when the
Safety Canopy deploys.
FASTENING THE SEATBELTS
The front outboard and rear safety
restraints in the vehicle are combination
lap and shoulder belts.
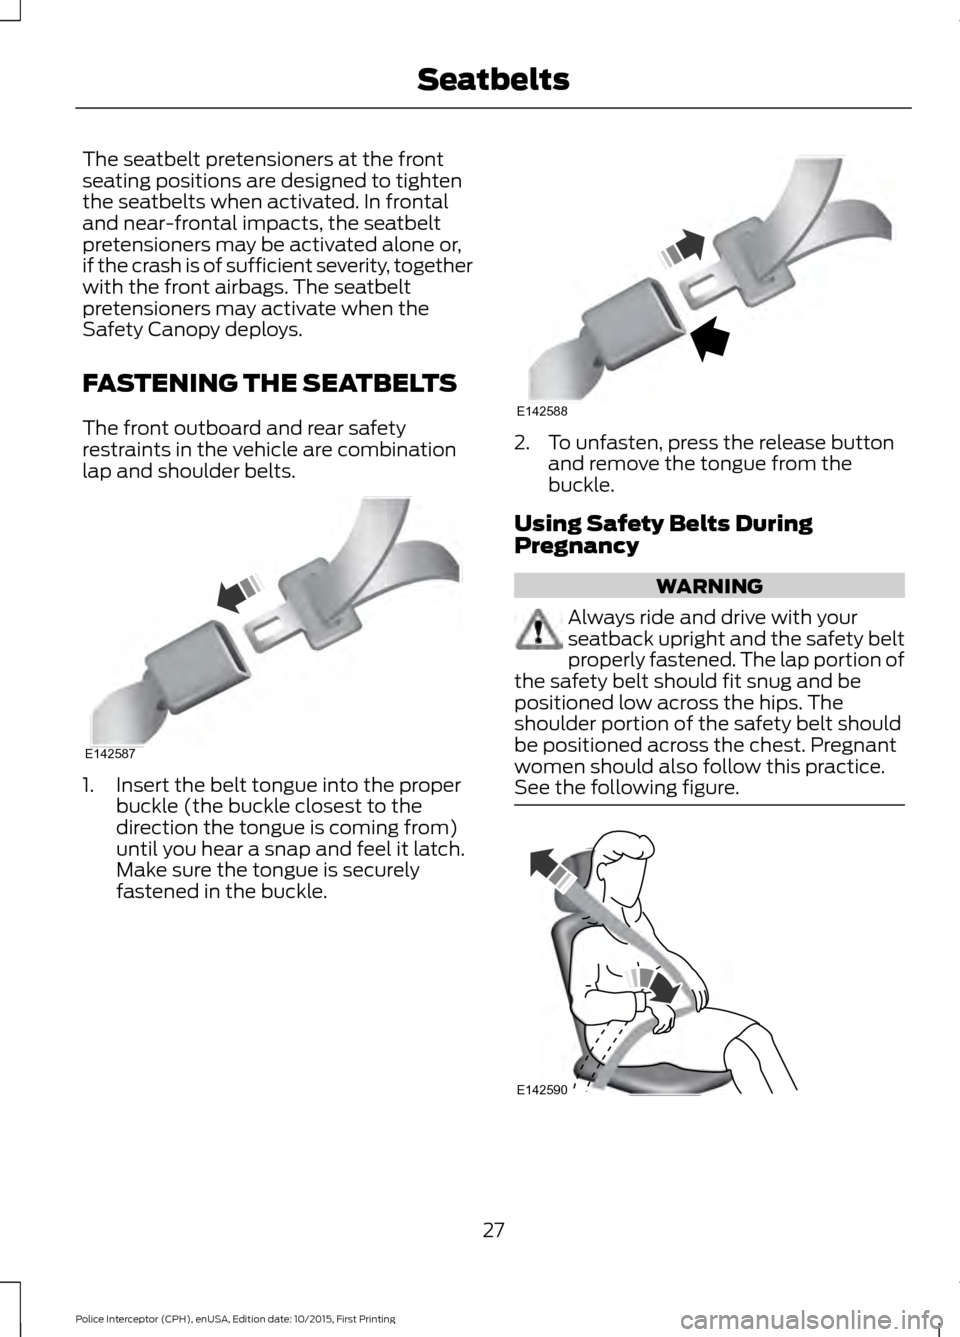
1. Insert the belt tongue into the proper
buckle (the buckle closest to the
direction the tongue is coming from)
until you hear a snap and feel it latch.
Make sure the tongue is securely
fastened in the buckle. 2. To unfasten, press the release button
and remove the tongue from the
buckle.
Using Safety Belts During
Pregnancy WARNING
Always ride and drive with your
seatback upright and the safety belt
properly fastened. The lap portion of
the safety belt should fit snug and be
positioned low across the hips. The
shoulder portion of the safety belt should
be positioned across the chest. Pregnant
women should also follow this practice.
See the following figure. 27
Police Interceptor (CPH), enUSA, Edition date: 10/2015, First Printing SeatbeltsE142587 E142588 E142590
Page 55 of 358
ANTI-THEFT ALARM (If Equipped)
Alarm System
The perimeter alarm is a deterrent against
unauthorized access to your vehicle
through the doors, luggage compartment
and the hood.
Triggering the Alarm
Once armed, the alarm is triggered in any
of the following ways:
• If someone opens a door, cargo area
or the hood without a valid key or
remote control.
• If you switch the ignition on without a
valid key.
If the alarm is triggered, the horn will sound
for 30 seconds and the hazard warning
flasher will flash for five minutes.
Any further attempts to perform one of the
above will trigger the alarm again.
Arming the Alarm
To arm the alarm, lock your vehicle. See
Locks
(page 48).
Disarming the Alarm
Disarm and silence the alarm by unlocking
the doors with the key and switching the
ignition on within 12 seconds, or by
unlocking the doors or the cargo area with
the remote control.
52
Police Interceptor (CPH), enUSA, Edition date: 10/2015, First Printing Security
Page 105 of 358
AUTOMATIC TRANSMISSION
WARNINGS
Always set the parking brake fully
and make sure the gearshift is
latched in park (P). Turn the ignition
to the off position and remove the key
whenever you leave your vehicle. Do not apply the brake pedal and
accelerator pedal simultaneously.
Applying both pedals simultaneously
for more than three seconds will limit
engine rpm, which may result in difficulty
maintaining speed in traffic and could lead
to serious injury. Understanding the Positions of
Your Automatic Transmission
Putting your vehicle in or out of gear:
1. Fully press down the brake pedal.
2. Move the gearshift lever into the
desired gear.
3. Come to a complete stop.
4. Move the gearshift lever and securely latch it in park (P). Park (P)
This position locks the transmission and
prevents the wheels from turning. Reverse (R)
With the gearshift lever in reverse (R), your
vehicle will move backward. Always come
to a complete stop before shifting into and
out of reverse (R).
Neutral (N)
With the gearshift lever in neutral (N), your
vehicle can be started and is free to roll.
Hold the brake pedal down while in this
position.
Drive (D)
Drive (D) is the normal driving position for
the best fuel economy. The overdrive
function allows automatic upshifts and
downshifts through gears one through six.
Low (L)
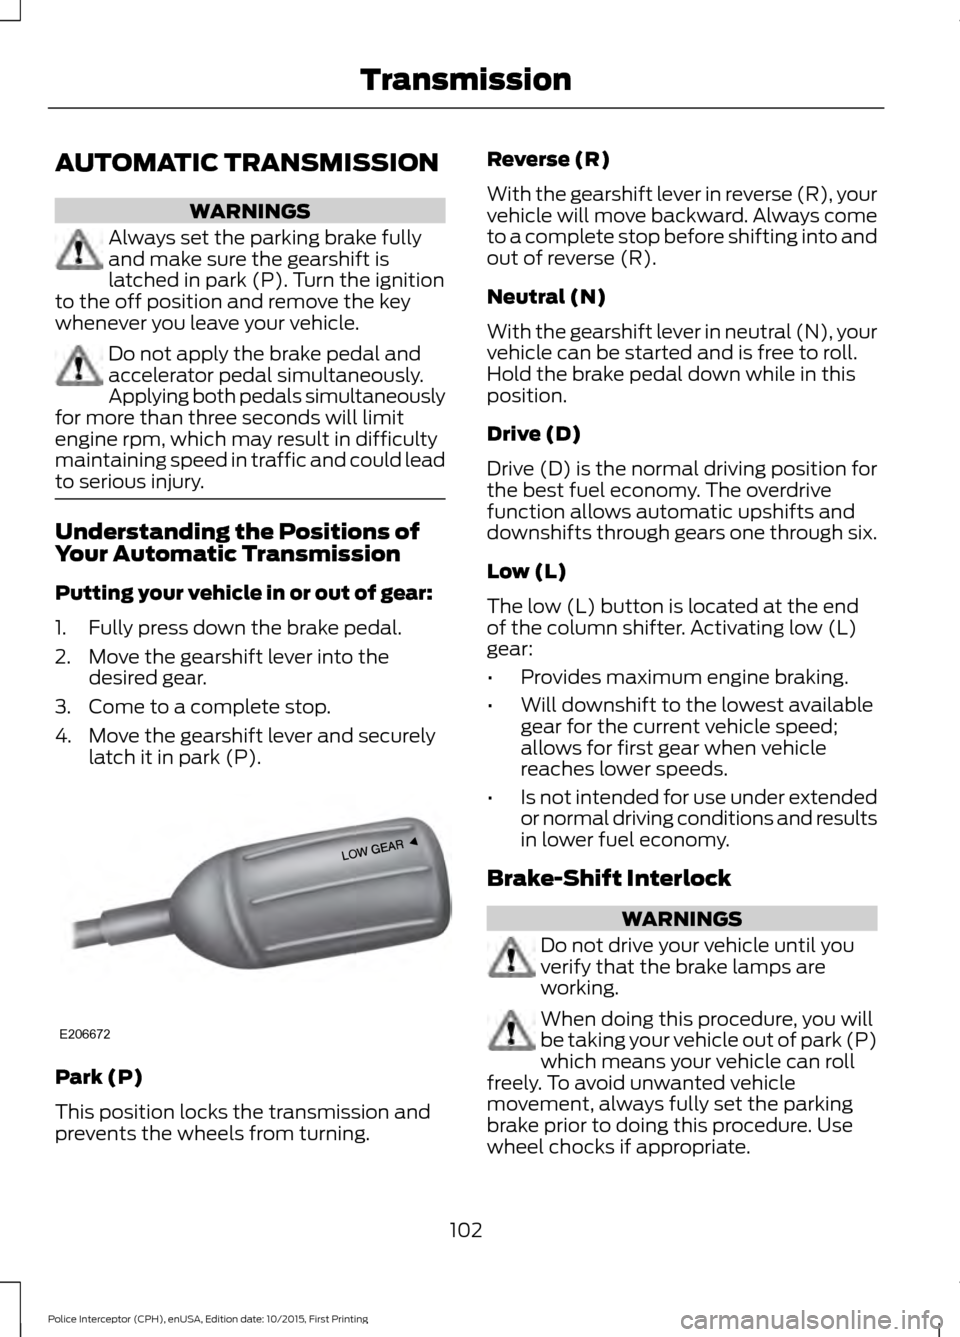
The low (L) button is located at the end
of the column shifter. Activating low (L)
gear:
•
Provides maximum engine braking.
• Will downshift to the lowest available
gear for the current vehicle speed;
allows for first gear when vehicle
reaches lower speeds.
• Is not intended for use under extended
or normal driving conditions and results
in lower fuel economy.
Brake-Shift Interlock WARNINGS
Do not drive your vehicle until you
verify that the brake lamps are
working.
When doing this procedure, you will
be taking your vehicle out of park (P)
which means your vehicle can roll
freely. To avoid unwanted vehicle
movement, always fully set the parking
brake prior to doing this procedure. Use
wheel chocks if appropriate.
102
Police Interceptor (CPH), enUSA, Edition date: 10/2015, First Printing TransmissionE206672
Page 106 of 358
WARNINGS
If you fully release the parking brake
and the brake warning lamp remains
illuminated, the brakes may not be
working properly. See your authorized
dealer. Your vehicle is equipped with a brake-shift
interlock feature that prevents moving the
gearshift lever from park (P) when the
ignition is in the on position and the brake
pedal is not pressed.
If you cannot move the gearshift lever out
of park (P) position with the ignition in the
on position and the brake pedal pressed,
a malfunction may have occurred. It is
possible that a fuse has blown or your
vehicle
’s brake lamps are not operating
properly. See Fuse Specification Chart
(page 159).
If the fuse is not blown and the brake
lamps are working properly, the following
procedure will allow you to move the
gearshift lever from park (P):
1. Apply the parking brake. Turn the ignition key to the off position, then
remove the key.
2. Move the steering column to the full down and full rearward position
(toward the driver ’s seat).
3. Remove the gearshift lever boot.
4. Place fingers into gearshift lever boot hole and pull top half of shroud up and
forward to separate it from the lower
half of the shroud. There is a hinge at
the forward edge of the top shroud.
Roll the top half of the shroud upward
on the hinge point to clear the hazard
flasher button, then pull straight
rearward toward the driver ’s seat to
remove.
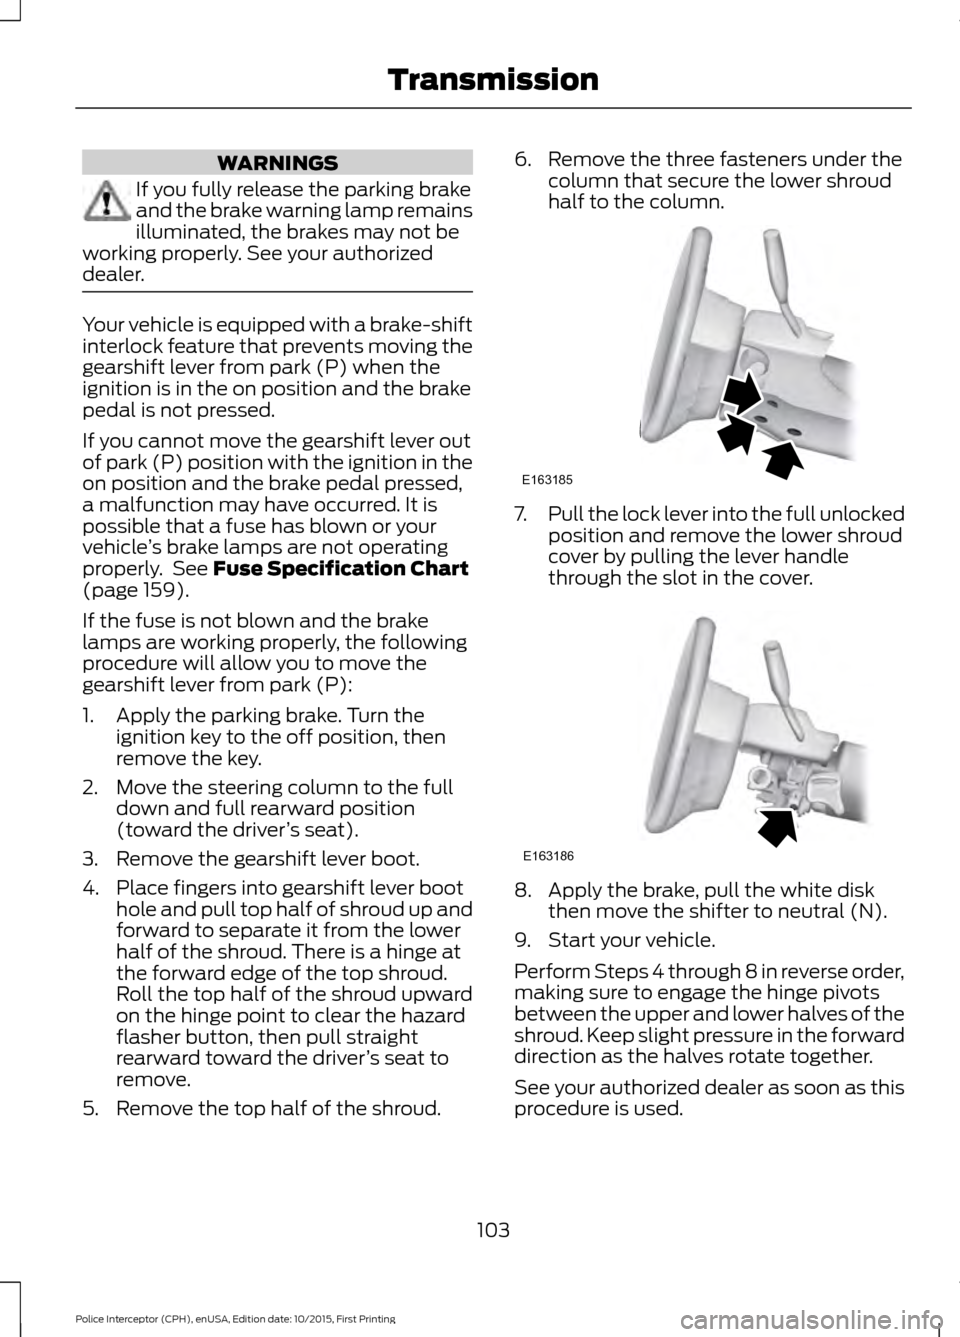
5. Remove the top half of the shroud. 6. Remove the three fasteners under the
column that secure the lower shroud
half to the column. 7.
Pull the lock lever into the full unlocked
position and remove the lower shroud
cover by pulling the lever handle
through the slot in the cover. 8. Apply the brake, pull the white disk
then move the shifter to neutral (N).
9. Start your vehicle.
Perform Steps 4 through 8 in reverse order,
making sure to engage the hinge pivots
between the upper and lower halves of the
shroud. Keep slight pressure in the forward
direction as the halves rotate together.
See your authorized dealer as soon as this
procedure is used.
103
Police Interceptor (CPH), enUSA, Edition date: 10/2015, First Printing TransmissionE163185 E163186
Page 133 of 358
REAR LOADSPACE HATCHES
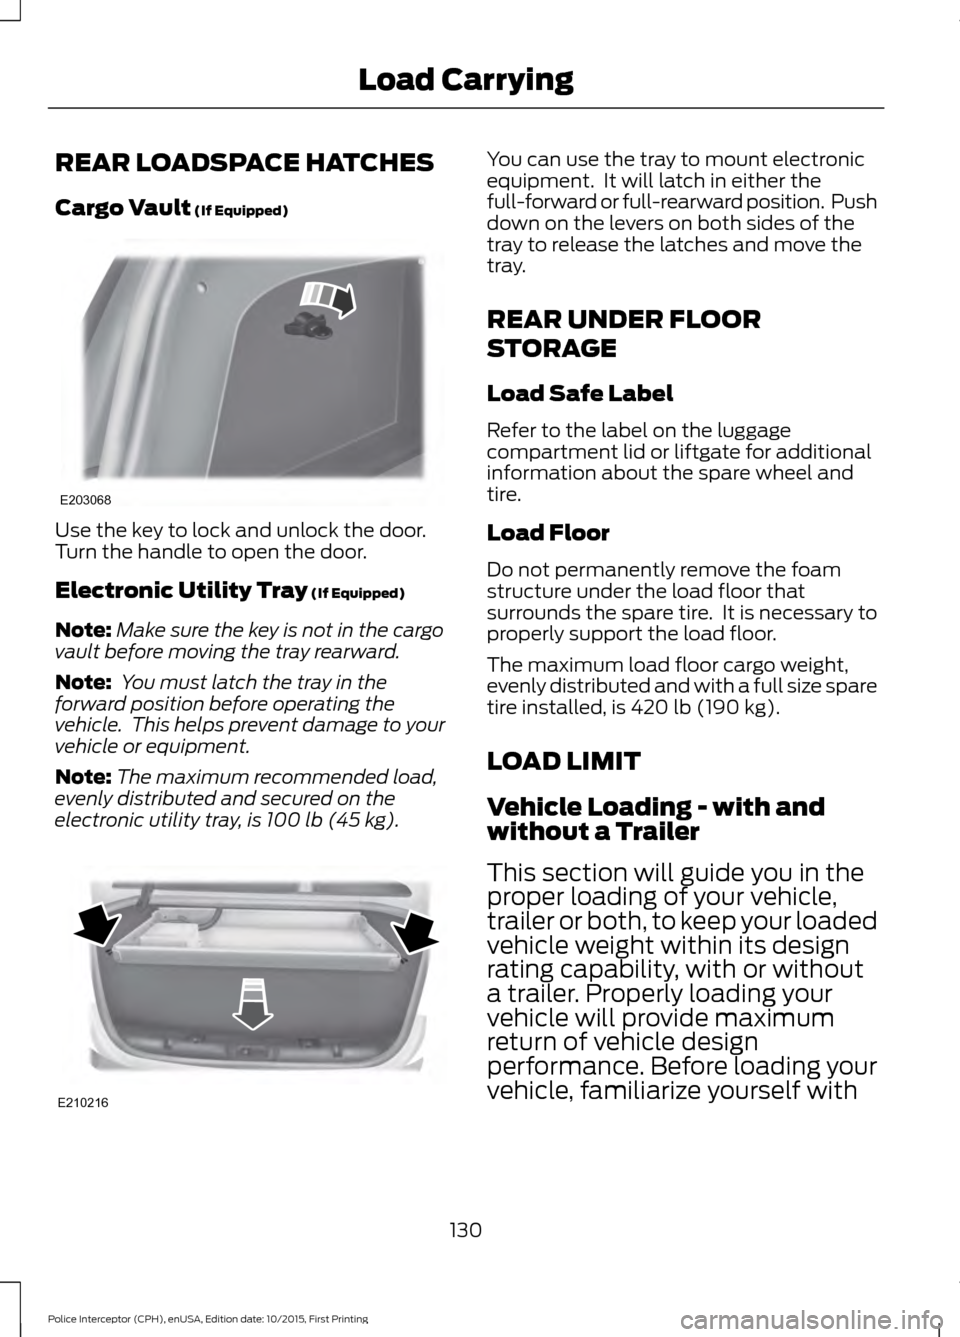
Cargo Vault (If Equipped)
Use the key to lock and unlock the door.
Turn the handle to open the door.
Electronic Utility Tray
(If Equipped)
Note: Make sure the key is not in the cargo
vault before moving the tray rearward.
Note: You must latch the tray in the
forward position before operating the
vehicle. This helps prevent damage to your
vehicle or equipment.
Note: The maximum recommended load,
evenly distributed and secured on the
electronic utility tray, is
100 lb (45 kg). You can use the tray to mount electronic
equipment. It will latch in either the
full-forward or full-rearward position. Push
down on the levers on both sides of the
tray to release the latches and move the
tray.
REAR UNDER FLOOR
STORAGE
Load Safe Label
Refer to the label on the luggage
compartment lid or liftgate for additional
information about the spare wheel and
tire.
Load Floor
Do not permanently remove the foam
structure under the load floor that
surrounds the spare tire. It is necessary to
properly support the load floor.
The maximum load floor cargo weight,
evenly distributed and with a full size spare
tire installed, is
420 lb (190 kg).
LOAD LIMIT
Vehicle Loading - with and
without a Trailer
This section will guide you in the
proper loading of your vehicle,
trailer or both, to keep your loaded
vehicle weight within its design
rating capability, with or without
a trailer. Properly loading your
vehicle will provide maximum
return of vehicle design
performance. Before loading your
vehicle, familiarize yourself with
130
Police Interceptor (CPH), enUSA, Edition date: 10/2015, First Printing Load CarryingE203068 E210216
Page 148 of 358

•
Transmissions give their best fuel
economy when operated in the top
cruise gear and with steady pressure
on the gas pedal.
• Four-wheel-drive operation (if
equipped) is less fuel efficient than
two-wheel-drive operation.
• Close the windows for high-speed
driving.
DRIVING THROUGH WATER WARNING
Do not drive through flowing or deep
water as you may lose control of your
vehicle.
Note:
Driving through standing water can
cause vehicle damage.
Note: Engine damage can occur if water
enters the air filter.
Before driving through standing water,
check the depth. Never drive through water
that is higher than the bottom of the front
rocker area of your vehicle. When driving through standing water, drive
very slowly and do not stop your vehicle.
Your brake performance and traction may
be limited. After driving through water and
as soon as it is safe to do so: •
Lightly press the brake pedal to dry the
brakes and to check that they work.
• Check that the horn works.
• Check that the exterior lights work.
• Turn the steering wheel to check that
the steering power assist works.
FLOOR MATS WARNINGS
Always use floor mats that are
designed to fit the foot well of your
vehicle. Only use floor mats that
leave the pedal area unobstructed. Only
use floor mats that are firmly secured to
retention posts so that they cannot slip out
of position and interfere with the pedals
or impair safe operation of your vehicle in
other ways. Pedals that cannot move freely can
cause loss of vehicle control and
increase the risk of serious personal
injury. Always make sure that the floor
mats are properly attached to the
retention posts in the carpet that are
supplied with your vehicle. Floor mats must
be properly secured to both retention posts
to make sure mats do not shift out of
position. Never place floor mats or any other
covering in the vehicle foot well that
cannot be properly secured to
prevent them from moving and interfering
with the pedals or the ability to control the
vehicle. Never place floor mats or any other
covering on top of already installed
floor mats. Floor mats should always
rest on top of vehicle carpeting surface and
not another floor mat or other covering.
Additional floor mats or any other covering
will reduce the pedal clearance and
potentially interfere with pedal operation.
145
Police Interceptor (CPH), enUSA, Edition date: 10/2015, First Printing Driving HintsE176360
Page 149 of 358
WARNINGS
Check attachment of floor mats on
a regular basis. Always properly
reinstall and secure floor mats that
have been removed for cleaning or
replacement. Always make sure that objects
cannot fall into the driver foot well
while the vehicle is moving. Objects
that are loose can become trapped under
the pedals causing a loss of vehicle control. Failure to properly follow floor mat
installation or attachment
instructions can potentially cause
interference with pedal operation causing
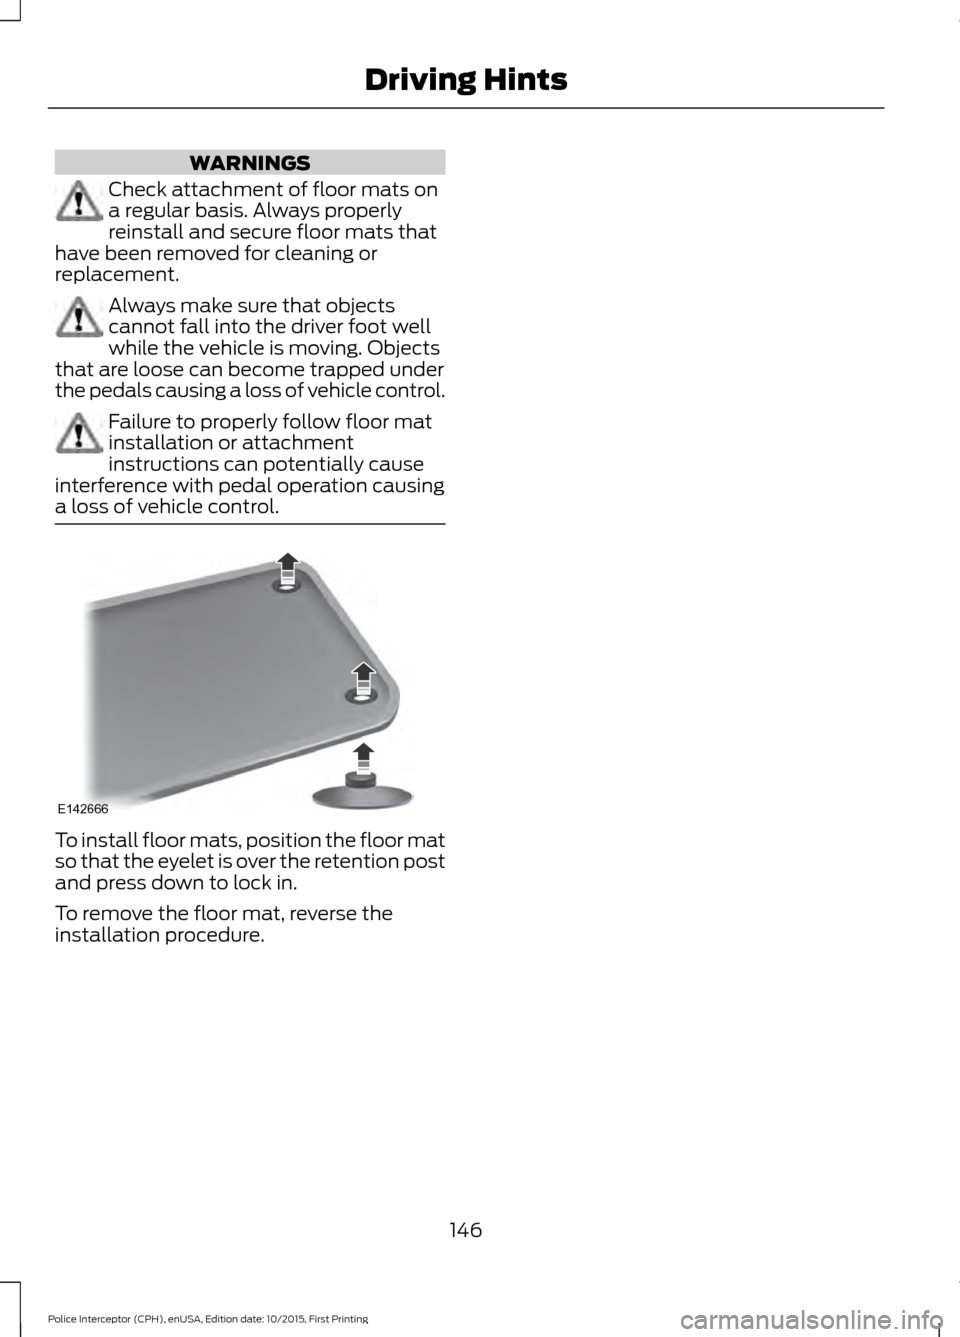
a loss of vehicle control. To install floor mats, position the floor mat
so that the eyelet is over the retention post
and press down to lock in.
To remove the floor mat, reverse the
installation procedure.
146
Police Interceptor (CPH), enUSA, Edition date: 10/2015, First Printing Driving HintsE142666
Page 156 of 358
2. If your inquiry or concern remains
unresolved, contact the Sales Manager,
Service Manager or Customer Relations
Manager.
3. If you require assistance or clarification
on Ford Motor Company policies,
please contact the Ford Customer
Relationship Center.
In order to help us serve you better, please
have the following information available
when contacting a Customer Relationship
Center:
• Vehicle Identification Number.
• Your telephone number (home and
business).
• The name of the authorized dealer and
city where located.
• The vehicle ’s current odometer reading.
In some states within the United States,
you must directly notify Ford in writing
before pursuing remedies under your
state's warranty laws, and Ford is also
allowed a final repair attempt.
Additionally, in some states within the
United States, a consumer has the option
of submitting a warranty dispute to the
BBB Auto Line before taking action under
the Magnuson-Moss Warranty Act, or to
the extent allowed by state law, before
pursuing replacement or repurchase
remedies provided by certain state laws.
This dispute handling procedure is not
required prior to enforcing state created
rights or other rights which are independent
of the Magnuson-Moss Warranty Act or
state replacement or repurchase laws. IN CALIFORNIA (U.S. ONLY)
California Civil Code Section 1793.2(d)
requires that, if a manufacturer or its
representative is unable to repair a motor
vehicle to conform to the vehicle
’s
applicable express warranty after a
reasonable number of attempts, the
manufacturer shall be required to either
replace the vehicle with one substantially
identical or repurchase the vehicle and
reimburse the buyer in an amount equal to
the actual price paid or payable by the
consumer (less a reasonable allowance
for consumer use). The consumer has the
right to choose whether to receive a refund
or replacement vehicle.
California Civil Code Section 1793.22(b)
presumes that the manufacturer has had
a reasonable number of attempts to
conform the vehicle to its applicable
express warranties if, within the first 18
months of ownership of a new vehicle or
the first 18000 miles (29 000 km),
whichever occurs first:
1. Two or more repair attempts are made
on the same non-conformity likely to
cause death or serious bodily injury OR
2. Four or more repair attempts are made
on the same nonconformity (a defect
or condition that substantially impairs
the use, value or safety of the vehicle)
OR
3. The vehicle is out of service for repair of nonconformities for a total of more
than 30 calendar days (not necessarily
all at one time).
In the case of 1 or 2 above, the consumer
must also notify the manufacturer of the
need for the repair of the nonconformity
at the following address:
Ford Motor Company
16800 Executive Plaza Drive
Mail Drop 3NE-B
Dearborn, MI 48126
153
Police Interceptor (CPH), enUSA, Edition date: 10/2015, First Printing Customer Assistance