2016 FORD FUSION (AMERICAS) tow
[x] Cancel search: towPage 229 of 518

ROADSIDE ASSISTANCE
Vehicles Sold in the United States:
Getting Roadside Assistance
To fully assist you should you have a
vehicle concern, Ford Motor Company
offers a complimentary roadside
assistance program. This program is
separate from the New Vehicle Limited
Warranty. The service is available:
•
24 hours a day, seven days a week.
• For the coverage period listed on the
Roadside Assistance Card included in
your Owner's Manual portfolio.
Roadside Assistance covers:
• A flat tire change with a good spare, if
provided with the vehicle (except
vehicles supplied with a tire inflation
kit).
• Battery jump start.
• Lock-out assistance (key replacement
cost is the customer's responsibility).
• Fuel delivery — independent service
contractors, if not prohibited by state,
local or municipal law, shall deliver up
to 2 gal (7.6 L) of gasoline or 5 gal
(18.9 L) of diesel fuel to a disabled
vehicle. Roadside Assistance limits fuel
delivery service to two no-charge
occurrences within a 12-month period.
• Winch out — available within
100 ft
(30.5 m) of a paved or county
maintained road, no recoveries.
• Towing — independent service
contractors, if not prohibited by state,
local or municipal law, shall tow Ford
eligible vehicles to an authorized dealer
within
35 mi (56 km) of the
disablement location or to the nearest authorized dealer. If a member
requests a tow to an authorized dealer
that is more than
35 mi (56 km) from
the disablement location, the member
shall be responsible for any mileage
costs in excess of
35 mi (56 km).
Roadside Assistance includes up to $200
for a towed trailer if the disabled eligible
vehicle requires service at the nearest
authorized dealer. If the towing vehicle is
operational but the trailer is not, then the
trailer does not qualify for any roadside
services.
Vehicles Sold in the United States:
Using Roadside Assistance
Complete the roadside assistance
identification card and place it in your
wallet for quick reference. This card is in
the owner's information portfolio in the
glove compartment.
United States Ford vehicle customers who
require Roadside Assistance, call
1-800-241-3673.
If you need to arrange roadside assistance
for yourself, Ford Motor Company
reimburses a reasonable amount for
towing to the nearest dealership within
35 mi (56 km)
. To obtain reimbursement
information, United States Ford vehicle
customers call 1-800-241-3673.
Customers need to submit their original
receipts.
Vehicles Sold in Canada: Getting
Roadside Assistance
Canadian customers who require roadside
assistance, call 1-800-665-2006.
Vehicles Sold in Canada: Using
Roadside Assistance
For your convenience, you may complete
the roadside assistance identification card
found in the centerfold of your warranty
guide and retain for future reference.
226
Fusion/Mondeo (CC7) Canada/United States of America, enUSA, First Printing Roadside Emergencies
Page 230 of 518

Canadian roadside coverage and benefits
may differ from the U.S. coverage. If you
require more information, please refer to
the coverage section of your warranty
guide, call us in Canada at
1-800-665-2006, or visit our website at
www.ford.ca.
Sykes Assistance Services Corporation
administers the Roadside Assistance
program. You must receive covered
services in Canada or the continental
United States. Coverage extends to
vehicles that use public, non-seasonal,
annually traveled roadways. Roadside
Assistance coverage does not extend to
vehicles involved in cross-country driving,
logging, autocross and any other form of
off-road use. Well maintained roads and
surfaces help ensure safe travel for the
supplier, and allow their representatives
to perform service as per the standard
operating procedures.
In Remote Locations
If our supplier cannot take your vehicle by
road to the nearest authorized dealership,
transportation by rail or water may be
necessary. The program covers a tow to
the dock or rail terminal and also to the
dealership at the end of the trip.
For rail or water transportation, however,
contact your authorized dealer to confirm
if you are eligible for additional coverage
before you authorize or pay for the service.
Call the Ford Roadside Assistance at
1-800-665-2006 for additional
information.
HAZARD WARNING FLASHERS
Note:
If used when the vehicle is not
running, the battery will lose charge. There
may be insufficient power to restart your
vehicle. The hazard warning button is
located on the instrument panel.
Use it when your vehicle is
creating a safety hazard for other
motorists.
• Press the button to turn on the hazard
warning function, and the front and
rear direction indicators will flash.
• Press the button again to turn them
off.
FUEL SHUTOFF WARNING
Failure to inspect and, if necessary,
repair fuel leaks after a collision may
increase the risk of fire and serious
injury. Ford Motor Company recommends
that the fuel system be inspected by an
authorized dealer after any collision. In the event of a moderate to severe
collision, this vehicle includes a fuel pump
shutoff feature that stops the flow of fuel
to the engine. Not every impact will cause
a shutoff.
Should your vehicle shut off after a
collision, you may restart your vehicle. For
vehicles equipped with a key system:
1. Switch off the ignition.
2. Switch on the ignition.
3. Repeat Steps 1 and 2 to re-enable the
fuel pump.
For vehicles equipped with a push button
start system:
1. Press the START/STOP button to
switch off the ignition.
2. Press the brake pedal and press the START/STOP
button to switch on the
ignition.
227
Fusion/Mondeo (CC7) Canada/United States of America, enUSA, First Printing Roadside Emergencies
Page 243 of 518

Protected components
Fuse amp rating
Fuse or relay number
Keep alive power.
10A 1
49
Horn.
20A 1
50
Not used.
—
51
Not used.
—
52
Power seats.
10A 1
53
Brake on off switch.
10A 2
54
ALT sensor.
10A 2
55
1 Micro fuse.
2 Dual micro fuse.
3 M-type fuse.
Power Distribution Box - Bottom
There are fuses located on the bottom of
the fuse box. To access the bottom of the
fuse box, do the following: 1. Release the two latches, located on
both sides of the fuse box.
2. Raise the inboard side of the fuse box from the cradle.
3. Move the fuse box toward the center of the engine compartment.
4. Pivot the outboard side of the fuse box
to access the bottom side.
240
Fusion/Mondeo (CC7) Canada/United States of America, enUSA, First Printing FusesE145983
Page 245 of 518

Protected components
Fuse amp rating
Fuse or relay number
Not used.
—
66
Body control module 2.
50A 2
67
Heated rear window.
40A 1
68
Anti-lock brake system valves.
30A 1
69
Passenger seat.
30A 1
70
Not used.
—
71
Trans oil pump.
20A 1
72
Rear heated seats.
20A 1
73
Driver seat module.
30A 1
74
Wiper motor 1.
25A 1
75
Power lift-gate module.
30A 1
76
Climate control seat module.
30A 1
77
Trailer tow module.
40A 1
78
Blower motor.
40A 2
79
Wiper motor 2.
25A 1
80
Inverter.
40A 1
81
Not used.
–
82
TRCM shifter.
20A 1
83
Starter solenoid.
30A 1
84
Wide open panoramic roof 2.
30A 1
85
242
Fusion/Mondeo (CC7) Canada/United States of America, enUSA, First Printing Fuses
Page 258 of 518

When Fail-Safe Mode Is Activated
WARNINGS
Fail-safe mode is for use during
emergencies only. Operate your
vehicle in fail-safe mode only as long
as necessary to bring your vehicle to rest
in a safe location and seek immediate
repairs. When in fail-safe mode, your
vehicle will have limited power, will not be
able to maintain high-speed operation, and
may completely shut down without
warning, potentially losing engine power,
power steering assist, and power brake
assist, which may increase the possibility
of a crash resulting in serious injury. Never remove the coolant reservoir
cap while the engine is running or hot.
Your vehicle has limited engine power
when in the fail-safe mode. Drive your
vehicle with caution. Your vehicle does not
maintain high-speed operation and the
engine operates poorly.
Remember that the engine is capable of
automatically shutting down to prevent
engine damage. In this situation:
1. Pull off the road as soon as safely
possible and switch off the engine.
2. Tow your vehicle to an authorized dealer.
3. If this is not possible, wait a short period for the engine to cool.
4. Check the coolant level and add if low.
5. Re-start the engine and drive your vehicle to an authorized dealer.
Note: Driving your vehicle without repair
increases the chance of engine damage. See
an authorized dealer as soon as possible. AUTOMATIC TRANSMISSION
FLUID CHECK
The automatic transmission does not have
a transmission fluid dipstick.
Have an authorized dealer check and
change the transmission fluid at the
correct service interval. See Scheduled
Maintenance (page 464). Your
transmission does not consume fluid.
However, if the transmission slips, shifts
slowly or if you notice a sign of leaking
fluid, contact an authorized dealer.
Do not use supplemental transmission
fluid additives, treatments or cleaning
agents. The use of these materials may
affect transmission operation and result
in damage to internal transmission
components.
BRAKE FLUID CHECK
Fluid levels between the MIN and MAX
lines are within the normal operating range;
there is no need to add fluid. If the fluid
levels are outside of the normal operating
range, the performance of the system
could be compromised; seek service from
your authorized dealer immediately.
POWER STEERING FLUID
CHECK
Your vehicle is equipped with an electric
power steering (EPS) system. There is no
fluid reservoir to check or fill.
255
Fusion/Mondeo (CC7) Canada/United States of America, enUSA, First Printing Maintenance
Page 269 of 518

GENERAL INFORMATION
Your Ford or Lincoln authorized dealer has
many quality products available to clean
your vehicle and protect its finishes.
CLEANING PRODUCTS
For best results, use the following products
or products of equivalent quality:
•
Motorcraft Bug and Tar Remover
(ZC-42)
• Motorcraft Custom Bright Metal
Cleaner (ZC-15)
• Motorcraft Detail Wash (ZC-3-A)
• Motorcraft Dusting Cloth (ZC-24)
• Motorcraft Engine Shampoo and
Degreaser (U.S. only) (ZC-20)
• Motorcraft Engine Shampoo (Canada
only) (CXC-66-A)
• Motorcraft Multi-Purpose Cleaner
(Canada only) (CXC-101)
• Motorcraft Premium Glass Cleaner
(Canada only) (CXC-100)
• Motorcraft Premium Quality
Windshield Washer Fluid (Canada
only) [CXC-37-(A, B, D or F)]
• Motorcraft Premium Windshield Wash
Concentrate with Bitterant (U.S. only)
(ZC-32-B2)
• Motorcraft Professional Strength
Carpet & Upholstery Cleaner (ZC-54)
• Motorcraft Premium Leather and Vinyl
Cleaner (ZC-56)
• Motorcraft Spot and Stain Remover
(U.S. only) (ZC-14)
• Motorcraft Ultra-Clear Spray Glass
Cleaner (ZC-23)
• Motorcraft Wheel and Tire Cleaner
(ZC-37-A) CLEANING THE EXTERIOR
Wash your vehicle regularly with cool or
lukewarm water and a neutral pH
shampoo, we recommend Motorcraft
Detail Wash.
•
Never use strong household detergents
or soap, for example dish washing or
laundry liquid. These products can
discolor and spot painted surfaces.
• Never wash your vehicle when is hot to
the touch, or during strong or direct
sunlight.
• Dry your vehicle with a chamois or soft
terry cloth towel to eliminate water
spotting.
• Immediately remove fuel spillages, bird
droppings, insect deposits and road tar.
These may cause damage to your
vehicle ’s paintwork or trim over time.
We recommend Motorcraft Bug and
Tar Remover.
• Remove any exterior accessories, for
example antennas, before entering a
car wash.
Note: Suntan lotions and insect repellents
can damage painted surfaces. If these
substances come in contact with your
vehicle, wash the affected area as soon as
possible.
Exterior Chrome Parts
• Apply a high quality-cleaning product
to bumpers and other chrome parts.
Follow the manufacturer ’s instructions.
We recommend Motorcraft Custom
Bright Metal Cleaner.
• Do not apply the cleaning product to
hot surfaces. Do not leave the cleaning
product on chrome surfaces longer
than the time recommended.
• Using other non-recommended
cleaners can result in severe and
permanent cosmetic damage.
266
Fusion/Mondeo (CC7) Canada/United States of America, enUSA, First Printing Vehicle Care
Page 277 of 518

General Information
WARNING
Failure to follow these guidelines
could result in an increased risk of
loss of vehicle control, injury or death.
Note:
Do not use the kit if a tire has become
severely damaged by driving the vehicle with
a tire that has insufficient air pressure. Only
punctured areas located within the tire tread
can be sealed with the kit.
Do not attempt to repair punctures larger
than 0.24 in (6 mm) or damage to the tire's
sidewall. The tire may not completely seal.
Loss of air pressure may adversely affect
tire performance. For this reason:
Note: Do not drive the vehicle above
50 mph (80 km/h).
Note: Do not drive further than
120 mi
(200 km). Drive only to the closest
authorized Ford dealer or tire repair shop to
have your tire inspected.
• Drive carefully and avoid abrupt
steering maneuvers.
• Periodically monitor tire inflation
pressure in the affected tire. If the tire
is losing pressure, have the vehicle
towed.
• Read the information in the Tips for
Use of the Kit section to make sure safe
operation of the kit and your vehicle.
Tips for Use of the Kit
To ensure safe operation of the kit:
• Read all instructions and cautions fully.
• Before operating the kit, make sure
your vehicle is safely off the road and
away from moving traffic. Turn on the
hazard lights.
• Always set the parking brake to ensure
the vehicle does not move
unexpectedly. •
Do not remove any foreign objects,
such as nails or screws, from the tire.
• When using the kit, leave the engine
running (only if the vehicle is outdoors
or in a well-ventilated area) so the
compressor does not drain the vehicle
battery.
• Do not allow the compressor to
operate continuously for more than 15
minutes. This will help prevent the
compressor from overheating.
• Never leave the kit unattended when
it is operating.
• Sealant compound contains latex.
Make sure that you use the non-latex
gloves provided to avoid an allergic
reaction.
• Keep the kit away from children.
• Only use the kit when the ambient
temperature is between
-22°F (-30°C)
and 158°F (70°C).
• Only use the sealing compound before
the use by date. The use by date is on
the lower right hand corner of the label
located on the sealant canister
(bottle). Check the use by date
regularly and replace the canister after
four years.
• Do not store the kit unsecured inside
the passenger compartment of the
vehicle as it may cause injury during a
sudden stop or crash. Always store the
kit in its original location.
• After sealant use, the tire pressure
monitoring system sensor and valve
stem on the wheel must be replaced
by an authorized Ford dealer.
• When inflating a tire or other objects,
use the black air hose only. Do not use
the transparent hose which is designed
for sealant application only.
• Operating the kit could cause an
electrical disturbance in radio, CD, and
DVD player operation.
274
Fusion/Mondeo (CC7) Canada/United States of America, enUSA, First Printing Wheels and Tires
Page 279 of 518

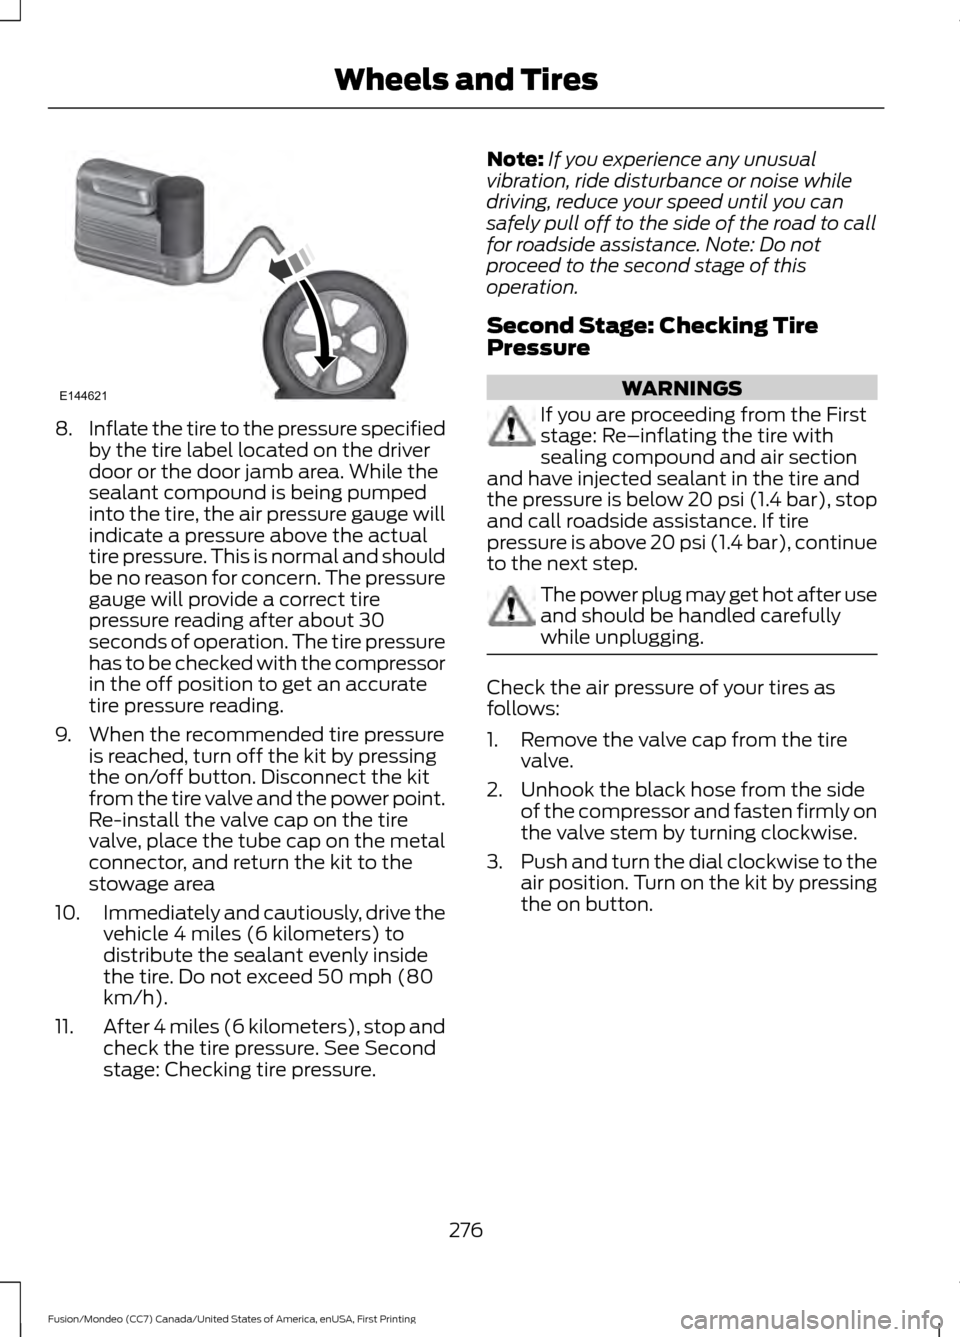
8.
Inflate the tire to the pressure specified
by the tire label located on the driver
door or the door jamb area. While the
sealant compound is being pumped
into the tire, the air pressure gauge will
indicate a pressure above the actual
tire pressure. This is normal and should
be no reason for concern. The pressure
gauge will provide a correct tire
pressure reading after about 30
seconds of operation. The tire pressure
has to be checked with the compressor
in the off position to get an accurate
tire pressure reading.
9. When the recommended tire pressure is reached, turn off the kit by pressing
the on/off button. Disconnect the kit
from the tire valve and the power point.
Re-install the valve cap on the tire
valve, place the tube cap on the metal
connector, and return the kit to the
stowage area
10. Immediately and cautiously, drive the
vehicle 4 miles (6 kilometers) to
distribute the sealant evenly inside
the tire. Do not exceed 50 mph (80
km/h).
11. After 4 miles (6 kilometers), stop and
check the tire pressure. See Second
stage: Checking tire pressure. Note:
If you experience any unusual
vibration, ride disturbance or noise while
driving, reduce your speed until you can
safely pull off to the side of the road to call
for roadside assistance. Note: Do not
proceed to the second stage of this
operation.
Second Stage: Checking Tire
Pressure WARNINGS
If you are proceeding from the First
stage: Re–inflating the tire with
sealing compound and air section
and have injected sealant in the tire and
the pressure is below 20 psi (1.4 bar), stop
and call roadside assistance. If tire
pressure is above 20 psi (1.4 bar), continue
to the next step. The power plug may get hot after use
and should be handled carefully
while unplugging.
Check the air pressure of your tires as
follows:
1. Remove the valve cap from the tire
valve.
2. Unhook the black hose from the side of the compressor and fasten firmly on
the valve stem by turning clockwise.
3. Push and turn the dial clockwise to the
air position. Turn on the kit by pressing
the on button.
276
Fusion/Mondeo (CC7) Canada/United States of America, enUSA, First Printing Wheels and TiresE144621