2016 FORD FUSION (AMERICAS) ECO mode
[x] Cancel search: ECO modePage 144 of 518
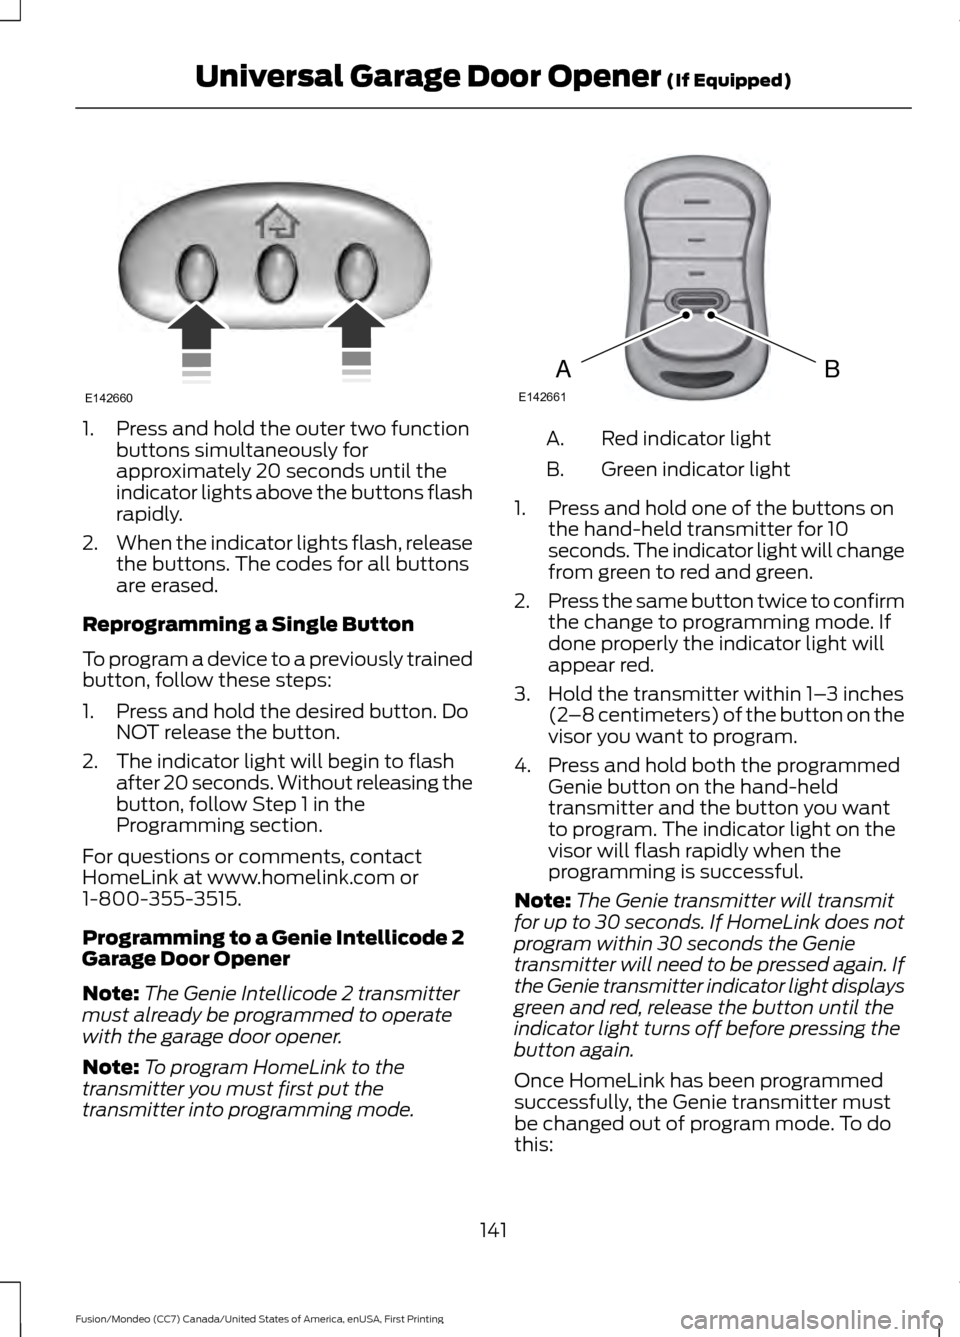
1. Press and hold the outer two function
buttons simultaneously for
approximately 20 seconds until the
indicator lights above the buttons flash
rapidly.
2. When the indicator lights flash, release
the buttons. The codes for all buttons
are erased.
Reprogramming a Single Button
To program a device to a previously trained
button, follow these steps:
1. Press and hold the desired button. Do NOT release the button.
2. The indicator light will begin to flash after 20 seconds. Without releasing the
button, follow Step 1 in the
Programming section.
For questions or comments, contact
HomeLink at www.homelink.com or
1-800-355-3515.
Programming to a Genie Intellicode 2
Garage Door Opener
Note: The Genie Intellicode 2 transmitter
must already be programmed to operate
with the garage door opener.
Note: To program HomeLink to the
transmitter you must first put the
transmitter into programming mode. Red indicator light
A.
Green indicator light
B.
1. Press and hold one of the buttons on the hand-held transmitter for 10
seconds. The indicator light will change
from green to red and green.
2. Press the same button twice to confirm
the change to programming mode. If
done properly the indicator light will
appear red.
3. Hold the transmitter within 1– 3 inches
(2 –8 centimeters) of the button on the
visor you want to program.
4. Press and hold both the programmed Genie button on the hand-held
transmitter and the button you want
to program. The indicator light on the
visor will flash rapidly when the
programming is successful.
Note: The Genie transmitter will transmit
for up to 30 seconds. If HomeLink does not
program within 30 seconds the Genie
transmitter will need to be pressed again. If
the Genie transmitter indicator light displays
green and red, release the button until the
indicator light turns off before pressing the
button again.
Once HomeLink has been programmed
successfully, the Genie transmitter must
be changed out of program mode. To do
this:
141
Fusion/Mondeo (CC7) Canada/United States of America, enUSA, First Printing Universal Garage Door Opener (If Equipped)E142660 BAE142661
Page 145 of 518
1. Press and hold the previously
programmed Genie button on the
hand-held transmitter for 10 seconds.
The indicator light will change from red
to red and green.
2. Press the same button twice to confirm
the change. If done correctly the
indicator light will turn green.
Programming HomeLink to the Genie
Intellicode Garage Door Opener Motor
Note: You may need a ladder to access the
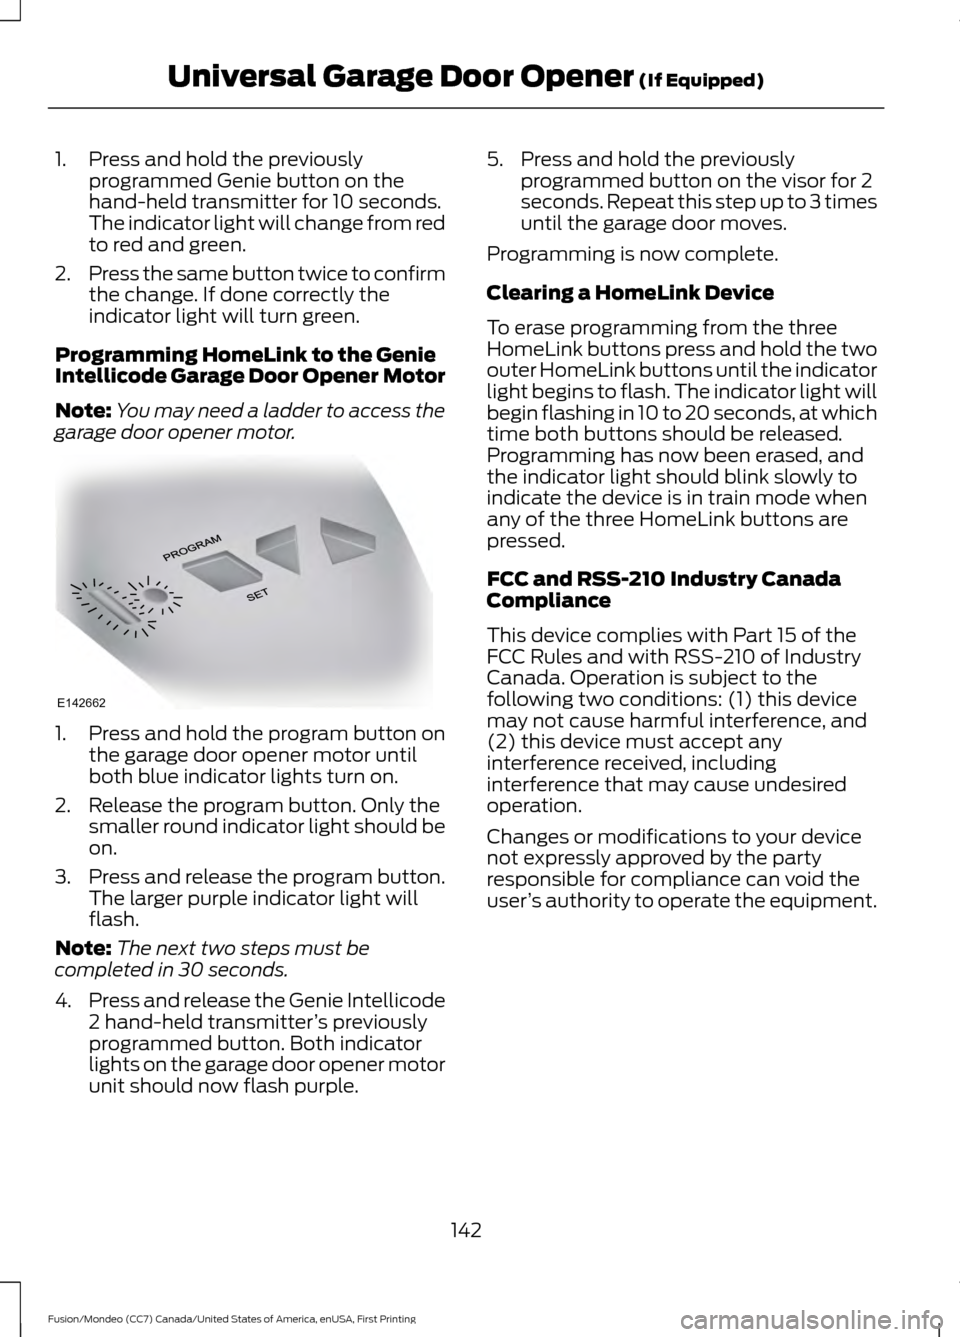
garage door opener motor. 1. Press and hold the program button on
the garage door opener motor until
both blue indicator lights turn on.
2. Release the program button. Only the smaller round indicator light should be
on.
3. Press and release the program button.
The larger purple indicator light will
flash.
Note: The next two steps must be
completed in 30 seconds.
4. Press and release the Genie Intellicode
2 hand-held transmitter ’s previously
programmed button. Both indicator
lights on the garage door opener motor
unit should now flash purple. 5. Press and hold the previously
programmed button on the visor for 2
seconds. Repeat this step up to 3 times
until the garage door moves.
Programming is now complete.
Clearing a HomeLink Device
To erase programming from the three
HomeLink buttons press and hold the two
outer HomeLink buttons until the indicator
light begins to flash. The indicator light will
begin flashing in 10 to 20 seconds, at which
time both buttons should be released.
Programming has now been erased, and
the indicator light should blink slowly to
indicate the device is in train mode when
any of the three HomeLink buttons are
pressed.
FCC and RSS-210 Industry Canada
Compliance
This device complies with Part 15 of the
FCC Rules and with RSS-210 of Industry
Canada. Operation is subject to the
following two conditions: (1) this device
may not cause harmful interference, and
(2) this device must accept any
interference received, including
interference that may cause undesired
operation.
Changes or modifications to your device
not expressly approved by the party
responsible for compliance can void the
user ’s authority to operate the equipment.
142
Fusion/Mondeo (CC7) Canada/United States of America, enUSA, First Printing Universal Garage Door Opener (If Equipped)E142662
Page 150 of 518
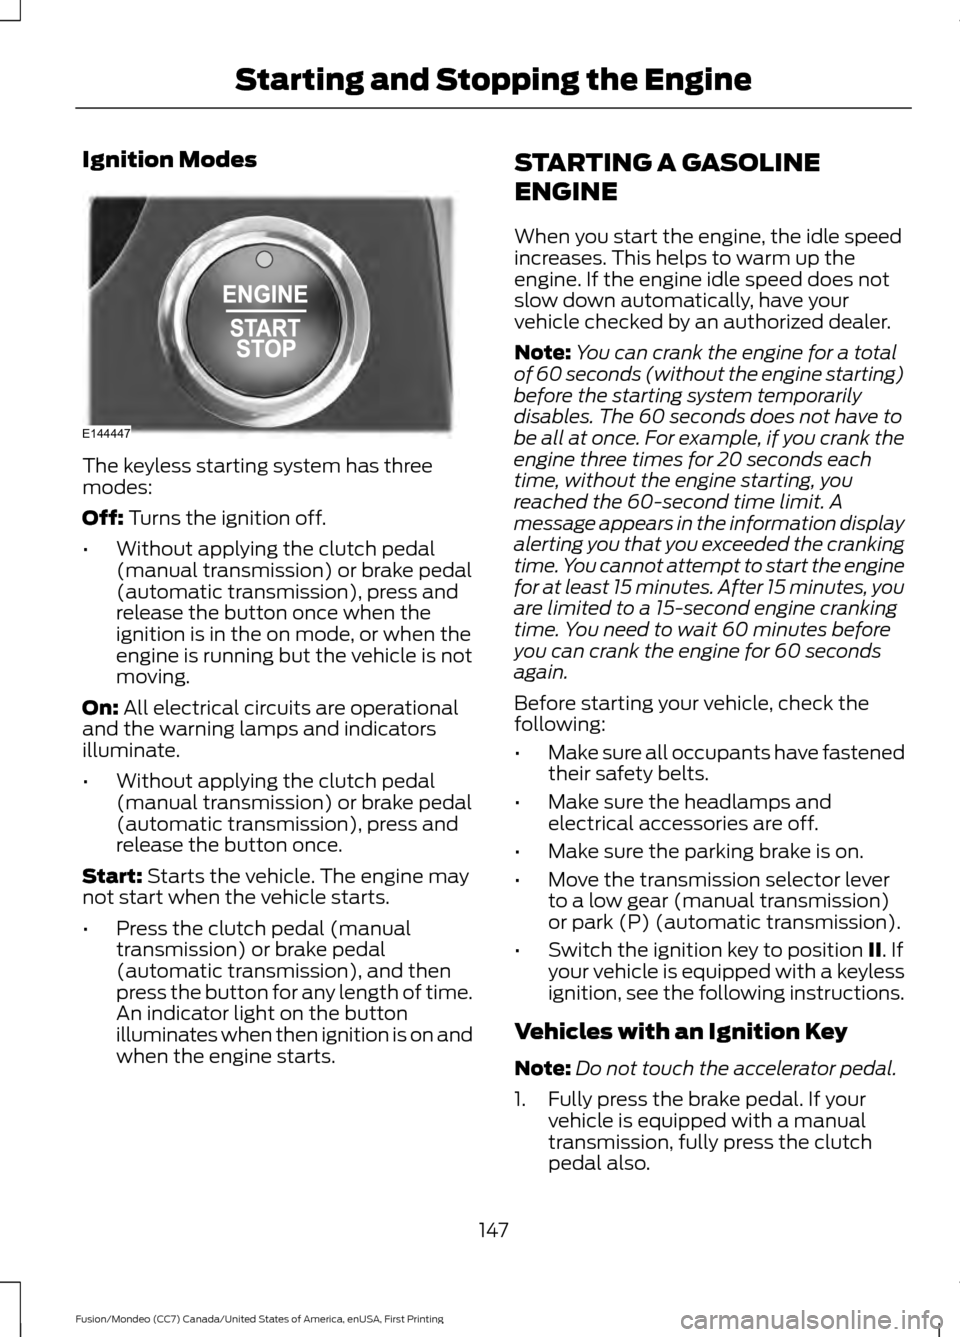
Ignition Modes
The keyless starting system has three
modes:
Off: Turns the ignition off.
• Without applying the clutch pedal
(manual transmission) or brake pedal
(automatic transmission), press and
release the button once when the
ignition is in the on mode, or when the
engine is running but the vehicle is not
moving.
On:
All electrical circuits are operational
and the warning lamps and indicators
illuminate.
• Without applying the clutch pedal
(manual transmission) or brake pedal
(automatic transmission), press and
release the button once.
Start:
Starts the vehicle. The engine may
not start when the vehicle starts.
• Press the clutch pedal (manual
transmission) or brake pedal
(automatic transmission), and then
press the button for any length of time.
An indicator light on the button
illuminates when then ignition is on and
when the engine starts. STARTING A GASOLINE
ENGINE
When you start the engine, the idle speed
increases. This helps to warm up the
engine. If the engine idle speed does not
slow down automatically, have your
vehicle checked by an authorized dealer.
Note:
You can crank the engine for a total
of 60 seconds (without the engine starting)
before the starting system temporarily
disables. The 60 seconds does not have to
be all at once. For example, if you crank the
engine three times for 20 seconds each
time, without the engine starting, you
reached the 60-second time limit. A
message appears in the information display
alerting you that you exceeded the cranking
time. You cannot attempt to start the engine
for at least 15 minutes. After 15 minutes, you
are limited to a 15-second engine cranking
time. You need to wait 60 minutes before
you can crank the engine for 60 seconds
again.
Before starting your vehicle, check the
following:
• Make sure all occupants have fastened
their safety belts.
• Make sure the headlamps and
electrical accessories are off.
• Make sure the parking brake is on.
• Move the transmission selector lever
to a low gear (manual transmission)
or park (P) (automatic transmission).
• Switch the ignition key to position
II. If
your vehicle is equipped with a keyless
ignition, see the following instructions.
Vehicles with an Ignition Key
Note: Do not touch the accelerator pedal.
1. Fully press the brake pedal. If your vehicle is equipped with a manual
transmission, fully press the clutch
pedal also.
147
Fusion/Mondeo (CC7) Canada/United States of America, enUSA, First Printing Starting and Stopping the EngineE144447
Page 170 of 518
USING ALL-WHEEL DRIVE
All-wheel drive uses all four wheels to
power the vehicle. This increases traction,
enabling you to drive over terrain and road
conditions that a conventional two-wheel
drive vehicle cannot. The AWD system is
active all the time and requires no input
from the operator.
Note:
Your AWD vehicle is not intended for
off-road use. The AWD feature gives your
vehicle some limited off-road capabilities
in which driving surfaces are relatively level,
obstruction-free and otherwise similar to
normal on-road driving conditions.
Operating your vehicle under other than
those conditions could subject the vehicle
to excessive stress which might result in
damage which is not covered under your
warranty.
Note: A warning message will be displayed
in the information display when an AWD
system fault is present See Information
Messages (page 105). An AWD system fault
will cause the AWD system to default to
front-wheel drive only mode. When this
warning message is displayed, have your
vehicle serviced at an authorized dealer
Note: A warning message will be displayed
in the information display if the AWD system
has overheated
See Information
Messages (page 105). This condition may
occur if the vehicle was operated in extreme
conditions with excessive wheel slip, such
as deep sand. To resume normal AWD
function as soon as possible, stop the
vehicle in a safe location and stop the
engine for at least 10 minutes. After the
engine has been restarted and the AWD
system has adequately cooled, the warning
message will turn off and normal AWD
function will return. Do not use a spare tire of a different size
other than the tire provided. If the
mini-spare tire is installed, the AWD
system may disable automatically and
enter front-wheel drive only mode to
protect driveline components. This
condition will be indicated by a warning in
the information display See Information
Messages (page 105). If there is a warning
message in the information display from
using the spare tire, this indicator should
turn off after reinstalling the repaired or
replaced normal road tire and cycling the
ignition off and on. It is recommended to
reinstall the repaired or replaced road tire
as soon as possible. Major dissimilar tire
sizes between the front and rear axles
could cause the AWD system to stop
functioning and default to front-wheel
drive or damage the AWD system.
Driving In Special Conditions With
All-Wheel Drive (AWD)
AWD vehicles are equipped for driving on
sand, snow, mud and rough roads and have
operating characteristics that are
somewhat different from conventional
vehicles, both on and off the highway.
Under severe operating conditions, the A/C
may cycle on and off to protect
overheating of the engine.
Basic operating principles in special
conditions
•
Drive slower in strong crosswinds which
can affect the normal steering
characteristics of your vehicle.
• Be extremely careful when driving on
pavement made slippery by loose sand,
water, gravel, snow or ice.
167
Fusion/Mondeo (CC7) Canada/United States of America, enUSA, First Printing All-Wheel Drive
(If Equipped)
Page 200 of 518
The current assessment of your alertness
indicates that you should rest as soon as
safely possible.
The status bar will travel from left to right
as the calculated alertness level
decreases. As the rest icon is approached
the color turns from green to yellow to red.
The yellow position indicates the first
warning is active and the red position
indicates the second warning is active.
Note:
If you have recently received a
warning; you should consider resting, even
if the current assessment is within the
typical range.
Note: If the camera sensor cannot track the
road lane markings or if your vehicle speed
drops below approximately 40 mph
(64 km/h), the alertness level will change
to grey for a short time and the information
display will inform you that the system is
unavailable.
Resetting the System
You can reset the system by either:
• Switching the ignition off and on.
• Stopping the vehicle and then opening
and closing the driver ’s door.
LANE KEEPING SYSTEM
(If
Equipped) WARNINGS
The system does not relieve you of
your responsibility to drive with due
care and attention.
At all times you are responsible for
controlling your vehicle, supervising
the system and intervening if
required. If the sensor becomes blocked the
system may not function. WARNINGS
In cold and severe weather
conditions the system may not
function. Rain, snow, spray can all
limit sensor performance. Large contrasts in lighting can limit
sensor performance.
The system will not operate if the
sensor cannot track the road lane
markings.
The vehicle should be taken to an
authorized dealer for inspection if
damage occurs in the immediate
area surrounding the sensor. Note:
The system works above
40 mph
(64 km/h).
Note: The system works as long as the
camera can detect one lane marking.
Note: The system may not function if the
camera is blocked or there is damage to the
windshield.
Note: When Aid mode is on and the system
detects no steering activity for a short
period, the system will alert you to put your
hands on the steering wheel. The system
may detect a light grip or touch on the
steering wheel as hands off driving.
The system notifies you to stay in your lane
through the steering system and the
instrument cluster display when the front
camera detects an unintentional drift out
of your lane is likely to occur. The system
automatically detects and tracks the road
lane markings using a camera mounted
behind the interior rear view mirror.
Switching the System On and Off
Note: The system on or off setting is stored
until it is manually changed, unless a MyKey
is detected. If the system detects a MyKey
it defaults to on and the mode is set to Alert.
197
Fusion/Mondeo (CC7) Canada/United States of America, enUSA, First Printing Driving Aids
Page 204 of 518
BLIND SPOT INFORMATION
SYSTEM
Blind Spot Information System
(BLIS
™) with Cross Traffic Alert
(If Equipped) WARNING
To help avoid injuries, NEVER use the
Blind Spot Information System as a
replacement for using the interior
and exterior mirrors and looking over your
shoulder before changing lanes. The Blind
Spot Information System is not a
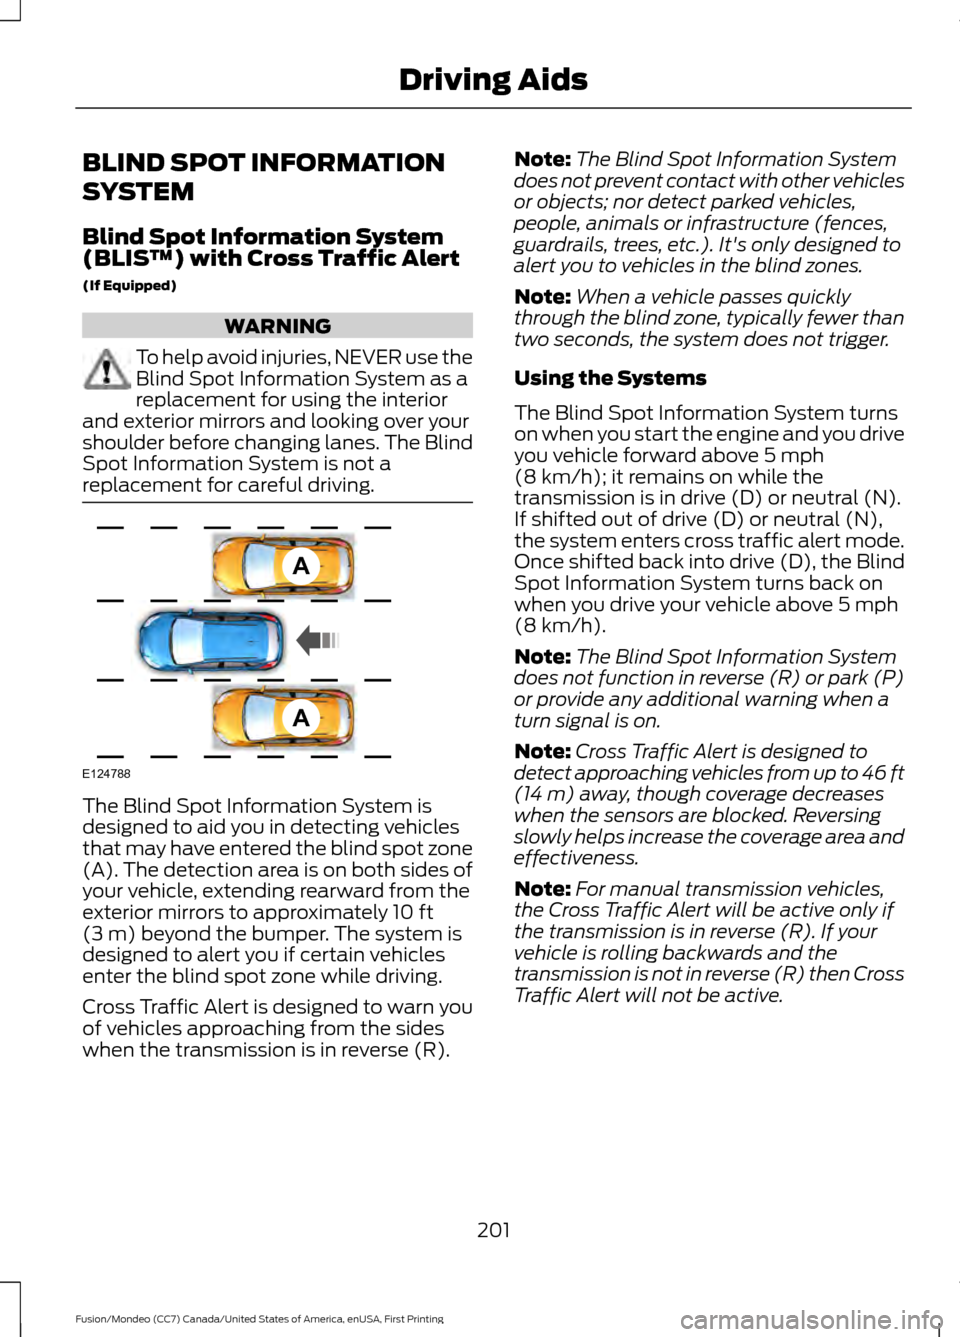
replacement for careful driving. The Blind Spot Information System is
designed to aid you in detecting vehicles
that may have entered the blind spot zone
(A). The detection area is on both sides of
your vehicle, extending rearward from the
exterior mirrors to approximately 10 ft
(3 m) beyond the bumper. The system is
designed to alert you if certain vehicles
enter the blind spot zone while driving.
Cross Traffic Alert is designed to warn you
of vehicles approaching from the sides
when the transmission is in reverse (R). Note:
The Blind Spot Information System
does not prevent contact with other vehicles
or objects; nor detect parked vehicles,
people, animals or infrastructure (fences,
guardrails, trees, etc.). It's only designed to
alert you to vehicles in the blind zones.
Note: When a vehicle passes quickly
through the blind zone, typically fewer than
two seconds, the system does not trigger.
Using the Systems
The Blind Spot Information System turns
on when you start the engine and you drive
you vehicle forward above
5 mph
(8 km/h); it remains on while the
transmission is in drive (D) or neutral (N).
If shifted out of drive (D) or neutral (N),
the system enters cross traffic alert mode.
Once shifted back into drive (D), the Blind
Spot Information System turns back on
when you drive your vehicle above
5 mph
(8 km/h).
Note: The Blind Spot Information System
does not function in reverse (R) or park (P)
or provide any additional warning when a
turn signal is on.
Note: Cross Traffic Alert is designed to
detect approaching vehicles from up to 46 ft
(14 m)
away, though coverage decreases
when the sensors are blocked. Reversing
slowly helps increase the coverage area and
effectiveness.
Note: For manual transmission vehicles,
the Cross Traffic Alert will be active only if
the transmission is in reverse (R). If your
vehicle is rolling backwards and the
transmission is not in reverse (R) then Cross
Traffic Alert will not be active.
201
Fusion/Mondeo (CC7) Canada/United States of America, enUSA, First Printing Driving AidsA
A
E124788
Page 225 of 518
It is acceptable to have your front-wheel
drive vehicle towed from the front if using
proper wheel lift equipment to raise the
front wheels off the ground. When towing
in this manner, the rear wheels can remain
on the ground.
Front-wheel drive vehicles must have the
front wheels placed on a tow dolly when
towing your vehicle from the rear using
wheel lift equipment. This prevents
damage to the transmission.
Towing an all-wheel drive vehicle requires
that all wheels be off the ground, such as
using a wheel lift and dollies or flatbed
equipment. This prevents damage to the
transmission, all-wheel drive system and
vehicle.
TOWING THE VEHICLE ON
FOUR WHEELS
Emergency Towing
WARNING
If your vehicle has a steering wheel
lock make sure the ignition is in the
accessory or on position when being
towed. If your vehicle becomes inoperable
(without access to wheel dollies,
car-hauling trailer, or flatbed transport
vehicle), it can be flat-towed (all wheels
on the ground, regardless of the powertrain
and transmission configuration) under the
following conditions:
•
Your vehicle is facing forward for
towing in a forward direction.
• Place the transmission in position N. If
you cannot move the transmission into
N
, you may need to override it. See
Transmission (page 163). •
Maximum speed is 35 mph (56 km/h).
• Maximum distance is 50 miles (80
kilometers).
Recreational Towing
Note: Put your climate control system in
recirculated air mode to prevent exhaust
fumes from entering the vehicle. See
Climate Control
(page 120).
Follow these guidelines if you have a need
for recreational (RV) towing. An example
of recreational towing would be towing
your vehicle behind a motorhome. We
designed these guidelines to prevent
damage to your transmission.
Front-wheel Drive Vehicles
Front-wheel drive vehicles
CANNOT be
flat-towed (all wheels on the ground) as
vehicle or transmission damage may occur.
It is recommended to tow your vehicle with
the front wheels off the ground by using a
tow dolly. If you are using a tow dolly,
follow the instructions specified by the
equipment provider.
All-wheel Drive Vehicles
All-wheel drive vehicles
CANNOT be
flat-towed (all wheels on the ground) as
vehicle or transmission damage may occur.
It is recommended to tow your vehicle with
all four (4) wheels off the ground such as
when using a car-hauling trailer. Otherwise,
you cannot recreational tow your vehicle.
222
Fusion/Mondeo (CC7) Canada/United States of America, enUSA, First Printing Towing
Page 226 of 518
BREAKING-IN
You need to break in new tires for
approximately 300 miles (480
kilometers). During this time, your vehicle
may exhibit some unusual driving
characteristics.
Avoid driving too fast during the first 1000
miles (1600 kilometers). Vary your speed
frequently and change up through the
gears early. Do not labor the engine.
Do not tow during the first 1000 miles
(1600 kilometers).
ECONOMICAL DRIVING
Fuel economy is affected by several things
such as how you drive, the conditions you
drive under and how you maintain your
vehicle.
There are some things to keep in mind that
may improve your fuel economy:
•
Accelerate and slow down in a smooth,
moderate fashion.
• Drive at steady speeds.
• Anticipate stops; slowing down may
eliminate the need to stop.
• Combine errands and minimize
stop-and-go driving.
•When running errands, go to the
furthest destination first and then
work your way back home.
• Close the windows for high-speed
driving.
• Drive at reasonable speeds. (Traveling
at 65 mph/105 kph uses about 15%
less fuel than traveling at 75 mph/121
kph).
• Keep the tires properly inflated and use
only the recommended size. •
Use the recommended engine oil.
• Perform all regularly scheduled
maintenance.
There are also some things you may want
to avoid doing because they reduce your
fuel economy:
• Avoid sudden or hard accelerations.
• Avoid revving the engine before turning
off the car.
• Avoid long idle periods.
• Do not warm up your vehicle on cold
mornings.
• Reduce the use of air conditioning and
heat.
• Avoid using speed control in hilly
terrain.
• Do not rest your foot on the brake
pedal while driving.
• Avoid carrying unnecessary weight
(approximately 1 mpg [0.4
kilometers/liter] is lost for every 400
lbs [180 kilograms] of weight carried).
• Avoid adding particular accessories to
your vehicle (e.g. bug deflectors,
rollbars/light bars, running boards, ski
racks).
• Avoid driving with the wheels out of
alignment.
DRIVING THROUGH WATER WARNING
Do not drive through flowing or deep
water as you may lose control of your
vehicle.
Note:
Driving through standing water can
cause vehicle damage.
Note: Engine damage can occur if water
enters the air filter.
223
Fusion/Mondeo (CC7) Canada/United States of America, enUSA, First Printing Driving Hints