2016 FORD F450 SUPER DUTY instrument cluster
[x] Cancel search: instrument clusterPage 180 of 507
PRINCIPLE OF OPERATION
WARNINGS
Hill descent control cannot controldescent in all surface conditions andcircumstances, such as ice orextremely steep grades. Hill descentcontrol is a driver assist system and cannotsubstitute for good judgment by the driver.Failure to do so may result in loss of vehiclecontrol, crash or serious injury.
Hill descent control does not providehill hold at zero miles per hour (0kilometers per hour). When stopped,the parking brake must be applied or thevehicle must be placed in P (Park) or itmay roll away.
Hill descent control allows the driver to setand maintain vehicle speed whiledescending steep grades in various surfaceconditions.
Hill descent control can maintain vehiclespeeds on downhill grades between 2 mph(3 km/h) and 12 mph (20 km/h). Above 20mph (32 km/h), the system remainsarmed, but descent speed cannot be setor maintained.
Hill descent control requires a coolingdown interval after a period of sustaineduse. The amount of time that the featurecan remain active before cooling varieswith conditions. The system will provide awarning in the message center and a chimewill sound when the system is about todisengage for cooling. At this time,manually apply the brakes as needed tomaintain descent speed.
USING HILL DESCENT
CONTROL
Press and release the hilldescent button located on theinstrument panel. A light in thecluster will illuminate and a chime willsound when this feature is activated.
To increase descent speed, press theaccelerator pedal until the desired speedis reached. To decrease descent speed,press the brake pedal until the desiredspeed is reached.
Whether accelerating or decelerating, oncethe desired descent speed is reached,remove your feet from the pedals and thechosen vehicle speed will be maintained.
Note:Noise from the ABS pump motor maybe observed during hill descent controloperation. This is a normal characteristic ofthe ABS and should be no reason forconcern.
Hill descent modes
•At speeds below 20 mph (32 km/h):When the Hill Descent Control switchis pressed and Hill Descent Control isactive, the Hill Descent Control telltalewill flash.
•At speeds below 20 mph (32 km/h):When the Hill Descent Control switchis pressed and conditions are notcorrect for hill descent activation, theHill Descent Control system will beenabled, the Hill Descent Controltelltale will be solid and a message willdisplay in the information display.
•At speeds above 20 mph (32 km/h):When the Hill Descent Control switchis pressed, the Hill Descent Controlsystem will be enabled, the telltale inthe cluster will not be illuminated anda message will be displayed in theinformation display.
177
Super Duty (TFA) Canada/United States of America, enUSA, First Printing
Terrain Response (If Equipped)E163957
Page 186 of 507
PRINCIPLE OF OPERATION
Cruise control lets you maintain a setspeed without keeping your foot on theaccelerator pedal. You can use cruisecontrol when your vehicle speed is greaterthan 20 mph (30 km/h).
USING CRUISE CONTROL
WARNINGS
Do not use cruise control in heavytraffic, on winding roads or when theroad surface is slippery. This couldresult in loss of vehicle control, seriousinjury or death.
When you are going downhill, yourvehicle speed may increase abovethe set speed. The system will notapply the brakes. Change down a gear toassist the system in maintaining the setspeed. Failure to do so could result in lossof vehicle control, serious injury or death.
Note:Cruise control will disengage if thevehicle speed decreases more than 10 mph(16 km/h) below your set speed whiledriving uphill.
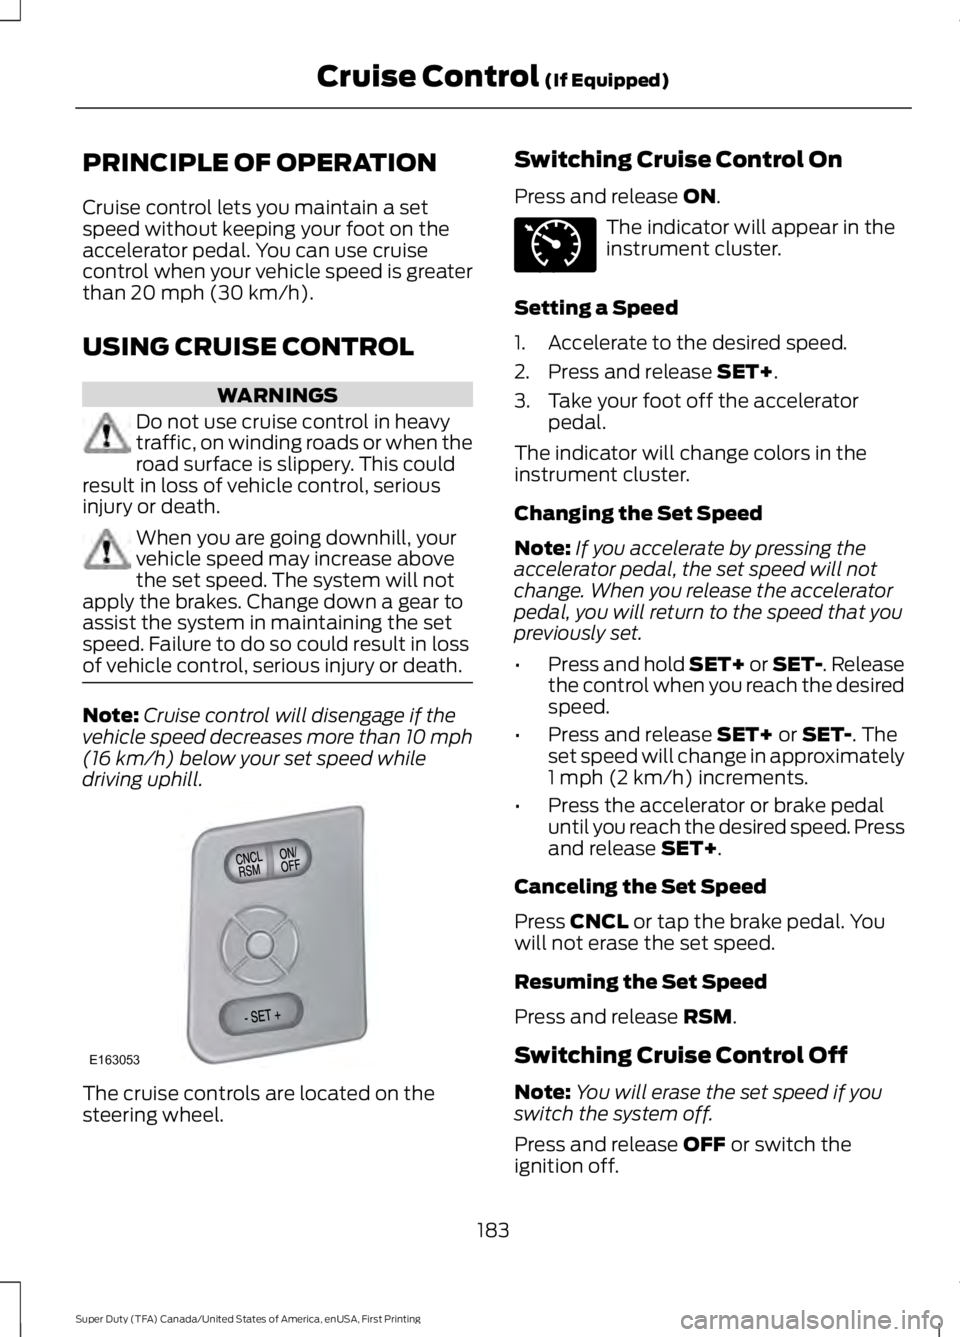
The cruise controls are located on thesteering wheel.
Switching Cruise Control On
Press and release ON.
The indicator will appear in theinstrument cluster.
Setting a Speed
1. Accelerate to the desired speed.
2. Press and release SET+.
3. Take your foot off the acceleratorpedal.
The indicator will change colors in theinstrument cluster.
Changing the Set Speed
Note:If you accelerate by pressing theaccelerator pedal, the set speed will notchange. When you release the acceleratorpedal, you will return to the speed that youpreviously set.
•Press and hold SET+ or SET-. Releasethe control when you reach the desiredspeed.
•Press and release SET+ or SET-. Theset speed will change in approximately1 mph (2 km/h) increments.
•Press the accelerator or brake pedaluntil you reach the desired speed. Pressand release SET+.
Canceling the Set Speed
Press CNCL or tap the brake pedal. Youwill not erase the set speed.
Resuming the Set Speed
Press and release RSM.
Switching Cruise Control Off
Note:You will erase the set speed if youswitch the system off.
Press and release OFF or switch theignition off.
183
Super Duty (TFA) Canada/United States of America, enUSA, First Printing
Cruise Control (If Equipped)E163053 E71340
Page 232 of 507
Protected componentsFuse amp ratingFuse or relay number
Driver lumbar motor7.5A7Driver seat switch
Power mirror switch10A8
Auxiliary switch relay #310A9
Customer access feed10A10Run/accessory relay
Instrument cluster10A11
Interior lighting15A12Lighted running board lamps
Right turn signals and brake lamps15A13
Left turn signals and brake lamps15A14
Backup lamps, Trailer tow backup relay15A15High-mounted stop lampsReverse signal interior mirror
Right low beam headlamp10A16
Left low beam headlamp10A17
Brake shift interlock10A18Keypad illuminationPassive anti-theft transceiverPowertrain control module
Amplifier20A19Subwoofer
Power door locks20A20
Brake on/off switch10A21
Horn20A22
Not used (spare)15A23
Diagnostic connector15A24Electronic finish panelPower fold mirror relayRemote keyless entrySteering wheel control module
Not used (spare)15A25
229
Super Duty (TFA) Canada/United States of America, enUSA, First Printing
Fuses
Page 244 of 507
Checking Automatic TransmissionFluid
For scheduled intervals of the fluid checksand changes, See ScheduledMaintenance (page 453). Yourtransmission does not consume fluid.However, the fluid level should be checkedif the transmission is not working properly,i.e., if the transmission slips or shifts slowlyor if you notice some sign of fluid leakage.
Automatic transmission fluid expandswhen warmed. To obtain an accurate fluidcheck, drive the vehicle until it is at normaloperating temperature (approximately19 mi (30 km)). Verify that thetransmission fluid temperature gauge,located on the instrument cluster, is withinnormal range.
1. Drive the vehicle 19 (30 km)until itreaches normal operating temperature.
2.Park the vehicle on a level surface andengage the parking brake.
3.With the engine running, parking brakeengaged and your foot on the brakepedal, move the gearshift lever throughall of the gear ranges. Allow sufficienttime for each gear to engage.
4.Latch the gearshift lever in P and leavethe engine running.
5. Remove the dipstick, wiping it cleanwith a clean, dry lint free rag. Ifnecessary, refer to the Under HoodOverview in this chapter for thelocation of the dipstick.
6.Install the dipstick making sure it is fullyseated in the filler tube.
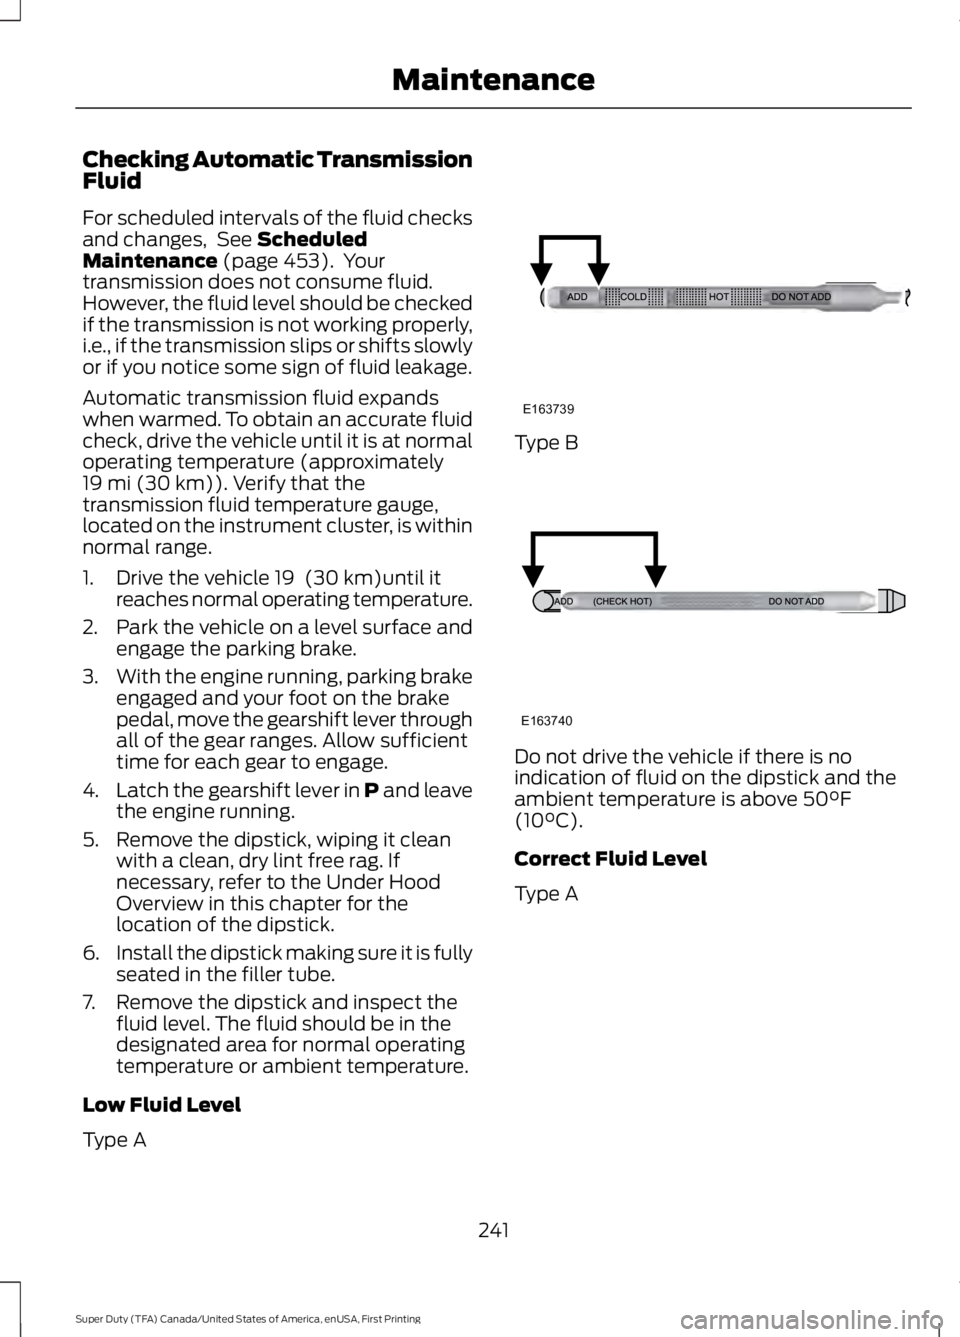
7. Remove the dipstick and inspect thefluid level. The fluid should be in thedesignated area for normal operatingtemperature or ambient temperature.
Low Fluid Level
Type A
Type B
Do not drive the vehicle if there is noindication of fluid on the dipstick and theambient temperature is above 50°F(10°C).
Correct Fluid Level
Type A
241
Super Duty (TFA) Canada/United States of America, enUSA, First Printing
MaintenanceE163739 E163740
Page 262 of 507
CLEANING THE INSTRUMENT
PANEL AND INSTRUMENT
CLUSTER LENS
WARNING
Do not use chemical solvents orstrong detergents when cleaning thesteering wheel or instrument panelto avoid contamination of the airbagsystem.
Note:Follow the same procedure ascleaning leather seats for cleaning leatherinstrument panels and leather interior trimsurfaces. See Cleaning Leather Seats(page 259).
Clean the instrument panel and clusterlens with a clean, damp and soft cloth,then use a clean, dry and soft cloth to drythese areas.
•Avoid cleaners or polishes that increasethe gloss of the upper portion of theinstrument panel. The dull finish in thisarea helps protect you fromundesirable windshield reflection.
•Do not use any household cleaningproducts or glass cleaners as thesemay damage the finish of theinstrument panel, interior trim andcluster lens.
•Wash or wipe your hands clean if youhave been in contact with certainproducts such as insect repellent andsuntan lotion to avoid possible damageto the interior painted surfaces.
•Do not allow air fresheners and handsanitizers to spill onto interior surfaces.If a spill occurs, wipe off immediately.Your warranty may not cover thesedamages.
If a staining liquid like coffee or juice hasbeen spilled on the instrument panel or oninterior trim surfaces:
1. Wipe up spilled liquid using a clean,soft cloth as quickly as possible.
2. Use Motorcraft Premium Leather andVinyl Cleaner or a commerciallyavailable leather cleaning product forautomotive interiors. Test any cleaneror stain remover on an inconspicuousarea.
3. Alternatively, wipe the surface with aclean, soft cloth and a mild soap andwater solution. Dry the area with aclean, soft cloth.
4. If necessary, apply more soap andwater solution or cleaning product toa clean, soft cloth and press it onto thesoiled area. Allow this to set at roomtemperature for 30 minutes.
5. Remove the soaked cloth, then with aclean, damp cloth, use a rubbingmotion for 60 seconds on the soiledarea.
6. Dry the area with a clean, soft cloth.
CLEANING LEATHER SEATS (If
Equipped)
Without King Ranch Edition
Note:Follow the same procedure ascleaning leather seats for cleaning leatherinstrument panels and leather interior trimsurfaces.
For routine cleaning, wipe the surface witha soft, damp cloth and a mild soap andwater solution. Dry the area with a clean,soft cloth.
For cleaning and removing spots and stainssuch as dye transfer, use MotorcraftPremium Leather and Vinyl Cleaner or acommercially available leather cleaningproduct for automotive interiors.
Note:Test any cleaner or stain remover onan inconspicuous area.
259
Super Duty (TFA) Canada/United States of America, enUSA, First Printing
Vehicle Care
Page 499 of 507
Capacities and Specifications - 6.8LTriton-30V - V10..........................................311Specifications.......................................................312Capacities and Specifications................303Car WashSee: Cleaning the Exterior..............................256Center Console..............................................139Removable Front Cupholders........................139Changing a Bulb...........................................249Replacing Brake/Tail/Turn/Reverse LampBulbs...................................................................251Replacing Cargo Lamp and Central HighMounted Brake Lamp Bulbs......................251Replacing Fog Lamp Bulbs............................250Replacing Front Clearance andIdentification Lamp Bulbs.........................250Replacing Front Park and DirectionIndicator Lamp Bulbs..................................250Replacing Headlamp Bulbs...........................250Replacing the License Plate LampBulb....................................................................252Changing a Fuse............................................231Fuses........................................................................231Changing a Road Wheel...........................290Dissimilar Spare Wheel and Tire AssemblyInformation.....................................................290Location of the Spare Tire and Tools..........291Removing the Spare Tire (With Spare TireCarrier Only)....................................................292Tire Change Procedure....................................293Changing the 12V Battery.........................245Battery Management System (IfEquipped)........................................................246Changing the Engine Air Filter................254Changing the Wiper Blades.....................247Checking MyKey System Status...............53Checking the Wiper Blades......................247Child Restraint and Safety BeltMaintenance.................................................36Child Safety.......................................................15General Information.............................................15Child Safety Locks..........................................27Child Seat Positioning..................................26Cleaning Leather Seats.............................259With King Ranch Edition.................................260Without King Ranch Edition..........................259Cleaning Products.......................................256Cleaning the Alloy Wheels........................261
Cleaning the Engine....................................257Cleaning the Exterior..................................256Exterior Chrome Parts.....................................256Exterior Plastic Parts.........................................257Stripes or Graphics............................................257Underbody............................................................257Cleaning the Instrument Panel andInstrument Cluster Lens........................259Cleaning the Interior...................................258Cleaning the Windows and WiperBlades...........................................................258Clearing All MyKeys.......................................53Climate............................................................428Climate Control Voice Commands..............431Climate Control..............................................110Climate Controlled Seats..........................125Cooled Seats........................................................126Heated Seats........................................................125Coolant CheckSee: Engine Coolant Check............................236Crash Sensors and Airbag Indicator........45Creating a MyKey............................................52Programming/Changing ConfigurableSettings...............................................................52Cruise Control..................................................67Principle of Operation.......................................183Cruise controlSee: Using Cruise Control................................183Customer Assistance...................................217
D
Data Recording..................................................9Event Data Recording...........................................9Service Data Recording........................................9Daytime Running Lamps.............................73Digital Radio..................................................323HD Radio Reception and StationTroubleshooting............................................324Direction Indicators........................................74Lane Change..........................................................74Driver and Passenger Airbags...................38Children and Airbags...........................................43Passenger Airbag On and Off Switch ..........38Proper Driver and Front Passenger SeatingAdjustment........................................................42Driving Aids.....................................................184Driving Hints...................................................207
496
Super Duty (TFA) Canada/United States of America, enUSA, First Printing
Index
Page 502 of 507
Information Messages...............................1004WD........................................................................109AdvanceTrac™...................................................100Alarm......................................................................100Diesel Messages..................................................101Doors and Locks.................................................104Drivetrain...............................................................104Engine.....................................................................105Fuel..........................................................................105Key...........................................................................105Maintenance........................................................106MyKey®..................................................................106Off Road.................................................................107Park Aid..................................................................107Park Brake..............................................................107Power Steering....................................................107Tire Pressure Monitoring System.................108Trailer......................................................................108Installing Child Seats.....................................16Child Seats...............................................................16Tether Strap Attachment..................................22Tether Strap Attachment (Rear SuperCabOnly).....................................................................23Using Cinch Tongue Lap and Shoulder Belts(All Front Center, Super Cab and CrewCab Rear Center Positions)..........................19Using Lap and Shoulder Belts..........................17Using Lower Anchors and Tethers forCHildren (LATCH).............................................21Using Tether Straps..............................................21Instrument Cluster.........................................82Instrument Lighting Dimmer......................73Interior Lamps..................................................74Front Map Lamps (If equipped).....................74Rear Dome and Map Lamps............................75Interior Mirror....................................................79Auto-Dimming Mirror..........................................79Introduction.........................................................7
J
Jump Starting the Vehicle.........................214Connecting the Jumper Cables.....................214Jump Starting.......................................................215Preparing Your Vehicle......................................214Removing the Jumper Cables........................215
K
Keyless Entry....................................................57SECURICODE™ KEYLESS ENTRYKEYPAD...............................................................57Unlocking and Locking the Doors..................59Keys and Remote Controls.........................47
L
Lighting Control................................................71Headlamp Flasher................................................72High Beams..............................................................71Lighting................................................................71General Information.............................................71Limited Slip Differential..............................167Load Carrying.................................................185Load Limit.......................................................185Special Loading Instructions for Owners ofPick-up Trucks and Utility-typeVehicles..............................................................191Vehicle Loading - with and without aTrailer.................................................................185Locking and Unlocking.................................56Autolock and Autounlock.................................56Battery Saver..........................................................57Illuminated Entry...................................................57Power Door Locks................................................56Remote Control....................................................56Smart Unlocks......................................................56Locks...................................................................56Lug NutsSee: Changing a Road Wheel.......................290
M
Maintenance..................................................232General Information..........................................232Manual Climate Control.............................110Manual Seats..................................................119Manual Lumbar ..................................................120Moving the Seat Backward andForward..............................................................119Recline Adjustment............................................119Media Hub......................................................328
499
Super Duty (TFA) Canada/United States of America, enUSA, First Printing
Index