2016 FORD F450 SUPER DUTY fuel type
[x] Cancel search: fuel typePage 13 of 507
The event data recorder in this vehicleis designed to record such data as:
•How various systems in your vehiclewere operating;
•Whether or not the driver andpassenger safety belts werebuckled/fastened;
•How far (if at all) the driver wasdepressing the accelerator and/orthe brake pedal; and
•How fast the vehicle was traveling;and
•Where the driver was positioningthe steering wheel.
This data can help provide a betterunderstanding of the circumstances inwhich crashes and injuries occur.
Note:Event data recorder data isrecorded by your vehicle only if anon-trivial crash situation occurs; no datais recorded by the event data recorderunder normal driving conditions and nopersonal data or information (e.g., name,gender, age, and crash location) isrecorded (see limitations regarding 911Assist and Traffic, directions andInformation privacy below). However,parties, such as law enforcement, couldcombine the event data recorder datawith the type of personally identifyingdata routinely acquired during a crashinvestigation.
To read data recorded by an event datarecorder, special equipment is required,and access to the vehicle or the eventdata recorder is needed. In addition tothe vehicle manufacturer, otherparties, such as law enforcement, thathave such special equipment, can readthe information if they have access tothe vehicle or the event data recorder.Ford Motor Company and Ford ofCanada do not access event datarecorder information without obtainingconsent, unless pursuant to court order
or where required by law enforcement,other government authorities or otherthird parties acting with lawfulauthority. Other parties may seek toaccess the information independentlyof Ford Motor Company and Ford ofCanada.
Note:Including to the extent that anylaw pertaining to Event Data Recordersapplies to SYNC or its features, pleasenote the following: Once 911 Assist (ifequipped) is enabled (set ON), 911 Assistmay, through any paired and connectedcell phone, disclose to emergencyservices that the vehicle has been in acrash involving the deployment of anairbag or, in certain vehicles, theactivation of the fuel pump shut-off.Certain versions or updates to 911 Assistmay also be capable of being used toelectronically or verbally provide to 911operators the vehicle location (such aslatitude and longitude), and/or otherdetails about the vehicle or crash orpersonal information about theoccupants to assist 911 operators toprovide the most appropriate emergencyservices. If you do not want to disclosethis information, do not activate the 911Assist feature. See SYNC™ (page 329).
Additionally, when you connect toTraffic, Directions and Information (ifequipped, U.S. only), the service usesGPS technology and advanced vehiclesensors to collect the vehicle’s currentlocation, travel direction, and speed(“vehicle travel information”), only tohelp provide you with the directions,traffic reports, or business searchesthat you request. If you do not wantFord or its vendors to receive thisinformation, do not activate theservice. For more information, seeTraffic, Directions and Information,Terms and Conditions. See SYNC™(page 329).
10
Super Duty (TFA) Canada/United States of America, enUSA, First Printing
Introduction
Page 51 of 507

Note:Replacing the battery will not deletethe transmitter from the vehicle. Thetransmitter should operate normally.
The remote control uses one coin-typethree-volt lithium battery CR2032 orequivalent.
Integrated Keyhead Transmitter
1. Twist a thin coin in the slot of thetransmitter near the key ring to removethe battery cover.
2. Carefully peel up the rubber gasketfrom the transmitter. It may come offwith the battery cover.
3. Remove the old battery
4. Insert the new battery. Refer to theinstructions inside the transmitter forthe correct orientation of the battery.Press the battery down to make sureit is fully in the housing.
5. Reinstall the rubber gasket.
6. Snap the battery cover back onto thetransmitter.
Memory Feature (If Equipped)
You can program your integrated keyheadtransmitter to recall memory settings forthe driver seat, power mirrors and powerfoot pedals. See Memory Function (page120).
Car Finder
Press the button twice withinthree seconds. The horn willsound and the turn signals willflash. We recommend you use this methodto locate your vehicle, rather than usingthe panic alarm.
Sounding a Panic Alarm
Note:The panic alarm will only operatewhen the ignition is off.
Press the button to activate thealarm. Press the button again orturn the ignition on to deactivateit.
Remote Start (If Equipped)
WARNING
To avoid exhaust fumes, do not useremote start if your vehicle is parkedindoors or areas that are not wellventilated.
Note:Do not use remote start if your vehicleis low on fuel.
The remote start button is on thetransmitter.
This feature allows you to start yourvehicle from outside the vehicle. Thetransmitter has an extended operatingrange.
Vehicles with automatic climate controlcan be set to operate when you remotestart the vehicle. See Climate Control(page 110). A manual climate controlsystem will run at the setting it was set towhen you switch the vehicle off.
48
Super Duty (TFA) Canada/United States of America, enUSA, First Printing
Keys and Remote ControlsE163048
3
2
1 E138623 E138624 E138625
Page 87 of 507
Variations:
Distance-to-emptyFuel gauge positionDriving type (fuel economyconditions)
35 miles to 80 miles (56 kmto 129 km)1/16thHighway driving
35 miles (56km)1/16thSevere duty driving (trailertowing, extended idle)
Information Display
Odometer
Located in the bottom of the informationdisplay Registers the accumulateddistance your vehicle has traveled.
Trip Computer
See (page 89).
Vehicle Settings and Personalization
See (page 89).
WARNING LAMPS AND
INDICATORS
The following warning lamps andindicators will alert you to a vehiclecondition that may become serious. Somelamps will illuminate when you start yourvehicle to make sure they work. If anylamps remain on after starting your vehicle,refer to the respective system warninglamp for further information.
Note:Some warning indicators appear inthe information display and function thesame as a warning lamp but do not displaywhen you start your vehicle.
Anti-Lock Braking System
If it illuminates when you aredriving, this indicates amalfunction. You will continueto have the normal braking system(without ABS) unless the brake systemwarning lamp is also illuminated. Have thesystem checked by your authorized dealer.
Battery
If it illuminates while driving, itindicates a malfunction. Switchoff all unnecessary electricalequipment and have the system checkedby your authorized dealer immediately.
Brake System
Illuminates when you engage theparking brake with the ignitionon.
If it illuminates when you are driving, checkthat the parking brake is not engaged. Ifthe parking brake is not engaged, thisindicates low brake fluid level or a brakesystem malfunction. Have the systemchecked immediately by your authorizeddealer.
84
Super Duty (TFA) Canada/United States of America, enUSA, First Printing
Instrument Cluster E144522
Page 92 of 507
GENERAL INFORMATION
WARNING
Driving while distracted can result inloss of vehicle control, crash andinjury. We strongly recommend thatyou use extreme caution when using anydevice that may take your focus off theroad. Your primary responsibility is the safeoperation of your vehicle. We recommendagainst the use of any hand-held devicewhile driving and encourage the use ofvoice-operated systems when possible.Make sure you are aware of all applicablelocal laws that may affect the use ofelectronic devices while driving.
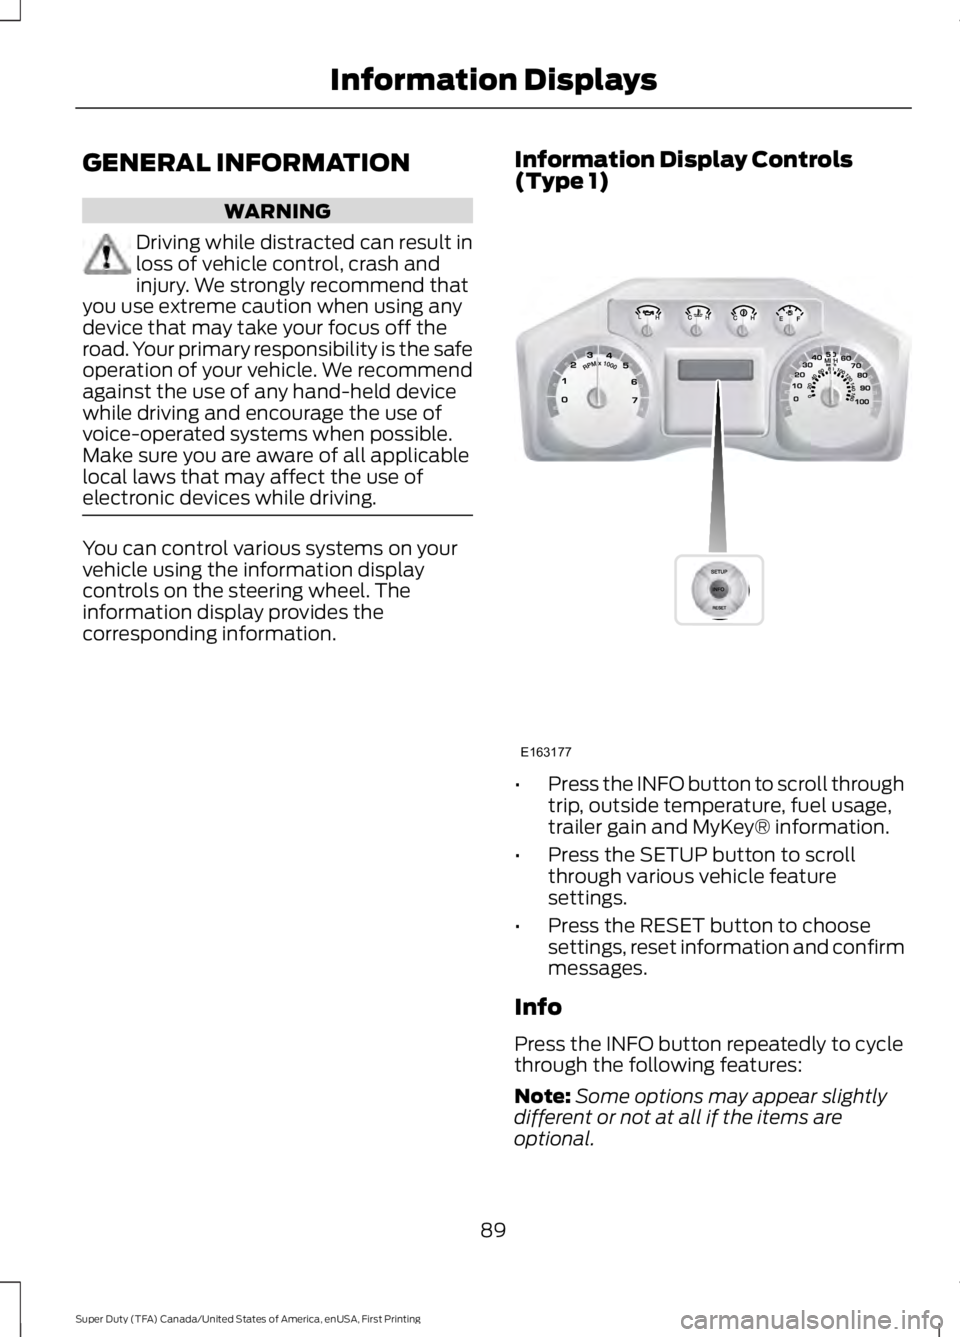
You can control various systems on yourvehicle using the information displaycontrols on the steering wheel. Theinformation display provides thecorresponding information.
Information Display Controls(Type 1)
•Press the INFO button to scroll throughtrip, outside temperature, fuel usage,trailer gain and MyKey® information.
•Press the SETUP button to scrollthrough various vehicle featuresettings.
•Press the RESET button to choosesettings, reset information and confirmmessages.
Info
Press the INFO button repeatedly to cyclethrough the following features:
Note:Some options may appear slightlydifferent or not at all if the items areoptional.
89
Super Duty (TFA) Canada/United States of America, enUSA, First Printing
Information DisplaysE163177
Page 151 of 507
Results are most accurate when the fillingmethod is consistent.
Calculating Fuel Economy
Do not measure fuel economy during thefirst 1000 miles (1600 kilometers) ofdriving (this is your engine’s break-inperiod); a more accurate measurement isobtained after 2000 miles - 3000 miles(3200 kilometers - 4800 kilometers). Also,fuel expense, frequency of fill ups or fuelgauge readings are not accurate ways tomeasure fuel economy.
1.Fill the fuel tank completely and recordthe initial odometer reading.
2. Each time you fill the tank, record theamount of fuel added.
3.After at least 3 to 5 tank fill ups, fill thefuel tank and record the currentodometer reading.
4. Subtract your initial odometer readingfrom the current odometer reading.
5. Calculate fuel economy by dividingmiles traveled by gallons used (ForMetric: Multiply liters used by 100, thendivide by kilometers traveled).
Keep a record for at least 1 month andrecord the type of driving (city or highway).This provides an accurate estimate of thevehicle’s fuel economy under currentdriving conditions. Additionally, keepingrecords during summer and winter showhow temperature impacts fuel economy.In general, lower temperatures mean lowerfuel economy.
Conditions
•Heavily loading a vehicle or towing atrailer may reduce fuel economy at anyspeed.
•Carrying unnecessary weight mayreduce fuel economy (approximately1 mpg [0.4 km/L] is lost for every 400pounds [180 kilograms] of weightcarried).
•Adding certain accessories to yourvehicle (for example bug deflectors,rollbars/light bars, running boards, skiracks) may reduce fuel economy.
•Using fuel blended with alcohol maylower fuel economy.
•Fuel economy may decrease with lowertemperatures during the first 8–10miles (12–16 kilometers) of driving.
•Driving on flat terrain offers improvedfuel economy as compared to drivingon hilly terrain.
•Transmissions give their best fueleconomy when operated in the topcruise gear and with steady pressureon the gas pedal.
•Close windows for high speed driving.
EMISSION CONTROL SYSTEM
WARNINGS
Do not park, idle, or drive your vehiclein dry grass or other dry ground cover.The emission system heats up theengine compartment and exhaust system,which can start a fire.
Exhaust leaks may result in entry ofharmful and potentially lethal fumesinto the passenger compartment. Ifyou smell exhaust fumes inside yourvehicle, have your dealer inspect yourvehicle immediately. Do not drive if yousmell exhaust fumes.
148
Super Duty (TFA) Canada/United States of America, enUSA, First Printing
Fuel and Refueling
Page 161 of 507
USING FOUR-WHEEL DRIVE
WARNING
For important information regardingsafe operation of this type of vehicle,See General Information (page264).
Note:Do not use 4X4 mode on dry, hardsurfaced roads. Doing so will produceexcessive noise, increase tire wear and maydamage drive components. 4X4 mode isonly intended for consistently slippery orloose surfaces.
Note:If 4X4 low is selected while thevehicle is moving above 3 mph (5 km/h),the 4WD system will not perform a shift.This is normal and should be no reason forconcern. Refer to Shifting to/from 4L (4X4Low) for proper operation.
Manual Shift On Stop (MSOS)4WD system (If Equipped)
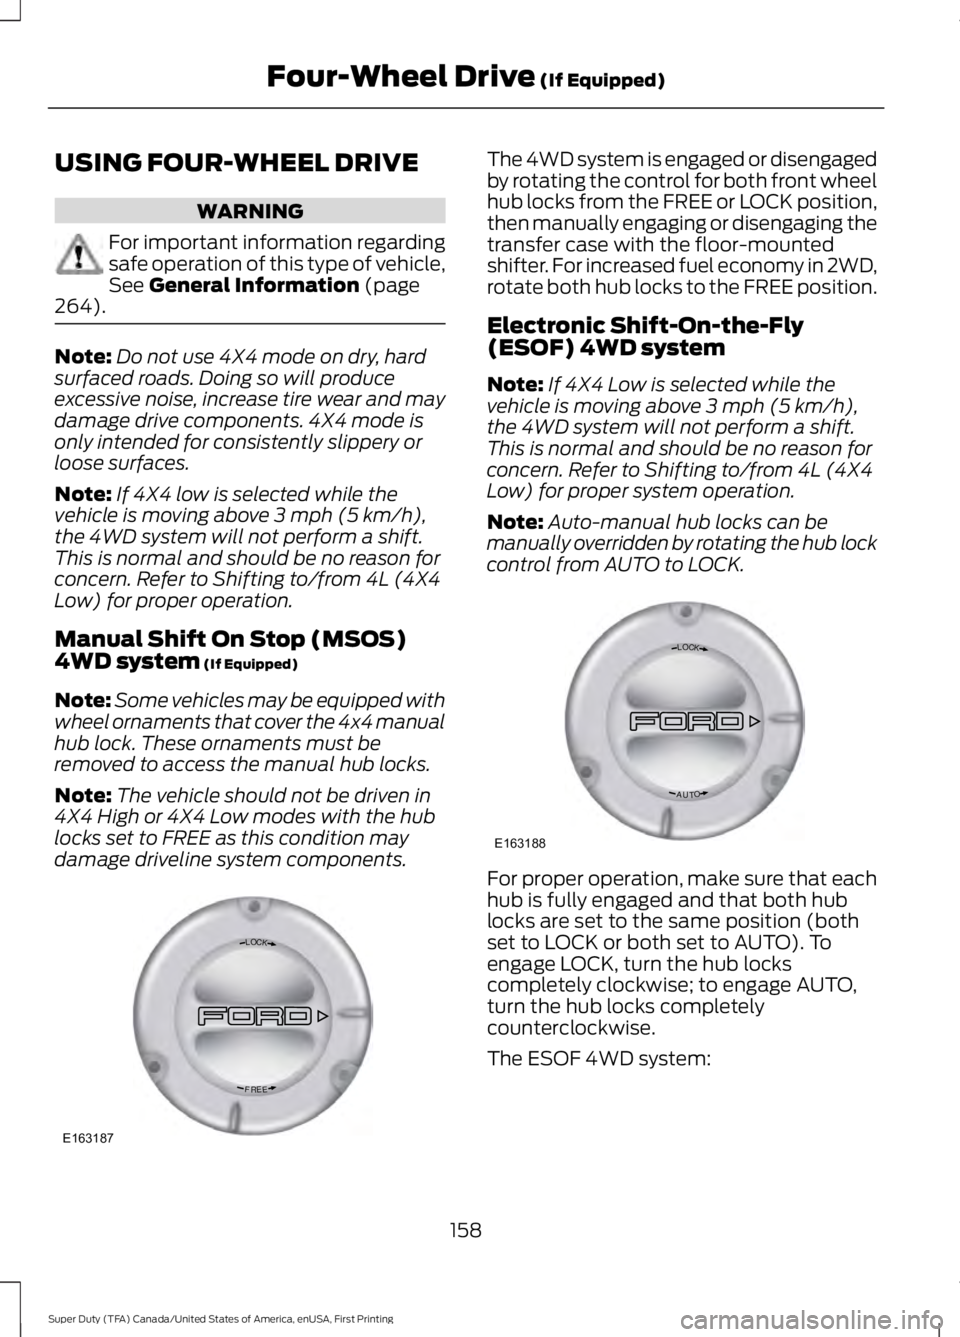
Note:Some vehicles may be equipped withwheel ornaments that cover the 4x4 manualhub lock. These ornaments must beremoved to access the manual hub locks.
Note:The vehicle should not be driven in4X4 High or 4X4 Low modes with the hublocks set to FREE as this condition maydamage driveline system components.
The 4WD system is engaged or disengagedby rotating the control for both front wheelhub locks from the FREE or LOCK position,then manually engaging or disengaging thetransfer case with the floor-mountedshifter. For increased fuel economy in 2WD,rotate both hub locks to the FREE position.
Electronic Shift-On-the-Fly(ESOF) 4WD system
Note:If 4X4 Low is selected while thevehicle is moving above 3 mph (5 km/h),the 4WD system will not perform a shift.This is normal and should be no reason forconcern. Refer to Shifting to/from 4L (4X4Low) for proper system operation.
Note:Auto-manual hub locks can bemanually overridden by rotating the hub lockcontrol from AUTO to LOCK.
For proper operation, make sure that eachhub is fully engaged and that both hublocks are set to the same position (bothset to LOCK or both set to AUTO). Toengage LOCK, turn the hub lockscompletely clockwise; to engage AUTO,turn the hub locks completelycounterclockwise.
The ESOF 4WD system:
158
Super Duty (TFA) Canada/United States of America, enUSA, First Printing
Four-Wheel Drive (If Equipped)LOC K
EERF
E163187 LOC K
OTUA
E163188
Page 206 of 507
•Check your hitch, electrical connectionsand trailer wheel lug nuts thoroughlyafter you have traveled 50 miles (80kilometers).
•When stopped in congested or heavytraffic during hot weather, place thegearshift in position P to aid engine andtransmission cooling and to help A/Cperformance.
•Turn off the speed control with heavyloads or in hilly terrain. The speedcontrol may turn off automaticallywhen you are towing on long, steepgrades.
•Shift to a lower gear when driving downa long or steep hill. Do not apply thebrakes continuously, as they mayoverheat and become less effective.
•If your transmission is equipped with aGrade Assist or Tow/Haul feature, usethis feature when towing. This providesengine braking and helps eliminateexcessive transmission shifting foroptimum fuel economy andtransmission cooling.
•If your vehicle is equipped withAdvanceTrac with RSC, this systemmay turn on during typical corneringmaneuvers with a heavily loaded trailer.This is normal. Turning the corner at aslower speed while towing may reducethis tendency.
•If you are towing a trailer frequently inhot weather, hilly conditions, at thegross combined weight rating (or anycombination of these factors), considerrefilling your rear axle with syntheticgear lubricant (if the axle is not alreadyfilled with it). See Capacities andSpecifications (page 303).
•Allow more distance for stopping witha trailer attached. Anticipate stops andbrake gradually.
•Avoid parking on a grade. However, ifyou must park on a grade:
1. Turn the steering wheel to point yourvehicle tires away from traffic flow.
2. Set your vehicle parking brake.
3. Place the automatic transmission inposition P.
4. Place wheel chocks in front and backof the trailer wheels. (Chocks notincluded with vehicle.)
Your vehicle may be equipped with atemporary or conventional spare tire. A"temporary" spare tire is different in size(diameter or width), tread-type(All-Season or All Terrain) or is from adifferent manufacturer than the road tireson your vehicle. Consult information on thetire label or Safety Compliance label forlimitations when using.
Launching or Retrieving a Boat orPersonal Watercraft (PWC)
Note:Disconnect the wiring to the trailerbefore backing the trailer into the water.
Note:Reconnect the wiring to the trailerafter you remove the trailer from the water.
When backing down a ramp during boatlaunching or retrieval:
•Do not allow the static water level torise above the bottom edge of the rearbumper.
•Do not allow waves to break higherthan 6 inches (15 centimeters) abovethe bottom edge of the rear bumper.
Exceeding these limits may allow water toenter vehicle components:
•Causing internal damage to thecomponents.
•Affecting driveability, emissions, andreliability.
203
Super Duty (TFA) Canada/United States of America, enUSA, First Printing
Towing
Page 247 of 507
BRAKE FLUID CHECK
Fluid levels between the MIN and MAXlines are within the normal operating range;there is no need to add fluid. If the fluidlevels are outside of the normal operatingrange, the performance of the systemcould be compromised; seek service fromyour authorized dealer immediately.
POWER STEERING FLUID
CHECK
Check the power steering fluid. SeeScheduled Maintenance (page 453). Ifadding fluid is necessary, use onlyMERCON LV ATF
Note:This procedure is for vehicles withgasoline engines. Vehicles with dieselengines are similar. See Under HoodOverview in your diesel supplement.
Check the fluid level when it is at ambienttemperature.
1. Check the fluid level in the reservoir. Itshould be between the MIN and MAXrange. Do not add fluid if the level iswithin this range.
2.If the fluid level is low, add fluid to bringthe fluid level up to between the MINand MAX range.
3. Switch the engine on.
4.While the engine idles, turn the steeringwheel left and right several times.
5. Switch the engine off.
6. Recheck the fluid level in the reservoir.Do not add fluid if the level is betweenthe MIN and MAX range.
7. If the fluid is low, add fluid in smallamounts, continuously checking thelevel until it is between the MIN andMAX range. For proper fluid type, SeeCapacities and Specifications (page303). Be sure to put the cap back on thereservoir.
WASHER FLUID CHECK
WARNING
If you operate your vehicle intemperatures below 40°F (5°C), usewasher fluid with antifreezeprotection. Failure to use washer fluid withantifreeze protection in cold weather couldresult in impaired windshield vision andincrease the risk of injury or accident.
Add fluid to fill the reservoir if the level islow. Only use a washer fluid that meetsFord specifications. See Capacities andSpecifications (page 303).
State or local regulations on volatileorganic compounds may restrict the useof methanol, a common windshield washerantifreeze additive. Washer fluidscontaining non-methanol antifreezeagents should be used only if they providecold weather protection without damagingthe vehicle’s paint finish, wiper blades orwasher system.
FUEL FILTER
Your vehicle is equipped with a lifetimefuel filter that is integrated with the fueltank. Regular maintenance or replacementis not needed.
244
Super Duty (TFA) Canada/United States of America, enUSA, First Printing
Maintenance