2016 FORD F450 SUPER DUTY change wheel
[x] Cancel search: change wheelPage 177 of 507
PRINCIPLE OF OPERATION
WARNINGS
Vehicle modifications involvingbraking system, aftermarket roofracks, suspension, steering system,tire construction and wheel and tire sizemay change the handling characteristicsof your vehicle and may adversely affectthe performance of the AdvanceTracsystem. In addition, installing any stereoloudspeakers may interfere with andadversely affect the AdvanceTrac system.Install any aftermarket stereo loudspeakeras far as possible from the front centerconsole, the tunnel, and the front seats inorder to minimize the risk of interfering withthe AdvanceTrac sensors. Reducing theeffectiveness of the AdvanceTrac systemcould lead to an increased risk of loss ofvehicle control, vehicle rollover, personalinjury and death.
Remember that even advancedtechnology cannot defy the laws ofphysics. It’s always possible to losecontrol of a vehicle due to inappropriatedriver input for the conditions. Aggressivedriving on any road condition can causeyou to lose control of your vehicleincreasing the risk of personal injury orproperty damage. Activation of theAdvanceTrac system is an indication thatat least some of the tires have exceededtheir ability to grip the road; this couldreduce the operator’s ability to control thevehicle potentially resulting in a loss ofvehicle control, vehicle rollover, personalinjury and death. If your AdvanceTracsystem activates, SLOW DOWN.
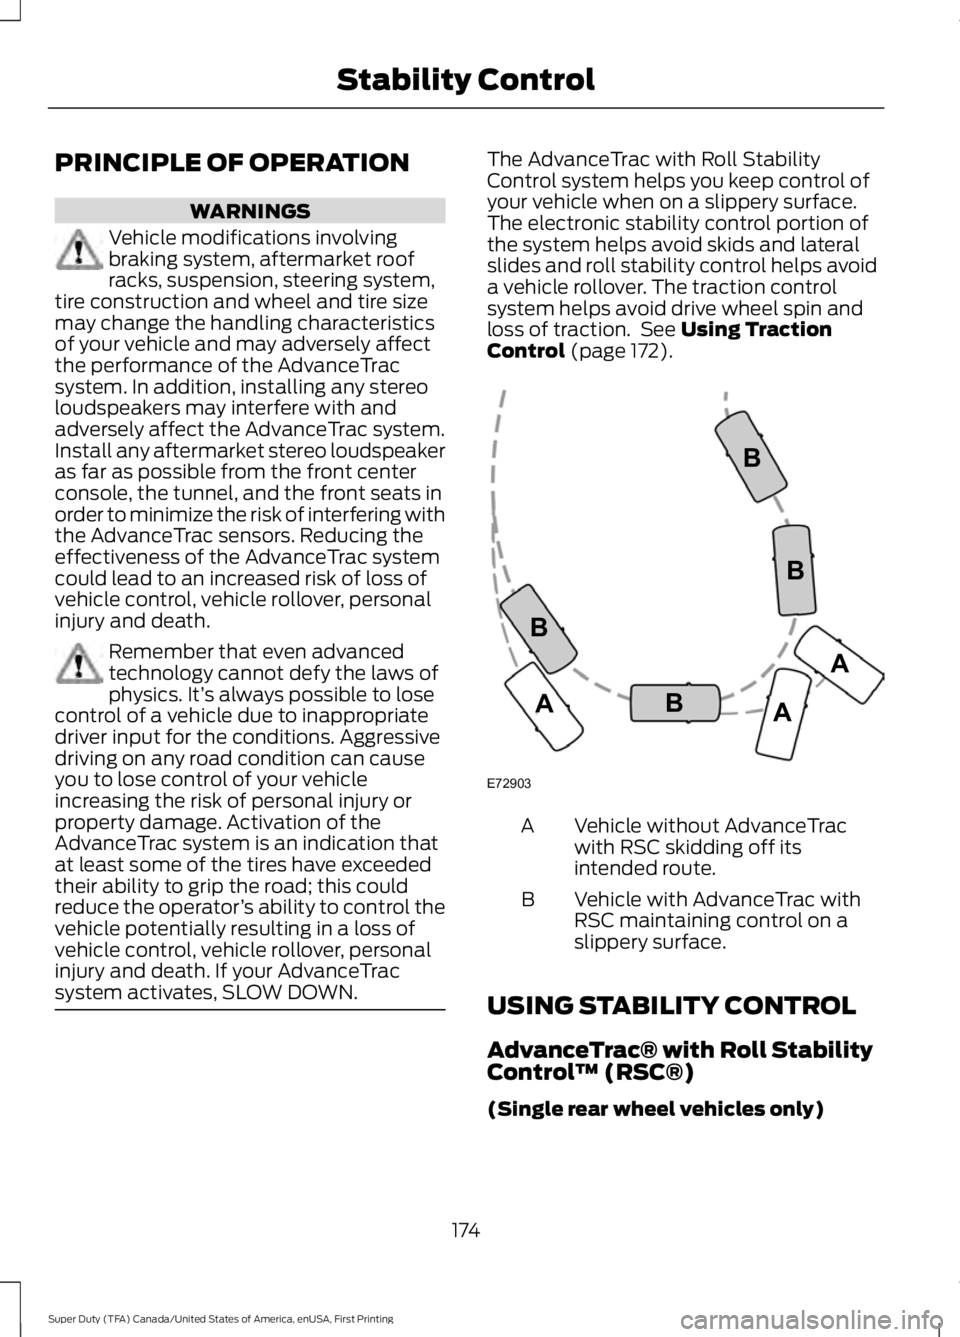
The AdvanceTrac with Roll StabilityControl system helps you keep control ofyour vehicle when on a slippery surface.The electronic stability control portion ofthe system helps avoid skids and lateralslides and roll stability control helps avoida vehicle rollover. The traction controlsystem helps avoid drive wheel spin andloss of traction. See Using TractionControl (page 172).
Vehicle without AdvanceTracwith RSC skidding off itsintended route.
A
Vehicle with AdvanceTrac withRSC maintaining control on aslippery surface.
B
USING STABILITY CONTROL
AdvanceTrac® with Roll StabilityControl™ (RSC®)
(Single rear wheel vehicles only)
174
Super Duty (TFA) Canada/United States of America, enUSA, First Printing
Stability ControlE72903A
AA
B
BB
B
Page 185 of 507
Fixed guidelines are always shown in thedisplay, but the active guidelines onlydisplay when the steering wheel is turned.To use active guidelines, turn the steeringwheel to point the guidelines toward anintended path. If the steering wheelposition is changed while reversing, thevehicle might deviate from the originalintended path.
The active guidelines fade in and outdepending on the steering wheel position.The active guidelines are not shown whenthe steering wheel position is straight.
Always use caution while reversing.Objects in the red zone are closest to yourvehicle and objects in the green zone arefarther away. Objects are getting closer toyour vehicle as they move from the greenzone to the yellow or red zones. Use theside view mirrors and rear view mirror toget better coverage on both sides and rearof your vehicle.
Enhanced Park Aids
Note:Enhanced park aids is only availablewhen the transmission is in reverse (R).
Note:The reverse sensing system is noteffective at speeds above 3 mph (5 km/h)and may not detect certain angular ormoving objects.
The system uses red, yellow and greenhighlights which appear on top of the videoimage when an object is detected by thereverse sensing system. The alert highlightsthe closest object detected. The reversesensing alert can be disabled and if visualpark aid alert is enabled, highlighted areasare still displayed.
Selectable settings for this feature are ONand OFF.
Manual Zoom
WARNING
When manual zoom is on, the fullarea behind your vehicle is notshown. Be aware of yoursurroundings when using the manual zoomfeature.
Note:Manual zoom is only available whenthe transmission is in reverse (R).
Note:When manual zoom is enabled, onlythe centerline is shown.
This feature allows you to get a closer viewof an object behind your vehicle (forexample, a trailer). The zoomed imagekeeps the bumper in the image to providea reference. The zoom is only active whilethe transmission is in reverse (R). Whenthe transmission is shifted out of reverse(R), the feature automatically turns offand must be reset when it is used again.
Selectable settings for this feature is OFF,Level 1, Level 2 and Level 3. The selectedlevel will appear between the buttons (forexample, Level 1) The default setting forthe manual zoom is OFF.
Rear Camera Delay
When shifting the transmission out ofreverse (R) and into any gear other thanpark (P), the camera image remains in thedisplay until your vehicle speed reaches5 mph (8 km/h). This occurs when the rearcamera delay feature is on or until a radiobutton is selected.
Selectable settings for this feature are ONand OFF. The default setting for the rearcamera delay is ON.
182
Super Duty (TFA) Canada/United States of America, enUSA, First Printing
Parking Aids
Page 186 of 507
PRINCIPLE OF OPERATION
Cruise control lets you maintain a setspeed without keeping your foot on theaccelerator pedal. You can use cruisecontrol when your vehicle speed is greaterthan 20 mph (30 km/h).
USING CRUISE CONTROL
WARNINGS
Do not use cruise control in heavytraffic, on winding roads or when theroad surface is slippery. This couldresult in loss of vehicle control, seriousinjury or death.
When you are going downhill, yourvehicle speed may increase abovethe set speed. The system will notapply the brakes. Change down a gear toassist the system in maintaining the setspeed. Failure to do so could result in lossof vehicle control, serious injury or death.
Note:Cruise control will disengage if thevehicle speed decreases more than 10 mph(16 km/h) below your set speed whiledriving uphill.
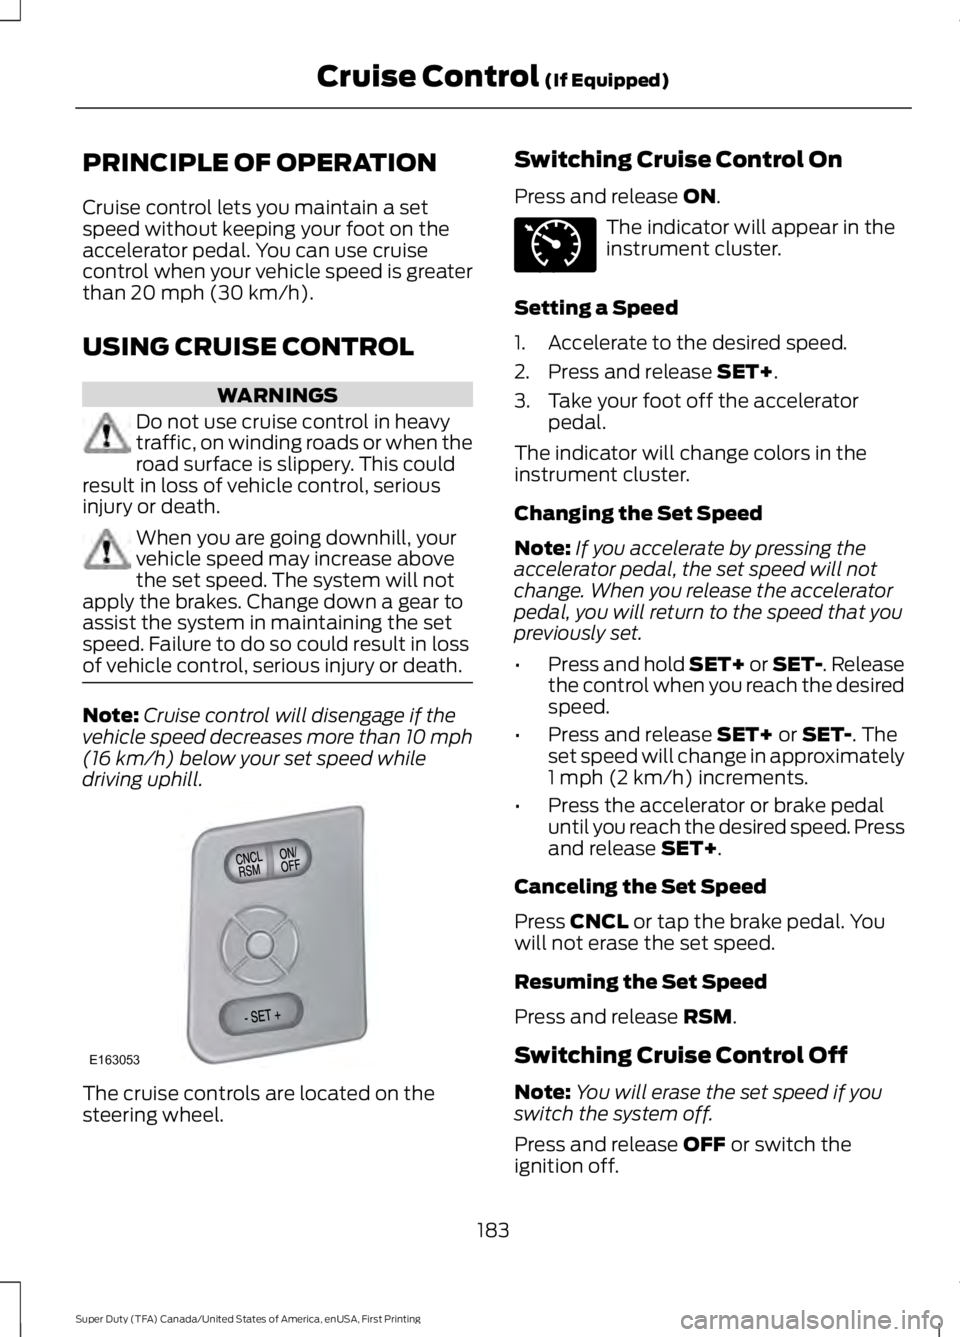
The cruise controls are located on thesteering wheel.
Switching Cruise Control On
Press and release ON.
The indicator will appear in theinstrument cluster.
Setting a Speed
1. Accelerate to the desired speed.
2. Press and release SET+.
3. Take your foot off the acceleratorpedal.
The indicator will change colors in theinstrument cluster.
Changing the Set Speed
Note:If you accelerate by pressing theaccelerator pedal, the set speed will notchange. When you release the acceleratorpedal, you will return to the speed that youpreviously set.
•Press and hold SET+ or SET-. Releasethe control when you reach the desiredspeed.
•Press and release SET+ or SET-. Theset speed will change in approximately1 mph (2 km/h) increments.
•Press the accelerator or brake pedaluntil you reach the desired speed. Pressand release SET+.
Canceling the Set Speed
Press CNCL or tap the brake pedal. Youwill not erase the set speed.
Resuming the Set Speed
Press and release RSM.
Switching Cruise Control Off
Note:You will erase the set speed if youswitch the system off.
Press and release OFF or switch theignition off.
183
Super Duty (TFA) Canada/United States of America, enUSA, First Printing
Cruise Control (If Equipped)E163053 E71340
Page 201 of 507
Fixed guidelines are always shown in thedisplay, but the active guidelines onlydisplay when the steering wheel is turned.To use active guidelines, turn the steeringwheel to point the guidelines toward anintended path. If the steering wheelposition is changed while reversing, yourvehicle might deviate from the originalintended path.
The active guidelines fade in and outdepending on the steering wheel position.The active guidelines are not shown whenthe steering wheel position is straight.
Always use caution while reversing.Objects in the red zone are closest to yourvehicle and objects in the green zone arefarther away. Objects are getting closer toyour vehicle as they move from the greenzone to the yellow or red zones. Use theside view mirrors and rear view mirror toget better coverage on both sides and rearof your vehicle.
Refer to the Rear View Camera section foradditional information. See Rear ViewCamera (page 180).
Hitches
WARNING
On pick-up trucks, the trailer hitchprovided on this vehicle enhancescrash protection for the fuel system.Do not remove!
Do not use a hitch that either clamps ontothe bumper or attaches to the axle. Youmust distribute the load in your trailer sothat 10-15% for conventional towing or15-25% for fifth wheel towing of the totalweight of the trailer is on the tongue.
Weight-distributing Hitches
WARNING
Do not adjust a weight-distributinghitch to any position where the rearbumper of the vehicle is higher thanit was before attaching the trailer. Doingso will defeat the function of theweight-distributing hitch, which may causeunpredictable handling, and could resultin serious personal injury.
When hooking-up a trailer using aweight-distributing hitch, always use thefollowing procedure:
1. Park the loaded vehicle, without thetrailer, on a level surface.
2. Measure the height to the top of yourvehicle's front wheel opening on thefender. This is H1.
3.Attach the loaded trailer to your vehiclewithout the weight-distributing barsconnected.
4. Measure the height to the top of yourvehicle's front wheel opening on thefender a second time. This is H2.
5. Install and adjust the tension in theweight-distributing bars so that theheight of your vehicle's front wheelopening on the fender is approximatelyhalfway between H1 and H2.
6.Check that the trailer is level or slightlynose down toward your vehicle. If not,adjust the ball height accordingly andrepeat Steps 2-6.
Once the trailer is level or slightly nosedown toward the vehicle:
•Lock the bar tension adjuster in place.
•Check that the trailer tongue securelyattaches and locks onto the hitch.
•Install safety chains, lighting, and trailerbrake controls as required by law or thetrailer manufacturer.
198
Super Duty (TFA) Canada/United States of America, enUSA, First Printing
Towing
Page 204 of 507
Trailer Brake Effort Setting
The trailer brake controller allows the userto customize how aggressively the trailerbrakes engage. The default value is "Low"and is the recommended setting for mosttrailers. If your trailer's brakes require moreinitial voltage, or if you prefer moreaggressive trailer braking, then select eitherthe "Medium" or the "High" setting. SeeInformation Displays (page 89).
Procedure for Adjusting Gain
Note:Only perform this procedure in atraffic-free environment at speeds ofapproximately 20-25 mph (30-40 km/h).
The gain setting adjusts the trailer brakecontroller for the specific towing condition.You should change the setting as towingconditions change. Changes to towingconditions include trailer load, vehicle load,road conditions and weather.
The gain should be set to provide themaximum trailer braking assistance whilemaking sure the trailer wheels do not lockwhen using the brakes. Locked trailerwheels may lead to trailer instability.
1.Make sure the trailer brakes are in goodworking condition, functioning normallyand properly adjusted. See your trailerdealer if necessary.
2. Hook up the trailer and make theelectrical connections according to thetrailer manufacturer's instructions.
3. When you plug in a trailer with electricor electric-over-hydraulic brakes,TRAILER CONNECTED appears inthe information display.
4. Use the gain adjustment (+ and -)buttons to increase or decrease thegain setting to the desired startingpoint. A gain setting of 6.0 is a goodstarting point for heavier loads.
5. In a traffic-free environment, tow thetrailer on a dry, level surface at a speedof 20-25 mph (30-40 km/h) andsqueeze the manual control levercompletely.
6. If the trailer wheels lock up, indicatedby squealing tires, reduce the gainsetting. If the trailer wheels turn freely,increase the gain setting. Repeat Steps5 and 6 until the gain setting is at apoint just below trailer wheel lock-up.If towing a heavier trailer, trailer wheellock-up may not be attainable evenwith the maximum gain setting of 10.
Information Display Warning Messages
Note:An authorized dealer can diagnosethe trailer brake controller to determineexactly which trailer fault has occurred.However, your Ford warranty does not coverthis diagnosis if the fault is with the trailer.
TRAILER BRAKE MODULE FAULT
Displays in response to faults sensed bythe trailer brake controller, accompaniedby a single tone. If this message appears,contact an authorized dealer as soon aspossible for diagnosis and repair. Thecontroller may still function, but withdegraded performance.
WIRING FAULT ON TRAILER
Displays when there is a short circuit onthe electric brake output wire.
If this message displays, with no trailerconnected, the problem is with your vehiclewiring or trailer brake controller. Contactan authorized dealer.
201
Super Duty (TFA) Canada/United States of America, enUSA, First Printing
Towing
Page 205 of 507
If the message only displays with a trailerconnected, the problem is with the trailerwiring. Consult your trailer dealer forassistance. This can be a short to ground(such as a chaffed wire), short to voltage(such as a pulled pin on trailer emergencybreakaway battery) or the trailer brakesmay be drawing too much current.
Points to Remember
Note:Do not attempt removal of the trailerbrake controller without consulting theWorkshop Manual. Damage to the unit mayresult.
•Adjust gain setting before using thetrailer brake controller.
•Adjust gain setting, using the procedureabove, whenever road, weather, traileror vehicle loading conditions changefrom when the gain was initially set.
•Only use the manual control lever forproper adjustment of the gain duringtrailer setup. Misuse, such asapplication during trailer sway, couldcause instability of trailer or towvehicle.
•Avoid towing in adverse weatherconditions. The trailer brake controllerdoes not provide anti-lock control ofthe trailer wheels. Trailer wheels canlock up on slippery surfaces, resultingin reduced stability of trailer and towvehicle.
•The trailer brake controller is equippedwith a feature that reduces output atvehicle speeds below 11 mph (18 km/h)so trailer and vehicle braking is not jerkyor harsh. This feature is only activewhen applying the brakes using yourvehicle's brake pedal, not thecontroller.
•The controller interacts with the brakecontrol system and powertrain controlsystem of your vehicle to provide thebest performance on different roadconditions.
•Your vehicle's brake system and thetrailer brake system workindependently of each other. Changingthe gain setting on the controller doesnot affect the operation of yourvehicle's brakes.
•When you switch the engine off, thecontroller output is disabled and thedisplay and module shut down.
Trailer Lamps
WARNING
Never connect any trailer lamp wiringto the vehicle's tail lamp wiring; thismay damage the electrical systemresulting in fire. Contact your authorizeddealer as soon as possible for assistancein proper trailer tow wiring installation.Additional electrical equipment may berequired.
Trailer lamps are required on most towedvehicles. Make sure all running lights, brakelights, turn signals and hazard lights areworking.
Before Towing a Trailer
Practice turning, stopping and backing upto get the feel of your vehicle-trailercombination before starting on a trip.When turning, make wider turns so thetrailer wheels clear curbs and otherobstacles.
When Towing a Trailer
•Do not drive faster than 70 mph (113km/h) during the first 500 miles (800kilometers).
•Do not make full-throttle starts.
202
Super Duty (TFA) Canada/United States of America, enUSA, First Printing
Towing
Page 210 of 507
BREAKING-IN
You need to break in new tires forapproximately 300 miles (480kilometers). During this time, your vehiclemay exhibit some unusual drivingcharacteristics.
Avoid driving too fast during the first 1000miles (1600 kilometers). Vary your speedfrequently and change up through thegears early. Do not labor the engine.
Do not tow during the first 1000 miles(1600 kilometers).
ECONOMICAL DRIVING
Your fuel economy is affected by severalthings, such as how you drive, theconditions you drive under, and how youmaintain your vehicle.
You may improve your fuel economy bykeeping these things in mind:
•Accelerate and slow down in a smooth,moderate fashion.
•Drive at steady speeds withoutstopping.
•Anticipate stops; slowing down mayeliminate the need to stop.
•Combine errands and minimizestop-and-go driving.
•Close the windows for high-speeddriving.
•Drive at reasonable speeds (travelingat 55 mph [88 km/h] uses 15% lessfuel than traveling at 65 mph [105km/h]).
•Keep the tires properly inflated and useonly the recommended size.
•Use the recommended engine oil.
•Perform all regularly scheduledmaintenance.
Avoid these actions; they reduce your fueleconomy:
•Sudden accelerations or hardaccelerations.
•Revving the engine before turning it off.
•Idle for periods longer than one minute.
•Warm up your vehicle on coldmornings.
•Use the air conditioner or frontdefroster.
•Use the speed control in hilly terrain.
•Rest your foot on the brake pedal whiledriving.
•Drive a heavily loaded vehicle or tow atrailer.
•Carry unnecessary weight(approximately 1 mpg [0.4 km/L] islost for every 400 lb [180 kilogram] ofweight carried).
•Driving with the wheels out ofalignment.
Conditions
•Heavily loading a vehicle or towing atrailer may reduce fuel economy at anyspeed.
•Adding certain accessories to yourvehicle (for example bug deflectors,rollbars, light bars, running boards, skiracks or luggage racks) may reducefuel economy.
•To maximize the fuel economy, drivewith the tonneau cover installed (ifequipped).
•Using fuel blended with alcohol maylower fuel economy.
•Fuel economy may decrease with lowertemperatures during the first 8–10miles (12–16 kilometers) of driving.
•Driving on flat terrain offers improvedfuel economy as compared to drivingon hilly terrain.
207
Super Duty (TFA) Canada/United States of America, enUSA, First Printing
Driving Hints
Page 267 of 507
GENERAL INFORMATION
Use only approved wheel and tire sizes,using other sizes could damage yourvehicle. If you change the diameter of thetires from that fitted at the factory, thespeedometer may not display the correctspeed. Take your vehicle to an authorizedFord dealer to have the systemreprogrammed. If you intend to change thesize of the wheels from that fitted by themanufacturer, you can check the suitabilitywith an authorized dealer.
Additional information related to thefunctionality and maintenance of your tirescan be found later in this chapter. See TireCare (page 267).
The Ford recommended tire inflationpressures can be found on the Tire Label,which is located on the B-pillar or the edgeof the driver's door. This information canalso be found on the Safety ComplianceCertification Label (affixed to either thedoor hinge pillar, door-latch post, or thedoor edge that meets the door last post;next to the driver’s seating position).
Ford strongly recommends maintainingthese tire pressures at all times. Failure tofollow the tire pressure recommendationscan cause uneven treadwear patterns,reduced fuel economy, and adverselyaffect the way your vehicle handles.
Note:Check and set the tire pressure at theambient temperature in which you areintending to drive your vehicle and when thetires are cold.
Note:Check your tire pressures at leastonce per month.
Set the pressure for your spare tire to thehighest value given for your vehicle and tiresize combination (if equipped).
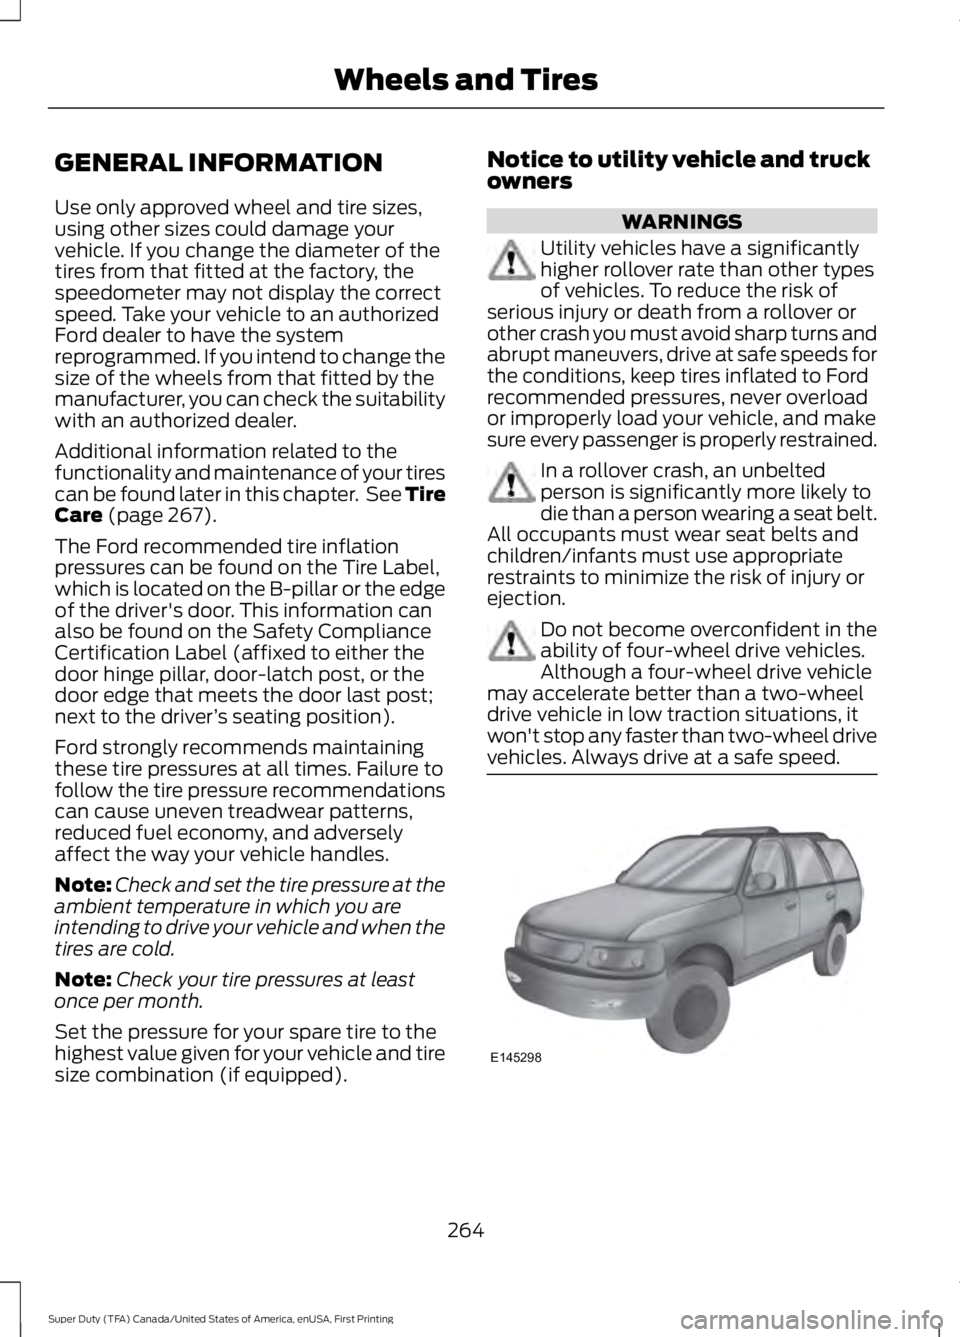
Notice to utility vehicle and truckowners
WARNINGS
Utility vehicles have a significantlyhigher rollover rate than other typesof vehicles. To reduce the risk ofserious injury or death from a rollover orother crash you must avoid sharp turns andabrupt maneuvers, drive at safe speeds forthe conditions, keep tires inflated to Fordrecommended pressures, never overloador improperly load your vehicle, and makesure every passenger is properly restrained.
In a rollover crash, an unbeltedperson is significantly more likely todie than a person wearing a seat belt.All occupants must wear seat belts andchildren/infants must use appropriaterestraints to minimize the risk of injury orejection.
Do not become overconfident in theability of four-wheel drive vehicles.Although a four-wheel drive vehiclemay accelerate better than a two-wheeldrive vehicle in low traction situations, itwon't stop any faster than two-wheel drivevehicles. Always drive at a safe speed.
264
Super Duty (TFA) Canada/United States of America, enUSA, First Printing
Wheels and TiresE145298