2016 FORD F450 SUPER DUTY change wheel
[x] Cancel search: change wheelPage 273 of 507
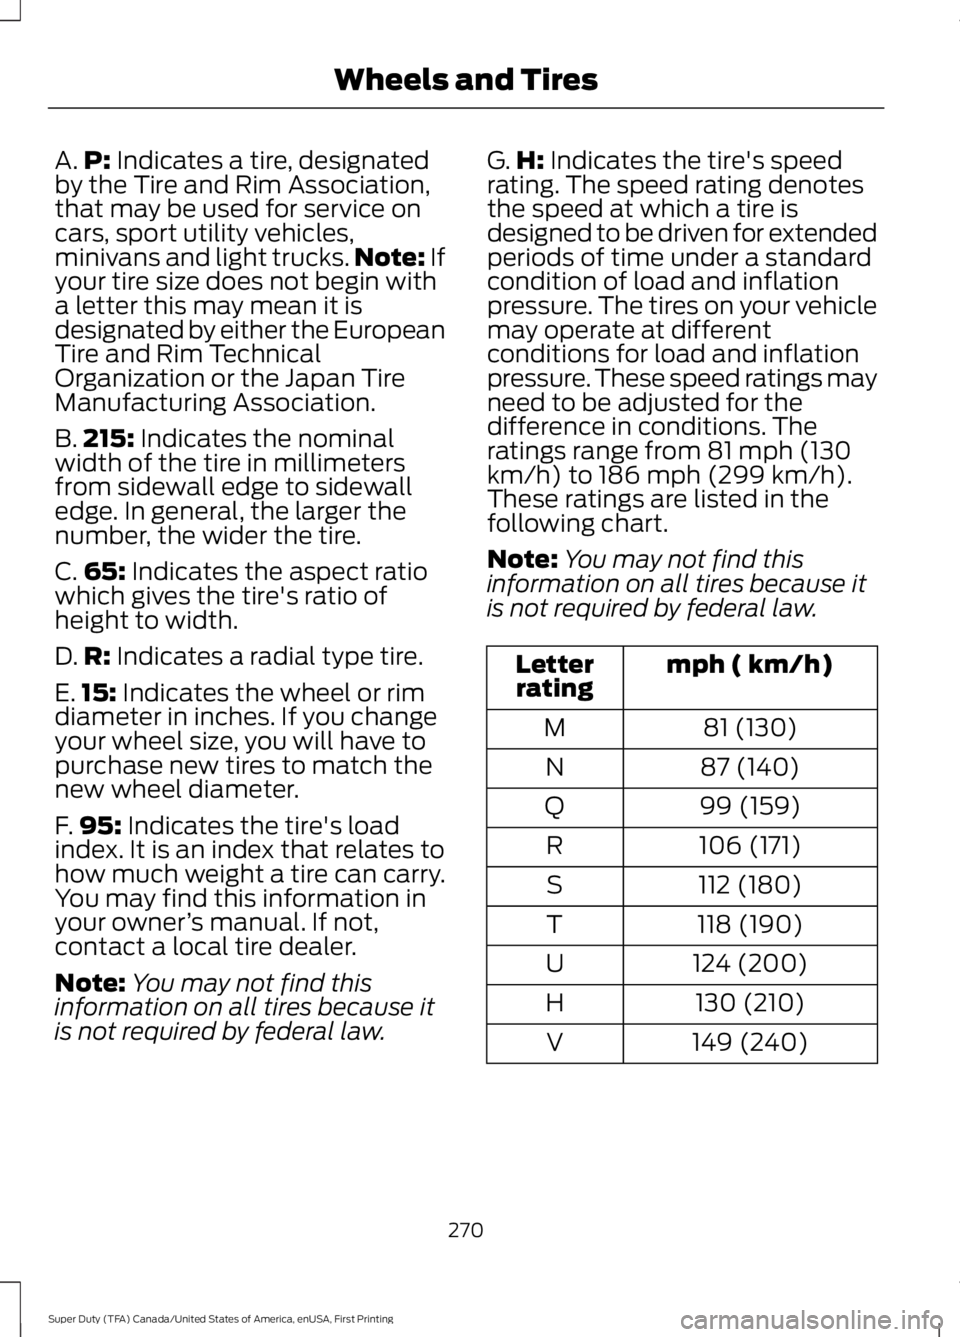
A.P: Indicates a tire, designatedby the Tire and Rim Association,that may be used for service oncars, sport utility vehicles,minivans and light trucks.Note: Ifyour tire size does not begin witha letter this may mean it isdesignated by either the EuropeanTire and Rim TechnicalOrganization or the Japan TireManufacturing Association.
B.215: Indicates the nominalwidth of the tire in millimetersfrom sidewall edge to sidewalledge. In general, the larger thenumber, the wider the tire.
C.65: Indicates the aspect ratiowhich gives the tire's ratio ofheight to width.
D.R: Indicates a radial type tire.
E.15: Indicates the wheel or rimdiameter in inches. If you changeyour wheel size, you will have topurchase new tires to match thenew wheel diameter.
F.95: Indicates the tire's loadindex. It is an index that relates tohow much weight a tire can carry.You may find this information inyour owner’s manual. If not,contact a local tire dealer.
Note:You may not find thisinformation on all tires because itis not required by federal law.
G.H: Indicates the tire's speedrating. The speed rating denotesthe speed at which a tire isdesigned to be driven for extendedperiods of time under a standardcondition of load and inflationpressure. The tires on your vehiclemay operate at differentconditions for load and inflationpressure. These speed ratings mayneed to be adjusted for thedifference in conditions. Theratings range from 81 mph (130km/h) to 186 mph (299 km/h).These ratings are listed in thefollowing chart.
Note:You may not find thisinformation on all tires because itis not required by federal law.
mph ( km/h)Letterrating
81 (130)M
87 (140)N
99 (159)Q
106 (171)R
112 (180)S
118 (190)T
124 (200)U
130 (210)H
149 (240)V
270
Super Duty (TFA) Canada/United States of America, enUSA, First Printing
Wheels and Tires
Page 276 of 507
D.Maximum Load Single lb(kg) at psi (kPa) cold: Indicatesthe maximum load and tirepressure when the tire is used asa single; defined as two tires(total) on the rear axle.
Information on T Type Tires
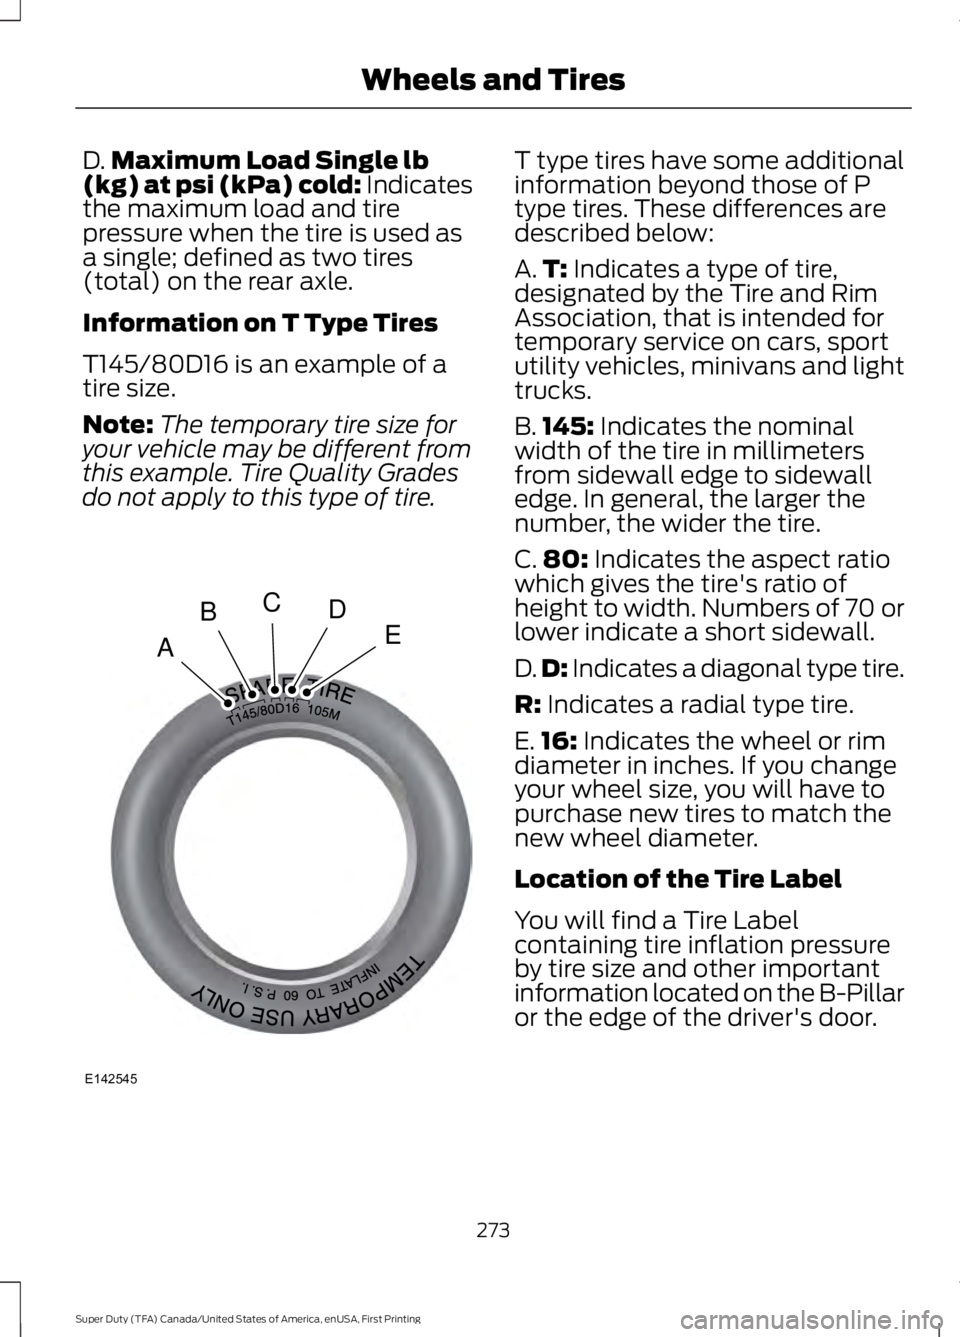
T145/80D16 is an example of atire size.
Note:The temporary tire size foryour vehicle may be different fromthis example. Tire Quality Gradesdo not apply to this type of tire.
T type tires have some additionalinformation beyond those of Ptype tires. These differences aredescribed below:
A.T: Indicates a type of tire,designated by the Tire and RimAssociation, that is intended fortemporary service on cars, sportutility vehicles, minivans and lighttrucks.
B.145: Indicates the nominalwidth of the tire in millimetersfrom sidewall edge to sidewalledge. In general, the larger thenumber, the wider the tire.
C.80: Indicates the aspect ratiowhich gives the tire's ratio ofheight to width. Numbers of 70 orlower indicate a short sidewall.
D.D: Indicates a diagonal type tire.
R: Indicates a radial type tire.
E.16: Indicates the wheel or rimdiameter in inches. If you changeyour wheel size, you will have topurchase new tires to match thenew wheel diameter.
Location of the Tire Label
You will find a Tire Labelcontaining tire inflation pressureby tire size and other importantinformation located on the B-Pillaror the edge of the driver's door.
273
Super Duty (TFA) Canada/United States of America, enUSA, First Printing
Wheels and TiresA
BCDE
E142545
Page 278 of 507
Note:Do not reduce tire pressureto change the ride characteristicsof the vehicle. If you do notmaintain the inflation pressure atthe levels specified by Ford, yourvehicle may experience a conditionknown as shimmy. Shimmy is asevere vibration and oscillation inthe steering wheel after the vehicletravels over a bump or dip in theroad that does not dampen out byitself. Shimmy may result fromsignificant under-inflation of thetires, improper tires (load range,size, or type), or vehiclemodifications such as lift-kits. Inthe event that your vehicleexperiences shimmy, you shouldslowly reduce speed by either liftingoff the accelerator pedal or lightlyapplying the brakes. The shimmywill cease as the vehicle speeddecreases.
Maximum Inflation Pressure isthe tire manufacturer's maximumpermissible pressure and thepressure at which the maximumload can be carried by the tire. Thispressure is normally higher thanthe manufacturer’s recommendedcold inflation pressure which canbe found on the SafetyCompliance Certification Label(affixed to either the door hingepillar, door-latch post, or the dooredge that meets the door-latchpost, next to the driver's seatingposition), or Tire Label located on
the B-pillar or the edge of thedriver's door. The cold inflationpressure should never be set lowerthan the recommended pressureon the Safety ComplianceCertification Label or Tire Label.
When weather temperaturechanges occur, tire inflationpressures also change. A 10°F(6°C) temperature drop cancause a corresponding drop of 1psi (7 kPa) in inflation pressure.Check your tire pressuresfrequently and adjust them to theproper pressure which can befound on the Safety ComplianceCertification Label or Tire Label.
To check the pressure in yourtire(s):
1. Make sure the tires are cool,meaning they are not hot fromdriving even a mile.
Note:If you are checking tirepressure when the tire is hot, (forexample, driven more than 1 mile[1.6 kilometers]), never bleed orreduce air pressure. The tires arehot from driving and it is normal forpressures to increase aboverecommended cold pressures. Ahot tire at or below recommendedcold inflation pressure could besignificantly under-inflated.
275
Super Duty (TFA) Canada/United States of America, enUSA, First Printing
Wheels and Tires
Page 296 of 507
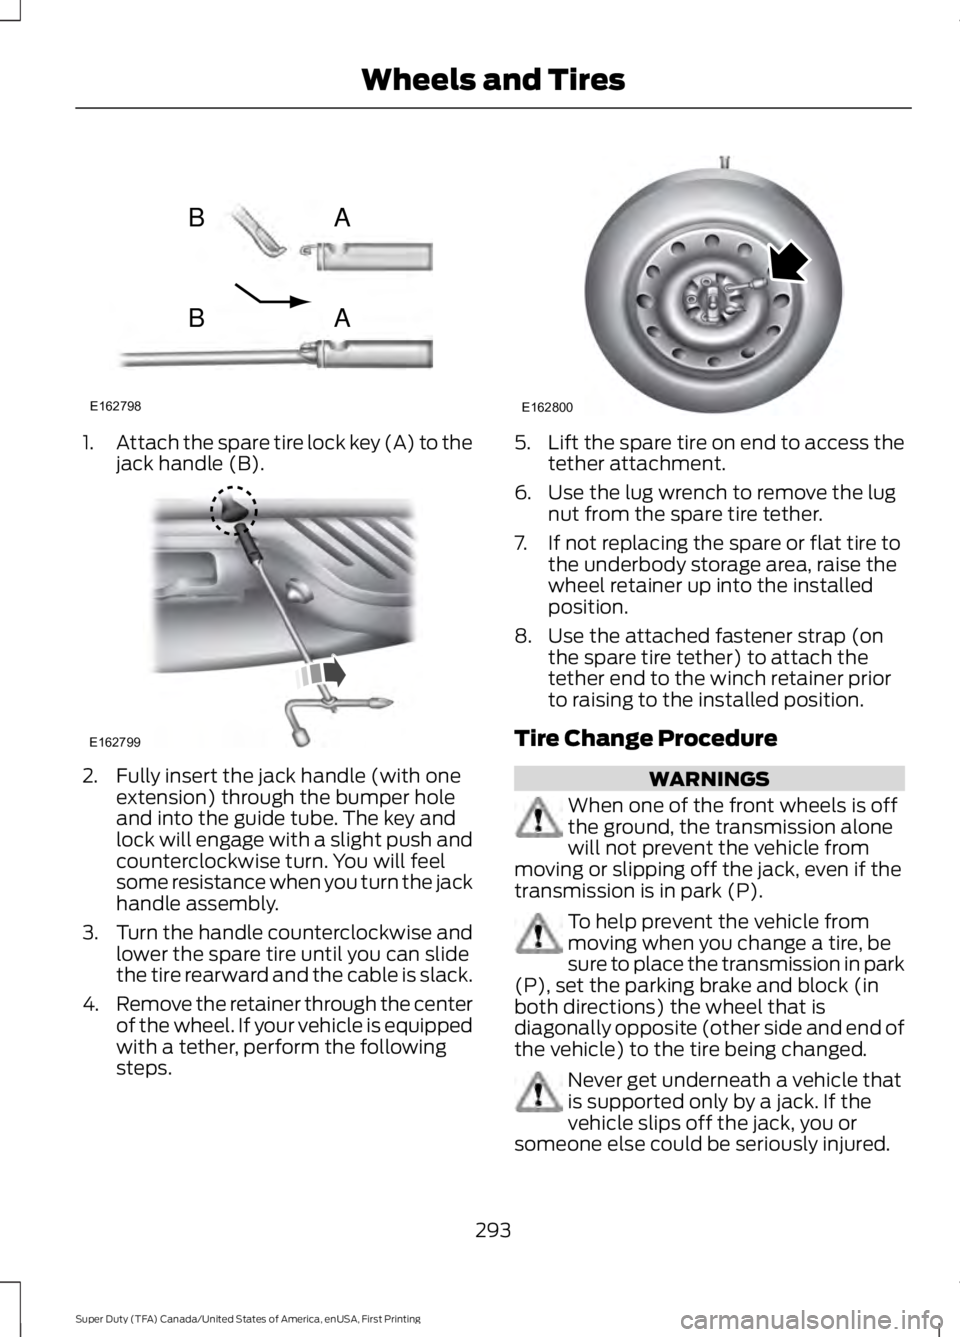
1.Attach the spare tire lock key (A) to thejack handle (B).
2. Fully insert the jack handle (with oneextension) through the bumper holeand into the guide tube. The key andlock will engage with a slight push andcounterclockwise turn. You will feelsome resistance when you turn the jackhandle assembly.
3.Turn the handle counterclockwise andlower the spare tire until you can slidethe tire rearward and the cable is slack.
4.Remove the retainer through the centerof the wheel. If your vehicle is equippedwith a tether, perform the followingsteps.
5.Lift the spare tire on end to access thetether attachment.
6. Use the lug wrench to remove the lugnut from the spare tire tether.
7. If not replacing the spare or flat tire tothe underbody storage area, raise thewheel retainer up into the installedposition.
8. Use the attached fastener strap (onthe spare tire tether) to attach thetether end to the winch retainer priorto raising to the installed position.
Tire Change Procedure
WARNINGS
When one of the front wheels is offthe ground, the transmission alonewill not prevent the vehicle frommoving or slipping off the jack, even if thetransmission is in park (P).
To help prevent the vehicle frommoving when you change a tire, besure to place the transmission in park(P), set the parking brake and block (inboth directions) the wheel that isdiagonally opposite (other side and end ofthe vehicle) to the tire being changed.
Never get underneath a vehicle thatis supported only by a jack. If thevehicle slips off the jack, you orsomeone else could be seriously injured.
293
Super Duty (TFA) Canada/United States of America, enUSA, First Printing
Wheels and TiresE162798
AB
AB E162799 E162800
Page 297 of 507
WARNINGS
Do not attempt to change a tire onthe side of the vehicle close tomoving traffic. Pull far enough off theroad to avoid the danger of being hit whenoperating the jack or changing the wheel.
Always use the jack provided asoriginal equipment with your vehicle.If using a jack other than the oneprovided as original equipment with yourvehicle, make sure the jack capacity isadequate for the vehicle weight, includingany vehicle cargo or modifications.
Note:Passengers should not remain in thevehicle when the vehicle is being jacked.
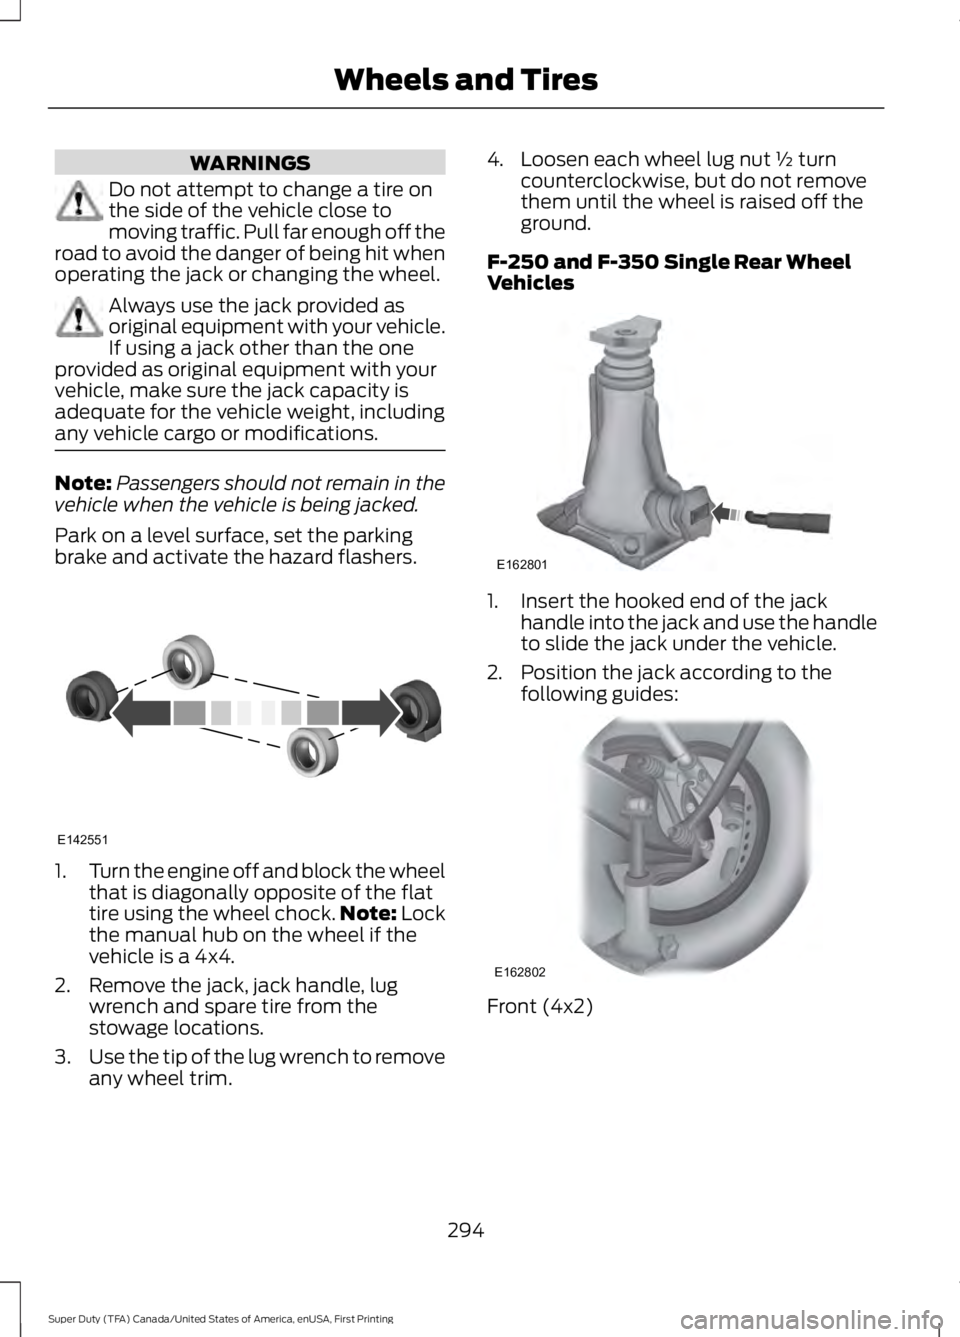
Park on a level surface, set the parkingbrake and activate the hazard flashers.
1.Turn the engine off and block the wheelthat is diagonally opposite of the flattire using the wheel chock.Note: Lockthe manual hub on the wheel if thevehicle is a 4x4.
2. Remove the jack, jack handle, lugwrench and spare tire from thestowage locations.
3.Use the tip of the lug wrench to removeany wheel trim.
4. Loosen each wheel lug nut ½ turncounterclockwise, but do not removethem until the wheel is raised off theground.
F-250 and F-350 Single Rear WheelVehicles
1. Insert the hooked end of the jackhandle into the jack and use the handleto slide the jack under the vehicle.
2. Position the jack according to thefollowing guides:
Front (4x2)
294
Super Duty (TFA) Canada/United States of America, enUSA, First Printing
Wheels and TiresE142551 E162801 E162802
Page 335 of 507
If you want the system to carry out the followingVoice command
Adjust the level of voice interaction and feedback.Voice Settings | VoicePreferences
Hear a list of voice commands available in the current mode.Help
You can say any of the voice commands that appear within open and close brackets thatare separated by |. For example, where (cancel | stop | exit) appears you say; cancel orstop or exit.
You must say any of the voice commands that appear outside of open and close brackets.For example, where mobile (apps | applications) appears, you must say mobile followedby either apps or applications.
You do not need to say words that appear within square brackets. For example, for where(USB [stick] | iPOD | MP3 [player]) appears, you can say USB or USB stick.
Note:SYNC Services and Vehicle health report are only available in the United States ofAmerica.
System Interaction and Feedback
The system provides feedback throughaudible tones, prompts, questions andspoken confirmations depending on thesituation and the chosen level ofinteraction (voice settings). You cancustomize the voice recognition system toprovide more or less instruction andfeedback.
The default setting is to a higher level ofinteraction in order to help you learn to usethe system. You can change these settingsat any time.
Adjusting the Interaction Level
Initiate a voice session bypressing the voice button on thesteering wheel controls. SeeVoice Control (page 67).
When prompted say the following:
If you want the system to carry out the followingVoice command
Voice Settings | Voice Preferences
Followed by either of the following:
Provide more detailed interaction and guidance.Interaction ModeStandard
Provide less audible interaction and more tone prompts.Interaction ModeAdvanced
The system defaults to the standard interaction mode.
332
Super Duty (TFA) Canada/United States of America, enUSA, First Printing
SYNC™ (If Equipped)E142599
Page 380 of 507
Action and DescriptionMessage
Midrange
Set Balance and Fade
DSP
EQ Mode
Speed Compensated Volume
Using the Steering Wheel Controls
Depending on your vehicle, it may also have the following controls:
Action and DescriptionControl
Adjust the volume of playing media.VOL
Press to start a voice session. Press again to interrupt a voiceprompt and begin speaking. Press and hold to end an activevoice session.
Voice
Use as you normally would in media and phone modes.Seek and Call Accept
Use as you normally would in media and phone modes.Seek and Call Reject
Using the Touchscreen
•Make sure your hands are clean anddry.
•Press firmly on the center of a controlgraphic or menu item.
•Keep metal objects or other conductivematerial away from the surface of thetouchscreen.
Cleaning the Touchscreen Display
Use a dry, clean, soft cloth. If dirt orfingerprints are still visible, apply a smallamount of alcohol to the cloth. Do not pouror spray alcohol onto the display. Do notuse detergent or any type of solvent toclean the display.
Support
The SYNC support team is available:
•Monday-Saturday, 8:30am-8:00pmEST.
•United States: 1-888-270-1055
•Canada: 1-800-565-3673
Note:Times are subject to change due toholidays.
377
Super Duty (TFA) Canada/United States of America, enUSA, First Printing
MyFord Touch™ (If Equipped)
Page 386 of 507

Action and DescriptionMenu Item
You can also switch the outside air temperature display offand on. It appears at the top center of the touchscreen, nextto the time and date.
Note:You cannot manually set the date. Your vehicle’s GPS does this for you.
Note:If the battery has been disconnected, your vehicle needs to acquire a GPS signal toupdate the clock. Once your vehicle acquires the signal, it may take a few minutes for theupdate to display the correct time.
Display
You can adjust the display using thetouchscreen or the voice button on thesteering wheel controls.
To make adjustments using the touchscreen, select:
Action and DescriptionMenu Item
Press the settings icon.Settings
Display
Then select from the following:
When set to On, lets you use the automatic dimming feature.Auto DimWhen set to Off you are able to adjust the brightness of the screen.
Make the screen display brighter or dimmer.Brightness
Allows you to switch the display off. It also allows you to set the screento a certain brightness or have the system automatically change basedon the outside light level.
Mode
If you also select:
These features will allow you to adjust the dimming ofyour screen.Auto
Night
Allows you to adjust screen dimming as the outside lighting conditionschange from day to night.Auto DimManual Offset
Allows you to display the default photo or upload your own.Edit Wallpaper
383
Super Duty (TFA) Canada/United States of America, enUSA, First Printing
MyFord Touch™ (If Equipped)