2016 FORD F450 SUPER DUTY buttons
[x] Cancel search: buttonsPage 116 of 507
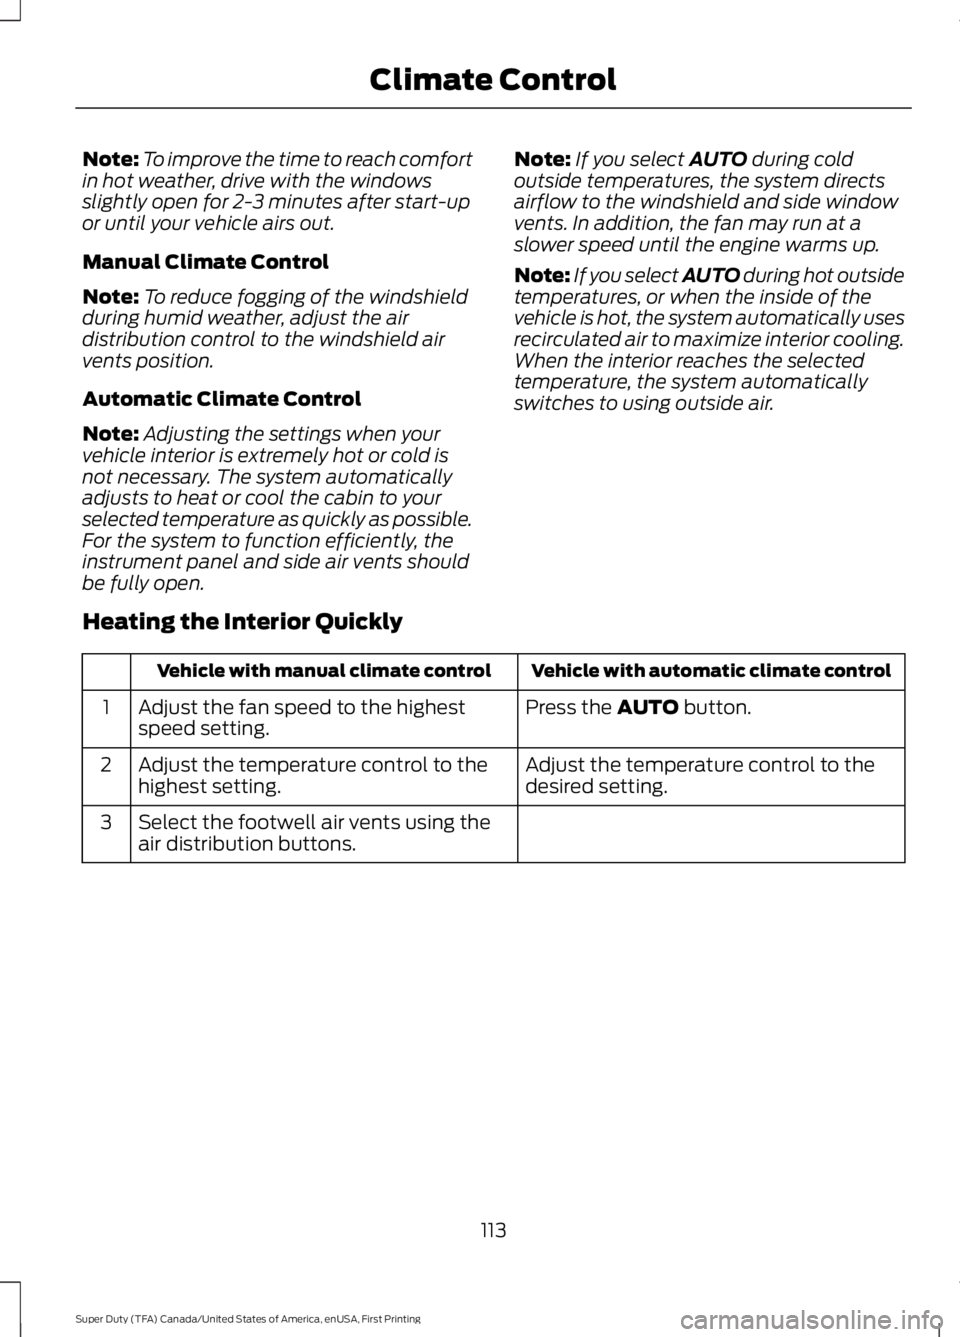
Note:To improve the time to reach comfortin hot weather, drive with the windowsslightly open for 2-3 minutes after start-upor until your vehicle airs out.
Manual Climate Control
Note:To reduce fogging of the windshieldduring humid weather, adjust the airdistribution control to the windshield airvents position.
Automatic Climate Control
Note:Adjusting the settings when yourvehicle interior is extremely hot or cold isnot necessary. The system automaticallyadjusts to heat or cool the cabin to yourselected temperature as quickly as possible.For the system to function efficiently, theinstrument panel and side air vents shouldbe fully open.
Note:If you select AUTO during coldoutside temperatures, the system directsairflow to the windshield and side windowvents. In addition, the fan may run at aslower speed until the engine warms up.
Note:If you select AUTO during hot outsidetemperatures, or when the inside of thevehicle is hot, the system automatically usesrecirculated air to maximize interior cooling.When the interior reaches the selectedtemperature, the system automaticallyswitches to using outside air.
Heating the Interior Quickly
Vehicle with automatic climate controlVehicle with manual climate control
Press the AUTO button.Adjust the fan speed to the highestspeed setting.1
Adjust the temperature control to thedesired setting.Adjust the temperature control to thehighest setting.2
Select the footwell air vents using theair distribution buttons.3
113
Super Duty (TFA) Canada/United States of America, enUSA, First Printing
Climate Control
Page 117 of 507
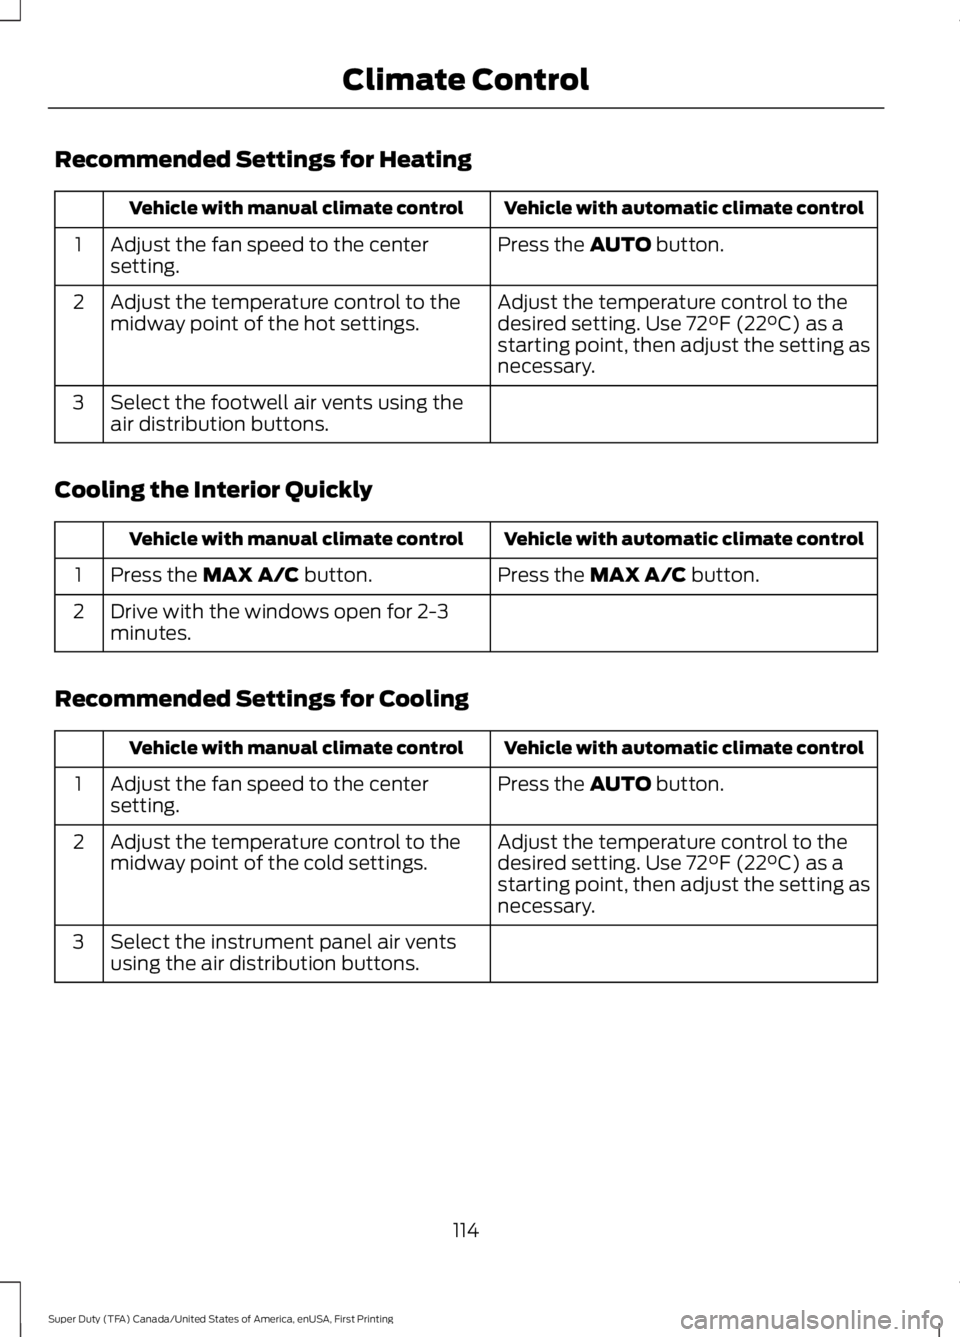
Recommended Settings for Heating
Vehicle with automatic climate controlVehicle with manual climate control
Press the AUTO button.Adjust the fan speed to the centersetting.1
Adjust the temperature control to thedesired setting. Use 72°F (22°C) as astarting point, then adjust the setting asnecessary.
Adjust the temperature control to themidway point of the hot settings.2
Select the footwell air vents using theair distribution buttons.3
Cooling the Interior Quickly
Vehicle with automatic climate controlVehicle with manual climate control
Press the MAX A/C button.Press the MAX A/C button.1
Drive with the windows open for 2-3minutes.2
Recommended Settings for Cooling
Vehicle with automatic climate controlVehicle with manual climate control
Press the AUTO button.Adjust the fan speed to the centersetting.1
Adjust the temperature control to thedesired setting. Use 72°F (22°C) as astarting point, then adjust the setting asnecessary.
Adjust the temperature control to themidway point of the cold settings.2
Select the instrument panel air ventsusing the air distribution buttons.3
114
Super Duty (TFA) Canada/United States of America, enUSA, First Printing
Climate Control
Page 121 of 507
WARNINGS
Install the head restraint properly tohelp minimize the risk of neck injuryin the event of a crash.
Note:Adjust the seat back to an uprightdriving position before adjusting the headrestraint. Adjust the head restraint so thatthe top of it is level with the top of your headand as far forward as possible. Make surethat you remain comfortable. If you areextremely tall, adjust the head restraint toits highest position.
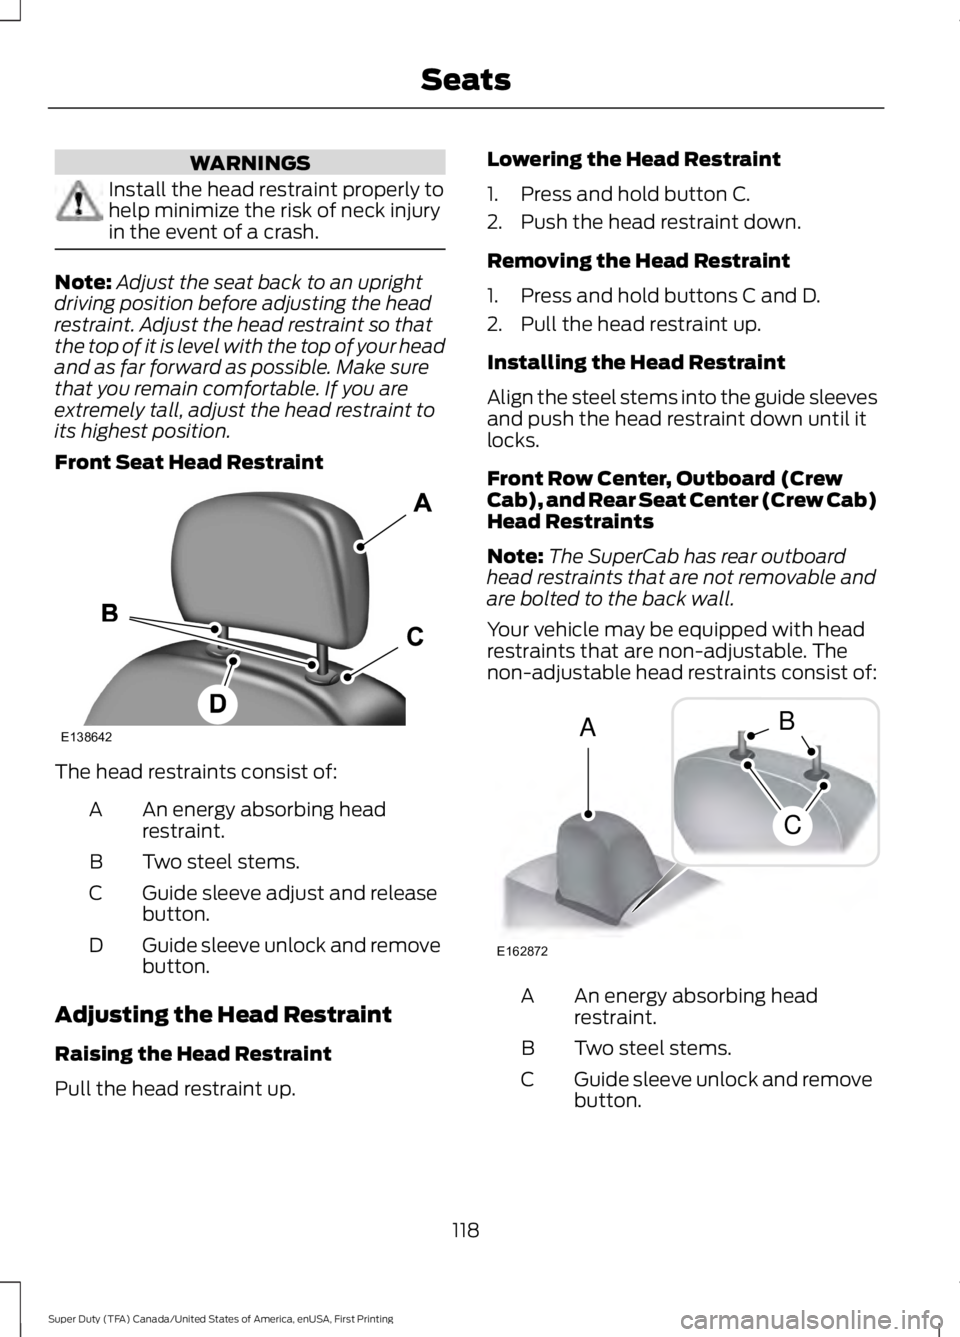
Front Seat Head Restraint
The head restraints consist of:
An energy absorbing headrestraint.A
Two steel stems.B
Guide sleeve adjust and releasebutton.C
Guide sleeve unlock and removebutton.D
Adjusting the Head Restraint
Raising the Head Restraint
Pull the head restraint up.
Lowering the Head Restraint
1. Press and hold button C.
2. Push the head restraint down.
Removing the Head Restraint
1. Press and hold buttons C and D.
2. Pull the head restraint up.
Installing the Head Restraint
Align the steel stems into the guide sleevesand push the head restraint down until itlocks.
Front Row Center, Outboard (CrewCab), and Rear Seat Center (Crew Cab)Head Restraints
Note:The SuperCab has rear outboardhead restraints that are not removable andare bolted to the back wall.
Your vehicle may be equipped with headrestraints that are non-adjustable. Thenon-adjustable head restraints consist of:
An energy absorbing headrestraint.A
Two steel stems.B
Guide sleeve unlock and removebutton.C
118
Super Duty (TFA) Canada/United States of America, enUSA, First Printing
SeatsE138642 E162872
A
C
B
Page 122 of 507
Removing the Head Restraint
1. Press and hold buttons C.
2. Pull up the head restraint.
Installing the Head Restraint
Align the steel stems into the guide sleevesand push the head restraint down until itlocks.
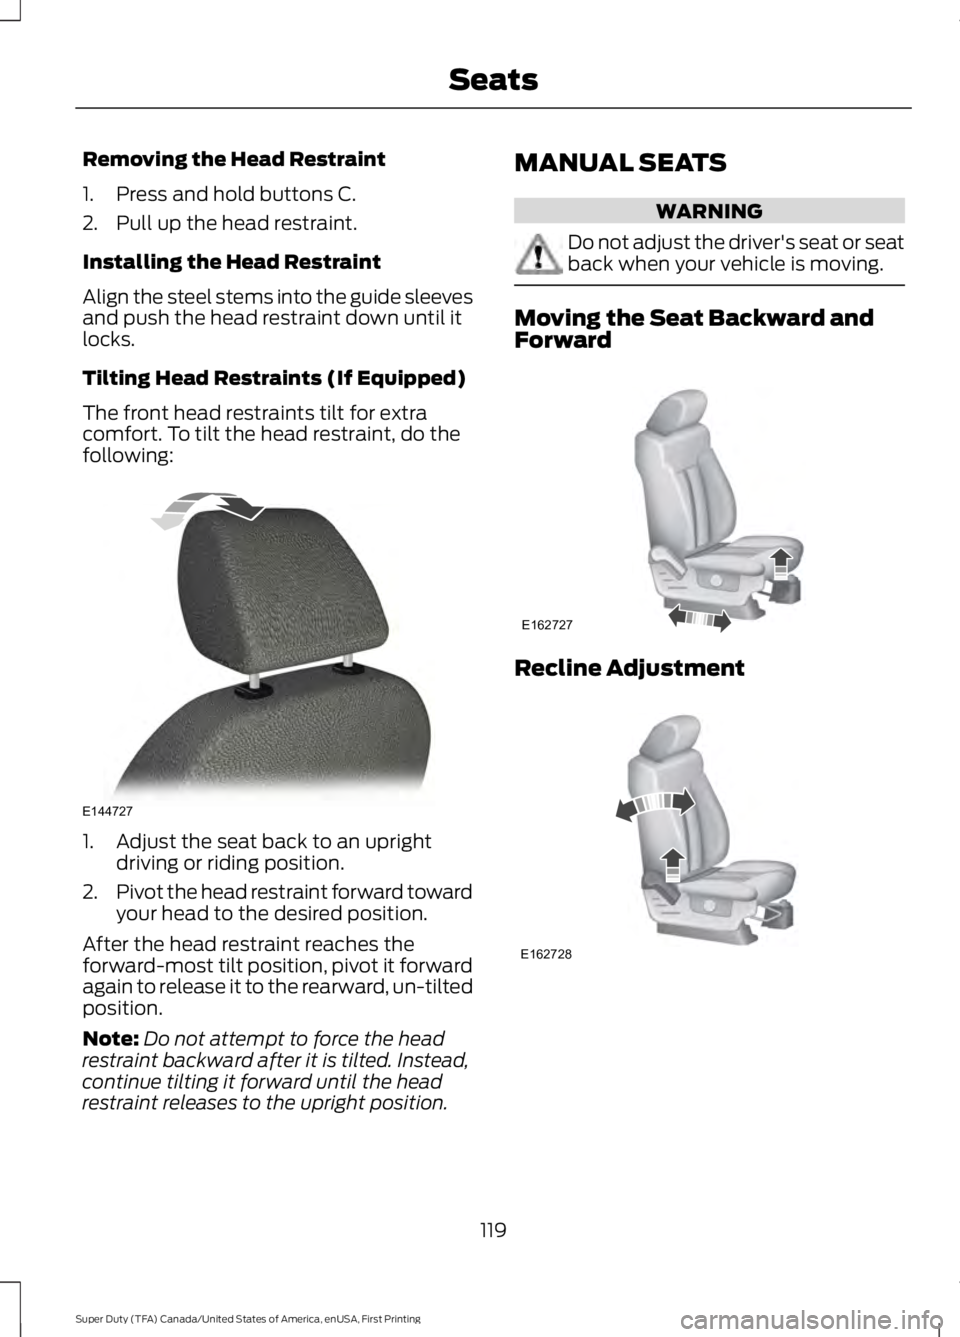
Tilting Head Restraints (If Equipped)
The front head restraints tilt for extracomfort. To tilt the head restraint, do thefollowing:
1. Adjust the seat back to an uprightdriving or riding position.
2.Pivot the head restraint forward towardyour head to the desired position.
After the head restraint reaches theforward-most tilt position, pivot it forwardagain to release it to the rearward, un-tiltedposition.
Note:Do not attempt to force the headrestraint backward after it is tilted. Instead,continue tilting it forward until the headrestraint releases to the upright position.
MANUAL SEATS
WARNING
Do not adjust the driver's seat or seatback when your vehicle is moving.
Moving the Seat Backward andForward
Recline Adjustment
119
Super Duty (TFA) Canada/United States of America, enUSA, First Printing
SeatsE144727 E162727 E162728
Page 132 of 507
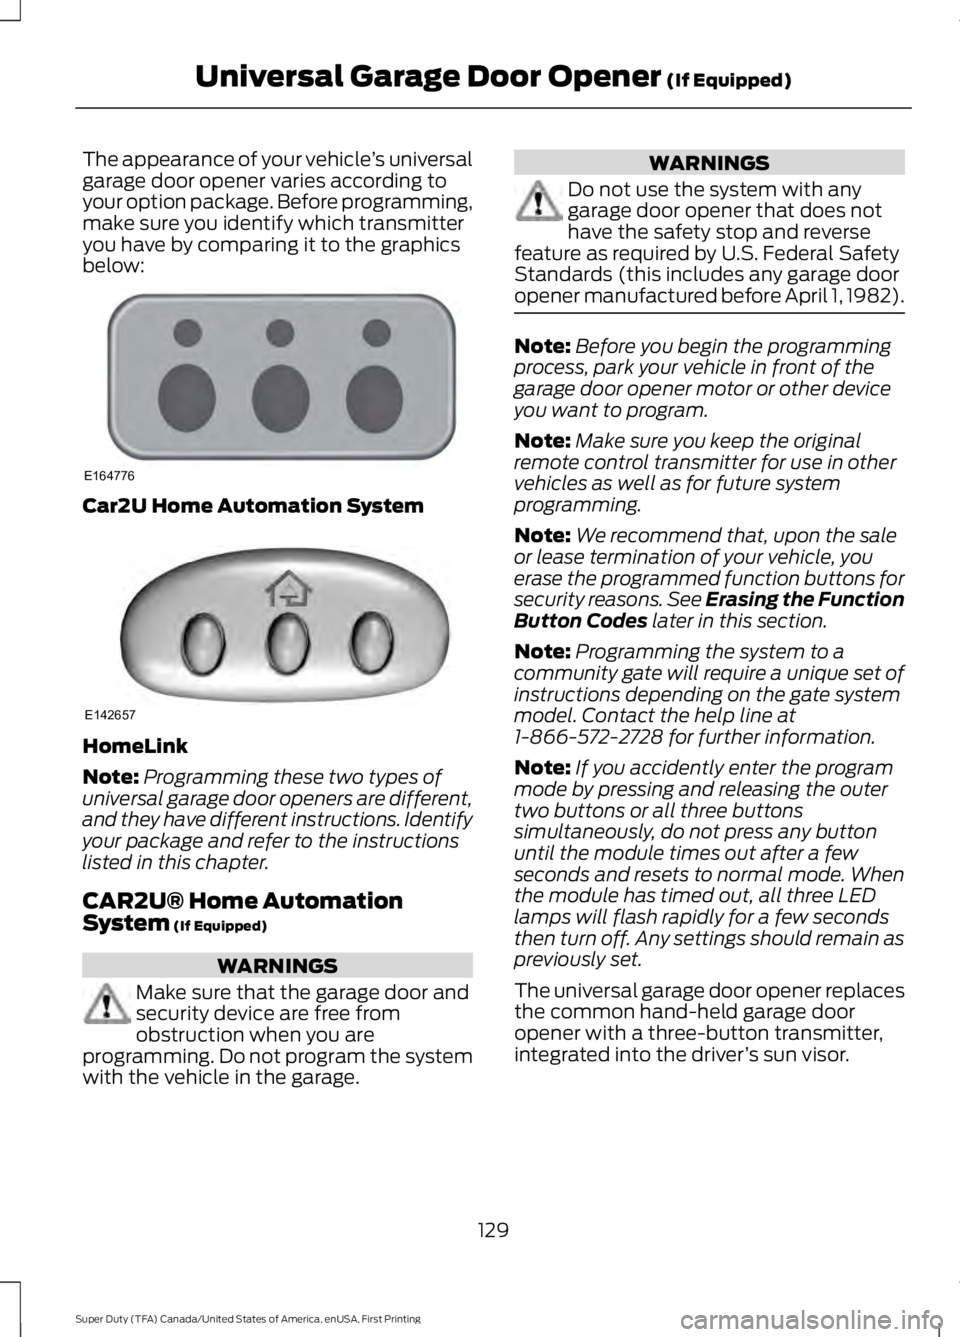
The appearance of your vehicle’s universalgarage door opener varies according toyour option package. Before programming,make sure you identify which transmitteryou have by comparing it to the graphicsbelow:
Car2U Home Automation System
HomeLink
Note:Programming these two types ofuniversal garage door openers are different,and they have different instructions. Identifyyour package and refer to the instructionslisted in this chapter.
CAR2U® Home AutomationSystem (If Equipped)
WARNINGS
Make sure that the garage door andsecurity device are free fromobstruction when you areprogramming. Do not program the systemwith the vehicle in the garage.
WARNINGS
Do not use the system with anygarage door opener that does nothave the safety stop and reversefeature as required by U.S. Federal SafetyStandards (this includes any garage dooropener manufactured before April 1, 1982).
Note:Before you begin the programmingprocess, park your vehicle in front of thegarage door opener motor or other deviceyou want to program.
Note:Make sure you keep the originalremote control transmitter for use in othervehicles as well as for future systemprogramming.
Note:We recommend that, upon the saleor lease termination of your vehicle, youerase the programmed function buttons forsecurity reasons. See Erasing the FunctionButton Codes later in this section.
Note:Programming the system to acommunity gate will require a unique set ofinstructions depending on the gate systemmodel. Contact the help line at1-866-572-2728 for further information.
Note:If you accidently enter the programmode by pressing and releasing the outertwo buttons or all three buttonssimultaneously, do not press any buttonuntil the module times out after a fewseconds and resets to normal mode. Whenthe module has timed out, all three LEDlamps will flash rapidly for a few secondsthen turn off. Any settings should remain aspreviously set.
The universal garage door opener replacesthe common hand-held garage dooropener with a three-button transmitter,integrated into the driver’s sun visor.
129
Super Duty (TFA) Canada/United States of America, enUSA, First Printing
Universal Garage Door Opener (If Equipped)E164776 E142657
Page 133 of 507
The system includes two primary features,a garage door opener and a platform forremote activation of devices within thehome. This functionality allows you toprogram garage door openers as well assecurity devices and home lightingsystems.
You can find additional system informationonline at www.learcar2U.com or by callingthe toll-free help line on 1-866-572-2728.
Rolling Code Programming
Note:If you do not follow the time-sensitiveinstructions, the device will time out andyou will have to repeat the completeprocedure.
Note:It may be helpful to have anotherperson assist you in programming thetransmitter.
1. Switch the ignition on.
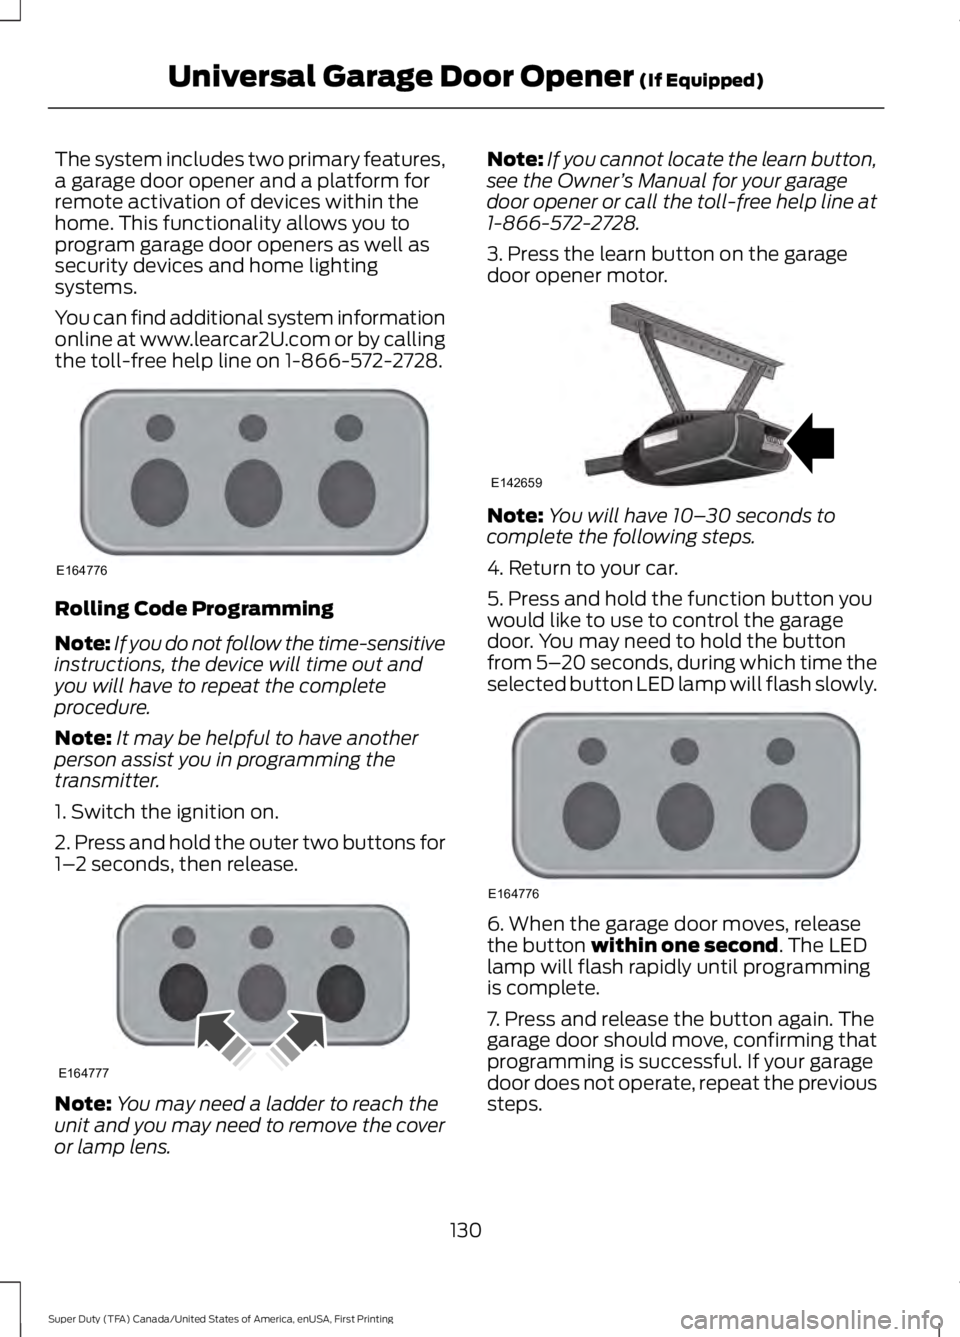
2. Press and hold the outer two buttons for1–2 seconds, then release.
Note:You may need a ladder to reach theunit and you may need to remove the coveror lamp lens.
Note:If you cannot locate the learn button,see the Owner’s Manual for your garagedoor opener or call the toll-free help line at1-866-572-2728.
3. Press the learn button on the garagedoor opener motor.
Note:You will have 10–30 seconds tocomplete the following steps.
4. Return to your car.
5. Press and hold the function button youwould like to use to control the garagedoor. You may need to hold the buttonfrom 5–20 seconds, during which time theselected button LED lamp will flash slowly.
6. When the garage door moves, releasethe button within one second. The LEDlamp will flash rapidly until programmingis complete.
7. Press and release the button again. Thegarage door should move, confirming thatprogramming is successful. If your garagedoor does not operate, repeat the previoussteps.
130
Super Duty (TFA) Canada/United States of America, enUSA, First Printing
Universal Garage Door Opener (If Equipped)E164776 E164777 E142659 E164776
Page 134 of 507
The LED lamp above the selected buttonwill illuminate to confirm that the systemis responding to the button command.
To program another rolling code device,repeat Steps 1 through 6, substituting adifferent function button in Step 5.
Fixed Code Programming
Note:It may be helpful to have anotherperson assist you in programming thetransmitter.
To program units with fixed code DIPswitches, you will need the garage doorhand-held transmitter, paper and a pen orpencil.
1. Switch the ignition on.
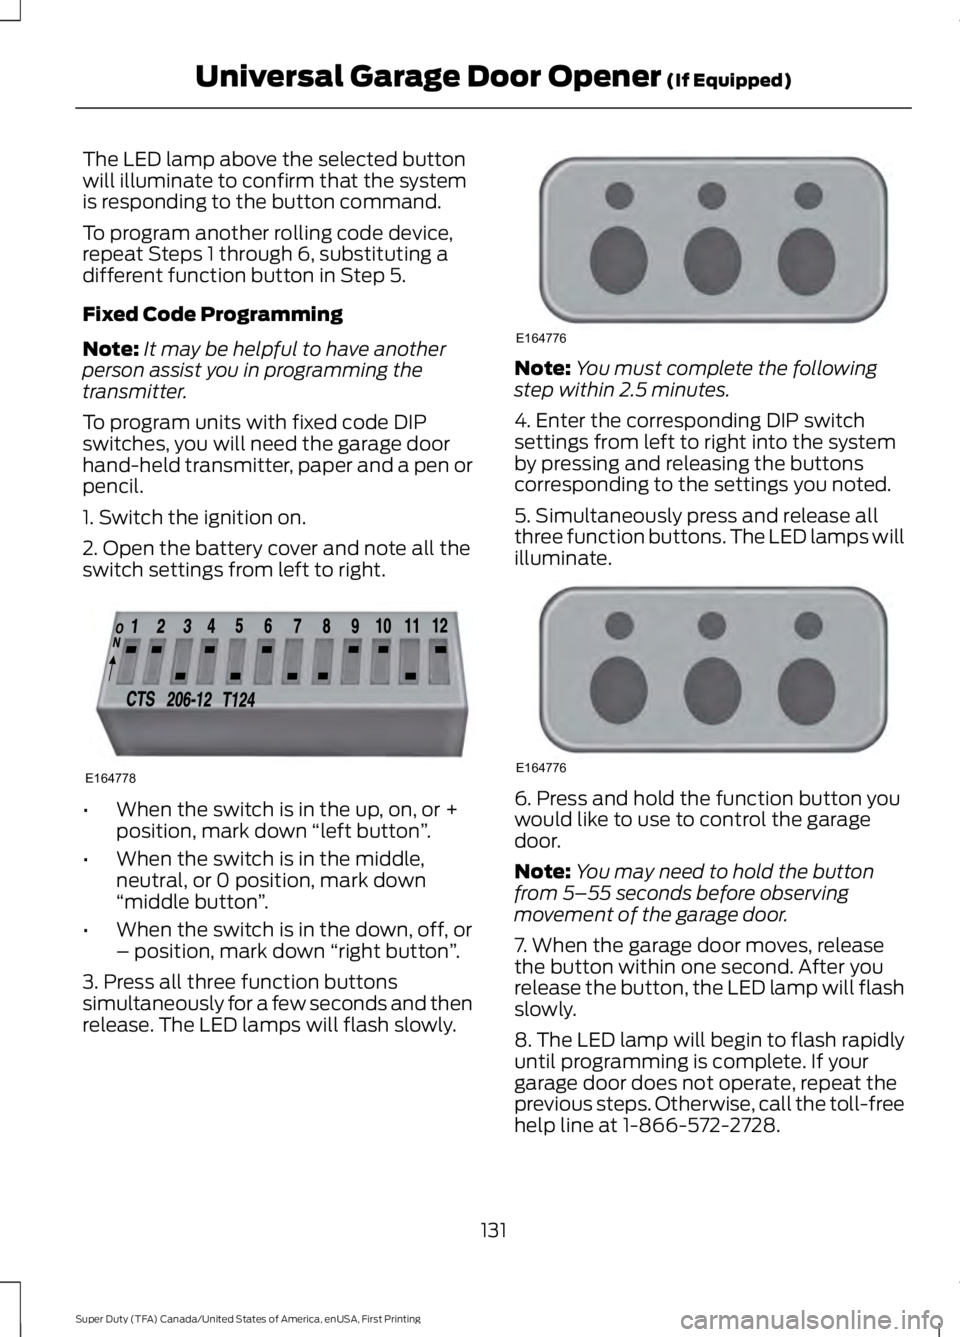
2. Open the battery cover and note all theswitch settings from left to right.
•When the switch is in the up, on, or +position, mark down “left button”.
•When the switch is in the middle,neutral, or 0 position, mark down“middle button”.
•When the switch is in the down, off, or– position, mark down “right button”.
3. Press all three function buttonssimultaneously for a few seconds and thenrelease. The LED lamps will flash slowly.
Note:You must complete the followingstep within 2.5 minutes.
4. Enter the corresponding DIP switchsettings from left to right into the systemby pressing and releasing the buttonscorresponding to the settings you noted.
5. Simultaneously press and release allthree function buttons. The LED lamps willilluminate.
6. Press and hold the function button youwould like to use to control the garagedoor.
Note:You may need to hold the buttonfrom 5–55 seconds before observingmovement of the garage door.
7. When the garage door moves, releasethe button within one second. After yourelease the button, the LED lamp will flashslowly.
8. The LED lamp will begin to flash rapidlyuntil programming is complete. If yourgarage door does not operate, repeat theprevious steps. Otherwise, call the toll-freehelp line at 1-866-572-2728.
131
Super Duty (TFA) Canada/United States of America, enUSA, First Printing
Universal Garage Door Opener (If Equipped)E164778 E164776 E164776
Page 135 of 507
The LED lamp above the selected buttonwill illuminate to confirm that the systemis responding to the button command.
Erasing the Function Button Codes
Note:You cannot erase individual buttons.
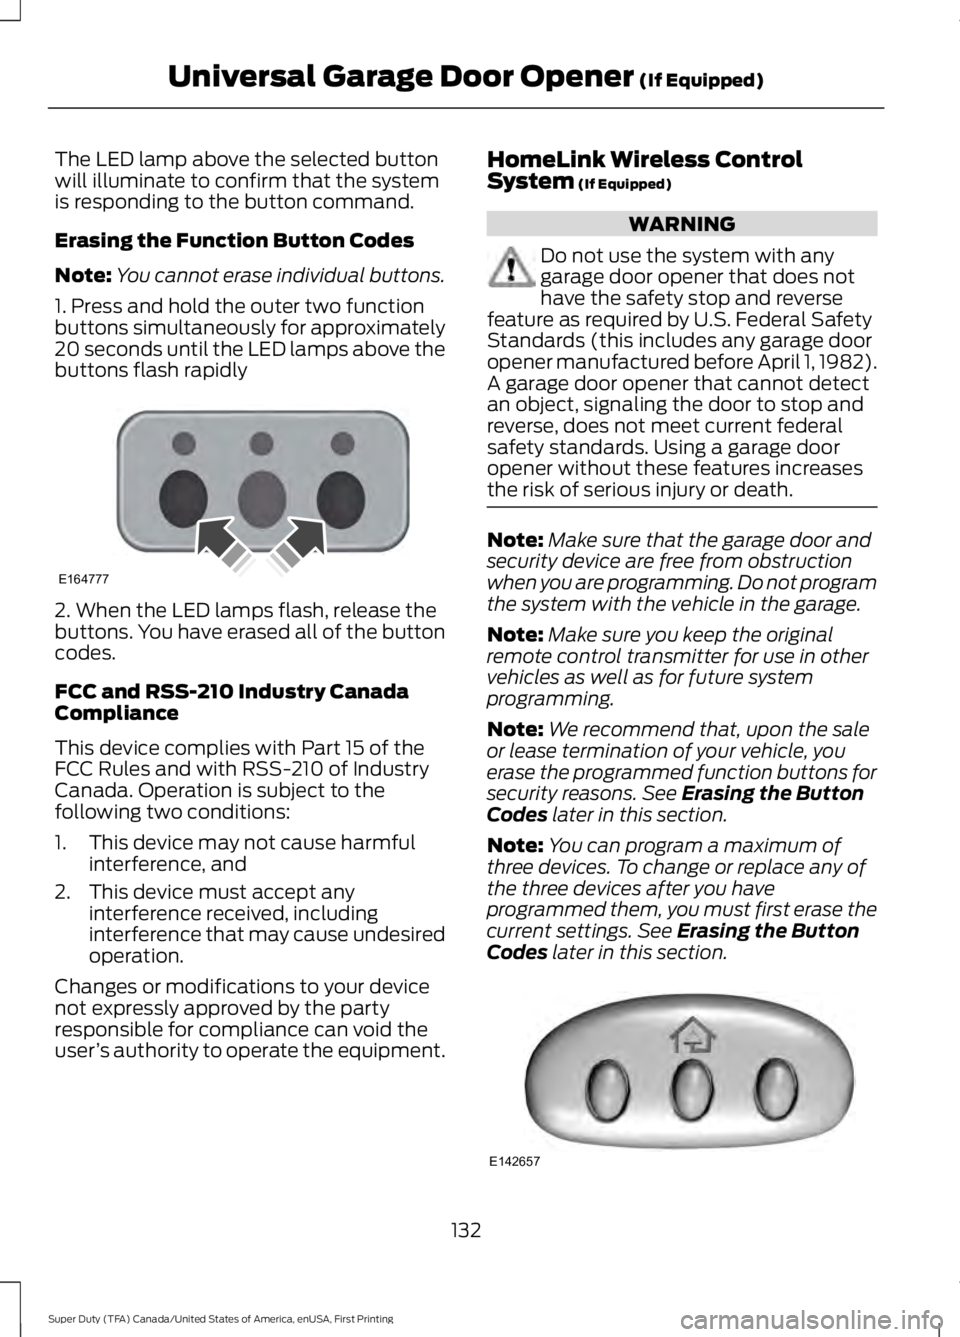
1. Press and hold the outer two functionbuttons simultaneously for approximately20 seconds until the LED lamps above thebuttons flash rapidly
2. When the LED lamps flash, release thebuttons. You have erased all of the buttoncodes.
FCC and RSS-210 Industry CanadaCompliance
This device complies with Part 15 of theFCC Rules and with RSS-210 of IndustryCanada. Operation is subject to thefollowing two conditions:
1. This device may not cause harmfulinterference, and
2. This device must accept anyinterference received, includinginterference that may cause undesiredoperation.
Changes or modifications to your devicenot expressly approved by the partyresponsible for compliance can void theuser’s authority to operate the equipment.
HomeLink Wireless ControlSystem (If Equipped)
WARNING
Do not use the system with anygarage door opener that does nothave the safety stop and reversefeature as required by U.S. Federal SafetyStandards (this includes any garage dooropener manufactured before April 1, 1982).A garage door opener that cannot detectan object, signaling the door to stop andreverse, does not meet current federalsafety standards. Using a garage dooropener without these features increasesthe risk of serious injury or death.
Note:Make sure that the garage door andsecurity device are free from obstructionwhen you are programming. Do not programthe system with the vehicle in the garage.
Note:Make sure you keep the originalremote control transmitter for use in othervehicles as well as for future systemprogramming.
Note:We recommend that, upon the saleor lease termination of your vehicle, youerase the programmed function buttons forsecurity reasons. See Erasing the ButtonCodes later in this section.
Note:You can program a maximum ofthree devices. To change or replace any ofthe three devices after you haveprogrammed them, you must first erase thecurrent settings. See Erasing the ButtonCodes later in this section.
132
Super Duty (TFA) Canada/United States of America, enUSA, First Printing
Universal Garage Door Opener (If Equipped)E164777 E142657