2016 FORD F450 SUPER DUTY automatic transmission
[x] Cancel search: automatic transmissionPage 155 of 507
Tow/Haul Mode
To activate tow/haul, press thebutton on the gearshift leveronce. The TOW HAUL indicatorlight illuminates in the instrument cluster.
The tow/haul feature:
•Delays upshifts to reduce the frequencyof transmission shifting.
•Provides engine braking in all forwardgears, which slows your vehicle andassists you in controlling your vehiclewhen descending a grade.
•Depending on driving conditions andload conditions, may downshift thetransmission, slow your vehicle andcontrol your vehicle speed whendescending a hill, without pressing theaccelerator pedal. The amount ofdownshift braking provided variesbased upon the amount you press thebrake pedal.
The tow/haul feature improvestransmission operation when towing atrailer or a heavy load. All transmissiongear ranges are available when usingtow/haul.
To deactivate the tow/haul feature andreturn to normal driving mode, press thebutton on the gearshift lever twice. TheTOW HAUL light deactivates. Tow/haulalso deactivates when you power downyour vehicle.
WARNING
Do not use the tow/haul featurewhen driving in icy or slipperyconditions as the increased enginebraking can cause the rear wheels to slideand your vehicle to swing around with thepossible loss of vehicle control.
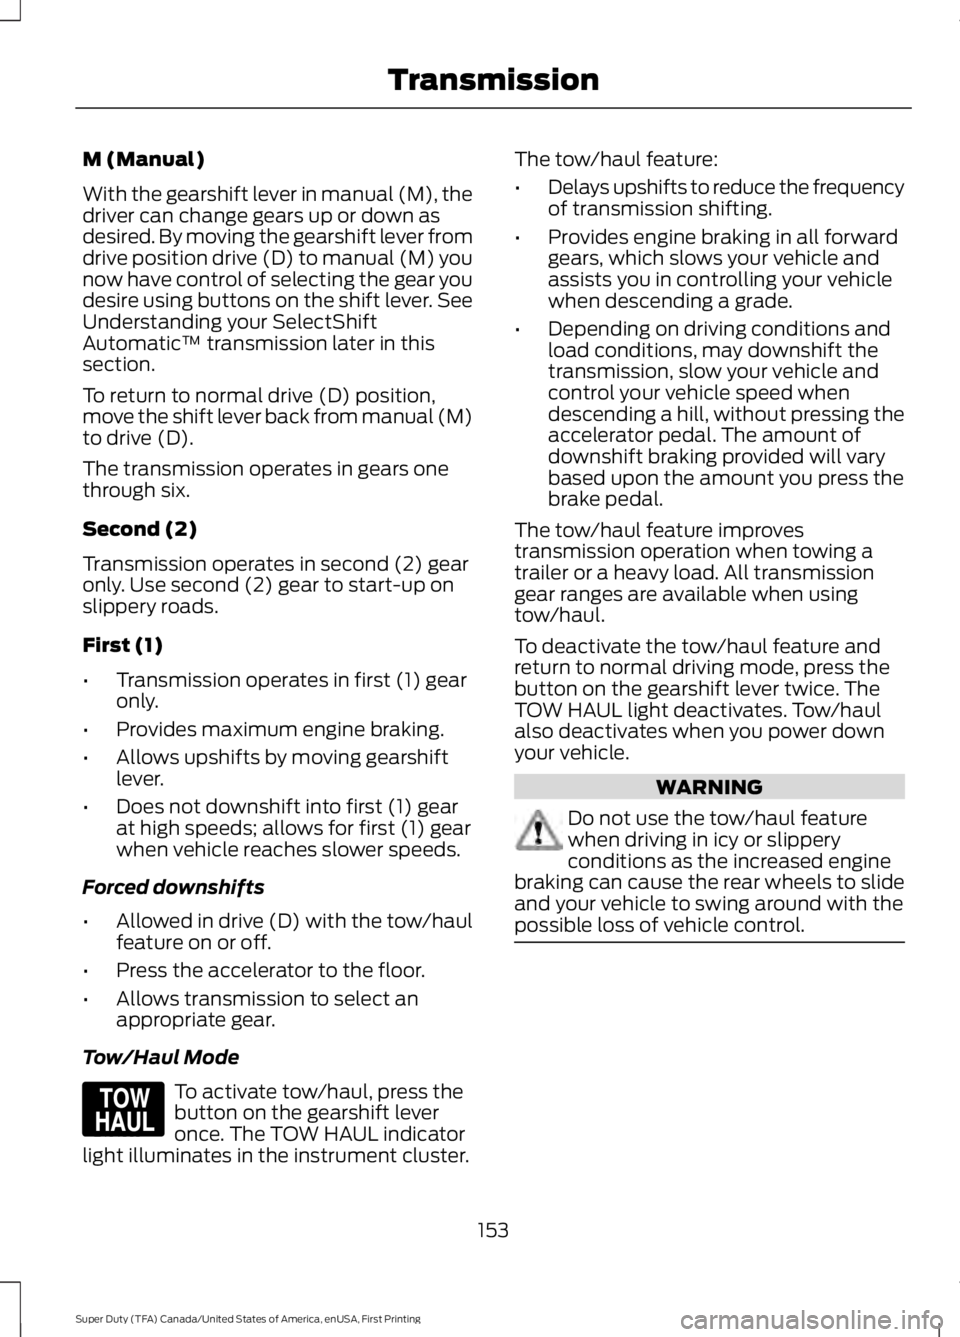
Understanding the Shift Positionsof a 6–Speed AutomaticTransmission (If Equipped)
Putting your vehicle in or out of gear:
1. Fully press down the brake pedal.
2. Move the gearshift lever into thedesired gear.
3. Come to a complete stop.
4. Move the gearshift lever and securelylatch it in park (P).
Park (P)
This position locks the transmission andprevents the rear wheels from turning.
Reverse (R)
With the gearshift lever in reverse (R), yourvehicle moves backward. Always come toa complete stop before shifting into andout of reverse (R).
Neutral (N)
With the gearshift lever in neutral (N), youcan start your vehicle and it is free to roll.Hold the brake pedal down while in thisposition.
Drive (D)
Drive (D) is the normal driving position forthe best fuel economy. The overdrivefunction allows automatic upshifts anddownshifts through gears one through six.
152
Super Duty (TFA) Canada/United States of America, enUSA, First Printing
TransmissionE161509 E163183
Page 156 of 507
M (Manual)
With the gearshift lever in manual (M), thedriver can change gears up or down asdesired. By moving the gearshift lever fromdrive position drive (D) to manual (M) younow have control of selecting the gear youdesire using buttons on the shift lever. SeeUnderstanding your SelectShiftAutomatic™ transmission later in thissection.
To return to normal drive (D) position,move the shift lever back from manual (M)to drive (D).
The transmission operates in gears onethrough six.
Second (2)
Transmission operates in second (2) gearonly. Use second (2) gear to start-up onslippery roads.
First (1)
•Transmission operates in first (1) gearonly.
•Provides maximum engine braking.
•Allows upshifts by moving gearshiftlever.
•Does not downshift into first (1) gearat high speeds; allows for first (1) gearwhen vehicle reaches slower speeds.
Forced downshifts
•Allowed in drive (D) with the tow/haulfeature on or off.
•Press the accelerator to the floor.
•Allows transmission to select anappropriate gear.
Tow/Haul Mode
To activate tow/haul, press thebutton on the gearshift leveronce. The TOW HAUL indicatorlight illuminates in the instrument cluster.
The tow/haul feature:
•Delays upshifts to reduce the frequencyof transmission shifting.
•Provides engine braking in all forwardgears, which slows your vehicle andassists you in controlling your vehiclewhen descending a grade.
•Depending on driving conditions andload conditions, may downshift thetransmission, slow your vehicle andcontrol your vehicle speed whendescending a hill, without pressing theaccelerator pedal. The amount ofdownshift braking provided will varybased upon the amount you press thebrake pedal.
The tow/haul feature improvestransmission operation when towing atrailer or a heavy load. All transmissiongear ranges are available when usingtow/haul.
To deactivate the tow/haul feature andreturn to normal driving mode, press thebutton on the gearshift lever twice. TheTOW HAUL light deactivates. Tow/haulalso deactivates when you power downyour vehicle.
WARNING
Do not use the tow/haul featurewhen driving in icy or slipperyconditions as the increased enginebraking can cause the rear wheels to slideand your vehicle to swing around with thepossible loss of vehicle control.
153
Super Duty (TFA) Canada/United States of America, enUSA, First Printing
TransmissionE161509
Page 157 of 507
Understanding your SelectShiftAutomatic™ transmission (If Equipped)
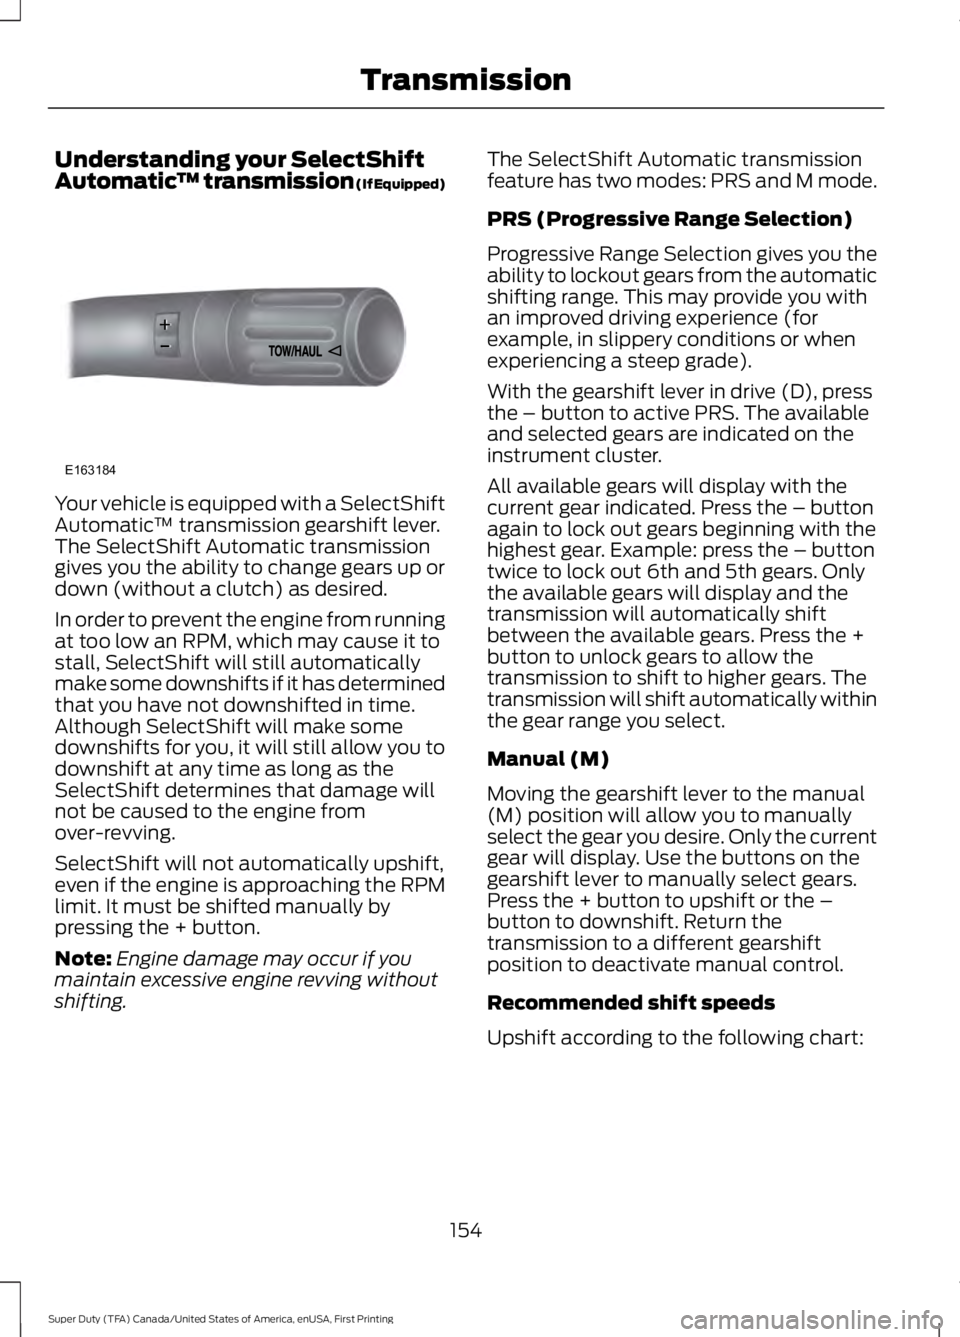
Your vehicle is equipped with a SelectShiftAutomatic™ transmission gearshift lever.The SelectShift Automatic transmissiongives you the ability to change gears up ordown (without a clutch) as desired.
In order to prevent the engine from runningat too low an RPM, which may cause it tostall, SelectShift will still automaticallymake some downshifts if it has determinedthat you have not downshifted in time.Although SelectShift will make somedownshifts for you, it will still allow you todownshift at any time as long as theSelectShift determines that damage willnot be caused to the engine fromover-revving.
SelectShift will not automatically upshift,even if the engine is approaching the RPMlimit. It must be shifted manually bypressing the + button.
Note:Engine damage may occur if youmaintain excessive engine revving withoutshifting.
The SelectShift Automatic transmissionfeature has two modes: PRS and M mode.
PRS (Progressive Range Selection)
Progressive Range Selection gives you theability to lockout gears from the automaticshifting range. This may provide you withan improved driving experience (forexample, in slippery conditions or whenexperiencing a steep grade).
With the gearshift lever in drive (D), pressthe – button to active PRS. The availableand selected gears are indicated on theinstrument cluster.
All available gears will display with thecurrent gear indicated. Press the – buttonagain to lock out gears beginning with thehighest gear. Example: press the – buttontwice to lock out 6th and 5th gears. Onlythe available gears will display and thetransmission will automatically shiftbetween the available gears. Press the +button to unlock gears to allow thetransmission to shift to higher gears. Thetransmission will shift automatically withinthe gear range you select.
Manual (M)
Moving the gearshift lever to the manual(M) position will allow you to manuallyselect the gear you desire. Only the currentgear will display. Use the buttons on thegearshift lever to manually select gears.Press the + button to upshift or the –button to downshift. Return thetransmission to a different gearshiftposition to deactivate manual control.
Recommended shift speeds
Upshift according to the following chart:
154
Super Duty (TFA) Canada/United States of America, enUSA, First Printing
TransmissionE163184
Page 158 of 507

Upshifts when accelerating (recommended for best fuel economy)
Diesel enginesGasoline enginesShift from:
12 mph (19 km/h)15 mph (24 km/h)1 – 2
19 mph (31 km/h)25 mph (40 km/h)2 – 3
26 mph (42 km/h)40 mph (64 km/h)3 – 4
34 mph (55 km/h)45 mph (72 km/h)4 – 5
46 mph (74 km/h)50 mph (80 km/h)5 – 6
Automatic Transmission AdaptiveLearning
This feature's design is to increasedurability and provide consistent shift feelover the life of your vehicle. A new vehicleor transmission may have firm shifts, softshifts or both. This operation is normal anddoes not affect function or durability of thetransmission. Over time, the adaptivelearning process fully updates transmissionoperation. Additionally, whenever youdisconnect the battery or install a newbattery, the system must relearn thestrategy.
Brake-Shift Interlock
WARNINGS
Do not drive your vehicle until youverify that the brake lamps areworking.
When doing this procedure, you willbe taking your vehicle out of parkwhich means your vehicle can rollfreely. To avoid unwanted vehiclemovement, always fully set the parkingbrake prior to doing this procedure. Usewheel chocks if appropriate.
WARNINGS
If the parking brake is fully released,but the brake warning lamp remainsilluminated, the brakes may not beworking properly. See your authorizeddealer.
Your vehicle is equipped with a brake-shiftinterlock feature that prevents thegearshift lever from moving from park (P)when the ignition is in the 3 (on) positionand the brake pedal is not pressed.
If you cannot move the gearshift lever outof park (P) position with the ignition in the4 (on) position and the brake pedalpressed, a malfunction may have occurred.It is possible that a fuse has blown or yourvehicle’s brake lamps are not operatingproperly. See Fuse Specification Chart(page 223).
If the fuse is not blown and the brakelamps are working properly, the followingprocedure allows you to move the gearshiftlever from park (P):
1. Apply the parking brake. Switch theignition key to 1 (off), then remove thekey.
2. Move the steering column to the fulldown and full rearward position(toward the driver’s seat).
3. Remove the gearshift lever boot.
155
Super Duty (TFA) Canada/United States of America, enUSA, First Printing
Transmission
Page 165 of 507
If SHIFT DELAYED PULL FORWARD isdisplayed in the information display,transfer case gear tooth blockage ispresent. To alleviate this condition, placethe transmission in a forward gear, movethe vehicle forward approximately 5 ft(1.5 m), and shift the transmission back toneutral to allow the transfer case tocomplete the range shift.
How Your Vehicle Differs FromOther Vehicles
WARNING
Vehicles with a higher center ofgravity such as utility and four-wheeldrive vehicles handle differently thanvehicles with a lower center of gravity.Utility and four-wheel drive vehicles arenot designed for cornering at speeds ashigh as passenger cars any more thanlow-slung sports cars are designed toperform satisfactorily under off-roadconditions. Avoid sharp turns, excessivespeed and abrupt maneuvers in thesevehicles. Failure to drive cautiously couldresult in an increased risk of loss of vehiclecontrol, vehicle rollover, personal injury anddeath.
Truck and utility vehicles can differ fromsome other vehicles. Your vehicle may behigher to allow it to travel over roughterrain without getting hung up ordamaging underbody components.
The differences that make your vehicle soversatile also make it handle differentlythan an ordinary passenger car.
Maintain steering wheel control at alltimes, especially in rough terrain. Sincesudden changes in terrain can result inabrupt steering wheel motion, make sureyou grip the steering wheel from theoutside. Do not grip the spokes.
Drive cautiously to avoid vehicle damagefrom concealed objects such as rocks andstumps.
You should either know the terrain orexamine maps of the area before driving.Map out your route before driving in thearea. To maintain steering and brakingcontrol of your vehicle, you must have allfour wheels on the ground and they mustbe rolling, not sliding or spinning.
Driving Off-Road With Truck andUtility Vehicles
Note:On some models, the initial shift fromtwo-wheel drive to four-wheel drive whilethe vehicle is moving can cause somemomentary clunk and ratcheting sounds.This is the front drivetrain coming up tospeed and the automatic locking hubsengaging and is not cause for concern.
Note:Your vehicle may be equipped witha front air dam that can become damaged(due to reduced ground clearance) whentaking your vehicle off-road. This air damcan be taken off by removing two bolts.
Four-wheel drive vehicles are speciallyequipped for driving on sand, snow, mudand rough terrain and have operatingcharacteristics that are somewhatdifferent from conventional vehicles, bothon and off the road.
Power is supplied to all four wheelsthrough a transfer case. On four-wheeldrive vehicles, the transfer case allows youto select 4WD when necessary.Information on transfer case operation andshifting procedures can be found in thischapter. Information on transfer casemaintenance can be found in theMaintenance chapter. You should becomethoroughly familiar with this informationbefore you operate your vehicle.
162
Super Duty (TFA) Canada/United States of America, enUSA, First Printing
Four-Wheel Drive (If Equipped)
Page 169 of 507
On some four-wheel drive vehicles, whenthe transfer case is in the N (Neutral)position, the engine and transmission aredisconnected from the rest of the driveline.Therefore, the vehicle is free to roll even ifthe automatic transmission is in P (Park)or the manual transmission is in gear. Donot leave the vehicle unattended with thetransfer case in the N (Neutral) position.Always set the parking brake fully and turnoff the ignition when leaving the vehicle.
Maintenance and Modifications
The suspension and steering systems onyour vehicle have been designed andtested to provide predictable performancewhether loaded or empty. For this reason,we strongly recommend that you do notmake modifications such as adding orremoving parts (i.e. lift kits or stabilizerbars) or by using replacement parts notequivalent to the original factoryequipment.
We recommend that you use caution whenyour vehicle has either a high load or device(i.e. ladder or luggage racks). Anymodifications to your vehicle that raise thecenter of gravity may cause your vehicleto roll over when there is a loss of vehiclecontrol.
Failure to maintain your vehicle correctlymay void the warranty, increase your repaircost, reduce vehicle performance andoperational capabilities and adverselyaffect you and your passenger's safety. Werecommend you frequently inspect yourvehicle's chassis components when yourvehicle is subject to off road usage.
166
Super Duty (TFA) Canada/United States of America, enUSA, First Printing
Four-Wheel Drive (If Equipped)
Page 173 of 507
PARKING BRAKE
WARNING
Always set the parking brake fullyand make sure the transmission isplaced in park (P). Failure to set theparking brake and engage park could resultin vehicle roll-away, property damage orbodily injury. Turn the ignition to the lockposition and remove the key whenever youleave your vehicle.
Apply the parking brake whenever yourvehicle is parked. Press the pedaldownward to set the parking brake. Thebrake warning lamp in the instrumentcluster will illuminate and remainsilluminated until the parking brake isreleased.
To release, pull the brake release leverlocated at the lower left side of theinstrument panel.
If you are parking your vehicle on a gradeor with a trailer, press and hold the brakepedal down, then set the parking brake.There may be a little vehicle movement asthe parking brake sets to hold the vehicle'sweight. This is normal and should be noreason for concern. If needed, press andhold the service brake pedal down, thentry reapplying the parking brake. Chock thewheels if required. If the parking brakecannot hold the weight of the vehicle, theparking brake may need to be serviced orthe vehicle may be overloaded.
HILL START ASSIST
WARNINGS
The system does not replace theparking brake. When you leave yourvehicle, always apply the parkingbrake. Failure to leave your vehicle securelyparked may lead to a crash or injury. SeeParking Brake (page 170).
WARNINGS
You must remain in your vehiclewhen the system turns on. At alltimes, you are responsible forcontrolling your vehicle, supervising thesystem and intervening, if required. Failureto take care may result in the loss ofcontrol of your vehicle, serious personalinjury or death.
The system will turn off if amalfunction is apparent or if you revthe engine excessively. Failure totake care may result in the loss of controlof your vehicle, serious personal injury ordeath.
The system makes it easier to pull awaywhen your vehicle is on a slope without theneed to use the parking brake.
When the system is active, your vehicleremains stationary on the slope for two tothree seconds after you release the brakepedal. This allows time to move your footfrom the brake to the accelerator pedal.The system releases the brakesautomatically once the engine hasdeveloped sufficient drive to prevent yourvehicle from rolling down the slope. Thisis an advantage when pulling away on aslope, for example from a car park ramp,traffic lights or when reversing uphill intoa parking space.
Note:The system only functions when youbring your vehicle to a complete standstillin an uphill gear (for example, drive whenfacing uphill or reverse when facingdownhill).
Note:There is no warning light to indicatethe system is either on or off.
Using Hill Start Assist
1. Press the brake pedal to bring yourvehicle to a complete standstill. Keepthe brake pedal pressed.
170
Super Duty (TFA) Canada/United States of America, enUSA, First Printing
Brakes
Page 174 of 507
2. If the sensors detect that your vehicleis on a slope, the system activatesautomatically.
3. When you remove your foot from thebrake pedal, your vehicle remains onthe slope without rolling away forabout two to three seconds. This holdtime automatically extends if you arein the process of driving off.
4. Drive off in the normal manner. Thesystem releases the brakesautomatically.
Note:When you remove your foot from thebrake pedal and press the pedal again whenthe system is active, you will experiencesignificantly reduced brake pedal travel. Thisis normal.
Switching the System On and Off
Vehicles with Manual Transmission
You can switch this feature on or off in theinformation display. The systemremembers the last setting when you startyour vehicle.
Vehicles with Automatic Transmission
You cannot turn the system on or off.When you switch the ignition on, thesystem automatically turns on.
171
Super Duty (TFA) Canada/United States of America, enUSA, First Printing
Brakes