2016 FORD F450 SUPER DUTY warning
[x] Cancel search: warningPage 161 of 507
USING FOUR-WHEEL DRIVE
WARNING
For important information regardingsafe operation of this type of vehicle,See General Information (page264).
Note:Do not use 4X4 mode on dry, hardsurfaced roads. Doing so will produceexcessive noise, increase tire wear and maydamage drive components. 4X4 mode isonly intended for consistently slippery orloose surfaces.
Note:If 4X4 low is selected while thevehicle is moving above 3 mph (5 km/h),the 4WD system will not perform a shift.This is normal and should be no reason forconcern. Refer to Shifting to/from 4L (4X4Low) for proper operation.
Manual Shift On Stop (MSOS)4WD system (If Equipped)
Note:Some vehicles may be equipped withwheel ornaments that cover the 4x4 manualhub lock. These ornaments must beremoved to access the manual hub locks.
Note:The vehicle should not be driven in4X4 High or 4X4 Low modes with the hublocks set to FREE as this condition maydamage driveline system components.
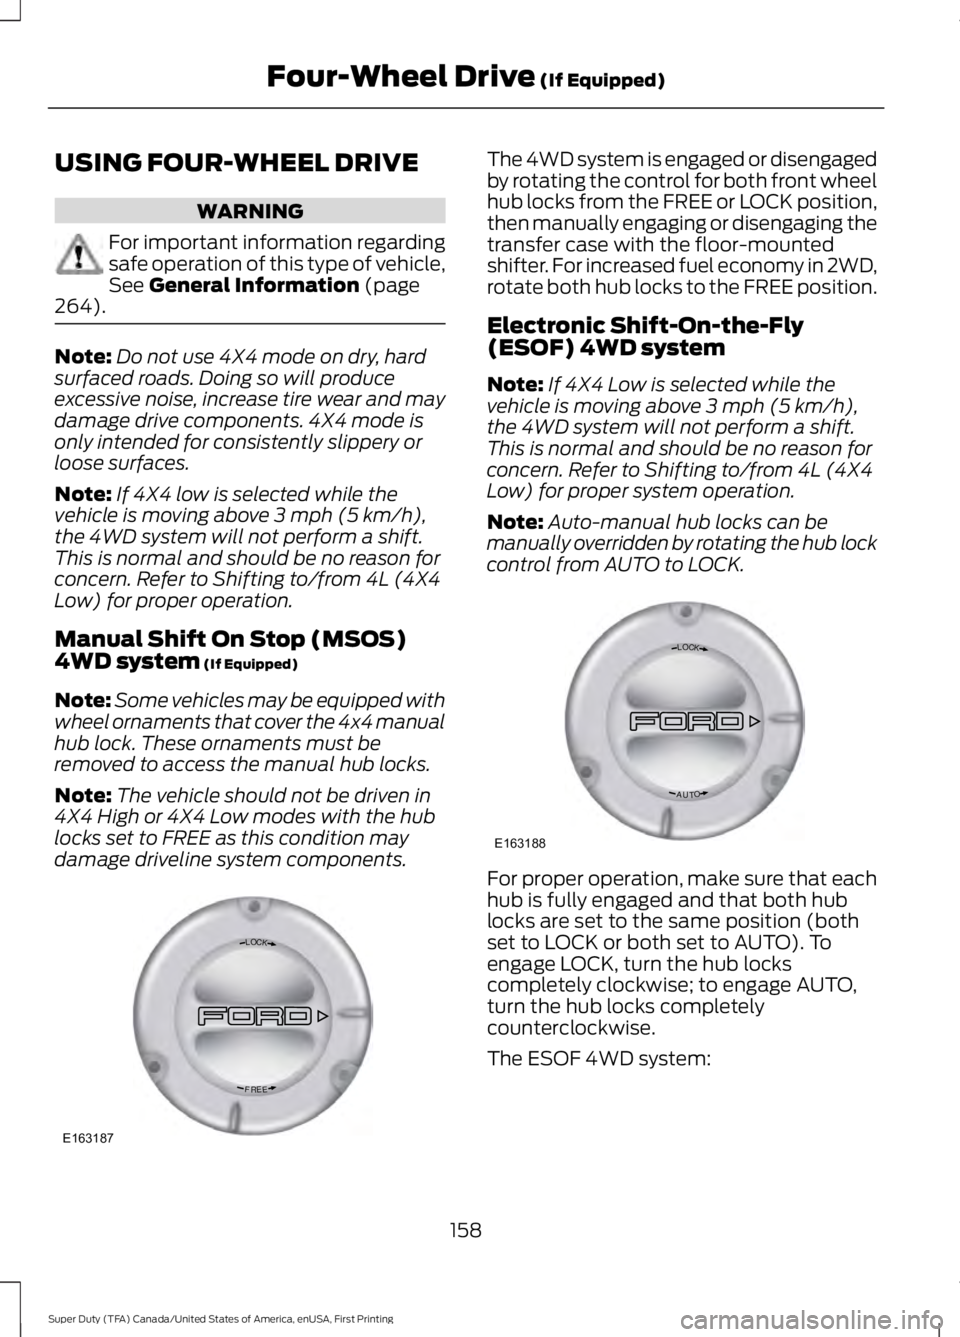
The 4WD system is engaged or disengagedby rotating the control for both front wheelhub locks from the FREE or LOCK position,then manually engaging or disengaging thetransfer case with the floor-mountedshifter. For increased fuel economy in 2WD,rotate both hub locks to the FREE position.
Electronic Shift-On-the-Fly(ESOF) 4WD system
Note:If 4X4 Low is selected while thevehicle is moving above 3 mph (5 km/h),the 4WD system will not perform a shift.This is normal and should be no reason forconcern. Refer to Shifting to/from 4L (4X4Low) for proper system operation.
Note:Auto-manual hub locks can bemanually overridden by rotating the hub lockcontrol from AUTO to LOCK.
For proper operation, make sure that eachhub is fully engaged and that both hublocks are set to the same position (bothset to LOCK or both set to AUTO). Toengage LOCK, turn the hub lockscompletely clockwise; to engage AUTO,turn the hub locks completelycounterclockwise.
The ESOF 4WD system:
158
Super Duty (TFA) Canada/United States of America, enUSA, First Printing
Four-Wheel Drive (If Equipped)LOC K
EERF
E163187 LOC K
OTUA
E163188
Page 162 of 507
•provides 4x4 High engagement anddisengagement while the vehicle ismoving.
•is operated by a rotary control locatedon the instrument panel that allowsyou select 4x2, 4x4 High or 4x4 Lowoperation.
•uses auto-manual hub locks that canbe engaged and disengagedautomatically based on the 4x4 modeselected.
•will increase fuel economy when usedin the recommended AUTO lock mode.
4WD Indicator Lights
Note:When a 4X4 system fault is present,the system will typically remain in whichever4X4 mode was selected prior to the faultcondition occurring. It will not default to 4X2in all circumstances. When this warning isdisplayed, have your vehicle serviced by anauthorized dealer.
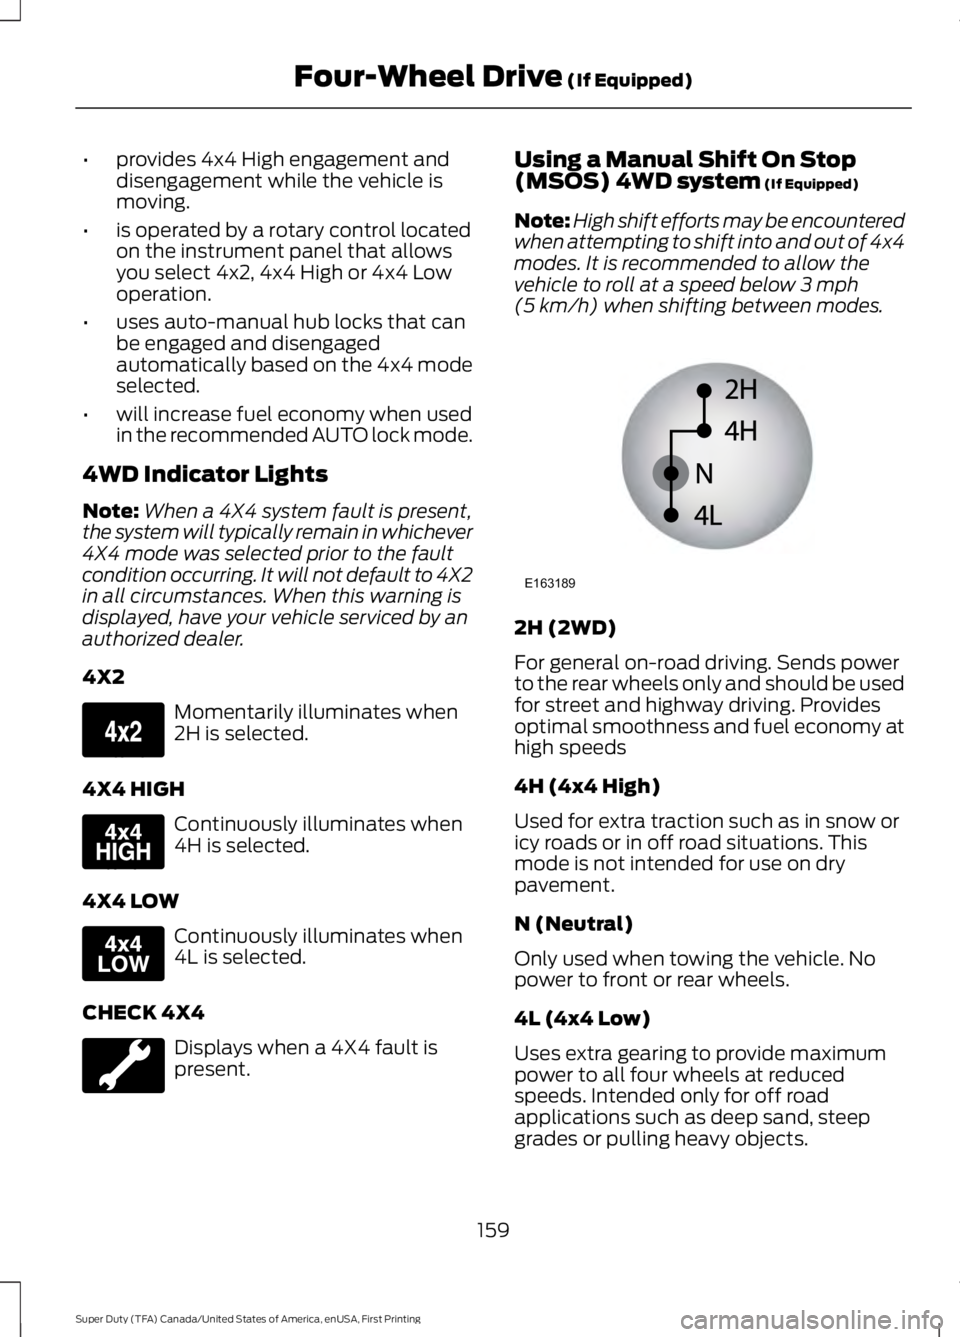
4X2
Momentarily illuminates when2H is selected.
4X4 HIGH
Continuously illuminates when4H is selected.
4X4 LOW
Continuously illuminates when4L is selected.
CHECK 4X4
Displays when a 4X4 fault ispresent.
Using a Manual Shift On Stop(MSOS) 4WD system (If Equipped)
Note:High shift efforts may be encounteredwhen attempting to shift into and out of 4x4modes. It is recommended to allow thevehicle to roll at a speed below 3 mph(5 km/h) when shifting between modes.
2H (2WD)
For general on-road driving. Sends powerto the rear wheels only and should be usedfor street and highway driving. Providesoptimal smoothness and fuel economy athigh speeds
4H (4x4 High)
Used for extra traction such as in snow oricy roads or in off road situations. Thismode is not intended for use on drypavement.
N (Neutral)
Only used when towing the vehicle. Nopower to front or rear wheels.
4L (4x4 Low)
Uses extra gearing to provide maximumpower to all four wheels at reducedspeeds. Intended only for off roadapplications such as deep sand, steepgrades or pulling heavy objects.
159
Super Duty (TFA) Canada/United States of America, enUSA, First Printing
Four-Wheel Drive (If Equipped)E163173 E163175 E163174 E163189
Page 163 of 507
Shifting between system modes
Note:Do not perform these operations ifthe rear wheels are slipping.
Note:Some noise may be heard as the 4x4system shifts or engages. This is normal. Inorder to reduce engagement noise, it isrecommended that all shifts be performedat speeds below3 mph (5 km/h).
Note:The vehicle should not be driven in4X4 High with the hub locks disengaged asthis condition may damage driveline systemcomponents.
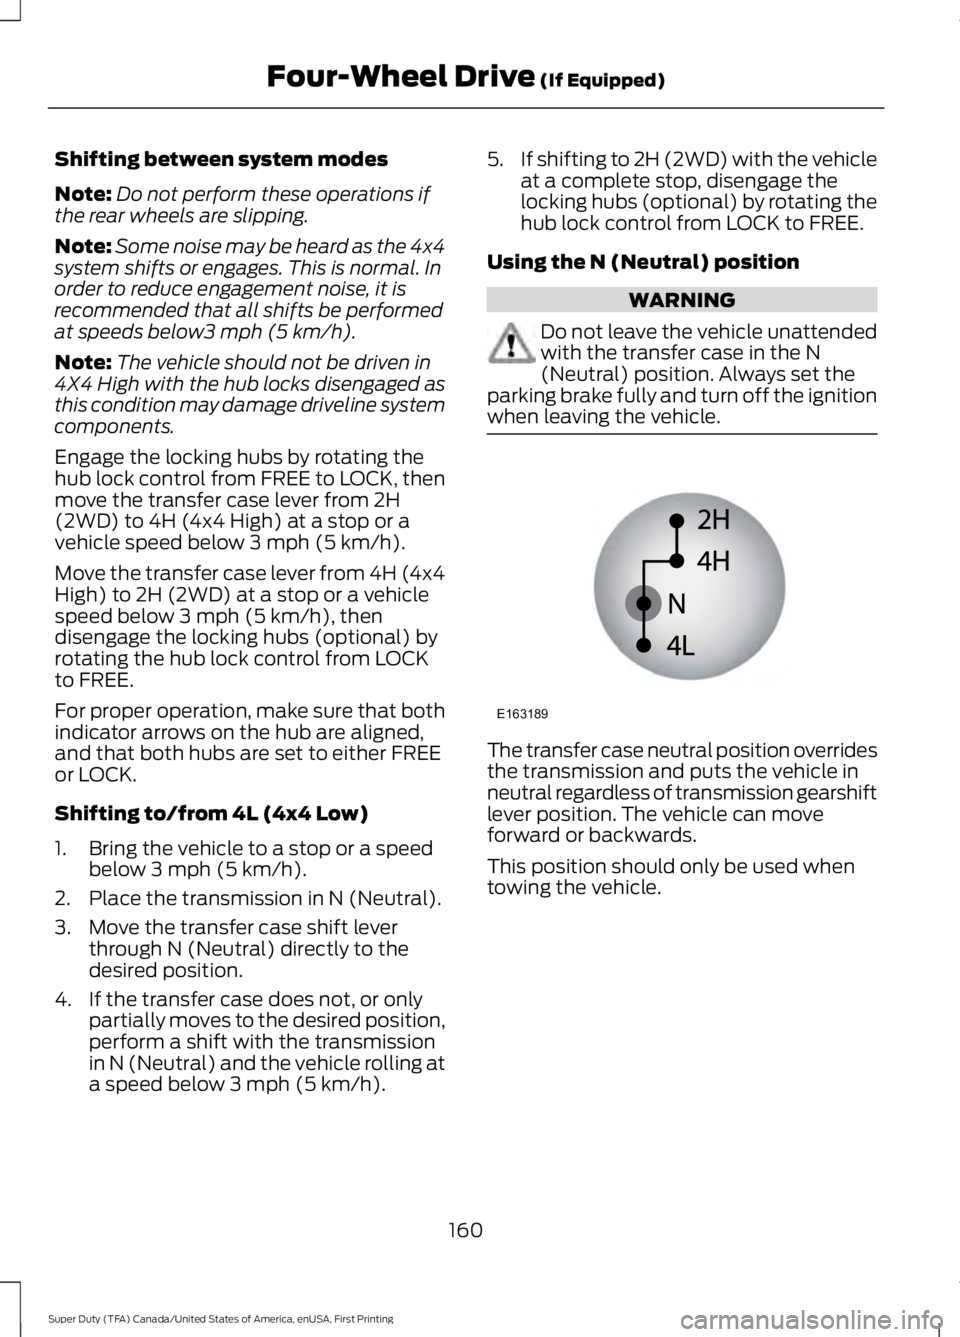
Engage the locking hubs by rotating thehub lock control from FREE to LOCK, thenmove the transfer case lever from 2H(2WD) to 4H (4x4 High) at a stop or avehicle speed below 3 mph (5 km/h).
Move the transfer case lever from 4H (4x4High) to 2H (2WD) at a stop or a vehiclespeed below 3 mph (5 km/h), thendisengage the locking hubs (optional) byrotating the hub lock control from LOCKto FREE.
For proper operation, make sure that bothindicator arrows on the hub are aligned,and that both hubs are set to either FREEor LOCK.
Shifting to/from 4L (4x4 Low)
1. Bring the vehicle to a stop or a speedbelow 3 mph (5 km/h).
2. Place the transmission in N (Neutral).
3. Move the transfer case shift leverthrough N (Neutral) directly to thedesired position.
4. If the transfer case does not, or onlypartially moves to the desired position,perform a shift with the transmissionin N (Neutral) and the vehicle rolling ata speed below 3 mph (5 km/h).
5.If shifting to 2H (2WD) with the vehicleat a complete stop, disengage thelocking hubs (optional) by rotating thehub lock control from LOCK to FREE.
Using the N (Neutral) position
WARNING
Do not leave the vehicle unattendedwith the transfer case in the N(Neutral) position. Always set theparking brake fully and turn off the ignitionwhen leaving the vehicle.
The transfer case neutral position overridesthe transmission and puts the vehicle inneutral regardless of transmission gearshiftlever position. The vehicle can moveforward or backwards.
This position should only be used whentowing the vehicle.
160
Super Duty (TFA) Canada/United States of America, enUSA, First Printing
Four-Wheel Drive (If Equipped)E163189
Page 165 of 507
If SHIFT DELAYED PULL FORWARD isdisplayed in the information display,transfer case gear tooth blockage ispresent. To alleviate this condition, placethe transmission in a forward gear, movethe vehicle forward approximately 5 ft(1.5 m), and shift the transmission back toneutral to allow the transfer case tocomplete the range shift.
How Your Vehicle Differs FromOther Vehicles
WARNING
Vehicles with a higher center ofgravity such as utility and four-wheeldrive vehicles handle differently thanvehicles with a lower center of gravity.Utility and four-wheel drive vehicles arenot designed for cornering at speeds ashigh as passenger cars any more thanlow-slung sports cars are designed toperform satisfactorily under off-roadconditions. Avoid sharp turns, excessivespeed and abrupt maneuvers in thesevehicles. Failure to drive cautiously couldresult in an increased risk of loss of vehiclecontrol, vehicle rollover, personal injury anddeath.
Truck and utility vehicles can differ fromsome other vehicles. Your vehicle may behigher to allow it to travel over roughterrain without getting hung up ordamaging underbody components.
The differences that make your vehicle soversatile also make it handle differentlythan an ordinary passenger car.
Maintain steering wheel control at alltimes, especially in rough terrain. Sincesudden changes in terrain can result inabrupt steering wheel motion, make sureyou grip the steering wheel from theoutside. Do not grip the spokes.
Drive cautiously to avoid vehicle damagefrom concealed objects such as rocks andstumps.
You should either know the terrain orexamine maps of the area before driving.Map out your route before driving in thearea. To maintain steering and brakingcontrol of your vehicle, you must have allfour wheels on the ground and they mustbe rolling, not sliding or spinning.
Driving Off-Road With Truck andUtility Vehicles
Note:On some models, the initial shift fromtwo-wheel drive to four-wheel drive whilethe vehicle is moving can cause somemomentary clunk and ratcheting sounds.This is the front drivetrain coming up tospeed and the automatic locking hubsengaging and is not cause for concern.
Note:Your vehicle may be equipped witha front air dam that can become damaged(due to reduced ground clearance) whentaking your vehicle off-road. This air damcan be taken off by removing two bolts.
Four-wheel drive vehicles are speciallyequipped for driving on sand, snow, mudand rough terrain and have operatingcharacteristics that are somewhatdifferent from conventional vehicles, bothon and off the road.
Power is supplied to all four wheelsthrough a transfer case. On four-wheeldrive vehicles, the transfer case allows youto select 4WD when necessary.Information on transfer case operation andshifting procedures can be found in thischapter. Information on transfer casemaintenance can be found in theMaintenance chapter. You should becomethoroughly familiar with this informationbefore you operate your vehicle.
162
Super Duty (TFA) Canada/United States of America, enUSA, First Printing
Four-Wheel Drive (If Equipped)
Page 168 of 507
If your vehicle has anti-lock brakes, applythe brakes steadily. Do not pump thebrakes.
Driving on Snow and Ice
WARNING
If you are driving in slipperyconditions that require tire chains orcables, then it is critical that you drivecautiously. Keep speeds down, allow forlonger stopping distances and avoidaggressive steering to reduce the chancesof a loss of vehicle control which can leadto serious injury or death. If the rear end ofyour vehicle slides while cornering, steer inthe direction of the slide until you regaincontrol of your vehicle.
Note:Excessive tire slippage can causetransmission damage.
Four-wheel drive vehicles have advantagesover two-wheel drive vehicles in snow andice but can skid like any other vehicle.Should you start to slide while driving onsnowy or icy roads, turn the steering wheelin the direction of the slide until you regaincontrol.
Avoid sudden applications of power andquick changes of direction on snow andice. Apply the accelerator slowly andsteadily when starting from a full stop.
Avoid sudden braking. Although afour-wheel drive vehicle may acceleratebetter than a two-wheel drive vehicle insnow and ice, it will not stop any faster asbraking occurs at all four wheels. Do notbecome overconfident as to roadconditions.
Make sure you allow sufficient distancebetween you and other vehicles forstopping. Drive slower than usual andconsider using one of the lower gears. Inemergency stopping situations, apply thebrake steadily. Do not pump the brakepedal. See Hints on Driving WithAnti-Lock Brakes (page 169).
If Your Vehicle Gets Stuck In Mud orSnow
WARNING
Do not spin the wheels at over35 mph (56 km/h). The tires may failand injure a passenger or bystander.
If your vehicle gets stuck in mud or snow,it may be rocked out by shifting betweenforward and reverse gears, stoppingbetween shifts in a steady pattern. Presslightly on the accelerator in each gear.
Note:Do not rock your vehicle if the engineis not at normal operating temperature,damage to the transmission may occur.
Note:Do not rock your vehicle for morethan a minute, damage to the transmissionand tires may occur or the engine mayoverheat.
Parking
WARNINGS
If the parking brake is fully released,but the brake warning lamp remainsilluminated, the brakes may not beworking properly. See your authorizeddealer.
Always set the parking brake fullyand make sure the gearshift islatched in P (Park). Turn the ignitionto the off position and remove the keywhenever you leave your vehicle.
165
Super Duty (TFA) Canada/United States of America, enUSA, First Printing
Four-Wheel Drive (If Equipped)
Page 172 of 507
GENERAL INFORMATION
Note:Occasional brake noise is normal. Ifa metal-to-metal, continuous grinding orcontinuous squeal sound is present, thebrake linings may be worn-out. Have thesystem checked by an authorized dealer. Ifyour vehicle has continuous vibration orshudder in the steering wheel while braking,have it checked by an authorized dealer.
Note:Brake dust may accumulate on thewheels, even under normal drivingconditions. Some dust is inevitable as thebrakes wear and does not contribute tobrake noise. See Cleaning the AlloyWheels (page 261).
See Warning Lamps andIndicators (page 84).
Wet brakes result in reduced brakingefficiency. Gently press the brake pedal afew times when driving from a car wash orstanding water to dry the brakes.
Brake Over Accelerator
In the event the accelerator pedalbecomes stuck or entrapped, apply steadyand firm pressure to the brake pedal toslow the vehicle and reduce engine power.If you experience this condition, apply thebrakes and bring your vehicle to a safestop. Move the transmission to park (P),switch the engine off and apply the parkingbrake. Inspect the accelerator pedal forany interference. If none are found and thecondition persists, have your vehicle towedto the nearest authorized dealer.
Brake Assist
Brake assist detects when you brakerapidly by measuring the rate at which youpress the brake pedal. It providesmaximum braking efficiency as long as youpress the pedal, and can reduce stoppingdistances in critical situations.
Anti-lock Brake System
This system helps you maintain steeringcontrol during emergency stops by keepingthe brakes from locking.
This lamp momentarilyilluminates when you turn theignition on. If the light does notilluminate during start up, remains on orflashes, the system may be disabled. Havethe system checked by an authorizeddealer. If the anti-lock brake system isdisabled, normal braking is still effective.
If the brake warning lampilluminates when you release theparking brake, have the systemchecked by an authorized dealer.
HINTS ON DRIVING WITH
ANTI-LOCK BRAKES
Note:When the system is operating, thebrake pedal will pulse and may travelfurther. Maintain pressure on the brakepedal. You may also hear a noise from thesystem. This is normal.
The anti-lock braking system will noteliminate the risks when:
•You drive too closely to the vehicle infront of you.
•Your vehicle is hydroplaning.
•You take corners too fast.
•The road surface is poor.
169
Super Duty (TFA) Canada/United States of America, enUSA, First Printing
BrakesE144522 E144522
Page 173 of 507
PARKING BRAKE
WARNING
Always set the parking brake fullyand make sure the transmission isplaced in park (P). Failure to set theparking brake and engage park could resultin vehicle roll-away, property damage orbodily injury. Turn the ignition to the lockposition and remove the key whenever youleave your vehicle.
Apply the parking brake whenever yourvehicle is parked. Press the pedaldownward to set the parking brake. Thebrake warning lamp in the instrumentcluster will illuminate and remainsilluminated until the parking brake isreleased.
To release, pull the brake release leverlocated at the lower left side of theinstrument panel.
If you are parking your vehicle on a gradeor with a trailer, press and hold the brakepedal down, then set the parking brake.There may be a little vehicle movement asthe parking brake sets to hold the vehicle'sweight. This is normal and should be noreason for concern. If needed, press andhold the service brake pedal down, thentry reapplying the parking brake. Chock thewheels if required. If the parking brakecannot hold the weight of the vehicle, theparking brake may need to be serviced orthe vehicle may be overloaded.
HILL START ASSIST
WARNINGS
The system does not replace theparking brake. When you leave yourvehicle, always apply the parkingbrake. Failure to leave your vehicle securelyparked may lead to a crash or injury. SeeParking Brake (page 170).
WARNINGS
You must remain in your vehiclewhen the system turns on. At alltimes, you are responsible forcontrolling your vehicle, supervising thesystem and intervening, if required. Failureto take care may result in the loss ofcontrol of your vehicle, serious personalinjury or death.
The system will turn off if amalfunction is apparent or if you revthe engine excessively. Failure totake care may result in the loss of controlof your vehicle, serious personal injury ordeath.
The system makes it easier to pull awaywhen your vehicle is on a slope without theneed to use the parking brake.
When the system is active, your vehicleremains stationary on the slope for two tothree seconds after you release the brakepedal. This allows time to move your footfrom the brake to the accelerator pedal.The system releases the brakesautomatically once the engine hasdeveloped sufficient drive to prevent yourvehicle from rolling down the slope. Thisis an advantage when pulling away on aslope, for example from a car park ramp,traffic lights or when reversing uphill intoa parking space.
Note:The system only functions when youbring your vehicle to a complete standstillin an uphill gear (for example, drive whenfacing uphill or reverse when facingdownhill).
Note:There is no warning light to indicatethe system is either on or off.
Using Hill Start Assist
1. Press the brake pedal to bring yourvehicle to a complete standstill. Keepthe brake pedal pressed.
170
Super Duty (TFA) Canada/United States of America, enUSA, First Printing
Brakes
Page 176 of 507
System Indicator Lights andMessages
WARNING
If a failure has been detected withinthe AdvanceTrac system, thestability control light will illuminatesteadily. Verify that the traction controlsystem was not manually disabled usingthe stability control button. If the stabilitycontrol light still illuminates steadily, havethe system serviced by an authorizeddealer immediately. Operating your vehiclewith traction control disabled could leadto an increased risk of loss of vehiclecontrol, vehicle rollover, personal injury anddeath.
The stability control lighttemporarily illuminates onengine start-up and flasheswhen a driving condition activates thestability system.
The stability control off lighttemporarily illuminates onengine start-up and stays onwhen you turn the traction control systemoff, or if a problem occurs in the stabilitysystem.
173
Super Duty (TFA) Canada/United States of America, enUSA, First Printing
Traction ControlE138639