2016 FORD F250 SUPER DUTY light
[x] Cancel search: lightPage 150 of 507
Fuel Filler Cap
WARNINGS
The fuel system may be underpressure. If you hear a hissing soundnear the fuel filler door, do not refueluntil the sound stops. Otherwise, fuel mayspray out, which could cause seriouspersonal injury.
If you do not use the proper fuel fillercap, excessive pressure or vacuumin the fuel tank may damage the fuelsystem or cause the fuel cap to disengagein a collision, which may result in possiblepersonal injury.
Note:If you must replace the fuel filler cap,replace it with a fuel filler cap that isdesigned for your vehicle. The customerwarranty may be void for any damage to thefuel tank or fuel system if the correctgenuine Ford, Motorcraft or other certifiedfuel filler cap is not used.
Your fuel tank filler cap has an indexeddesign with a 1/4th turn on and off feature.When fueling your vehicle:
1. Put your vehicle in park (P).
2. Switch the engine off.
3. Carefully turn the filler capcounterclockwise until it spins off.
4. Pull to remove the cap from the fuelfiller pipe.
5.To install the cap, align the tabs on thecap with the notches on the filler pipe.
6. Turn the filler cap clockwise 1/4 of aturn clockwise until it clicks at leastonce.
If the Check Fuel Cap light or a Check FuelCap message appears in the instrumentcluster and stays on after you start theengine, you may not have installed the fuelfiller properly.
If the fuel cap light remains on, at the nextopportunity, safely pull off of the road,remove the fuel filler cap, align the capproperly and reinstall it. The check fuel caplight or Check fuel cap message may notreset immediately. It may take severaldriving cycles for the indicators to turn off.A driving cycle consists of an enginestart-up (after four or more hours with theengine off) followed by normal city andhighway driving.
FUEL CONSUMPTION
Empty reserve is the amount of fuelremaining in the tank after the fuel gaugeindicates empty. The amount of usablefuel in the empty reserve varies and shouldnot be relied upon to increase driving range.
•The usable capacity of the fuel tank isthe amount of fuel that can be addedinto the tank after the gauge indicatesempty
•The advertised capacity is the total fueltank size. See Capacities andSpecifications (page 303). It is thecombined usable capacity plus theempty reserve.
•Due to the empty reserve, you may notbe able to refuel the full amount of theadvertised capacity of the fuel tankeven when the fuel gauge reads empty.
Filling the Tank
For consistent results when filling the fueltank:
•Turn the ignition off before fueling; aninaccurate reading results if the engineis left running.
•Use the same fill rate(low-medium-high) each time the tankis filled.
•Allow no more than two automaticclick-offs when filling.
147
Super Duty (TFA) Canada/United States of America, enUSA, First Printing
Fuel and Refueling
Page 151 of 507
Results are most accurate when the fillingmethod is consistent.
Calculating Fuel Economy
Do not measure fuel economy during thefirst 1000 miles (1600 kilometers) ofdriving (this is your engine’s break-inperiod); a more accurate measurement isobtained after 2000 miles - 3000 miles(3200 kilometers - 4800 kilometers). Also,fuel expense, frequency of fill ups or fuelgauge readings are not accurate ways tomeasure fuel economy.
1.Fill the fuel tank completely and recordthe initial odometer reading.
2. Each time you fill the tank, record theamount of fuel added.
3.After at least 3 to 5 tank fill ups, fill thefuel tank and record the currentodometer reading.
4. Subtract your initial odometer readingfrom the current odometer reading.
5. Calculate fuel economy by dividingmiles traveled by gallons used (ForMetric: Multiply liters used by 100, thendivide by kilometers traveled).
Keep a record for at least 1 month andrecord the type of driving (city or highway).This provides an accurate estimate of thevehicle’s fuel economy under currentdriving conditions. Additionally, keepingrecords during summer and winter showhow temperature impacts fuel economy.In general, lower temperatures mean lowerfuel economy.
Conditions
•Heavily loading a vehicle or towing atrailer may reduce fuel economy at anyspeed.
•Carrying unnecessary weight mayreduce fuel economy (approximately1 mpg [0.4 km/L] is lost for every 400pounds [180 kilograms] of weightcarried).
•Adding certain accessories to yourvehicle (for example bug deflectors,rollbars/light bars, running boards, skiracks) may reduce fuel economy.
•Using fuel blended with alcohol maylower fuel economy.
•Fuel economy may decrease with lowertemperatures during the first 8–10miles (12–16 kilometers) of driving.
•Driving on flat terrain offers improvedfuel economy as compared to drivingon hilly terrain.
•Transmissions give their best fueleconomy when operated in the topcruise gear and with steady pressureon the gas pedal.
•Close windows for high speed driving.
EMISSION CONTROL SYSTEM
WARNINGS
Do not park, idle, or drive your vehiclein dry grass or other dry ground cover.The emission system heats up theengine compartment and exhaust system,which can start a fire.
Exhaust leaks may result in entry ofharmful and potentially lethal fumesinto the passenger compartment. Ifyou smell exhaust fumes inside yourvehicle, have your dealer inspect yourvehicle immediately. Do not drive if yousmell exhaust fumes.
148
Super Duty (TFA) Canada/United States of America, enUSA, First Printing
Fuel and Refueling
Page 152 of 507
Your vehicle is equipped with variousemission control components and acatalytic converter that will enable yourvehicle to comply with applicable exhaustemission standards. To make sure that thecatalytic converter and other emissioncontrol components continue to workproperly:
•Use only the specified fuel listed.
•Avoid running out of fuel.
•Do not turn off the ignition while yourvehicle is moving, especially at highspeeds.
•Have the items listed in scheduledmaintenance information performedaccording to the specified schedule.
The scheduled maintenance items listedin scheduled maintenance information areessential to the life and performance ofyour vehicle and to its emissions system.
If you use parts other than Ford, Motorcraftor Ford-authorized parts for maintenancereplacements, or for service ofcomponents affecting emission control,such non-Ford parts should be theequivalent to genuine Ford Motor Companyparts in performance and durability.
Illumination of the service engine soonindicator, charging system warning light orthe temperature warning light, fluid leaks,strange odors, smoke or loss of enginepower could indicate that the emissioncontrol system is not working properly.
An improperly operating or damagedexhaust system may allow exhaust toenter the vehicle. Have a damaged orimproperly operating exhaust systeminspected and repaired immediately.
Do not make any unauthorized changes toyour vehicle or engine. By law, vehicleowners and anyone who manufactures,repairs, services, sells, leases, tradesvehicles, or supervises a fleet of vehiclesare not permitted to intentionally remove
an emission control device or prevent itfrom working. Information about yourvehicle’s emission system is on the VehicleEmission Control Information Decallocated on or near the engine. This decalalso lists engine displacement
Please consult your warranty informationfor complete details.
On-Board Diagnostics (OBD-II)
Your vehicle has a computer known as theon-board diagnostics system (OBD-II) thatmonitors the engine’s emission controlsystem. The system protects theenvironment by making sure that yourvehicle continues to meet governmentemission standards. The OBD-II systemalso assists a service technician in properlyservicing your vehicle.
When the service engine soonindicator illuminates, the OBD-IIsystem has detected amalfunction. Temporary malfunctions maycause the service engine soon indicator toilluminate.
Examples of temporary malfunctions are:
•the vehicle has run out of fuel—theengine may misfire or run poorly
•poor fuel quality or water in thefuel—the engine may misfire or runpoorly
•the fuel fill inlet may not have closedproperly. See Refueling (page 146).
•driving through deep water—theelectrical system may be wet.
You can correct these temporarymalfunctions by filling the fuel tank withgood quality fuel, properly closing the fuelfill inlet or letting the electrical system dryout. After three driving cycles without theseor any other temporary malfunctions
149
Super Duty (TFA) Canada/United States of America, enUSA, First Printing
Fuel and Refueling
Page 155 of 507
Tow/Haul Mode
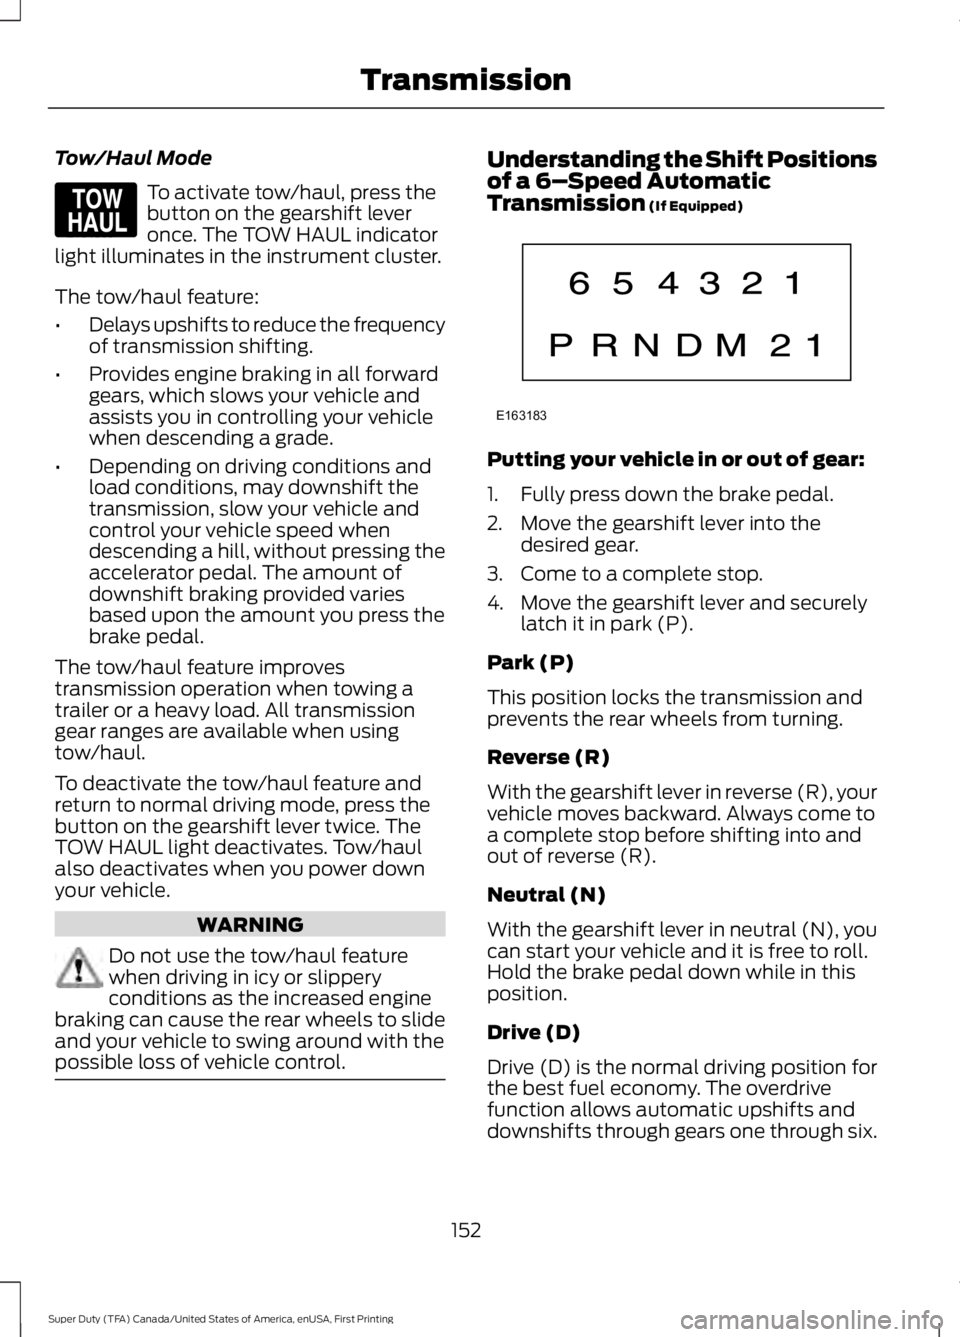
To activate tow/haul, press thebutton on the gearshift leveronce. The TOW HAUL indicatorlight illuminates in the instrument cluster.
The tow/haul feature:
•Delays upshifts to reduce the frequencyof transmission shifting.
•Provides engine braking in all forwardgears, which slows your vehicle andassists you in controlling your vehiclewhen descending a grade.
•Depending on driving conditions andload conditions, may downshift thetransmission, slow your vehicle andcontrol your vehicle speed whendescending a hill, without pressing theaccelerator pedal. The amount ofdownshift braking provided variesbased upon the amount you press thebrake pedal.
The tow/haul feature improvestransmission operation when towing atrailer or a heavy load. All transmissiongear ranges are available when usingtow/haul.
To deactivate the tow/haul feature andreturn to normal driving mode, press thebutton on the gearshift lever twice. TheTOW HAUL light deactivates. Tow/haulalso deactivates when you power downyour vehicle.
WARNING
Do not use the tow/haul featurewhen driving in icy or slipperyconditions as the increased enginebraking can cause the rear wheels to slideand your vehicle to swing around with thepossible loss of vehicle control.
Understanding the Shift Positionsof a 6–Speed AutomaticTransmission (If Equipped)
Putting your vehicle in or out of gear:
1. Fully press down the brake pedal.
2. Move the gearshift lever into thedesired gear.
3. Come to a complete stop.
4. Move the gearshift lever and securelylatch it in park (P).
Park (P)
This position locks the transmission andprevents the rear wheels from turning.
Reverse (R)
With the gearshift lever in reverse (R), yourvehicle moves backward. Always come toa complete stop before shifting into andout of reverse (R).
Neutral (N)
With the gearshift lever in neutral (N), youcan start your vehicle and it is free to roll.Hold the brake pedal down while in thisposition.
Drive (D)
Drive (D) is the normal driving position forthe best fuel economy. The overdrivefunction allows automatic upshifts anddownshifts through gears one through six.
152
Super Duty (TFA) Canada/United States of America, enUSA, First Printing
TransmissionE161509 E163183
Page 156 of 507
M (Manual)
With the gearshift lever in manual (M), thedriver can change gears up or down asdesired. By moving the gearshift lever fromdrive position drive (D) to manual (M) younow have control of selecting the gear youdesire using buttons on the shift lever. SeeUnderstanding your SelectShiftAutomatic™ transmission later in thissection.
To return to normal drive (D) position,move the shift lever back from manual (M)to drive (D).
The transmission operates in gears onethrough six.
Second (2)
Transmission operates in second (2) gearonly. Use second (2) gear to start-up onslippery roads.
First (1)
•Transmission operates in first (1) gearonly.
•Provides maximum engine braking.
•Allows upshifts by moving gearshiftlever.
•Does not downshift into first (1) gearat high speeds; allows for first (1) gearwhen vehicle reaches slower speeds.
Forced downshifts
•Allowed in drive (D) with the tow/haulfeature on or off.
•Press the accelerator to the floor.
•Allows transmission to select anappropriate gear.
Tow/Haul Mode
To activate tow/haul, press thebutton on the gearshift leveronce. The TOW HAUL indicatorlight illuminates in the instrument cluster.
The tow/haul feature:
•Delays upshifts to reduce the frequencyof transmission shifting.
•Provides engine braking in all forwardgears, which slows your vehicle andassists you in controlling your vehiclewhen descending a grade.
•Depending on driving conditions andload conditions, may downshift thetransmission, slow your vehicle andcontrol your vehicle speed whendescending a hill, without pressing theaccelerator pedal. The amount ofdownshift braking provided will varybased upon the amount you press thebrake pedal.
The tow/haul feature improvestransmission operation when towing atrailer or a heavy load. All transmissiongear ranges are available when usingtow/haul.
To deactivate the tow/haul feature andreturn to normal driving mode, press thebutton on the gearshift lever twice. TheTOW HAUL light deactivates. Tow/haulalso deactivates when you power downyour vehicle.
WARNING
Do not use the tow/haul featurewhen driving in icy or slipperyconditions as the increased enginebraking can cause the rear wheels to slideand your vehicle to swing around with thepossible loss of vehicle control.
153
Super Duty (TFA) Canada/United States of America, enUSA, First Printing
TransmissionE161509
Page 159 of 507
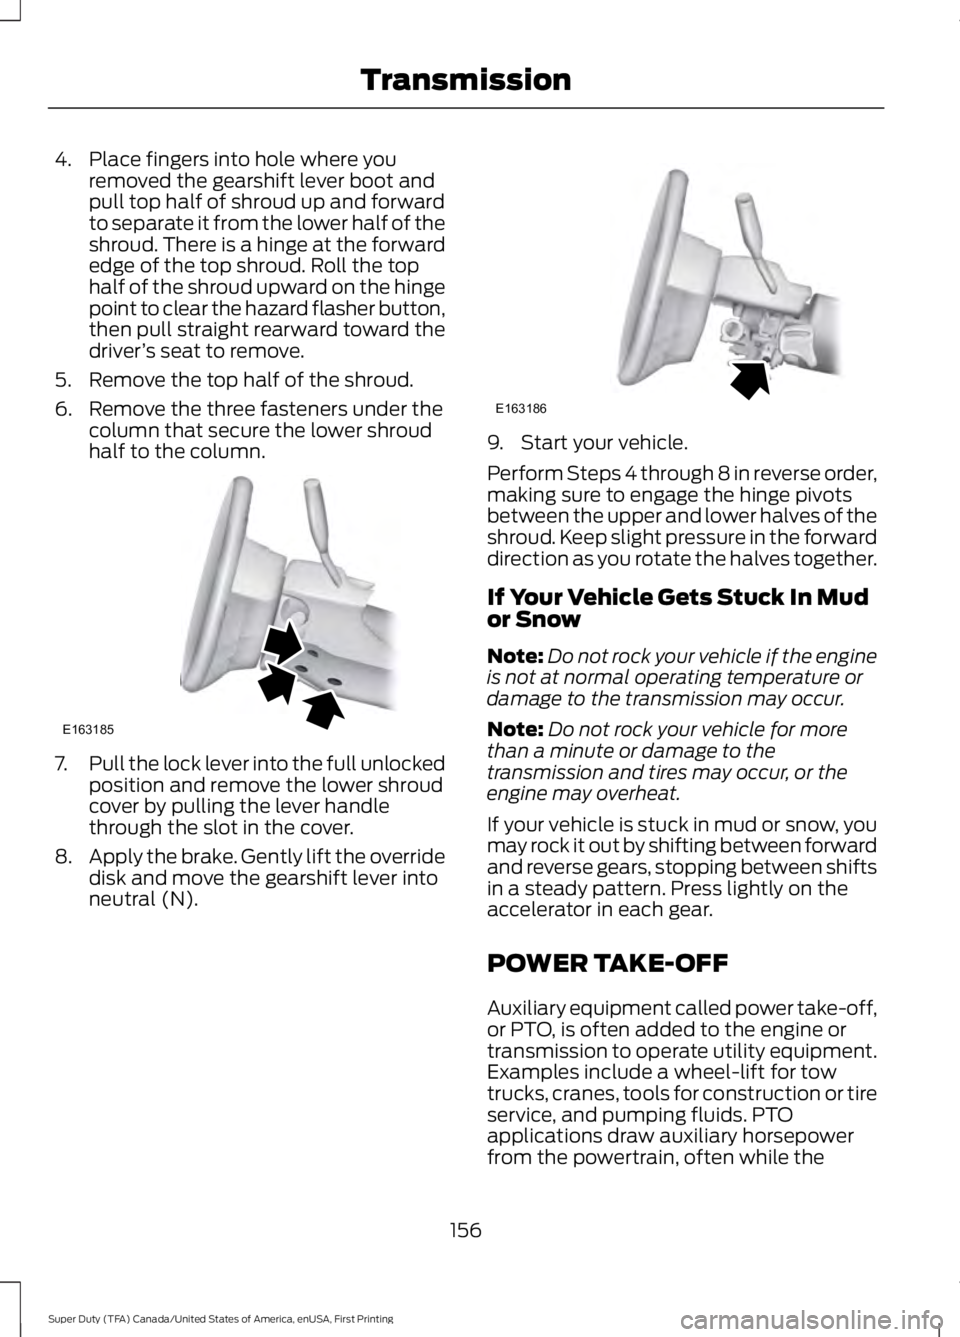
4. Place fingers into hole where youremoved the gearshift lever boot andpull top half of shroud up and forwardto separate it from the lower half of theshroud. There is a hinge at the forwardedge of the top shroud. Roll the tophalf of the shroud upward on the hingepoint to clear the hazard flasher button,then pull straight rearward toward thedriver’s seat to remove.
5. Remove the top half of the shroud.
6. Remove the three fasteners under thecolumn that secure the lower shroudhalf to the column.
7.Pull the lock lever into the full unlockedposition and remove the lower shroudcover by pulling the lever handlethrough the slot in the cover.
8.Apply the brake. Gently lift the overridedisk and move the gearshift lever intoneutral (N).
9. Start your vehicle.
Perform Steps 4 through 8 in reverse order,making sure to engage the hinge pivotsbetween the upper and lower halves of theshroud. Keep slight pressure in the forwarddirection as you rotate the halves together.
If Your Vehicle Gets Stuck In Mudor Snow
Note:Do not rock your vehicle if the engineis not at normal operating temperature ordamage to the transmission may occur.
Note:Do not rock your vehicle for morethan a minute or damage to thetransmission and tires may occur, or theengine may overheat.
If your vehicle is stuck in mud or snow, youmay rock it out by shifting between forwardand reverse gears, stopping between shiftsin a steady pattern. Press lightly on theaccelerator in each gear.
POWER TAKE-OFF
Auxiliary equipment called power take-off,or PTO, is often added to the engine ortransmission to operate utility equipment.Examples include a wheel-lift for towtrucks, cranes, tools for construction or tireservice, and pumping fluids. PTOapplications draw auxiliary horsepowerfrom the powertrain, often while the
156
Super Duty (TFA) Canada/United States of America, enUSA, First Printing
TransmissionE163185 E163186
Page 162 of 507
•provides 4x4 High engagement anddisengagement while the vehicle ismoving.
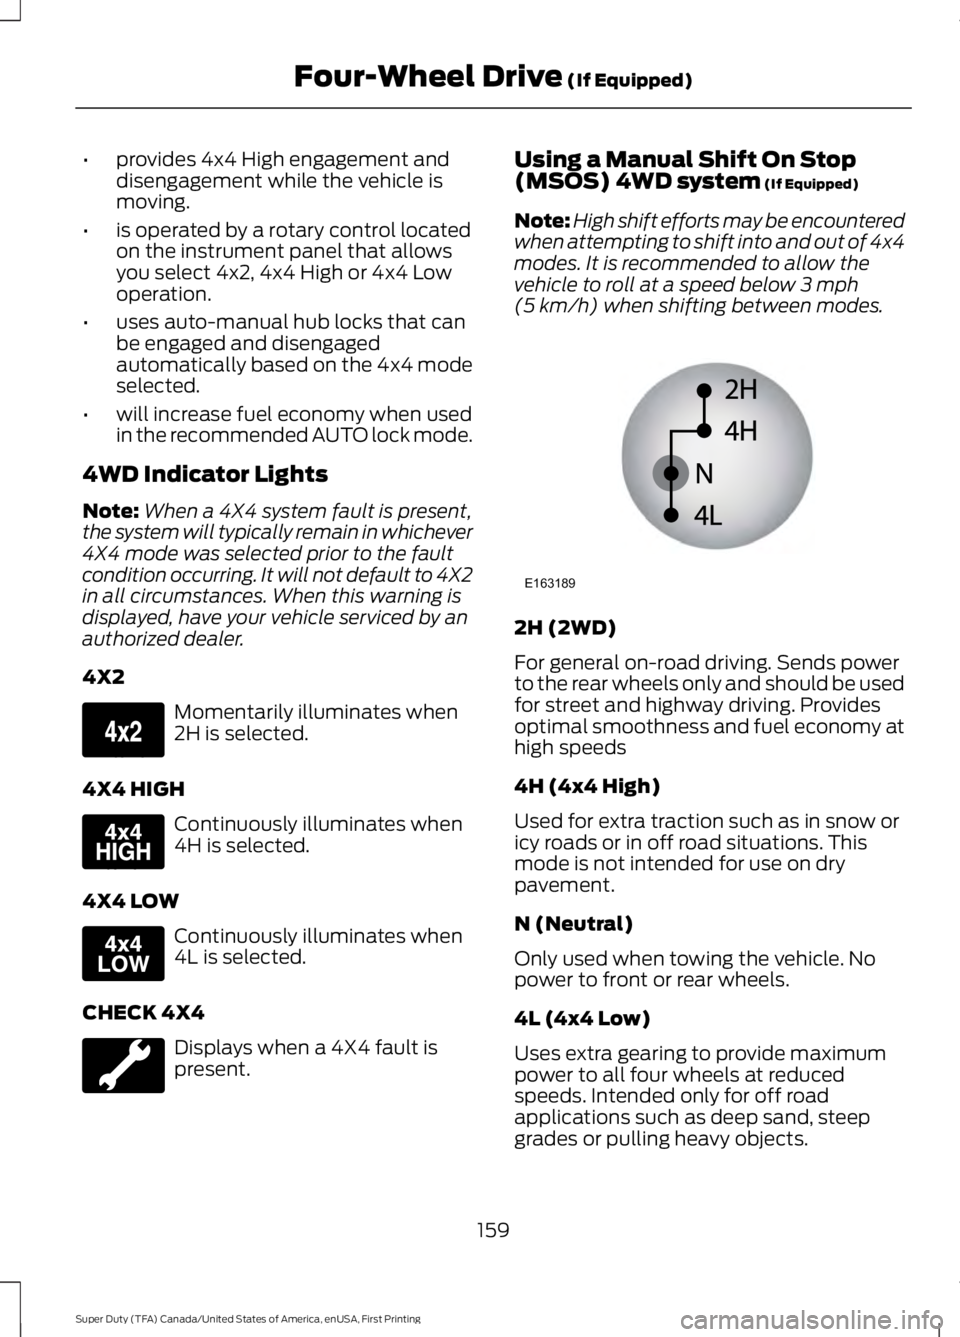
•is operated by a rotary control locatedon the instrument panel that allowsyou select 4x2, 4x4 High or 4x4 Lowoperation.
•uses auto-manual hub locks that canbe engaged and disengagedautomatically based on the 4x4 modeselected.
•will increase fuel economy when usedin the recommended AUTO lock mode.
4WD Indicator Lights
Note:When a 4X4 system fault is present,the system will typically remain in whichever4X4 mode was selected prior to the faultcondition occurring. It will not default to 4X2in all circumstances. When this warning isdisplayed, have your vehicle serviced by anauthorized dealer.
4X2
Momentarily illuminates when2H is selected.
4X4 HIGH
Continuously illuminates when4H is selected.
4X4 LOW
Continuously illuminates when4L is selected.
CHECK 4X4
Displays when a 4X4 fault ispresent.
Using a Manual Shift On Stop(MSOS) 4WD system (If Equipped)
Note:High shift efforts may be encounteredwhen attempting to shift into and out of 4x4modes. It is recommended to allow thevehicle to roll at a speed below 3 mph(5 km/h) when shifting between modes.
2H (2WD)
For general on-road driving. Sends powerto the rear wheels only and should be usedfor street and highway driving. Providesoptimal smoothness and fuel economy athigh speeds
4H (4x4 High)
Used for extra traction such as in snow oricy roads or in off road situations. Thismode is not intended for use on drypavement.
N (Neutral)
Only used when towing the vehicle. Nopower to front or rear wheels.
4L (4x4 Low)
Uses extra gearing to provide maximumpower to all four wheels at reducedspeeds. Intended only for off roadapplications such as deep sand, steepgrades or pulling heavy objects.
159
Super Duty (TFA) Canada/United States of America, enUSA, First Printing
Four-Wheel Drive (If Equipped)E163173 E163175 E163174 E163189
Page 167 of 507
Mud and Water
Mud
Be cautious of sudden changes in vehiclespeed or direction when you are driving inmud. Even four-wheel drive vehicles canlose traction in slick mud. If your vehicledoes slide, steer in the direction of the slideuntil you regain control of your vehicle.
After driving through mud, clean off residuestuck to rotating driveshafts and tires.Excess mud stuck on tires and rotatingdriveshafts can cause an imbalance thatcould damage drive components.
Water
If you must drive through high water, driveslowly. Traction or brake capability maybe limited.
When driving through water, determine thedepth and avoid water higher than thebottom of the hubs. If the ignition systemgets wet, your vehicle may stall.
Once through water, always try the brakes.Wet brakes do not stop your vehicle aseffectively as dry brakes. Drying can beimproved by applying light pressure to thebrake pedal while moving slowly.
Note:Driving through deep water maydamage the transmission. If the front or rearaxle is submerged in water, the axlelubricant and power transfer unit lubricantshould be checked and changed ifnecessary.
Driving on Hilly or Sloping Terrain
Although natural obstacles may make itnecessary to travel diagonally up or downa hill or steep incline, you should alwaystry to drive straight up or straight down.
Note:Avoid turning on steep slopes or hills.A danger lies in losing traction, slippingsideways and possible vehicle roll over.Whenever driving on a hill, determinebeforehand the route you will use. Do notdrive over the crest of a hill without seeingwhat conditions are on the other side. Donot drive in reverse over a hill without theaid of an observer.
When climbing a steep slope or hill, startin a lower gear rather than downshifting toa lower gear from a higher gear once theascent has started. This reduces strain onthe engine and the possibility of stalling.
If your vehicle stalls, do not try to turnaround because this could cause vehicleroll over. It is better to reverse back to asafe location.
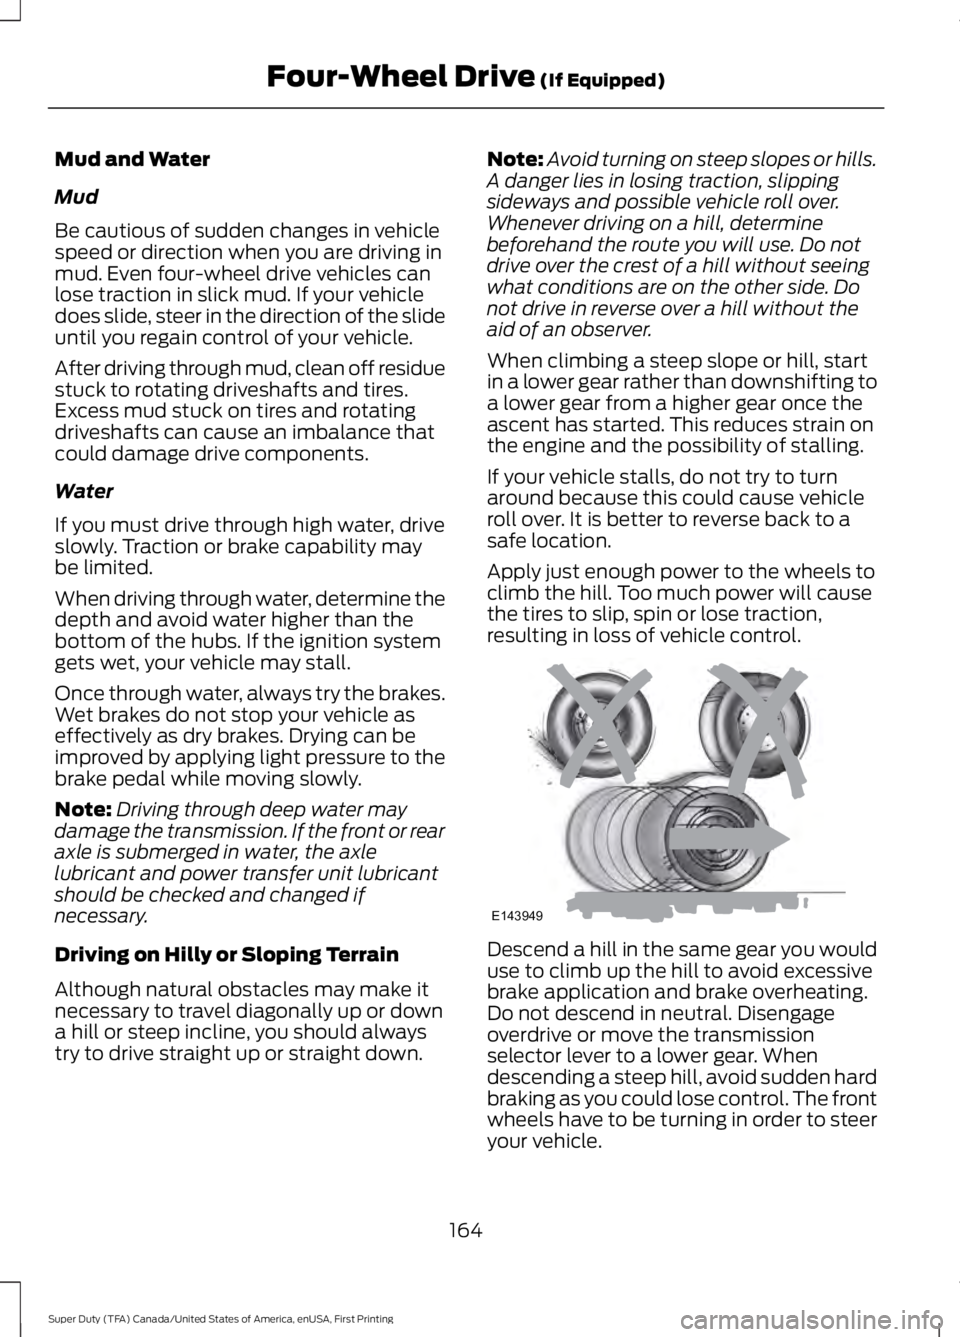
Apply just enough power to the wheels toclimb the hill. Too much power will causethe tires to slip, spin or lose traction,resulting in loss of vehicle control.
Descend a hill in the same gear you woulduse to climb up the hill to avoid excessivebrake application and brake overheating.Do not descend in neutral. Disengageoverdrive or move the transmissionselector lever to a lower gear. Whendescending a steep hill, avoid sudden hardbraking as you could lose control. The frontwheels have to be turning in order to steeryour vehicle.
164
Super Duty (TFA) Canada/United States of America, enUSA, First Printing
Four-Wheel Drive (If Equipped)E143949