2016 FORD F250 SUPER DUTY light
[x] Cancel search: lightPage 133 of 507
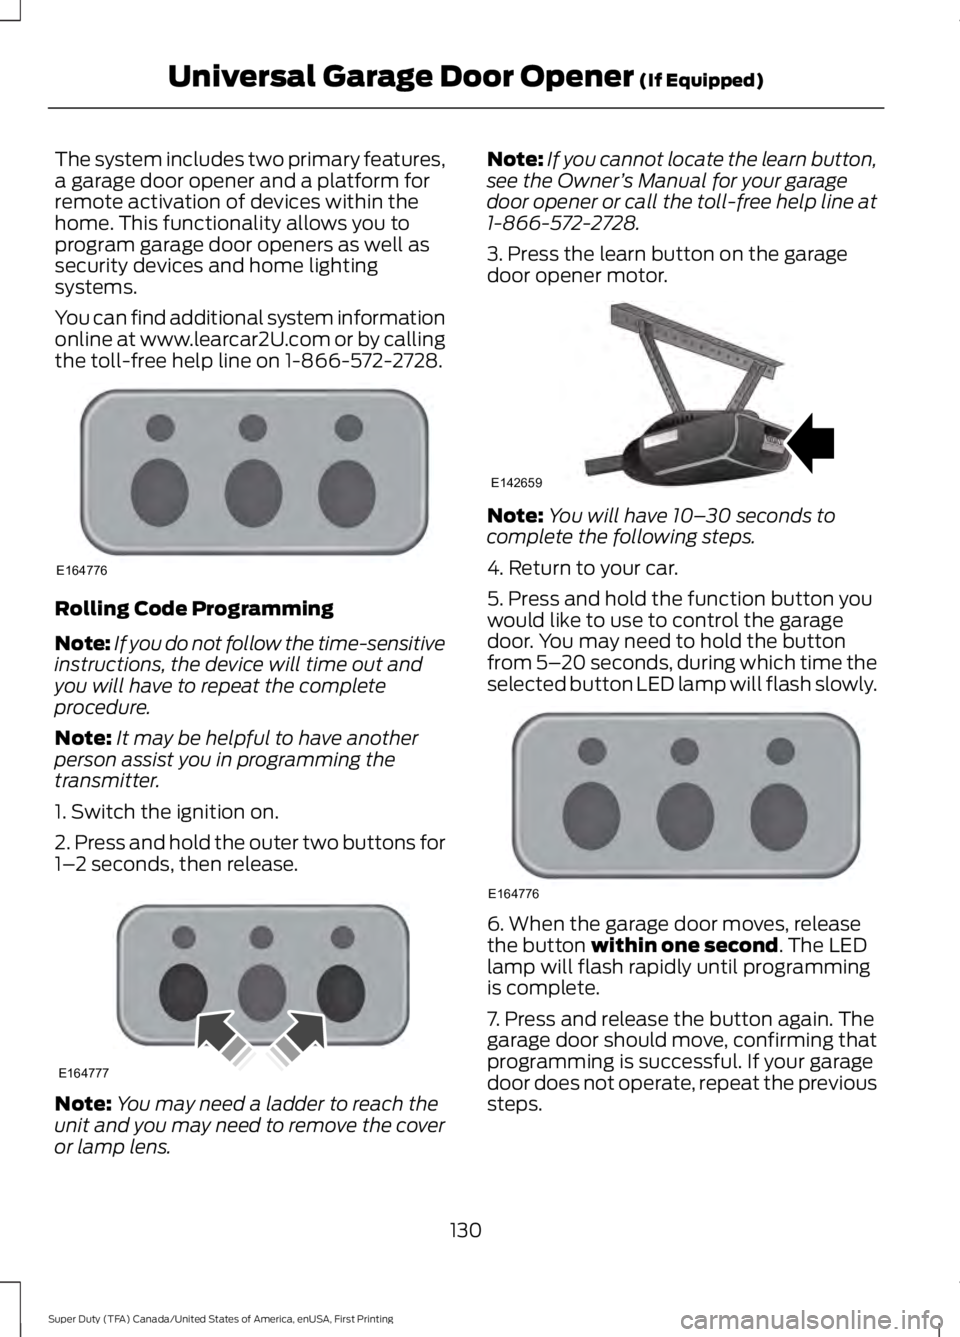
The system includes two primary features,a garage door opener and a platform forremote activation of devices within thehome. This functionality allows you toprogram garage door openers as well assecurity devices and home lightingsystems.
You can find additional system informationonline at www.learcar2U.com or by callingthe toll-free help line on 1-866-572-2728.
Rolling Code Programming
Note:If you do not follow the time-sensitiveinstructions, the device will time out andyou will have to repeat the completeprocedure.
Note:It may be helpful to have anotherperson assist you in programming thetransmitter.
1. Switch the ignition on.
2. Press and hold the outer two buttons for1–2 seconds, then release.
Note:You may need a ladder to reach theunit and you may need to remove the coveror lamp lens.
Note:If you cannot locate the learn button,see the Owner’s Manual for your garagedoor opener or call the toll-free help line at1-866-572-2728.
3. Press the learn button on the garagedoor opener motor.
Note:You will have 10–30 seconds tocomplete the following steps.
4. Return to your car.
5. Press and hold the function button youwould like to use to control the garagedoor. You may need to hold the buttonfrom 5–20 seconds, during which time theselected button LED lamp will flash slowly.
6. When the garage door moves, releasethe button within one second. The LEDlamp will flash rapidly until programmingis complete.
7. Press and release the button again. Thegarage door should move, confirming thatprogramming is successful. If your garagedoor does not operate, repeat the previoussteps.
130
Super Duty (TFA) Canada/United States of America, enUSA, First Printing
Universal Garage Door Opener (If Equipped)E164776 E164777 E142659 E164776
Page 136 of 507
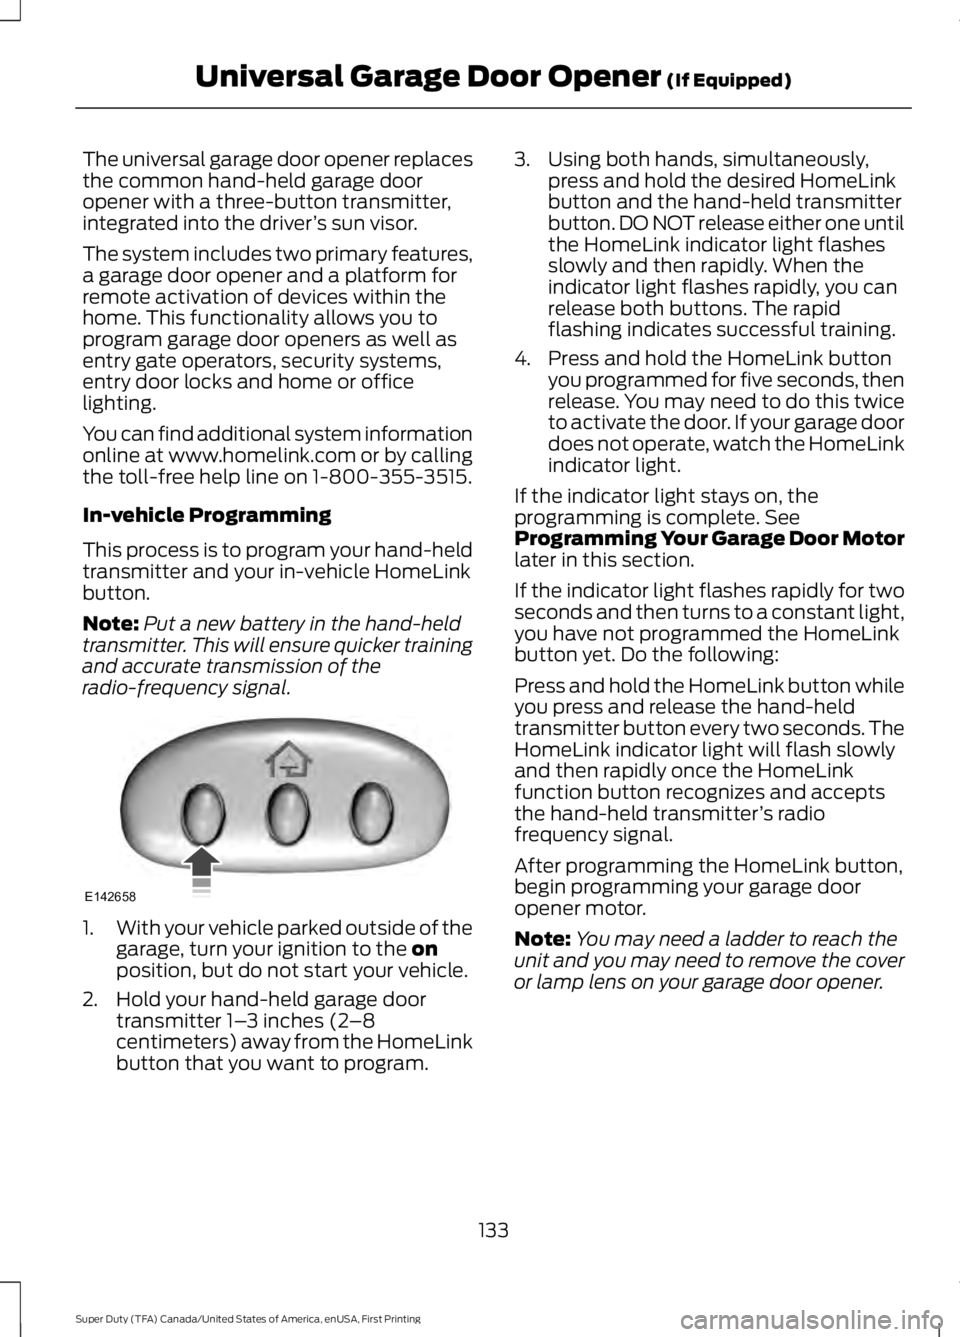
The universal garage door opener replacesthe common hand-held garage dooropener with a three-button transmitter,integrated into the driver’s sun visor.
The system includes two primary features,a garage door opener and a platform forremote activation of devices within thehome. This functionality allows you toprogram garage door openers as well asentry gate operators, security systems,entry door locks and home or officelighting.
You can find additional system informationonline at www.homelink.com or by callingthe toll-free help line on 1-800-355-3515.
In-vehicle Programming
This process is to program your hand-heldtransmitter and your in-vehicle HomeLinkbutton.
Note:Put a new battery in the hand-heldtransmitter. This will ensure quicker trainingand accurate transmission of theradio-frequency signal.
1.With your vehicle parked outside of thegarage, turn your ignition to the onposition, but do not start your vehicle.
2. Hold your hand-held garage doortransmitter 1–3 inches (2–8centimeters) away from the HomeLinkbutton that you want to program.
3. Using both hands, simultaneously,press and hold the desired HomeLinkbutton and the hand-held transmitterbutton. DO NOT release either one untilthe HomeLink indicator light flashesslowly and then rapidly. When theindicator light flashes rapidly, you canrelease both buttons. The rapidflashing indicates successful training.
4. Press and hold the HomeLink buttonyou programmed for five seconds, thenrelease. You may need to do this twiceto activate the door. If your garage doordoes not operate, watch the HomeLinkindicator light.
If the indicator light stays on, theprogramming is complete. SeeProgramming Your Garage Door Motorlater in this section.
If the indicator light flashes rapidly for twoseconds and then turns to a constant light,you have not programmed the HomeLinkbutton yet. Do the following:
Press and hold the HomeLink button whileyou press and release the hand-heldtransmitter button every two seconds. TheHomeLink indicator light will flash slowlyand then rapidly once the HomeLinkfunction button recognizes and acceptsthe hand-held transmitter’s radiofrequency signal.
After programming the HomeLink button,begin programming your garage dooropener motor.
Note:You may need a ladder to reach theunit and you may need to remove the coveror lamp lens on your garage door opener.
133
Super Duty (TFA) Canada/United States of America, enUSA, First Printing
Universal Garage Door Opener (If Equipped)E142658
Page 137 of 507
To program additional buttons, repeatSteps 1 – 4.
For questions or comments, please contactHomeLink at www.homelink.com or1-800-355-3515.
Programming Your Garage DoorOpener Motor
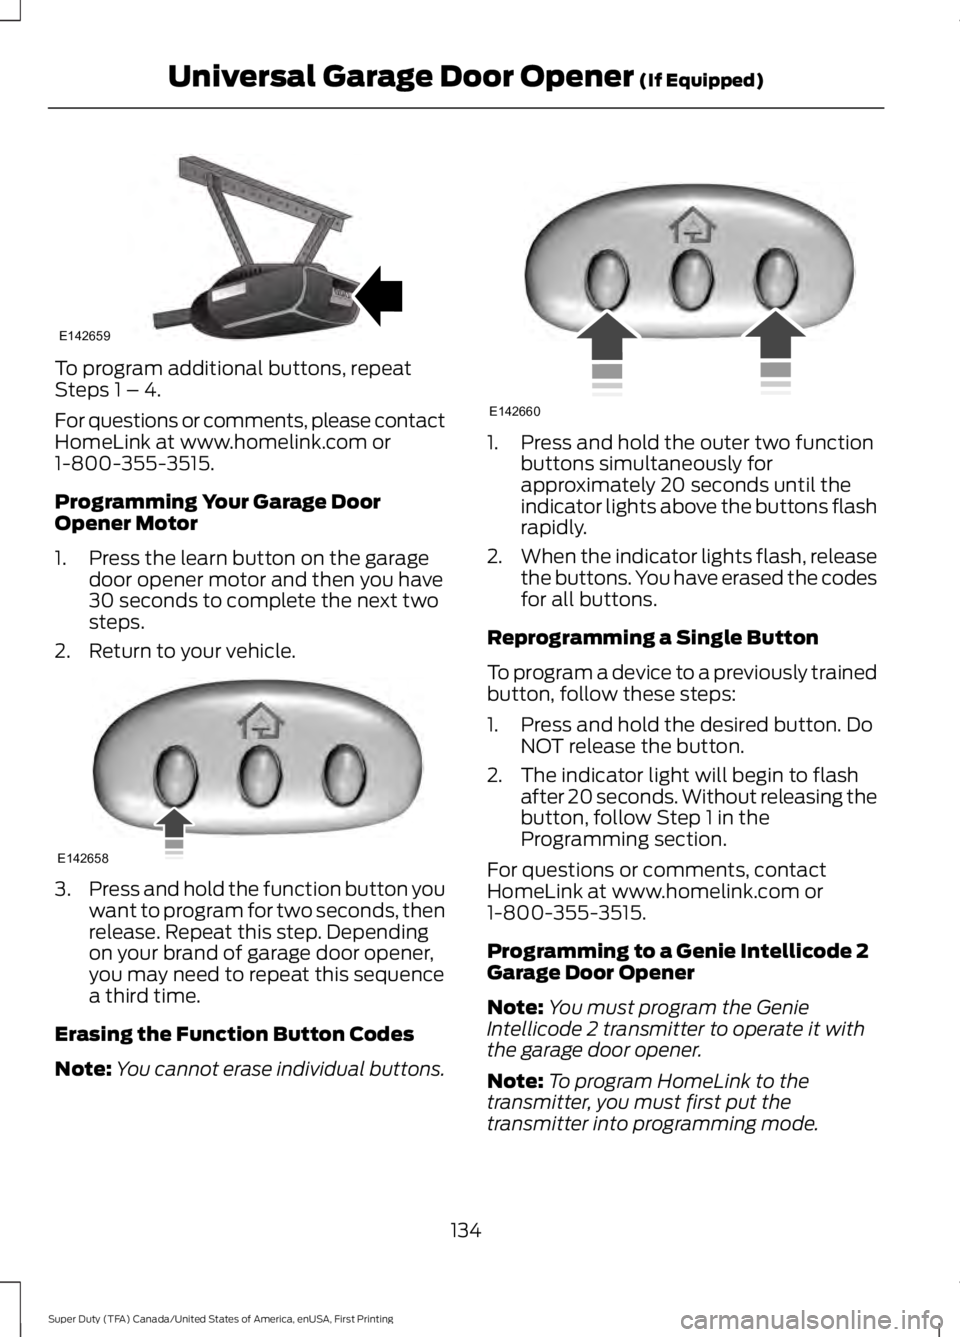
1. Press the learn button on the garagedoor opener motor and then you have30 seconds to complete the next twosteps.
2. Return to your vehicle.
3.Press and hold the function button youwant to program for two seconds, thenrelease. Repeat this step. Dependingon your brand of garage door opener,you may need to repeat this sequencea third time.
Erasing the Function Button Codes
Note:You cannot erase individual buttons.
1. Press and hold the outer two functionbuttons simultaneously forapproximately 20 seconds until theindicator lights above the buttons flashrapidly.
2.When the indicator lights flash, releasethe buttons. You have erased the codesfor all buttons.
Reprogramming a Single Button
To program a device to a previously trainedbutton, follow these steps:
1. Press and hold the desired button. DoNOT release the button.
2. The indicator light will begin to flashafter 20 seconds. Without releasing thebutton, follow Step 1 in theProgramming section.
For questions or comments, contactHomeLink at www.homelink.com or1-800-355-3515.
Programming to a Genie Intellicode 2Garage Door Opener
Note:You must program the GenieIntellicode 2 transmitter to operate it withthe garage door opener.
Note:To program HomeLink to thetransmitter, you must first put thetransmitter into programming mode.
134
Super Duty (TFA) Canada/United States of America, enUSA, First Printing
Universal Garage Door Opener (If Equipped)E142659 E142658 E142660
Page 138 of 507
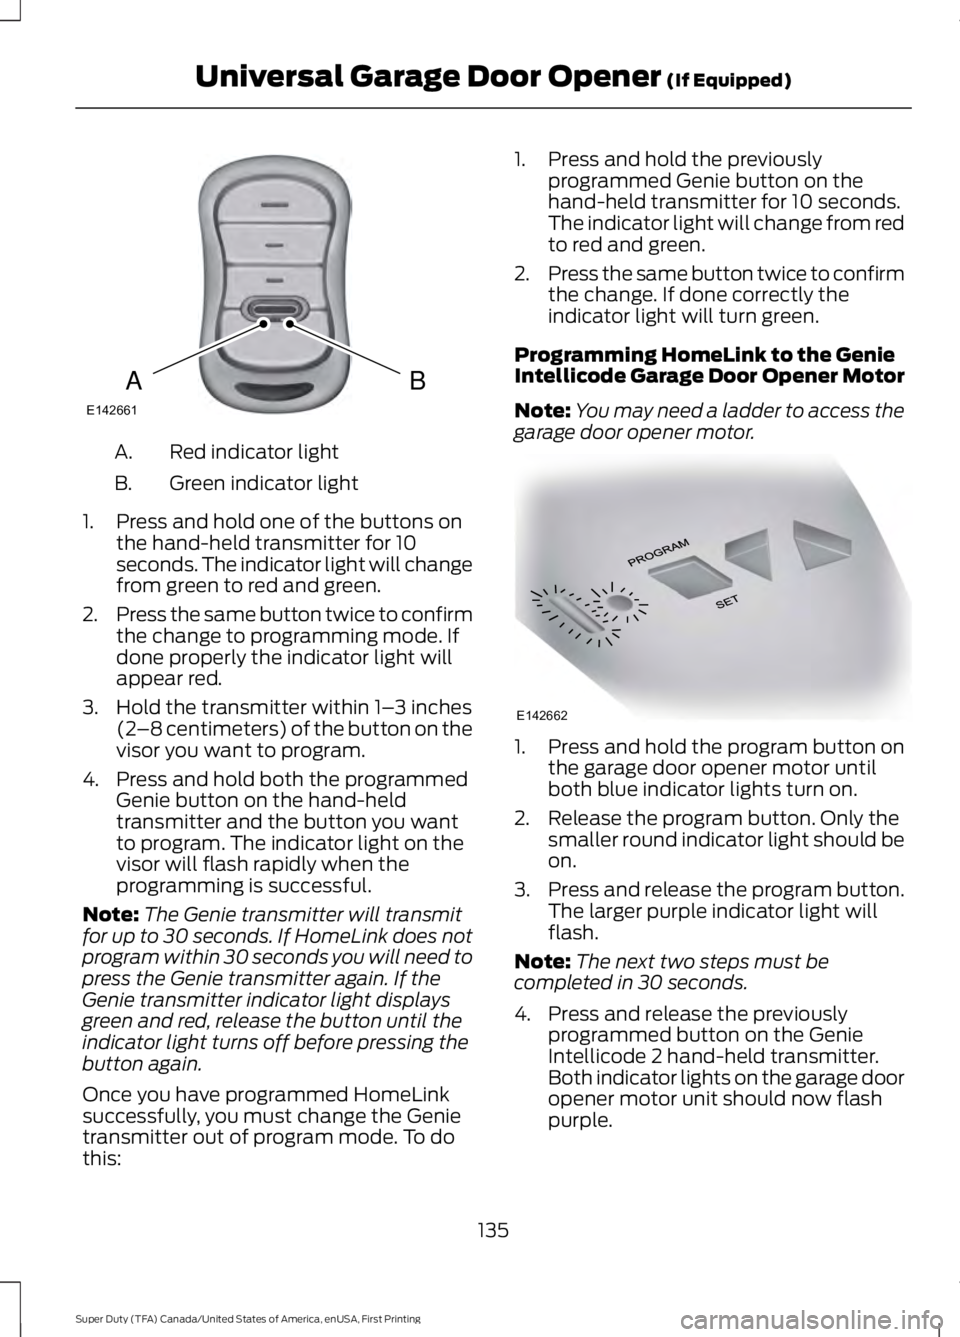
Red indicator lightA.
Green indicator lightB.
1. Press and hold one of the buttons onthe hand-held transmitter for 10seconds. The indicator light will changefrom green to red and green.
2.Press the same button twice to confirmthe change to programming mode. Ifdone properly the indicator light willappear red.
3. Hold the transmitter within 1–3 inches(2–8 centimeters) of the button on thevisor you want to program.
4. Press and hold both the programmedGenie button on the hand-heldtransmitter and the button you wantto program. The indicator light on thevisor will flash rapidly when theprogramming is successful.
Note:The Genie transmitter will transmitfor up to 30 seconds. If HomeLink does notprogram within 30 seconds you will need topress the Genie transmitter again. If theGenie transmitter indicator light displaysgreen and red, release the button until theindicator light turns off before pressing thebutton again.
Once you have programmed HomeLinksuccessfully, you must change the Genietransmitter out of program mode. To dothis:
1. Press and hold the previouslyprogrammed Genie button on thehand-held transmitter for 10 seconds.The indicator light will change from redto red and green.
2.Press the same button twice to confirmthe change. If done correctly theindicator light will turn green.
Programming HomeLink to the GenieIntellicode Garage Door Opener Motor
Note:You may need a ladder to access thegarage door opener motor.
1. Press and hold the program button onthe garage door opener motor untilboth blue indicator lights turn on.
2. Release the program button. Only thesmaller round indicator light should beon.
3.Press and release the program button.The larger purple indicator light willflash.
Note:The next two steps must becompleted in 30 seconds.
4. Press and release the previouslyprogrammed button on the GenieIntellicode 2 hand-held transmitter.Both indicator lights on the garage dooropener motor unit should now flashpurple.
135
Super Duty (TFA) Canada/United States of America, enUSA, First Printing
Universal Garage Door Opener (If Equipped)BAE142661 E142662
Page 139 of 507
5. Press and hold the previouslyprogrammed button on the visor fortwo seconds. Repeat this step up tothree times until the garage doormoves.
Programming is now complete.
Clearing a HomeLink Device
To erase programming from the threeHomeLink buttons press and hold the twoouter HomeLink buttons until the indicatorlight begins to flash. The indicator light willbegin flashing in 10-20 seconds. When thishappens, release both buttons. You havenow erased the programming, and theindicator light should blink slowly toindicate the device is in train mode whenyou press any of the three HomeLinkbuttons.
FCC and RSS-210 Industry CanadaCompliance
This device complies with Part 15 of theFCC Rules and with RSS-210 of IndustryCanada. Operation is subject to thefollowing two conditions: (1) this devicemay not cause harmful interference, and(2) this device must accept anyinterference received, includinginterference that may cause undesiredoperation.
Changes or modifications to your devicenot expressly approved by the partyresponsible for compliance can void theuser’s authority to operate the equipment.
136
Super Duty (TFA) Canada/United States of America, enUSA, First Printing
Universal Garage Door Opener (If Equipped)
Page 140 of 507
12 Volt DC Power Point
WARNING
Do not plug optional electricalaccessories into the cigar lightersocket. Incorrect use of the cigarlighter can cause damage not covered bythe vehicle warranty, and can result in fireor serious injury.
Note:If used when the vehicle is notrunning, the battery will run out of charge.There may be insufficient power to restartyour vehicle.
Note:Do not insert objects other than anaccessory plug into the power point. Thiswill damage the outlet and blow the fuse.
Note:Do not hang any accessory from theaccessory plug.
Note:Do not use the power point over thevehicle capacity of 12 volt DC 180 watts ora fuse may blow.
Note:Do not use a power point foroperating a cigar lighter.
Note:Incorrect use of the power points cancause damage not covered by the vehiclewarranty, and can result in fire or seriousinjury.
Note:Always keep the power point capsclosed when not in use.
Run the vehicle for full capacity use of thepower point. To prevent the battery fromrunning out of charge:
•Do not use the power point longer thannecessary when the vehicle is notrunning.
•Do not leave devices plugged inovernight or when you park your vehiclefor extended periods.
Locations
Power points may be in the followinglocations:
•On the instrument panel.
•Inside the center console.
•On the rear of the center console.
•Inside the front under-seat storagecompartment (if equipped).
•Inside the rear under-seat storagecompartment (if equipped).
110 Volt AC Power Point (If Equipped)
WARNING
Do not keep electrical devicesplugged in the power point wheneverthe device is not in use. Do not useany extension cord with the 110 volt ACpower point, since it will defeat the safetyprotection design. Doing so my cause thepower point to overload due to poweringmultiple devices that can reach beyondthe 150 watt load limit and could result infire or serious injury.
Note:Run the vehicle for full capacity useof the power point.
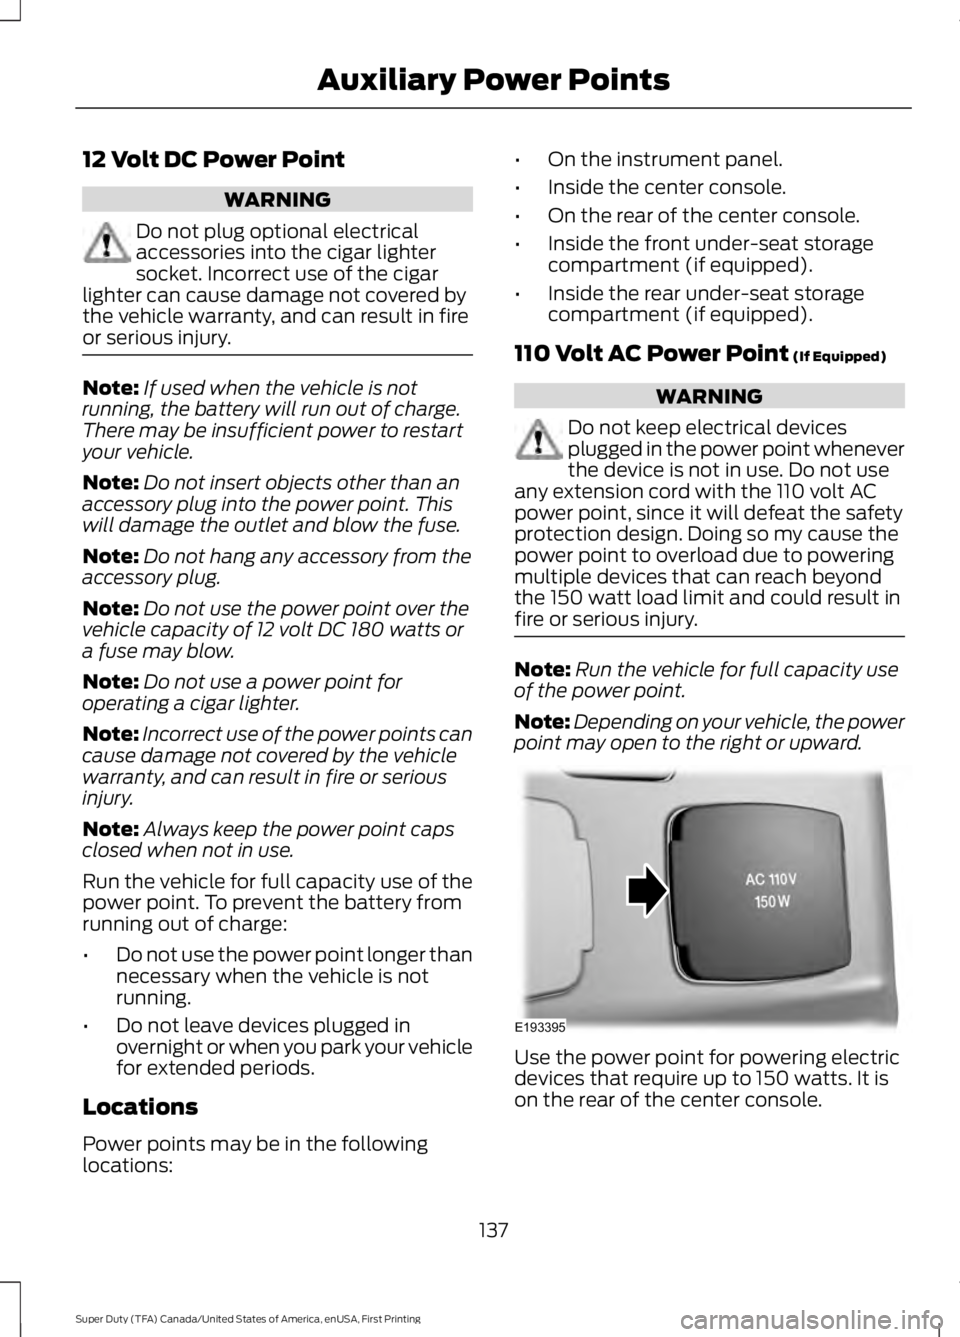
Note:Depending on your vehicle, the powerpoint may open to the right or upward.
Use the power point for powering electricdevices that require up to 150 watts. It ison the rear of the center console.
137
Super Duty (TFA) Canada/United States of America, enUSA, First Printing
Auxiliary Power PointsE193395
Page 141 of 507
When the indicator light on the power pointis:
•On, the power point is working, theignition is on and a device is pluggedin.
•Off, the power point is off, the ignitionis off or no device is plugged in.
•Flashing, the power point is in faultmode.
The power outlet temporarily turns offpower when in fault mode if the deviceexceeds the 150 watt limit. Unplug yourdevice and switch the ignition off. Switchthe ignition back on, but do not plug yourdevice back in. Let the system cool off andswitch the ignition off to reset the faultmode. Switch the ignition back on andmake sure the indicator light remains on.
The power point is not designed for electricdevices such as:
•Cathode-ray, tube-type televisions.
•Motor loads, such as vacuum cleaners,electric saws and other electric powertools or compressor-drivenrefrigerators.
•Measuring devices, which processprecise data, such as medicalequipment or measuring equipment.
•Other appliances requiring anextremely stable power supply such asmicrocomputer-controlled electricblankets or touch-sensor lamps.
138
Super Duty (TFA) Canada/United States of America, enUSA, First Printing
Auxiliary Power Points
Page 149 of 507
We recommend regular unleaded gasolinewith a pump (R+M)/2 octane rating of 87.Some stations offer fuels posted as regularwith an octane rating below 87, particularlyin high altitude areas. We do notrecommend fuels with an octane ratingbelow 87.
Do not be concerned if your enginesometimes knocks lightly. However, if itknocks heavily under most drivingconditions while you are using fuel with therecommended octane rating, see yourauthorized dealer to prevent any enginedamage.
RUNNING OUT OF FUEL
Avoid running out of fuel because thissituation may have an adverse effect onengine components.
If you have run out of fuel:
•You may need to cycle the ignition fromoff to on several times after refuelingto allow the fuel system to pump thefuel from the tank to the engine. Onrestarting, cranking time will take a fewseconds longer than normal. Withkeyless ignition, just start the engine.Crank time will be longer than usual.
•Normally, adding 1.06 gal (4 L) of fuelis enough to restart the engine. If thevehicle is out of fuel and on a steepgrade, more than 1.06 gal (4 L) may berequired.
REFUELING
WARNINGS
Fuel vapor burns violently and a fuelfire can cause severe injuries.
Read and follow all the instructionson the pump island.
WARNINGS
Turn off your engine when you arerefueling.
Do not smoke if you are near fuel orrefueling your vehicle.
Keep sparks, flames and smokingmaterials away from fuel.
Stay outside your vehicle and do notleave the fuel pump unattendedwhen refueling your vehicle. This isagainst the law in some places.
Keep children away from the fuelpump; never let children pump fuel.
Do not use personal electronicdevices while refueling.
Wait at least 10 seconds beforeremoving the fuel pump nozzle toallow any residual fuel to drain intothe fuel tank.
Stop refueling after the fuel pumpnozzle automatically shuts off for thesecond time. Failure to follow thiswill fill the expansion space in the fuel tankand could lead to fuel overflowing.
Do not remove the fuel pump nozzlefrom its fully inserted position whenrefueling.
Use the following guidelines to avoidelectrostatic charge build-up when fillingan ungrounded fuel container:
•Place approved fuel container on theground.
•Do not fill a fuel container while it is inthe vehicle (including the cargo area).
•Keep the fuel pump nozzle in contactwith the fuel container while filling.
•Do not use a device that would holdthe fuel pump handle in the fill position.
146
Super Duty (TFA) Canada/United States of America, enUSA, First Printing
Fuel and Refueling