2016 FORD EXPEDITION EL steering
[x] Cancel search: steeringPage 124 of 421
HEATED WINDOWS AND
MIRRORS
Heated Rear Window
Note:Make sure the engine is runningbefore operating the heated windows.
Press the button to clear theheated rear window of thin iceand fog. The heated rear windowwill automatically turn off after a shortperiod of time. Start the engine before youswitch the heated rear window on.
Note:Do not use razor blades or othersharp objects to clean or remove decalsfrom the inside of the heated rear window.The vehicle warranty does not coverdamage caused to the heated rear windowgrid lines.
Heated Exterior Mirror (If Equipped)
When you switch the heated rear windowon, the heated exterior mirrors willautomatically turn on.
Note:Do not remove ice from the mirrorswith a scraper or adjust the mirror glasswhen it is frozen in place.
Note:Do not clean the mirror housing orglass with harsh abrasives, fuel or otherpetroleum-based cleaning products.
REMOTE START (If Equipped)
The remote start feature allows you topre-condition the interior of your vehicle.The climate control system works toachieve comfort according to your previoussettings.
Note:You cannot adjust the system duringremote start operation.
Turn the ignition on to return the systemto its previous settings. You can now makeadjustments normally, but you need to turncertain vehicle-dependent features backon, such as:
•Heated seats.
•Cooled seats.
•Heated steering wheel.
•Heated mirrors.
•Heated rear window.
You can adjust the default remote startsettings using the information displaycontrols. See Information Displays(page 92).
Automatic Settings
In hot weather, the system is set to 72°F(22°C). The cooled seats are set to high(if available, and selected to AUTO in theinformation display).
In moderate weather, the system eitherheats or cools (based on previoussettings). The rear defroster, heatedmirrors and heated seats do notautomatically turn on.
In cold weather, the system is set to 72°F(22°C). The heated seats are set to high(if available, and selected to AUTO in theinformation display). The rear defrosterand heated mirrors automatically turn on.
121
Expedition (TB7) Canada/United States of America, enUSA, First Printing
Climate ControlE184884
Page 125 of 421
SITTING IN THE CORRECT
POSITION
WARNINGS
Sitting improperly, out of position orwith the seatback reclined too farcan take weight off the seat cushionand affect the decision of the passengersensing system, resulting in serious injuryor death in the event of a crash. Always situpright against your seat back, with yourfeet on the floor.
Do not recline the seatback as thiscan cause the occupant to slideunder the safety belt, resulting inserious injury in the event of a crash.
Do not place objects higher than theseatback to reduce the risk of seriousinjury in the event of a crash or duringheavy braking.
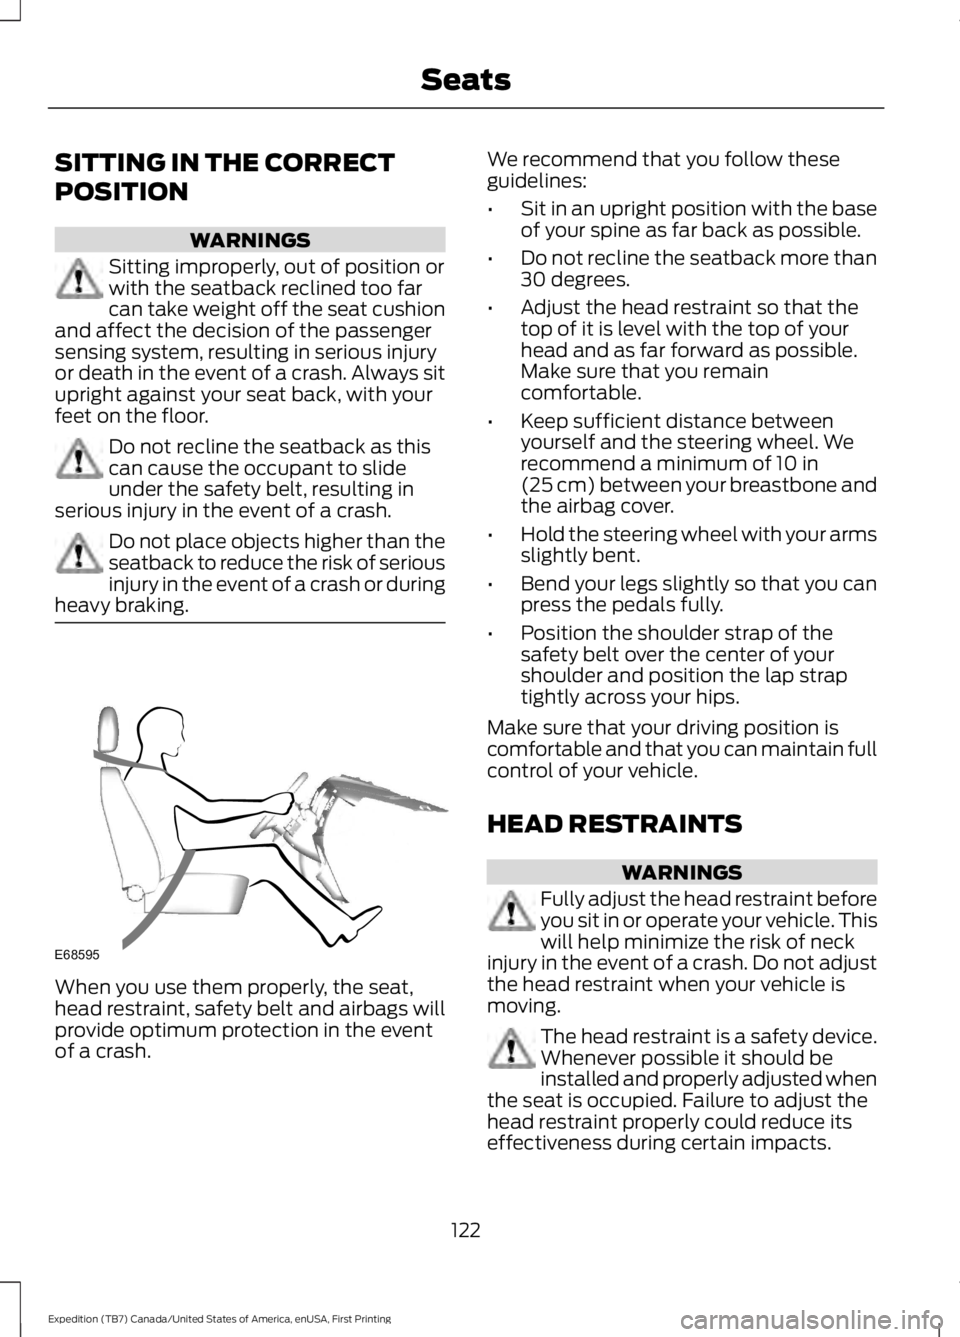
When you use them properly, the seat,head restraint, safety belt and airbags willprovide optimum protection in the eventof a crash.
We recommend that you follow theseguidelines:
•Sit in an upright position with the baseof your spine as far back as possible.
•Do not recline the seatback more than30 degrees.
•Adjust the head restraint so that thetop of it is level with the top of yourhead and as far forward as possible.Make sure that you remaincomfortable.
•Keep sufficient distance betweenyourself and the steering wheel. Werecommend a minimum of 10 in(25 cm) between your breastbone andthe airbag cover.
•Hold the steering wheel with your armsslightly bent.
•Bend your legs slightly so that you canpress the pedals fully.
•Position the shoulder strap of thesafety belt over the center of yourshoulder and position the lap straptightly across your hips.
Make sure that your driving position iscomfortable and that you can maintain fullcontrol of your vehicle.
HEAD RESTRAINTS
WARNINGS
Fully adjust the head restraint beforeyou sit in or operate your vehicle. Thiswill help minimize the risk of neckinjury in the event of a crash. Do not adjustthe head restraint when your vehicle ismoving.
The head restraint is a safety device.Whenever possible it should beinstalled and properly adjusted whenthe seat is occupied. Failure to adjust thehead restraint properly could reduce itseffectiveness during certain impacts.
122
Expedition (TB7) Canada/United States of America, enUSA, First Printing
SeatsE68595
Page 129 of 421
2. Continue pressing the control until itreaches the end of the seat track.
3.Continue pressing the control for abouttwo seconds. You will feel the seatbounce back slightly.
Power Lumbar (If Equipped)
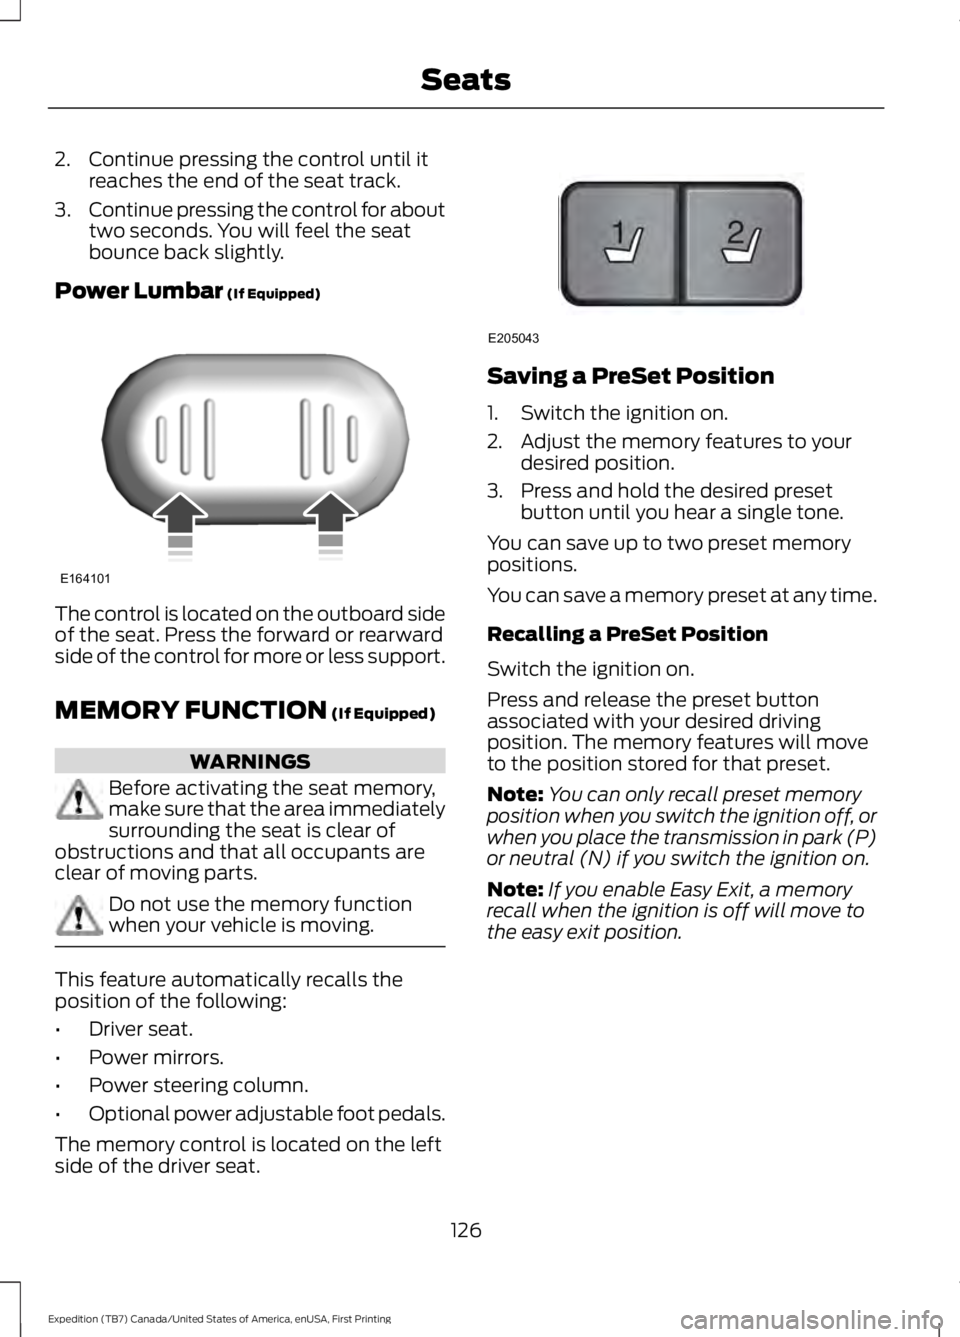
The control is located on the outboard sideof the seat. Press the forward or rearwardside of the control for more or less support.
MEMORY FUNCTION (If Equipped)
WARNINGS
Before activating the seat memory,make sure that the area immediatelysurrounding the seat is clear ofobstructions and that all occupants areclear of moving parts.
Do not use the memory functionwhen your vehicle is moving.
This feature automatically recalls theposition of the following:
•Driver seat.
•Power mirrors.
•Power steering column.
•Optional power adjustable foot pedals.
The memory control is located on the leftside of the driver seat.
Saving a PreSet Position
1. Switch the ignition on.
2. Adjust the memory features to yourdesired position.
3. Press and hold the desired presetbutton until you hear a single tone.
You can save up to two preset memorypositions.
You can save a memory preset at any time.
Recalling a PreSet Position
Switch the ignition on.
Press and release the preset buttonassociated with your desired drivingposition. The memory features will moveto the position stored for that preset.
Note:You can only recall preset memoryposition when you switch the ignition off, orwhen you place the transmission in park (P)or neutral (N) if you switch the ignition on.
Note:If you enable Easy Exit, a memoryrecall when the ignition is off will move tothe easy exit position.
126
Expedition (TB7) Canada/United States of America, enUSA, First Printing
SeatsE164101 21
E205043
Page 130 of 421
You can also recall a preset memoryposition by:
•Pressing the unlock button on yourremote control if it is linked to a presetposition.
•Unlocking the intelligent driver doorhandle if a linked key fob is present.
•Entering a personal entry code on theSecuricode keypad. See Locks (page53).
Note:Using a linked key fob to recall yourmemory position when the ignition is offmoves the seat and steering column to theEasy Entry position.
Note:Pressing any active memory featurecontrol - power seat, mirror (or steeringcolumn switch) (or any memory button)during a memory recall cancels theoperation.
Linking a PreSet Position to yourRemote Control or Intelligent AccessKey Fob
Your vehicle can save the preset memorypositions for up to two remote controls.
1.With the ignition on, move the memorypositions to the desired positions.
2. Press and hold the desired presetbutton for about five seconds. A tonewill sound after about two seconds.Continue holding until a second toneis heard.
3. Within three seconds, press the lockbutton on the remote control you arelinking.
To unlink a remote control, follow thesame procedure – except in step 3, pressthe unlock button on the remote control.
Note:If more than one linked remotecontrol or intelligent access key is in range,the memory function moves to the settingsof the first key to initiate a memory recall.
Easy Entry and Exit Feature (If
Equipped)
This feature adjusts the position of the seatand steering column to allow easier exitand entry to the vehicle.
The driver seat automatically moves 2inches (5 centimeters) rearward when thetransmission is in park (P) and you removethe key from the ignition or you switch theignition off.
The driver seat returns to the previousposition when you put the key in theignition or switch the ignition on.
You can enable or disable this feature inthe information display. See InformationDisplays (page 92).
REAR SEATS
Folding Down the Second Row40% Seat
WARNINGS
Use caution when folding theseatback to the flat back position asthe system will move forward whenyou lift the release handle.
Before returning the seatback to itsoriginal position, make sure thatcargo or any objects are not trappedbehind the seatback. After returning theseatback to its original position, pull on theseatback to make sure that it has fullylatched. An unlatched seat may becomedangerous in the event of a sudden stopor crash.
Make sure that the head restraint is in thedown position and no objects such asbooks, purses or briefcases are on the floorin front of the second row seats beforefolding them down.
127
Expedition (TB7) Canada/United States of America, enUSA, First Printing
Seats
Page 151 of 421
Automatic Engine Shutdown
For vehicles with a keyless ignition, thisfeature automatically shuts down theengine if it has been idling for an extendedperiod. The ignition also turns off in orderto save battery power. Before your vehicleshuts down, a message appears in theinformation display showing a timercounting down from 30 seconds. If you donot intervene within 30 seconds, yourvehicle shuts down. Another messageappears in the information display toinform you that your vehicle has shut downto save fuel. Start your vehicle as younormally do.
Automatic Engine Shutdown Override
Note:You cannot permanently switch offthe automatic shutdown feature. When youswitch it off temporarily, it turns on at thenext ignition cycle.
You can stop the shutdown, or reset thetimer, at any point before the 30-secondcountdown has expired by doing any of thefollowing:
•You can reset the timer by interactingwith your vehicle, for example pressingthe brake or accelerator pedal.
•You can temporarily switch off theshutdown feature any time the ignitionis on using the information display. SeeInformation Displays (page 92). Thefeature only remains off for the currentignition cycle.
•During the 30-second countdown, thesystem prompts you to press OK orRESET to temporarily switch thefeature off for the current ignition cycleonly.
Stopping the Engine When YourVehicle is Stationary
Vehicles with an Ignition Key
1. Shift into park (P).
2. Switch the ignition off.
3. Apply the parking brake.
Vehicles with Keyless Start
1. Shift into park (P).
2. Press the push button ignition switch.
3. Apply the parking brake.
Note:The ignition, all electrical circuits andall warning lamps and indicators will beturned off.
Note:If the engine is idling for 30 minutes,the ignition and engine automatically shutdown.
Stopping the Engine When YourVehicle is Moving
WARNING
Switching off the engine when thevehicle is still moving will result in aloss of brake and steering assistance.The steering will not lock, but higher effortwill be required. When the ignition isswitched off, some electrical circuits,including air bags, warning lamps andindicators may also be off. If the ignitionwas turned off accidentally, you can shiftinto neutral (N) and re-start the engine.
Vehicles with an Ignition Key
1.Shift into neutral and use the brakes tobring your vehicle to a safe stop.
2. When your vehicle has stopped, shiftinto park (P) and switch the ignitionoff.
3. Apply the parking brake.
Vehicles with Keyless Start
1.Shift into neutral and use the brakes tobring your vehicle to a safe stop.
2. When your vehicle has stopped, shiftinto park (P).
148
Expedition (TB7) Canada/United States of America, enUSA, First Printing
Starting and Stopping the Engine
Page 165 of 421
Brake-Shift Interlock
WARNINGS
Do not drive your vehicle until youverify that the brake lamps areworking.
When doing this procedure, you willbe taking your vehicle out of park (P)which means your vehicle can rollfreely. To avoid unwanted vehiclemovement, always fully set the parkingbrake prior to doing this procedure. Usewheel chocks if appropriate.
If you fully release the parking brakeand the brake warning lamp remainsilluminated, the brakes may not beworking properly. See your authorizeddealer.
Your vehicle is equipped with a brake-shiftinterlock feature that prevents moving thegearshift lever from park (P) when theignition is in the on position and the brakepedal is not pressed.
If you cannot move the gearshift lever outof park (P) position with the ignition in theon position and the brake pedal pressed,a malfunction may have occurred. It ispossible that a fuse has blown or yourvehicle’s brake lamps are not operatingproperly. See Fuse Specification Chart(page 234).
If the fuse is not blown and the brakelamps are working properly, the followingprocedure will allow you to move thegearshift lever from park (P):
Column-shifter
1. Apply the parking brake. Turn theignition key to the off position, thenremove the key.
2. Move the steering column to the fulldown and full rearward position(toward the driver’s seat).
3. Remove the gearshift lever boot.
4. Place fingers into gearshift lever boothole and pull top half of shroud up andforward to separate it from the lowerhalf of the shroud. There is a hinge atthe forward edge of the top shroud.Roll the top half of the shroud upwardon the hinge point to clear the hazardflasher button, then pull straightrearward toward the driver’s seat toremove.
5. Remove the top half of the shroud.
6. Remove the three fasteners under thecolumn that secure the lower shroudhalf to the column.
7.Pull the lock lever into the full unlockedposition and remove the lower shroudcover by pulling the lever handlethrough the slot in the cover.
162
Expedition (TB7) Canada/United States of America, enUSA, First Printing
TransmissionE163185 E163186
Page 169 of 421
3. Move the 4WD switch to the desiredmode.
The information display will display amessage indicating a 4X4 shift is inprogress. The information display will thendisplay the system mode selected.
If any of the above shift conditions are notmet, the shift will not occur and theinformation display will display informationguiding the driver through the proper rangeof shifting procedures.
If SHIFT DELAYED PULL FORWARD isdisplayed in the information display,transfer case gear tooth blockage ispresent. To alleviate this condition, placethe transmission in a forward gear, movethe vehicle forward approximately 5 ft(2 m), and shift the transmission back toneutral (N) to allow the transfer case tocomplete the range shift.
How Your Vehicle Differs FromOther Vehicles
WARNING
Vehicles with a higher center ofgravity such as utility and four-wheeldrive vehicles handle differently thanvehicles with a lower center of gravity.Utility and four-wheel drive vehicles arenot designed for cornering at speeds ashigh as passenger cars any more thanlow-slung sports cars are designed toperform satisfactorily under off-roadconditions. Avoid sharp turns, excessivespeed and abrupt maneuvers in thesevehicles. Failure to drive cautiously couldresult in an increased risk of loss of vehiclecontrol, vehicle rollover, personal injury anddeath.
Truck and utility vehicles can differ fromsome other vehicles. Your vehicle may behigher to allow it to travel over roughterrain without getting hung up ordamaging underbody components.
The differences that make your vehicle soversatile also make it handle differentlythan an ordinary passenger car.
Maintain steering wheel control at alltimes, especially in rough terrain. Sincesudden changes in terrain can result inabrupt steering wheel motion, make sureyou grip the steering wheel from theoutside. Do not grip the spokes.
Drive cautiously to avoid vehicle damagefrom concealed objects such as rocks andstumps.
You should either know the terrain orexamine maps of the area before driving.Map out your route before driving in thearea. To maintain steering and brakingcontrol of your vehicle, you must have allfour wheels on the ground and they mustbe rolling, not sliding or spinning.
Driving Off-Road With Truck andUtility Vehicles
Note:On some models, the initial shift fromtwo-wheel drive to four-wheel drive whileyour vehicle is moving can cause somemomentary clunk and ratcheting sounds.This is the front drivetrain coming up tospeed and the automatic locking hubsengaging and is not cause for concern.
Note:Your vehicle may be equipped witha front air dam that can become damaged(due to reduced ground clearance) whentaking your vehicle off-road. You mayremove this air dam by removing eight bolts.
Four-wheel drive vehicles are speciallyequipped for driving on sand, snow, mudand rough terrain and have operatingcharacteristics that are somewhatdifferent from conventional vehicles, bothon and off the road.
166
Expedition (TB7) Canada/United States of America, enUSA, First Printing
Four-Wheel Drive (If Equipped)
Page 170 of 421
The transfer case supples power to all fourwheels. On four-wheel drive vehicles, thetransfer case allows you to select different4WD modes when necessary. You can findinformation on transfer case operation andshifting procedures in this chapter. You canfind information on transfer casemaintenance in the Maintenance chapter.You should become thoroughly familiarwith this information before you operateyour vehicle.
Four-wheel drive (when you select a 4WDmode) uses all four wheels to power yourvehicle. This increases traction, enablingyou to drive over terrain and roadconditions that a conventional two-wheeldrive vehicle cannot.
Basic Operating Principles
•Do not use 4H or 4L on dry, hardsurfaced roads. Doing so will produceexcessive noise, increase tire wear andmay damage drive components. 4H or4L modes are only intended forconsistently slippery or loose surfaces.
•Drive slower in strong crosswinds whichcan affect the normal steeringcharacteristics of your vehicle.
•When driving your vehicle on surfacesmade slippery by loose sand, water,gravel, snow or ice proceed with care.
If Your Vehicle leaves the Road
If your vehicle leaves the road, reduce yourvehicle speed and avoid severe braking.When your vehicle speed decreases, easeyour vehicle back onto the road. Do notturn the steering wheel sharply whilereturning your vehicle to the road.
It may be safer to stay on the shoulder ofthe road and slow down gradually beforereturning to the road. You may lose controlif you do not slow down or if you turn thesteering wheel too sharply or abruptly.
It may be less risky to strike small objects,such as freeway reflectors, with minordamage to your vehicle rather thanattempt a sudden return to the road whichcould cause your vehicle to slide sidewaysout of control or roll over. Remember, yoursafety and the safety of others should beyour primary concern.
If your vehicle gets stuck
WARNING
Do not spin the wheels at over 35mph (56 km/h). The tires may failand injure a passenger or bystander.
Note:Do not rock your vehicle if the engineis not at normal operating temperature,damage to the transmission may occur.
Note:Do not rock your vehicle for morethan a minute, damage to the transmissionand tires may occur or the engine mayoverheat.
If your vehicle gets stuck in mud or snow itmay be rocked out by shifting betweenforward and reverse gears, stoppingbetween shifts, in a steady pattern. Presslightly on the accelerator in each gear.
Emergency Maneuvers
In an unavoidable emergency situationwhere a sudden sharp turn must be made,remember to avoid over-driving yourvehicle (i.e. turn the steering wheel only asrapidly and as far as required to avoid theemergency). Excessive steering can resultin loss of vehicle control. Apply smoothpressure to the accelerator pedal or brakepedal when changes in vehicle speed arerequired. Avoid abrupt steering,acceleration and braking. This could resultin an increased risk of vehicle roll over, lossof vehicle control and personal injury. Useall available road surface to bring yourvehicle to a safe direction of travel.
167
Expedition (TB7) Canada/United States of America, enUSA, First Printing
Four-Wheel Drive (If Equipped)