Page 17 of 204

fig. 11 to fold the required backrest
section.
Total luggage compartment
extension
Tilting the rear seat completely forwards
allows maximum loading volume.
Proceed as follows:
completely lower the rear seat head
restraints;
operate release devices 1 to fold
both the right and the left backrest
section, following as previously
described.
Repositioning the backrests
13)
Raise the backrests and push them
back until the locking click of both
retainers is heard. Visually check that
the red marks have disappeared from
the release devices 1 fig. 11. The
presence of the red notches indicatesthat the backrest is not secured. In the
left buckle (without the red unlock
button on the slot) insert the first tongue
which is located at the end of the
diagonal section of the seat belt of the
central seat.
IMPORTANT When returning the rear
seat from the tilted position to the
normal operating position, take care to
refit the seat belt correctly, in order to
guarantee prompt availability every
time.
WARNING
11)All adjustments must be made with the
car stationary.
12)Once you have released the
adjustment lever, always check that the
seat is locked on the guides by trying to
move it back and forth. If the seat is not
locked into place, it may unexpectedly slide
and cause the driver to lose control of the
car.
13)Make sure the backrests are properly
secured at both sides (not visible "red
notches) to prevent them from moving
forward, in the event of sharp braking, with
possible impact with of the passengers.14)People who can't feel skin pain due to
advanced age, chronic diseases, diabetes,
spine damage, medication, alcohol,
exhaustion, or other physical conditions,
must be careful when using the seat
heater. It could cause burns even at a low
temperature, especially when used for long
periods of time.
15)Do not place objects on the seat or on
the backrest that may isolate the heat,
such as a cover or a pillow. It may cause
the seat heating device to overheat. Sitting
on an overheated seat may cause severe
burns due to the increase in temperature of
the seat surface.
IMPORTANT
4)The fabric upholstery of the seats has
been designed to withstand long-term wear
deriving from normal use of the car. Some
precautions are however required. Avoid
prolonged and/or excessive rubbing
against clothing accessories such as metal
buckles and Velcro strips which, by
applying a high pressure on the fabric in a
small area, could cause it to break, thereby
damaging the upholstery.
1104066J0007EM
15
operate release device 1 (right or left)
Page 18 of 204

Adjustment
They can be adjusted to 4 height
positions (completely raised / 2
intermediate positions / completely
lowered).
Upward adjustment: raise the head
restrai")
HEADRESTS
FRONT HEAD
RESTRAINTS
16)
Adjustment
They can be adjusted to 4 height
positions (completely raised / 2
intermediate positions / completely
lowered).
Upward adjustment: raise the head
restraint until it clicks into place.
Downward adjustment: press button 1
fig. 12 and lower the head restraint.
Removal
Proceed as follows to remove the head
restraint:
tilt the backrest (to prevent it from
coming into contact with the roof);
press both buttons 1 and 2 fig. 12 atthe side of the two supports, then
remove the head restraint.
IMPORTANT Always reposition the
head restraints if they have been
removed before starting to drive
normally.
REAR HEAD RESTRAINTS
16)
Adjustment
Two side and one central head
restraints (where provided) can be
height-adjusted to 3 positions
(completely raised / intermediate /
completely lowered) are provided for
the rear seats
Upward adjustment: raise the head
restraint until it clicks into place.
On some versions, the label shown in
fig. 13 reminds the passenger using therear central seat to correctly adjust the
head restraint by lifting it up to one of
the two possible positions.
IMPORTANT To permit maximum
visibility for the driver, if the head
restraints are not used, they are moved
to the rest position: fully down.
Downward adjustment: press button 1
fig. 14 and lower the head restraint.
Removal
Proceed as follows to remove the head
restraint:
raise the head restraint to its
maximum height;
press buttons 1 and 2 fig. 14 at the
side of the two supports, then remove
the head restraint.
For versions with folding rear backrests,
use the release device to fold the
1204076J0001EM
1304076J0002EM
1404076J0003EM
16
KNOWING YOUR CAR
Page 19 of 204
He")
backrests approx. 45 degrees to make
it easier to remove the head restraints.
IMPORTANT Always reposition the
head restraints if they have been
removed before starting to drive
normally.
WARNING
16)Head restraints must be adjusted so
that the head, rather than the neck, rests
on them. Only in this case they can protect
your head correctly. Any removed head
restraints must be repositioned correctly, in
order to protect the occupants in the event
of impact: follow the instructions above.
STEERING WHEEL
17) 18)
ADJUSTMENTS
The steering wheel can be adjusted
both in height and axially.
To adjust the position bring the lever 1
fig. 15 down to position B after which
the steering wheel can be adjusted to
the most suitable position and
subsequently locked in this position by
bringing lever 1 to position A again.
WARNING
17)All adjustments must be carried out
only with the car stationary and engine
stopped.18)It is absolutely forbidden to carry out
any after-market operation involving
steering system or steering column
modifications (e.g. installation of anti-theft
device) that could adversely affect
performance and safety, invalidate the
warranty and also result in the car not
meeting type-approval requirements.
1504086J0001EM
17
Page 20 of 204

The electroc")
REAR VIEW
MIRRORS
INTERIOR MIRROR
Manual adjustment
Operate lever 1 fig. 16 to adjust the
mirror into two different positions:
normal or anti-glare.
Electrochromic mirror
(where provided)
The electrochromic mirror can
automatically modify its reflecting action
to prevent dazzling the driver fig. 17.
The electrochromic mirror has an
ON/OFF button to activate/deactivate
the electrochromic anti-glare function.When reverse gear is engaged, the
mirror is automatically set for daytime
use.
DOOR MIRRORS
19)
Manual adjustment
From the inside of the vehicle, operate
lever 1 fig. 18 to adjust the mirror.Electric adjustment
The mirrors can only be adjusted with
the ignition device at MAR.
To carry out the adjustment, proceed as
follows:
use switch 1 fig. 19 to select the
mirror (left or right) to be adjusted;
adjust the mirror by moving the
switch 2 fig. 19 in the four directions.
Manual folding
When required (for example when the
shape causes difficulty in narrow
spaces), it is possible to fold the mirrors
by moving them from position A to
position B fig. 20.
1604106J0001EM
1704106J0002EM
1804106J0006EM
1904106J0003EM
18
KNOWING YOUR CAR
Page 21 of 204
 on the central dashboard
panel activates the demisting/defrosting
of the external rear view mirrors.
WARNING
19)As the drivers door mirror is curved, i")
Heated
Pressing the
button (heated rear
window) on the central dashboard
panel activates the demisting/defrosting
of the external rear view mirrors.
WARNING
19)As the driver's door mirror is curved, it
may slightly alter the perception of
distance.
EXTERNAL LIGHTS
The left-hand stalk 1 fig. 21 operates
most of the external lights. The exterior
lights turn on also with the ignition key
in the MAR position. The instrument
panel and the various dashboard
controls will come on with the external
lights.
AUTO FUNCTION(Dusk sensor)
(where provided)
This is an infrared LED sensor that
works in conjunction with the rain
sensor and is located on the
windscreen. It is able to detect
variations in outside lighting based on
the light sensitivity set in the display
Menu or theUconnect™system
(where provided).The higher the sensitivity, the lower the
amount of external light needed to
automatically switch the external lights
on.
Function activation
Turn the left stalk ring nut to position
.
IMPORTANT The function can only be
activated with the ignition device at
MAR.
Function deactivation
To deactivate the function, turn the left
stalk ring nut to a position other than
.
DIPPED HEADLIGHTS
With the ignition key turned to MAR,
turn the ring nut 1 fig. 21 to
.Ifthe
dipped beam headlights are activated,
the daytime running lights are switched
off and the dipped beam headlights,
rear side lights and number plate lights
are switched on. The
warning light
switches on in the instrument panel.
DAYTIME RUNNING
LIGHTS (DRL)
"Daytime Running Lights"
20) 21)
With the key in MAR position and the
ring nut turned to theOposition, the
daytime running lights and the rear side
lights switch on automatically; the other
2004106J0004EM
2104126J0001EM
19
Page 22 of 204
, no light comes on when
the ring nut is turned toO.
FRONT FOG LIG")
lights and the internal lighting remain
off. If the daytime running lights are
deactivated (for versions/markets where
it is provided), no light comes on when
the ring nut is turned toO.
FRONT FOG LIGHTS(where provided)
Press button 1 fig. 22 to switch on the
fog lights. With fog lights on, the
warning light on the instrument
panel will come on at the same time.
The front fog lights are activated when
the dipped headlights are on.
Press button 1 again to switch the
lights off.
REAR FOG LIGHT(where provided)
When the dipped beam headlights are
on, these can be activated by pressing
button 1 fig. 23. With the light on, the
warning light in the instrument panel
switches on.Press the button again to switch off; the
rear fog light also switches off
automatically by switching off the
dipped beam headlights or the fog
lights.
PARKING LIGHTS
These lights can be turned on with
ignition device in STOP position or with
the key removed, by moving the left
stalk ring nut first to positionOand
then to position
.
The
warning light switches on in
the instrument panel.
Repeat the same operation to switch
them off.
HEADLIGHTS OFF DELAY
(Follow me home)
Multifunction display
Activation
Bring the ignition device to STOP.
Within 2 minutes pull the left stalk in
main beam headlights flashing mode,
each displacement of the stalk will
correspond to an increment of 30
seconds of delay on headlights
switching off up to a maximum of 210
seconds (equal to 7 flashes).
Deactivation
Keep the left stalk in main beam
headlights flashing position for a few
seconds or with the key to MAR
position or after the period previously
set.
Multifunction display reconfigurable
and/or in presence of Uconnect
TM
5”/UconnectTM5” Nav
Activation
Setting can be done through menu (0,
30, 60, 90 seconds).
If the set value is other than 0 seconds,
the feature can be activated as follows:
With the key turned to MAR, bring ring
nut to
. When switching off the
vehicle, turning the ring nut toO(Off)
position, Follow me home feature will
be activated for the time previously set
in the menu.
2204126J0008EM
2304126J0009EM
20
KNOWING YOUR CAR
Page 23 of 204

If the set value is at 0 seconds, the
feature can be activated as follows:
Bring the ignition device to STOP.
Within 2 minutes pull the left stalk in
main beam headlights flashing mode,
each displacement of the stalk will
correspond to an increment of 30
seconds of delay on headlights
switching off up to a maximum of 210
seconds (equal to 7 flashes).
If the vehicle also features the dusk
sensor, it is possible to activate feature
in automatic mode - with key to MAR
bring the ring nut to
position.
Bringing the key in OFF position with
the headlights turned on, the feature
automatically activates for the time
previously set in menu.
Deactivation
If activation is done by pulling the main
beam headlight stalk, deactivate the
feature keeping the left stalk in main
beam headlights flashing position for at
least two seconds, with key to MAR or
after the set time.
If activation is done via the ring nut of
lights placed on the left stalk, it won't
be possible to disable the feature and
the switching off of the headlights will
happen at the end of the set time or
with key to MAR.
MAIN BEAM HEADLIGHTS
With ring nut in position, push the
stalk forward toward the dashboard
(stable position). The
warning light
switches on in the instrument panel.
They are switched off by pulling the
stalk towards the steering wheel.
Flashing the headlights
Pull the left stalk 1 fig. 24 toward
yourself, to the stable position; the stalk
goes back to the central stable position
when it is released.
With main beam headlights on, the
warning light on the instrument
panel will come on at the same time.
DIRECTION INDICATORS
Bring the left stalk 1 fig. 24 to the
(stable) position:
upwards: activates the right direction
indicator;downwards: activates the left direction
indicator.
The
orwarning light respectively
will flash on the instrument panel.
The direction indicators switch off
automatically when the steering wheel
is straightened or when the daytime
running lights (D.R.L.) /parking lights are
activated.
Cornering lights
The function activates with the main
beam headlights switched on with a
speed lower than 40 km/h - For wide
wheel rotation angles or at the
switching on the direction indicator, a
light will turn on (built in the front fog
light) referring to the turning side which
will extend the night visibility angle.
HEADLIGHT ALIGNMENT
ADJUSTMENT
Headlight alignment corrector
The headlight alignment corrector
operates with ignition device at MAR
and dipped headlights on.
Press
andon the control panel.2404126J0002EM
21
Page 24 of 204

The display located on the instrument
panel provides a visual indication of the
adjusted position.
Position 0: one or two people on
the front seats;
Position 1: 4 or 5 passengers;
Position 2: 4 or 5 passengers + load
in the luggage compartment;
Position 3: driver + maximum
admissible load stowed only in the
luggage compartment.
IMPORTANT Check the headlight
alignment each time the weight of the
load transported changes.INSTRUMENT PANEL AND
CONTROL BUTTON
GRAPHIC BRIGHTNESS
ADJUSTMENT
The brightness for the instrument panel
and the control buttons can be
adjusted using the main menu on the
instrument panel (refer to the
“Reconfigurable Multifunction Display”
paragraph).
WARNING
20)The daytime running lights are an
alternative to the dipped headlights for
driving during the daytime in countries
where it is compulsory to have lights on
during the day; where it is not compulsory,
the use of daytime running lights is
permitted.
21)Daytime running lights cannot replace
dipped beam headlights when driving at
night or through tunnels. The use of
daytime running lights is governed by the
highway code of the country in which you
are driving. Comply with legal
requirements.
INTERIOR LIGHTS
FRONT CEILING LIGHT
Singe-bulb ceiling light
To switch on/off the ceiling light press
the fig. 26 button:
pressed to 1: interior ceiling light
always off;
pressed to 2: interior ceiling light
always on;
position 0: the interior ceiling light
switches on when a door is opened.
Multi-bulb ceiling light
Switch 1 fig. 27 is used to switch on/off
the ceiling light bulbs.
Switch 1 positions:
central position: lights 2 and 5 switch
on/off when the doors are
opened/closed;
2504126J0003EM
26F1B0043C
22
KNOWING YOUR CAR
 1
1 2
2 3
3 4
4 5
5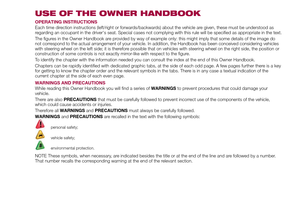 6
6 7
7 8
8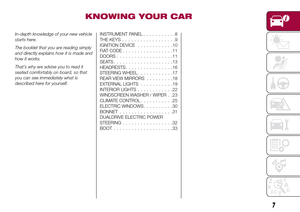 9
9 10
10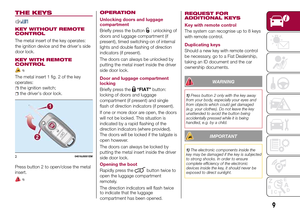 11
11 12
12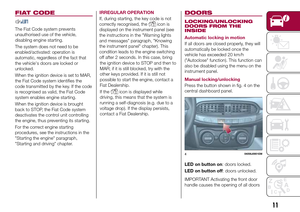 13
13 14
14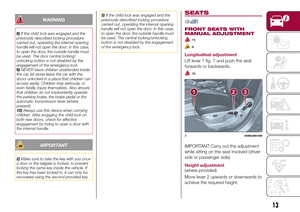 15
15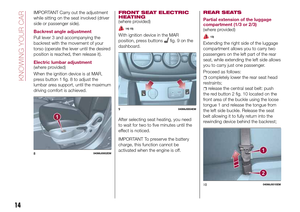 16
16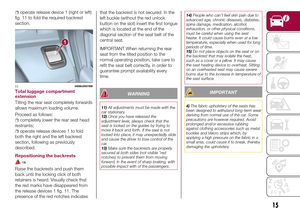 17
17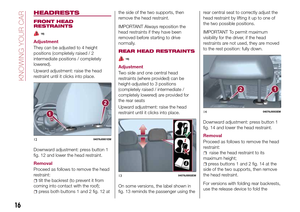 18
18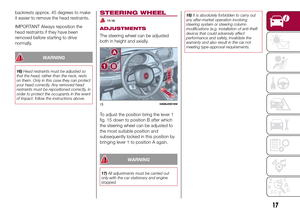 19
19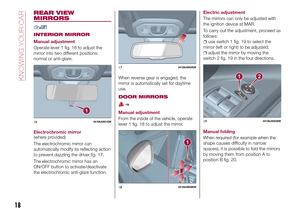 20
20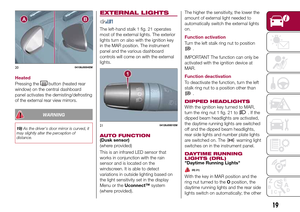 21
21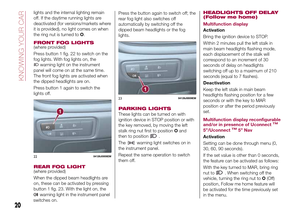 22
22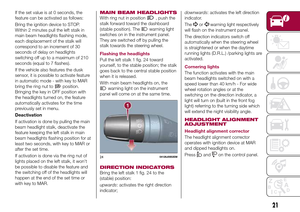 23
23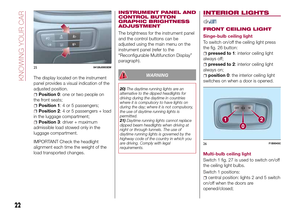 24
24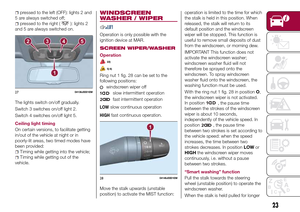 25
25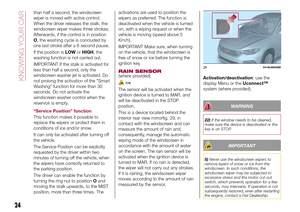 26
26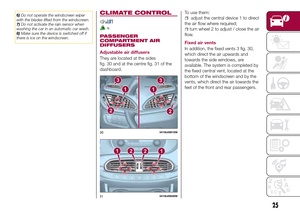 27
27 28
28 29
29 30
30 31
31 32
32 33
33 34
34 35
35 36
36 37
37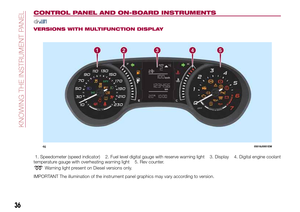 38
38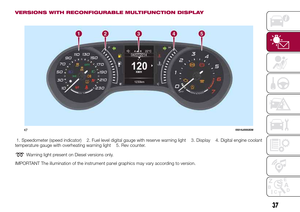 39
39 40
40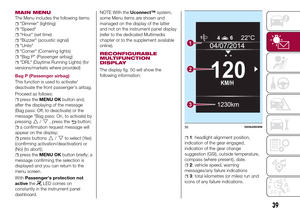 41
41 42
42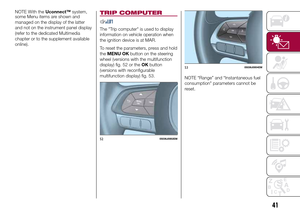 43
43 44
44 45
45 46
46 47
47 48
48 49
49 50
50 51
51 52
52 53
53 54
54 55
55 56
56 57
57 58
58 59
59 60
60 61
61 62
62 63
63 64
64 65
65 66
66 67
67 68
68 69
69 70
70 71
71 72
72 73
73 74
74 75
75 76
76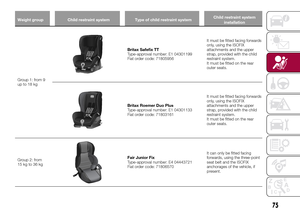 77
77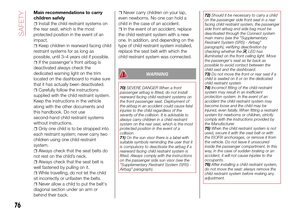 78
78 79
79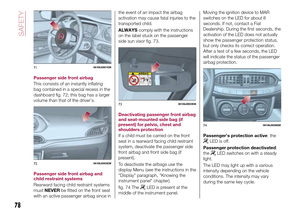 80
80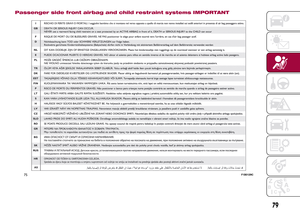 81
81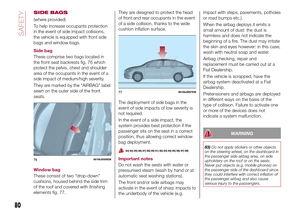 82
82 83
83 84
84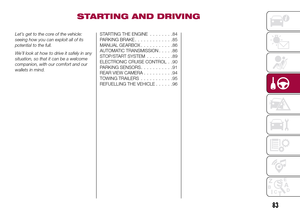 85
85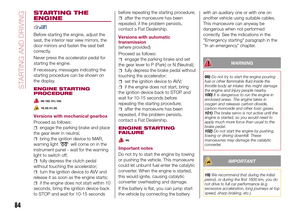 86
86 87
87 88
88 89
89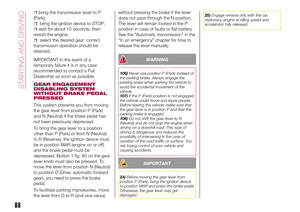 90
90 91
91 92
92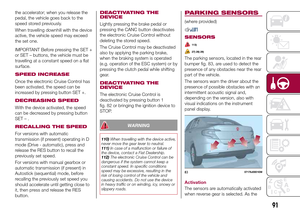 93
93 94
94 95
95 96
96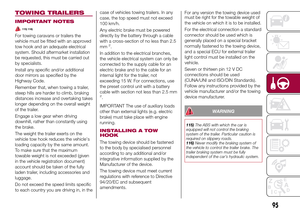 97
97 98
98 99
99 100
100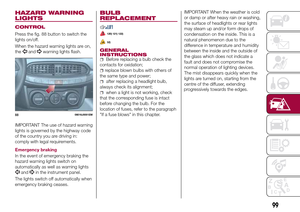 101
101 102
102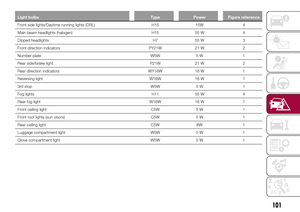 103
103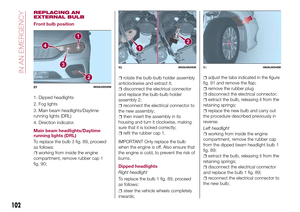 104
104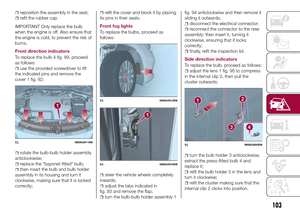 105
105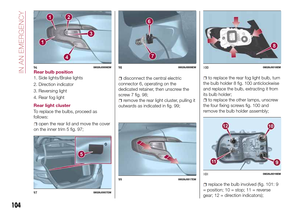 106
106 107
107 108
108 109
109 110
110 111
111 112
112 113
113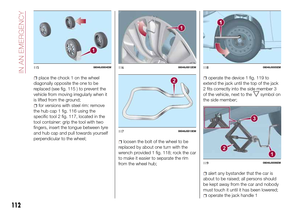 114
114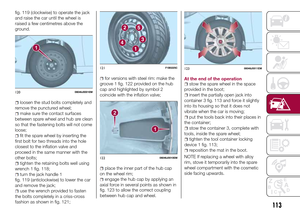 115
115 116
116 117
117 118
118 119
119 120
120 121
121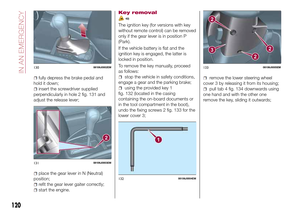 122
122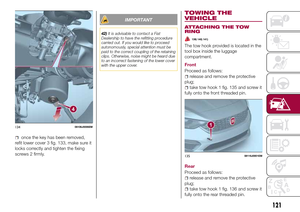 123
123 124
124 125
125 126
126 127
127 128
128 129
129 130
130 131
131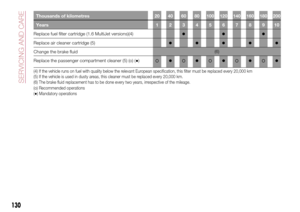 132
132 133
133 134
134 135
135 136
136 137
137 138
138 139
139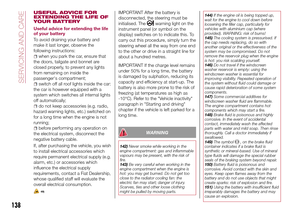 140
140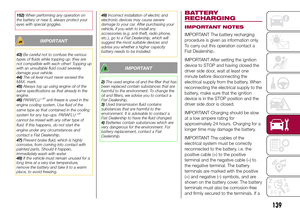 141
141 142
142 143
143 144
144 145
145 146
146 147
147 148
148 149
149 150
150 151
151 152
152 153
153 154
154 155
155 156
156 157
157 158
158 159
159 160
160 161
161 162
162 163
163 164
164 165
165 166
166 167
167 168
168 169
169 170
170 171
171 172
172 173
173 174
174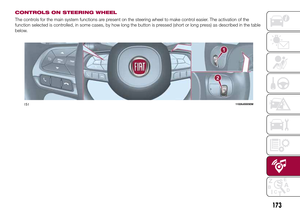 175
175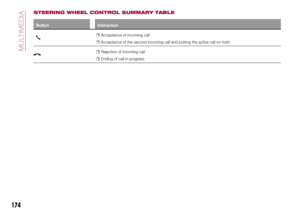 176
176 177
177 178
178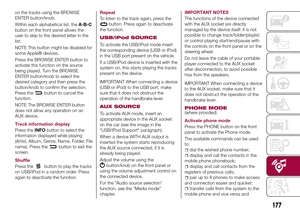 179
179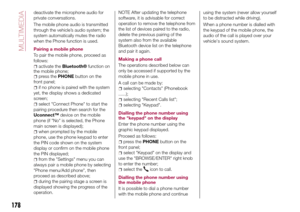 180
180 181
181 182
182 183
183 184
184 185
185 186
186 187
187 188
188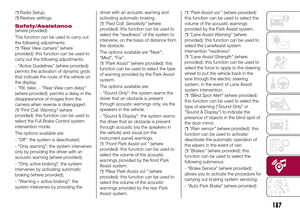 189
189 190
190 191
191 192
192 193
193 194
194 195
195 196
196 197
197 198
198 199
199 200
200 201
201 202
202 203
203