Page 67 of 587
Manual Front Seat Forward/Rearward Adjustment
On models equipped with manual seats, the forward/
rearward adjusting bar is located at the front of the seats,
near the floor.
While sitting in the seat, lift up on the bar and move the
seat forward or rearward. Release the bar once you have
reached the desired position. Then, using body pressure,
move forward and rearward on the seat to be sure that
the seat adjusters have latched.
WARNING!
•Adjusting a seat while the vehicle is moving is
dangerous. The sudden movement of the seat could
cause you to lose control. The seat belt might not be
adjusted properly and you could be injured. Adjust
the seat only while the vehicle is parked.
(Continued)
WARNING! (Continued)
•Do not ride with the seatback reclined so that the
shoulder belt is no longer resting against your
chest. In a collision you could slide under the seat
belt and be seriously or even fatally injured. Use
the recliner only when the vehicle is parked.
Height Adjustment
The front driver and passenger seats height can be raised
or lowered by using a lever, located on the outboard side
of the seat. Pull upward on the lever to raise the seat
height or push downward on the lever to lower the seat
height.
Recline Adjustment
To adjust the seatback, lift the lever located on the
outboard side of the seat, lean back to the desired
position and release the lever. To return the seatback, lift
the lever, lean forward and release the lever.
4
GETTING TO KNOW YOUR VEHICLE 65
Page 75 of 587
WARNING!
The head restraints for all occupants must be prop-
erly adjusted prior to operating the vehicle or occu-
pying a seat. Head restraints should never be ad-
justed while the vehicle is in motion. Driving a
vehicle with the head restraints improperly adjusted
or removed could cause serious injury or death in the
event of a collision.
Front Head Restraints
Your vehicle is equipped with driver and passenger head
restraints.
To raise the head restraint, pull upward on the head
restraint. To lower the head restraint, push the adjust-
ment button, located on the base of the head restraint,
and push downward on the head restraint.To remove the head restraint recline the backrest of the
seat to avoid interference with the roof. Raise the head
restraint as far as it can go then push the release button
and adjustment button at the base of each post while
pulling the head restraint up. To reinstall the head
restraint, put the head restraint posts into the holes and
push downward. Then adjust it to the appropriate height.
4
GETTING TO KNOW YOUR VEHICLE 73
Page 77 of 587
Rear Head Restraints
Your vehicle is equipped with two outboard head re-
straints and one center head restraint for its rear passen-
gers. The rear head restraints can be raised or lowered.
When the center seat is being occupied, the head restraint
should be in the raised position. When there are no
occupants in the center seat, the head restraint can be
lowered for maximum visibility for the driver.
To raise the head restraint, pull upward on the head
restraint. To lower the head restraint, push the adjust-
ment button, located at the base of the head restraint, and
push downward on the head restraint.
To remove the head restraint, raise it as far as it can go
then push the release button and adjustment button at
the base of each post while pulling the head restraint up.
To reinstall the head restraint, put the head restraint posts
into the holes and push downward. Then adjust it to the
appropriate height.
Rear Head Restraint
1 — Adjustment Button
2 — Release Button
4
GETTING TO KNOW YOUR VEHICLE 75
Page 173 of 587
Clock and Date
By selecting the item�clock and date,�you can adjust the
clock.
Possible options are:
• Set Time: Adjust hours/minutes
• Set Format: Adjust the time format �12h�(12 hours) or
� 24h� (24 hours)
• Set Date: Adjust day/month/year
Security
By selecting the item “Security,” you can make the
following adjustments:
• Speed Warning: Set the vehicle speed limit (MPH
or km/h), which the driver is notified through a visual
and acoustic signaling (display of a message and a
symbol on the display). •
Seat Belt Buzzer: This function is only viewable when
the Seat Belt Reminder (SBR) system is active.
• Hill Start Assist: Activation/Deactivation of the Hill
Start Assist system.
Safety and Assistance
By selecting the item �Safety & Assistance,� you can make
the following adjustments:
• FCW: A selection of operating modes of the system
Forward Collision Warning Plus
• FCW Sensitivity: A selection of the �readiness�of
intervention of the Forward Collision Warning Plus
system, based on the distance to the obstacle
• ParkSense: A selection of the type of information
provided by ParkSense
• ParkSense Vol.: A selection of the volume of acoustic
signals provided by ParkSense
5
GETTING TO KNOW YOUR INSTRUMENT CLUSTER 171
Page 392 of 587
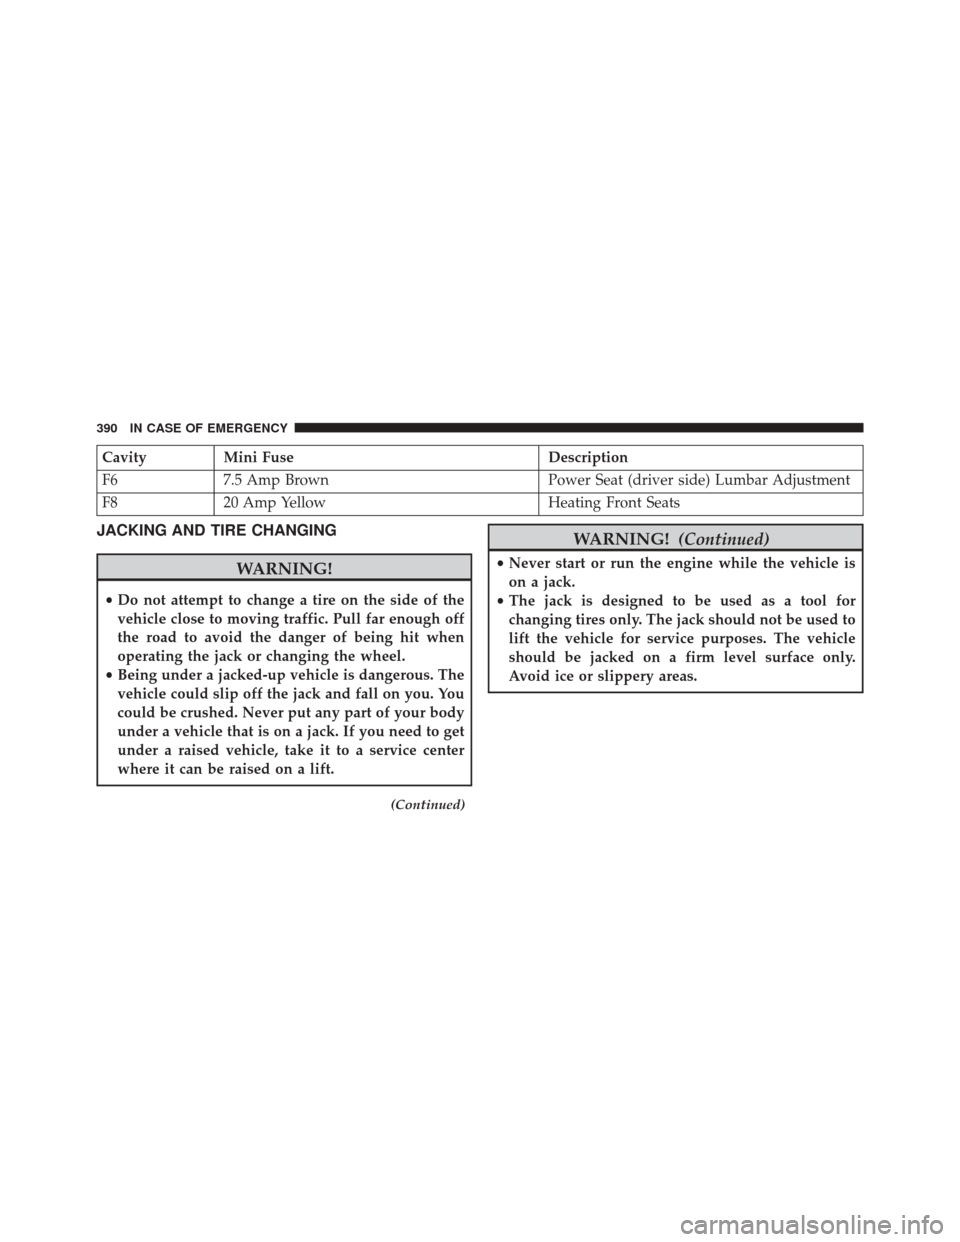
CavityMini Fuse Description
F6 7.5 Amp Brown Power Seat (driver side) Lumbar Adjustment
F8 20 Amp Yellow Heating Front Seats
JACKING AND TIRE CHANGING
WARNING!
•Do not attempt to change a tire on the side of the
vehicle close to moving traffic. Pull far enough off
the road to avoid the danger of being hit when
operating the jack or changing the wheel.
• Being under a jacked-up vehicle is dangerous. The
vehicle could slip off the jack and fall on you. You
could be crushed. Never put any part of your body
under a vehicle that is on a jack. If you need to get
under a raised vehicle, take it to a service center
where it can be raised on a lift.
(Continued)
WARNING! (Continued)
•Never start or run the engine while the vehicle is
on a jack.
• The jack is designed to be used as a tool for
changing tires only. The jack should not be used to
lift the vehicle for service purposes. The vehicle
should be jacked on a firm level surface only.
Avoid ice or slippery areas.
390 IN CASE OF EMERGENCY