2016 Citroen JUMPY auxiliary
[x] Cancel search: auxiliaryPage 8 of 595
6
Jumpy _en_Chap00b_vue-ensemble_ed01-2016
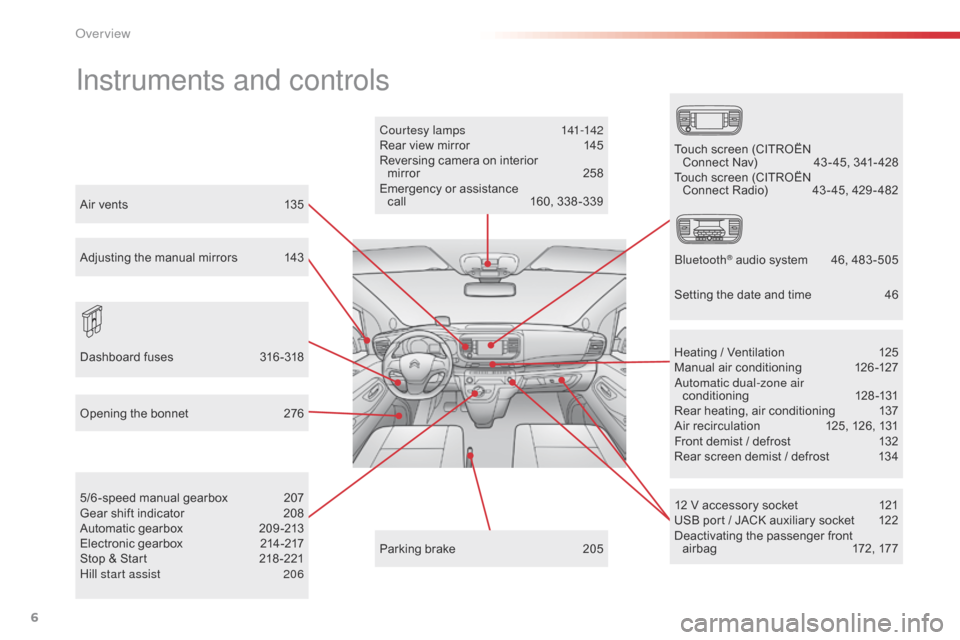
Instruments and controls
Courtesy lamps 141-142
Rear view mirror 1 45
Reversing camera on interior mirror
2
58
Emergency or assistance call
1
60, 338 -339
12 V accessory socket
1
21
USB port / JACK auxiliary socket
1
22
Deactivating the passenger front airbag
1
72, 177
5/6 -speed manual gearbox
2
07
Gear shift indicator
2
08
Automatic gearbox
2
09 -213
Electronic gearbox
2
14-217
Stop & Start
2
18 -221
Hill start assist
2
06 Heating / Ventilation
1
25
Manual air conditioning
1
26-127
Automatic dual-zone air conditioning
1
28-131
Rear heating, air conditioning
1
37
Air recirculation
1
25, 126, 131
Front demist / defrost
1
32
Rear screen demist / defrost
1
34
Parking brake
2
05
Opening the bonnet
2
76
Dashboard fuses
3
16 -318 Touch screen (CITROËN
Connect Nav)
4
3 - 45, 341- 428
Touch screen (CITROËN Connect Radio)
4
3 - 45, 429 - 482
Bluetooth
® audio system 4 6, 483 -505
Air vents
1
35
Adjusting the manual mirrors
1
43
Setting the date and time
4
6
Over view
Page 10 of 595

8
Jumpy _en_Chap00b_vue-ensemble_ed01-2016
Rear courtesy lamps 141
Changing courtesy lamp bulbs 3 12 Interior rear view mirror
1
45
Front courtesy lamp
1
41
Changing courtesy lamp bulbs
3
12
Interior fittings
1
19 -122
-
c
up/can holder
- mats
-
s
un visors
-
g
love box
-
s
torage box
-
u
pper storage box
-
a
ccessory socket, USB port, JACK
auxiliary socket
Tool box
2
87-289
ISOFIX mountings (fixed crew cab)
1
86 -189
2-seat front bench seat
1
04-105
Heated bench seat
1
05
Moduwork 10 6 -109
Work table 1 09
Child seats
1
74-183
Temporary puncture repair kit
2
87-289, 290 -295
Spare wheel, jack, changing a wheel
2
87-289, 296 -302
Loading area fittings
1
22-123
-
la
shing rings
-
l
oading area bulkhead
Accessories
2
71-273
Fixed crew cab
1
17-118 Airbags, front, lateral
1
70 -173
Deactivating the passenger front airbag
1
72, 177
12 V accessory socket
1
21
USB port
1
22
JACK auxiliary socket
1
22
Front seats
9
9 -103
-
m
anual adjustments
-
e
lectric adjustments
-
h
ead restraints
-
hea
ted seats
Seat belts
1
66 -168
Interior
Over view
Page 11 of 595

9
Jumpy _en_Chap00b_vue-ensemble_ed01-2016
Interior fittings 119 -122
- c up/can holder
-
mats
-
s
un visors
-
g
love box
-
s
torage box
-
u
pper storage box
-
a
ccessory socket, USB port, JACK
auxiliary socket
Tool box
2
87-289
Child seats
1
74-181, 184-185
ISOFIXmountings
1
86 -187, 190 -192
Rear side windows
1
24, 195
Fixed one-piece bench seat
1
10-112
Rear seat and fixed bench seat
1
13 -115
Seat labels
1
16
2-seat front bench seat
1
04-105
Heated bench seat
1
05
Rear heating - air conditioning
1
37
Temporary puncture repair kit
2
87-289, 290 -295
Spare wheel, jack, changing a wheel, tools
2
87-289, 296 -302
Seating area fittings
1
23 -124
-
h
igh load retaining net
-
r
ear windows
Accessories
2
71-272
Rear courtesy lamp
1
42
Changing courtesy lamp bulbs
3
12Rear view mirror
1 45
Front courtesy lamp
1
42
Changing courtesy lamp bulbs
3
12Front, side airbags
1
70 -173
Deactivating the passenger front airbag
1
72, 177
12 V accessory sockets
1
21
USB port
1
22
JACK auxiliary socket
1
22
Front seats, adjustments, head restraint
9
9-103
-
m
anual adjustments
-
e
lectric adjustments
-
t
able positon
-
h
ead restraints
-
hea
ted seats
Seat belts
1
66 -168
Fixed one-piece bench seat
1
10-112
Rear seat and fixed bench seat
1
13 -115
Seat labels
1
16
Interior
.
Over view
Page 124 of 595

122
Jumpy _en_Chap03_ergonomie-et-confort_ed01-2016
Auxiliary socket
It permits the connection of a portable device
so that you can listen to your music files via the
vehicle's speakers.
The management of the files is done using your
portable device.For more information on the use of
this equipment, refer to the Audio and
telematics section.
Lashing rings
Loading area
fittings
Use the lashing rings on the rear floor to secure
your loads.
As a safety precaution in case of sharp braking,
you are advised to place heavy objects as far
for wards towards the cab as possible.
You are advised to immobilise the load by
securing it firmly using the lashing rings on the
f l o o r.Depending on the vehicle's equipment, the
various fittings below are located in the loading
area.
USB port
It allows the connection of a portable device,
such as a digital audio player of the iPod® type
or a USB memory stick.
It reads the audio files which are transmitted to
your audio system and played via the vehicle's
speakers.
You can manage these files using the steering
mounted controls or the audio system.
When a USB port is used, the portable
device charges automatically.
While charging, a message is displayed
if the current consumption of the
portable device exceeds the power
rating of the port.
For more information on using this
equipment, refer to the Audio and
telematics section.
Ease of use and comfort
Page 345 of 595
343
12:13
23 °C531 kHz
Jumpy_en_Chap10b_NAC-1_ed01-2016
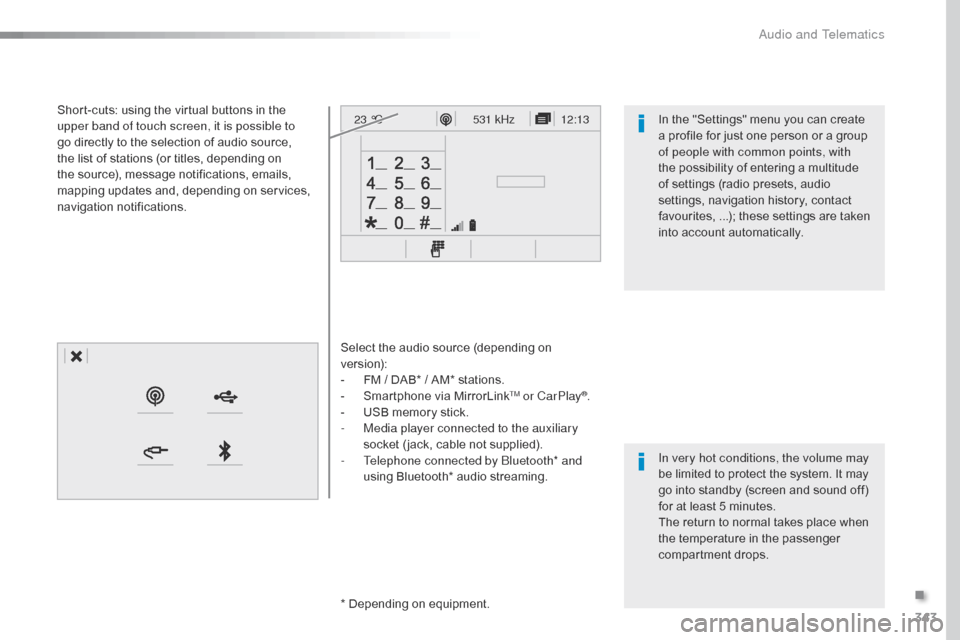
Select the audio source (depending on
version):
-
F
M / DAB* / AM* stations.
-
S
martphone via MirrorLink
TM or CarPlay®.
-
U
SB memory stick.
-
M
edia player connected to the auxiliary
socket ( jack, cable not supplied).
-
T
elephone connected by Bluetooth* and
using Bluetooth* audio streaming.
* Depending on equipment.
Short-cuts: using the virtual buttons in the
upper band of touch screen, it is possible to
go directly to the selection of audio source,
the list of stations (or titles, depending on
the source), message notifications, emails,
mapping updates and, depending on services,
navigation notifications.
In very hot conditions, the volume may
be limited to protect the system. It may
go into standby (screen and sound off)
for at least 5 minutes.
The return to normal takes place when
the temperature in the passenger
compartment drops. In the "Settings" menu you can create
a profile for just one person or a group
of people with common points, with
the possibility of entering a multitude
of settings (radio presets, audio
settings, navigation history, contact
favourites, ...); these settings are taken
into account automatically.
.
Audio and Telematics
Page 400 of 595
398
Jumpy_en_Chap10b_NAC-1_ed01-2016
Media
USB playerSelecting the source
Select "Source".
Press Radio Media
to display the
primary page.
The system builds playlists (in temporary
memory), an operation which can take from
a few seconds to several minutes at the first
connection.
Reduce the number of non-music files and the
number of folders to reduce the waiting time.
The playlists are updated every time the
ignition is switched off or connection of a USB
memory stick. The lists are memorised: if they
are not modified, the subsequent loading time
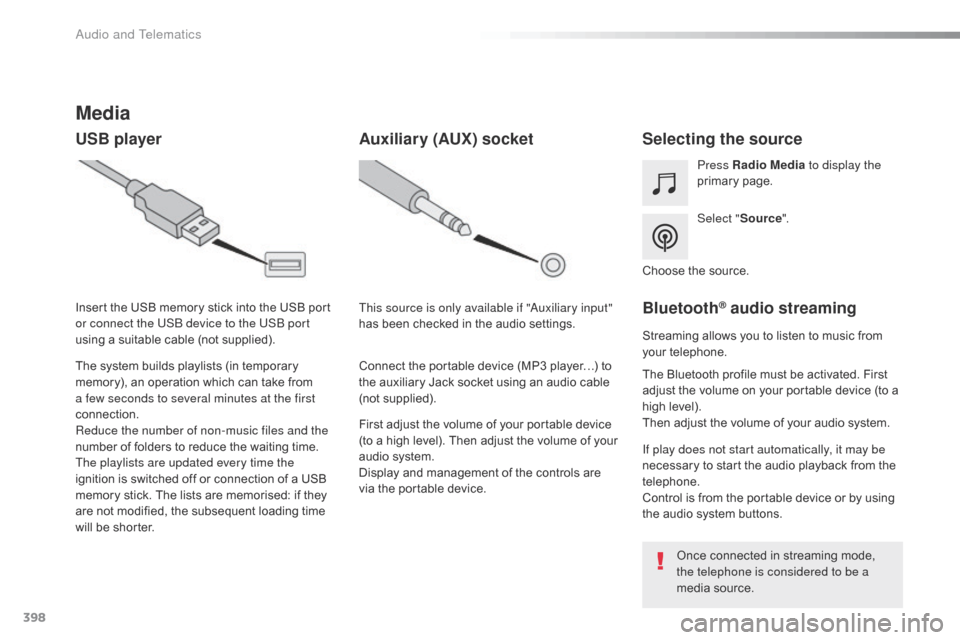
will be shorter. Insert the USB memory stick into the USB port
or connect the USB device to the USB port
using a suitable cable (not supplied).
Auxiliary (AUX) socket
First adjust the volume of your portable device
(to a high level). Then adjust the volume of your
audio system.
Display and management of the controls are
via the portable device. This source is only available if "Auxiliary input"
has been checked in the audio settings.
Connect the portable device (MP3 player…) to
the auxiliary Jack socket using an audio cable
(not supplied). Choose the source.
Bluetooth® audio streaming
Streaming allows you to listen to music from
your telephone.
The Bluetooth profile must be activated. First
adjust the volume on your portable device (to a
high level).
Then adjust the volume of your audio system.
If play does not start automatically, it may be
necessary to start the audio playback from the
telephone.
Control is from the portable device or by using
the audio system buttons.
Once connected in streaming mode,
the telephone is considered to be a
media source.
Audio and Telematics
Page 401 of 595
399
Jumpy_en_Chap10b_NAC-1_ed01-2016
Connecting Apple® players
Connect the Apple® player to the USB port
using a suitable cable (not supplied).
Play starts automatically.
Control is via the audio system.
The classifications available are those
of the portable device connected
(artists / albums / genres / playlists /
audiobooks / podcasts).
The default classification used is by
artist. To modify the classification used,
return to the first level of the menu
then select the desired classification
(playlists for example) and confirm
to go down through the menu to the
desired track.
The version of software in the audio system
may not be compatible with the generation of
your Apple
® player. The audio equipment will only play audio files
with ".wma, .aac, .flac, .ogg and .mp3" file
extensions and with a bit rate of between 32
Kbps and 320 Kbps.
It also supports VBR (Variable Bit Rate) mode.
No other type of file (.mp4,
...) can be played.
".wma" files must be of the standard wma 9 type.
The sampling rates supported are 32, 44 and
48 KHz.
It is advisable to restrict file names to
20 characters, without using of special
characters (e.g.: " " ? ; ù) to avoid any playing
and displaying problems.
Information and advice
Use only USB memory sticks formatted FAT 32
(file allocation table). The system supports USB mass
storage devices, BlackBerry
® devices
or Apple® players via USB ports. The
adaptor cable is not supplied.
Control of the peripheral device is with
the audio system controls.
Other peripherals, not recognised on
connection, must be connected to the
auxiliary socket using a Jack cable (not
supplied) or via Bluetooth streaming,
depending on compatibility.
It is recommended that the USB cable
for the portable device is used.
.
Audio and Telematics
Page 420 of 595
418
3
4
5
6
7
1
19
Jumpy_en_Chap10b_NAC-1_ed01-2016
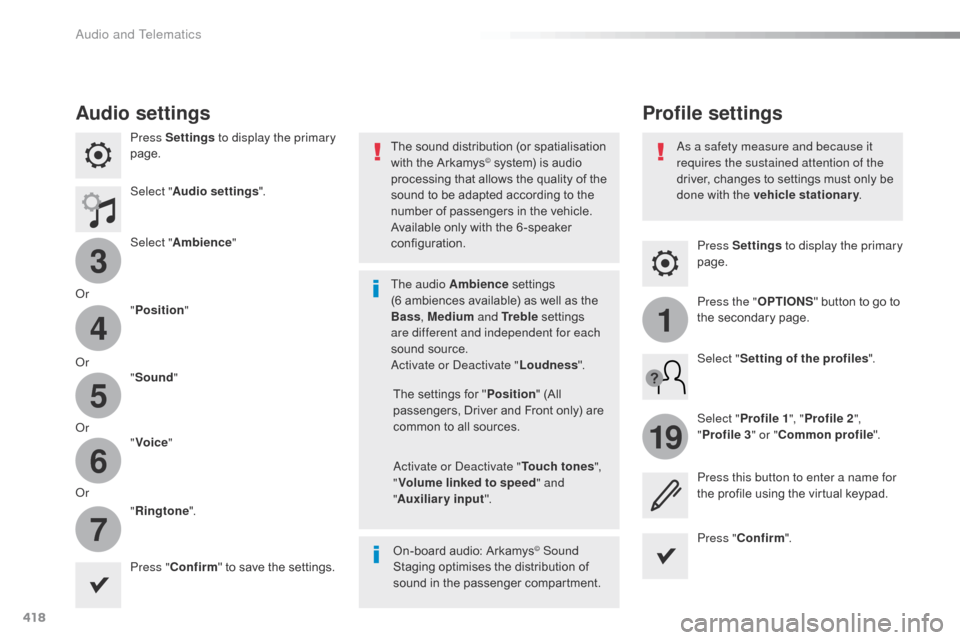
Press Settings to display the primary
page.
Profile settings
Audio settings
Press Settings to display the primary
page.
Select " Audio settings ".
Select " Ambience "
Or "Position "
Or "Sound "
Or "Voice "
Or "Ringtone ".
On-board audio: Arkamys
© Sound
Staging optimises the distribution of
sound in the passenger compartment. The settings for " Position" (All
passengers, Driver and Front only) are
common to all sources.
Activate or Deactivate " Touch tones",
" Volume linked to speed " and
" Auxiliary input ".
The sound distribution (or spatialisation
with the Arkamys
© system) is audio
processing that allows the quality of the
sound to be adapted according to the
number of passengers in the vehicle.
Available only with the 6 -speaker
configuration.
The audio Ambience settings
(6
ambiences available) as well as the
Bass , Medium and Tr e b l e settings
are different and independent for each
sound source.
Activate or Deactivate " Loudness".
Press " Confirm " to save the settings. Press "
Confirm ".
Press the "
OPTIONS" button to go to
the secondary page.
Select " Profile 1 ", "Profile 2 ",
" Profile 3 " or "Common profile ".
Select "
Setting of the profiles ".
Press this button to enter a name for
the profile using the virtual keypad.
As a safety measure and because it
requires the sustained attention of the
driver, changes to settings must only be
done with the vehicle stationary
.
Audio and Telematics