2016 Citroen DS5 buttons
[x] Cancel search: buttonsPage 20 of 500

Petrol-Diesel instrument panel
1. Rev counter (x 1 000 rpm or tr/min),
graduation according to engine (petrol or
Diesel).
2.
Fu
el gauge.
3.
En
gine coolant temperature gauge.
4.
An
alogue speedometer (mph or km/h).
5.
Cr
uise control or speed limiter settings. A. Ma
in lighting and controls dimmer.
B. - Sh ort press: display in turn of servicing
information, remaining range for the
AdBlue additive and the alert log.
- Lo
ng press: reset the service indicator or
trip recorder (depending on context).
6. Ge
ar shift indicator or gear lever position
and gear engaged for an automatic
gearbox.
7.
In
strument panel screen: distance
recorders, service indicator, engine oil
level indicator*, remaining range for the
AdBlue additive and the SCR system*, alert
messages, trip computer, media currently
playing, navigation instructions*.
8.
Di
gital speedometer (mph or km/h).
dials and screenscontr ol buttons
When switching the ignition on or off,
the speedometer needle and the bars of
the dials carry out a full sweep and then
return to 0.
* Depending on version.
Page 40 of 500

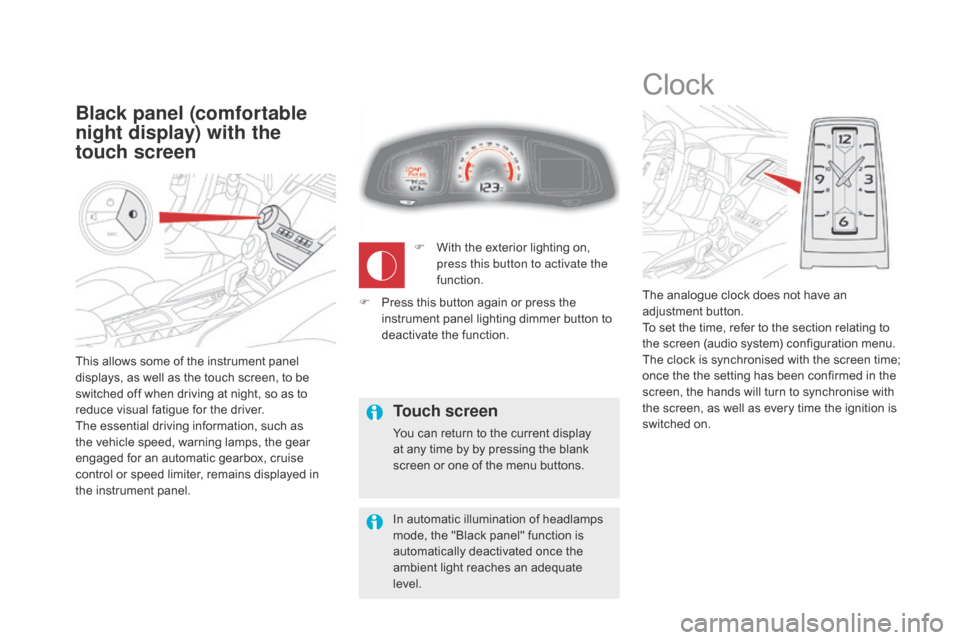
This allows some of the instrument panel
displays, as well as the touch screen, to be
switched off when driving at night, so as to
reduce visual fatigue for the driver.
The essential driving information, such as
the vehicle speed, warning lamps, the gear
engaged for an automatic gearbox, cruise
control or speed limiter, remains displayed in
the instrument panel.
Black panel (comfortable
night display) with the
touch screen
Clock
The analogue clock does not have an
adjustment button.
To set the time, refer to the section relating to
the screen (audio system) configuration menu.
The clock is synchronised with the screen time;
once the the setting has been confirmed in the
screen, the hands will turn to synchronise with
the screen, as well as every time the ignition is
switched on.
F
Wi
th the exterior lighting on,
press this button to activate the
function.
Touch screen
You can return to the current display
at any time by by pressing the blank
screen or one of the menu buttons.
In automatic illumination of headlamps
mode, the "Black panel" function is
automatically deactivated once the
ambient light reaches an adequate
level.
F
Pr
ess this button again or press the
instrument panel lighting dimmer button to
deactivate the function.
Page 41 of 500

39
Monochrome screen C
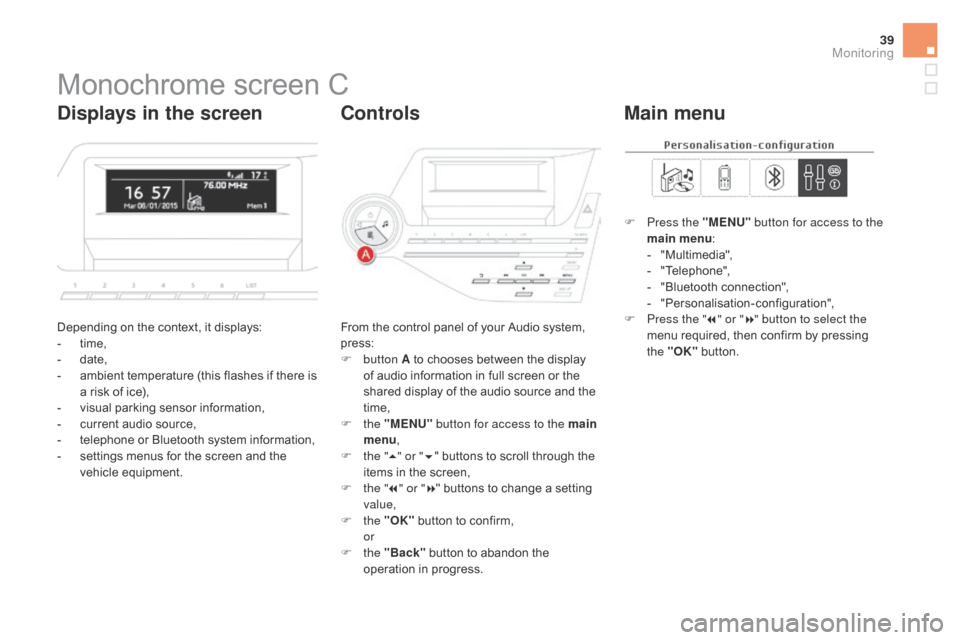
Depending on the context, it displays:
- time,
-
dat
e,
-
am
bient temperature (this flashes if there is
a risk of ice),
-
vi
sual parking sensor information,
-
cu
rrent audio source,
-
te
lephone or Bluetooth system information,
-
se
ttings menus for the screen and the
vehicle equipment. From the control panel of your Audio system,
press:
F
b
utton A to chooses between the display
of audio information in full screen or the
shared display of the audio source and the
time,
F
t
he "MENU" button for access to the main
menu ,
F
th
e "5" or " 6" buttons to scroll through the
items in the screen,
F
th
e "7" or " 8" buttons to change a setting
value,
F
t
he "OK" button to confirm,
or
F t
he "Back" button to abandon the
operation in progress. F
Pr
ess the "MENU"
button for access to the
main menu :
-
"M
ultimedia",
-
"T
elephone",
-
"B
luetooth connection",
-
"P
ersonalisation-configuration",
F Pr ess the "
7" or " 8" button to select the
menu required, then confirm by pressing
the "OK" button.
displays in the screencontr olsMain menu
Monitoring
Page 43 of 500

41
- "Driving assistance":
● "Parking brake automatic" (Automatic
electric parking brake; see the "Driving"
section),
●
"R
ear wipe in reverse gear" (Rear
wiper coupled to reverse gear; see the
"Visibility" section),
●
"S
peeds memorised" (Memorising
speeds; see the "Driving" section).
-
" V
ehicle lighting" (see the " Visibility"
section):
●
"D
irectional headlamps" (Main /
additional directional lighting),
-
"I
nterior lighting" (see the " Visibility"
section):
●
"F
ollow-me-home headlamps"
(Automatic operation of headlamps after
switching off the ignition),
●
" W
elcome lighting" (Exterior welcome
lighting),
●
"M
ood lighting" (Mood lighting). For example: setting of the duration of the
"follow-me-home" lighting
F
Pr
ess the "7" or " 8" buttons, to select the
"Define the vehicle parameters" menu,
then the " OK" button.
F
Pr
ess the "5" or " 6" buttons to select
the "Interior lighting" line, then the
"OK"
b
utton; then follow the same
procedure to select the "Follow-me-home
headlamps" line. F Pr
ess the "7" or " 8" buttons to set the
value required (15, 30 or 60 seconds), then
press the "OK" button to confirm.
F
Pr
ess the "5" or " 6" buttons, then the
"OK" button to select the "OK" box and
confirm or press the "Back" button to
cancel.
Monitoring
Page 45 of 500

43
Touch screen
Associated with the navigation system, this
screen gives access to:
-
me
nus for adjusting settings for vehicle
functions and systems,
-
au
dio and display settings menus,
-
au
dio system and telephone controls and
the display of associated information.
-
th
e controls for the navigation system
and Internet services and the display of
associated information.
It also allows the display of:
-
th
e ambient temperature (a blue snowflake
appears if there is a risk of ice),
-
th
e trip computer,
-
vi
sual parking sensor information,
-
th
e image from the reversing camera. As a safety measure, the driver
should only carr y out operations
that require close attention with the
vehicle stationary.
Some functions are not accessible
when driving.General operation
Recommendations
Its use is possible at all temperatures and when
wearing gloves.
Do not use pointed objects on the touch
screen.
Do not touch the touch screen with wet hands.
Uses a soft clean cloth to clean the touch
screen.
Principles
Press the virtual buttons in the touch screen.
Each menu is displayed over one or two pages
(primary page and secondary page).
Use the "Options" button to go to the
secondary page.
After a few moments with no action on
the secondary page, the primary page
is displayed automatically.
Use this button for access to
additional information and to the
settings for certain functions.
Use this button to confirm.
Use this button to quit the current
display and return to the primary
page.
For versions equipped with a navigation
system in the touch screen, refer to the
supplement in the handbook pack.
Monitoring
Page 46 of 500

Menus
Press one of the buttons on the control panel
for direct access to a particular menu.
dri
ving
Allows settings to be adjusted for
certain vehicle functions.
See the corresponding section.
Navigation .
See the "Audio and telematics"
section.
Radio Media .
See the "Audio and telematics"
section.
Telephone .
See the "Audio and telematics"
section.
con
nected services .
The connected services are
accessible via Bluetooth, Wi-Fi,
MirrorLink™ or CarPlay
® connections.
See the "Audio and telematics"
section. Settings
.
Allows configuration of the display
and the system.
Language, units, date and time,
colour schemes, ... 1.
Vol
ume.
2.
On / O
ff.
3.
Bl
ack panel (comfortable night driving
display).
4.
Ch
ange audio source.
5.
Ac
cess to audio settings.
See the "Audio and telematics" section.
Page 49 of 500

47
Touch screen
1. "Instantaneous ".
2. " Tr
i p 1".
3.
" T
r i p 2".
4.
" 00
.0 / Reset ".
display of information
The current instantaneous fuel consumption tab with:- the range,- the current fuel consumption,- the Stop & Start time counter.
The trip "1" tab with:
- th e average speed,
-
th
e average fuel consumption,
fo
r the first trip.
The trip "2" tab with:
-
th
e average speed,
-
th
e average fuel consumption,
fo
r the second trip. F
Wh
en the desired trip is
displayed, press the reset button
or press and hold the end of the
wiper control stalk.
Trip reset
Tr i p s "1" and "2" are independent but their use
is identical.
For example, trip "1" can be used for daily
figures, and trip "2" for monthly figures.
The trip computer information is displayed in
the primary page of the menu.
F
Pr
ess one of the buttons to display the
desired tab. F
Selec
t the "
dri
ving
" menu.
Monitoring
Page 57 of 500

55
DS5_en_Chap02_ouvertures_ed02-2015
Locking the vehicle
F With the electronic key on your person in
the recognition zone A , press with a finger
or thumb on one of the door handles (at the
markings) to lock the vehicle.
F
Ma
intain pressure with your finger or thumb
until the windows close completely.
Locking is confirmed by fixed
lighting of the direction indicators for
approximately two seconds.
The door mirrors fold at the same time. If one of the doors or the boot is still
open or if the key for Keyless Entry and
Starting system has been left inside
the vehicle or if the ignition is on, the
central locking does not take place.
When the vehicle is locked, if it is
unlocked inadvertently, it will lock itself
again automatically after about thirty
seconds unless a door is opened.
If the alarm was previously activated, it
will not be reactivated automatically.
The folding and unfolding of the door
mirrors by the remote control can be
deactivated by a CITROËN dealer or a
qualified workshop.
As a safety measure (children on
board), never leave the vehicle without
taking the key for the Keyless Entry and
Starting system, even for a short period.
Guard against theft when the key for the
Keyless Entry and Starting system is
in the recognition zone with the vehicle
unlocked.
In order to preserve the charge of the
cell battery in the remote control, the
"hands-free" functions go into extended
stand-by after 21 days of non-use. To
restore these functions, press one of
the remote control buttons or start the
engine with the electronic key in the
reader.
Ensure that nothing and no person
prevents the correct operation of the
windows.
Be particularly aware of children when
operating the windows.
This function allows you to identify
your vehicle from a distance,
particularly in poor light. Your vehicle
must be locked.
Locating your vehicle
F Press the closed padlock on the remote
c
ontrol.
This will switch on the courtesy lamps and
the direction indicators will flash for around
ten
sec
onds.
Access