Page 17 of 400
15
Limit the causes of excess consumption
Spread loads throughout the vehicle; place the heaviest items in the
bottom of the boot, as close as possible to the rear seats.
Limit the loads carried in the vehicle and reduce wind resistance (roof
bars, roof rack, bicycle carrier, trailer...). Use a roof box in preference.
Remove roof bars and roof racks after use.
At the end of winter, remove snow tyres and refit your summer tyres.
Observe the recommendations on maintenance
Check the tyre pressures regularly, when cold, referring to the label in
the door aperture, driver's side.
Carry out this check in particular:
-
b
efore a long journey,
-
a
t each change of season,
-
a
fter a long period out of use.
Don't forget the spare wheel and the tyres on any trailer or caravan.
Have your vehicle serviced regularly (engine oil, oil filter, air filter,
passenger compartment filter...) and observe the schedule of
operations recommended in the manufacturer's service schedule.
With a BlueHDi Diesel engine, if the SCR system is faulty your vehicle
becomes polluting; go to a CITROËN dealer or a qualified workshop
without delay to have the emissions of nitrous oxides brought back to
the legal level.
When refuelling, do not continue after the third cut-off of the nozzle to
avoid any over flow.
At the wheel of your new vehicle, it is only after the first 1 800 miles
(3
000 kilometres) that you will see the fuel consumption settle down to
a consistent average.
Eco-driving
Page 34 of 400
coolant
temperature gauge
With the engine running:
- i n zone A , the temperature is correct,
-
i
n zone B, the temperature is too high; the
central STOP warning lamp comes on,
accompanied by an audible signal and a
message in the instrument panel screen.
You MUST stop as soon as it is safe to do so.
Wait a few minutes before switching off the
engine.
Contact a CITROËN dealer or a qualified
workshop. After driving for a few minutes, the temperature
and pressure in the cooling system increase.
To top up the level:
F
w
ait for the engine to cool,
F
u
nscrew the cap by two turns to allow the
pressure to drop,
F
w
hen the pressure has dropped, remove
the cap,
F
t
op up the level to the "MA X" mark.
Be aware of the risk of burns when
topping up the cooling system. Do not
fill above the maximum level (indicated
on the reservoir).
Page 77 of 400
75
The head restraints have support rods
with notches which prevent them from
lowering; this is a safety device in case
of impact.
The adjustment is correct when the
upper edge of the head restraint is
level with the top of the head.
Never drive with the head restraints
removed; they must be in place and
adjusted correctly.
Head restraint height and
angle adjustment
F To raise a head restraint, pull it upwards.
F T o remove the head restraint, press the
lug A and pull the head restraint upwards.
F
T
o put the head restraint back in place,
engage the head restraint rods in the
openings keeping them in line with the seat
backrest.
F
T
o lower the head restraint, press the lug A
and push down on the head restraint at the
same time.
F
T
o adjust the angle of the head restraint, tilt
its lower part for wards or rear wards.
comfort
Page 79 of 400
77
Rear seats
F Move the corresponding front seat for ward if necessary.
F
P
lace the head restraints in the low
position or remove them.
F
R
emove the seat belt from its guide.
Folding the cushion and
backrest
F Lift the cushion 1 by hand, lifting from the rear.
F
T
ip the seat cushion 1 fully against the
front seat.
F
K
eep the seat belt guide 2 held against
the
vehicle. F
P
ull control 3 for wards to release the seat
back 4 .
F
F
old the seat backrest 4.
Bench seat with split cushion and backrest (left hand 2/3, right hand 1/3) which can be folded individually to adapt the load space in the boot.
comfort
Page 81 of 400
79
These have one position for use (up) and a
stowed position (down).
They can also be removed.
To remove a head restraint:
F
r
elease the backrest using control 1 ,
F
t
ilt the backrest 2 slightly for wards,
F
p
ull the head restraint upwards to the stop,
F
t
hen, press the lug A .
Rear head restraints
Never drive with the head restraints
removed; they must be in place and
correctly adjusted.
F
R
emove the seat cushion 1 from its fixings
by pulling upwards.
Removing the seat cushion
Refitting the seat cushion
F Position the seat cushion 1 vertically in its fixings.
comfort
Page 84 of 400
Front fittings
1. glove box
2. Sto
rage
3.
Sto
rage (according to version)
4.
T
icket holder (according to version)
5.
R
emovable ashtray / 12 V accessor y
socket (120 W)
P
ress the lid to open the ashtray.
T
o empty the ashtray, remove it by pulling it
upwards.
6.
ce
ntre armrest and storage
I
t is illuminated, cooled and contains
storage spaces (1.5 litre bottle, ...).
7.
U
SB Player
8.
1 2
V accessory socket (120 W )
O
bserve the maximum power rating to
avoid damaging your device.
9.
do
or panel with cup holder
Page 85 of 400
83
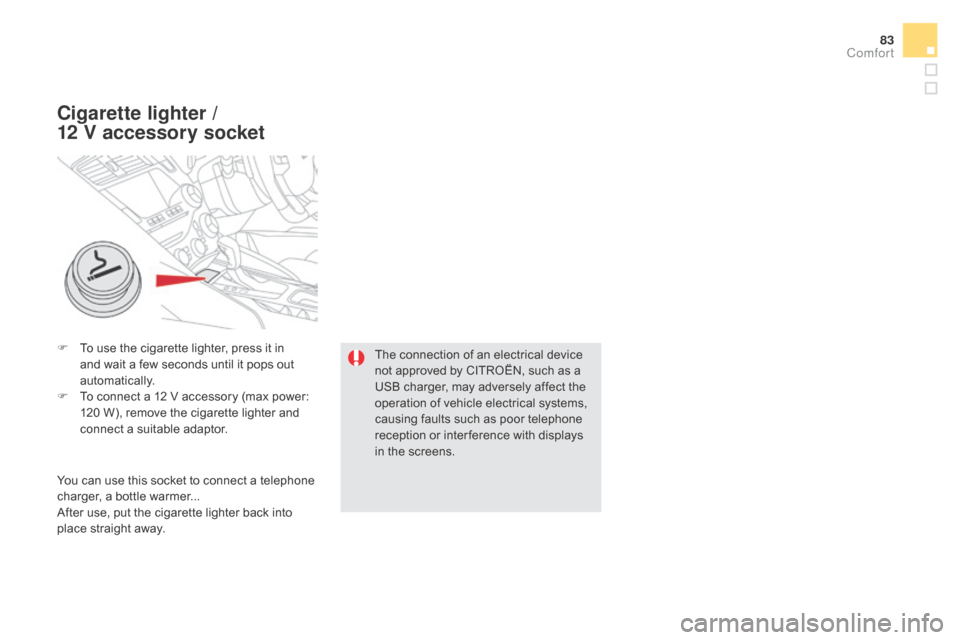
F To use the cigarette lighter, press it in and wait a few seconds until it pops out
automatically.
F
T
o connect a 12 V accessory (max power:
120 W), remove the cigarette lighter and
connect a suitable adaptor.
cigarette lighter /
12
V
accessory socket
The connection of an electrical device
not approved by CITROËN, such as a
USB charger, may adversely affect the
operation of vehicle electrical systems,
causing faults such as poor telephone
reception or inter ference with displays
in the screens.
You can use this socket to connect a telephone
charger, a bottle warmer...
After use, put the cigarette lighter
back into
place straight away.
comfort
Page 86 of 400
Mats
Fitting
To fit the mat on the driver's side:
F m ove the seat fully back,
F
f
it the mat in place,
F
engage the fixings by pressing down on them.
Removal
To remove the mat on the driver's side:
F m ove the seat fully back,
F
d
isengage the fixings, leaving the fixing
pins in the floor carpet,
F
r
emove the mat.
Refitting
To refit the mat on the driver's side:
F p osition the mat correctly,
F
r
efit the fixings by pressing,
F
c
heck that the mat is secured correctly.
To avoid any risk of jamming of the
pedals:
-
o
nly use mats which are suited to
the fixings already present in the
vehicle; these fixings must be used,
-
n
ever fit one mat on top of another.
The use of mats not approved by
CITROËN may inter fere with access to
the pedals and hinder the operation of
the cruise control / speed limiter.