Page 305 of 380

1
1
20
5
4
2
7
303
Select a radio station or frequency (refer to the corresponding s ection). Press on Radio Media
to display the p
rimary pag e.
Press
on the secondary page.
Select " Settings ".
Select " Radio".
Activate/deactivate
" RdS
opt
ions".
Press on Radio Media
to
display
the
p
rimary
pag
e.
Press
on
the
secondary
page. Press on "
Save"
(preset).
Select
a number in the list to preset the
p
reviously chosen radio station.
A
long press on a number presets (memorises)
t
he station.
Press on Frequency
.
Enter
the
frequency
in
full
(e.g.:
9
2.10
MHz)
using
the
keypad
then
" Co
nfirm ".
Changing radio station
Pressing
the
name
of
the
current
radio
station
b
rings
up
a
list.
To
change
radio
station
press
the
name
of
the
de
sired
s
tation. Or
Press on Radio Media
to display the
p
rimary
pag
e.
Select " Save"
(preset).
Preset a station Activate/ de activate RdS
OR
THE
n
A p
ress on this button presets all of
the
stations one after the other.
Recall pre-set stations
RDS, if activated, allows you to continue listening to the same station by automatic r
etuning to alternative frequencies.
H
owever, in certain conditions, coverage
o
f an RDS station may not be assured
t
hroughout the entire country as radio
s
tations do not cover 100 % of the
t
erritory. This explains the loss of
r
eception of the station during a journey.
Audio and Telematics
Page 306 of 380

Display of options:
i f active but not available, the display will be greyed out,
if
active and available, the display will be blank. Display
of "Radiotext" for
t
he current station.
Manage the Jukebox.
Display current action.
Select the audio source.
Display the "DAB" band.
Display
of
the name of the
c
urrent
station.
Short-cut: access to the choice of audio
s
ource and the list of stations (or titles,
d
epending on the source).
Select the radio station.
Any
thumbnail
broadcast
by
t
he
station.
Preset stations, buttons 1
to
15.
Short
press:
select
the
p
reset
radio
station.
Long
press:
preset
a
radio
s
tation. Next
"
Multiplex".
Next radio station.
Secondary p
age.
Display
the
name
and
n
umber
of
the
multiplex
ser
vice
b
eing
u
sed.
Previous
"
Multiplex".
Previous
radio
station.
DAB (Digital Audio Broadcasting) radio
If the "DAB" radio station being listened to is not a
vailable on "FM", the "DAB FM" option is greyed out.
Journaline® is a text-based information service designed for digital radio systems.
I
t
provides
text-based information structured around topics and sub-topics.
This
service is available from the "LIST OF DAB STATIONS" page.
Page 307 of 380

31
20
305
Select change of source.
P ress on Radio Media
to display the
p
rimary
pag
e.
Select "
d
AB Radio ".
Select " List"
in the primary page.
Select
the radio station from the list offered.Press on Radio Media
to display the
p
rimary
pag
e.
Press on the secondary page.
Select " Settings ".
Select " Radio".
Select "
di
gital/FM auto
tracking " then "Confirm ".
dAB / FM auto trackingdi
gital radio
"DAB" does not cover 100% of the t
e r r i to r y.
When
the digital radio signal is poor,
"
DAB/FM
s
tation
t
racking"
a
llows
y
ou
t
o
c
ontinue listening to the same station,
b
y automatically switching to the
c
orresponding "FM" analogue station
(
if there is one). If
"DAB/FM station tracking" is a
ctivated, there is a difference of a few
s
econds when the system switches to
"
FM" analogue radio with sometimes a
v
ariation in volume.
When
the digital signal is restored, the
s
ystem automatically changes back to
"
DA B ".
Digital
radio
provides
higher
quality
r
eception
and
also
the
graphical
display o
f
current
information
on
the
radio
s
tation
being
listened
to.
Select
"List"
in
t
he
primary
page.
The
range
of
multiplexes
available
is
d
isplayed
in
alphabetical
order. If
the "DAB" station being listened to
i
s not available on "FM" ("
d
AB/FM"
option
greyed out), or "DAB/FM station
t
racking" is not activated, the sound
w
ill cut out while the digital signal is too
w
eak.
or
Select " Radio list "
in
the
secondary
pag
e.
Audio and Telematics
Page 308 of 380

3
Media
USB playerSelection of source
The steering mounted SRC (source) b
utton can be used to go to the next
m
edia source, available if the source
i
s active.
Select
change of source.
Press on Radio Media
to display the
p
rimary
pag
e.
The
system
builds
playlists
(in
temporary
m
emory),
an
operation
which
can
take
from
a
few
seconds
to
several
minutes
at
the
first
c
onnection.
Reduce
the
number
of
non-music
files
and
the
n
umber
of
folders
to
reduce
the
waiting
time.
The
playlists
are
updated
every
time
the
i
gnition
is
switched
off
or
connection
of
a
USB
m
emory
stick.
The
lists
are
memorised:
if
they
a
re
not
modified,
the
subsequent
loading
time
w
ill
be
shorter.
Insert
the
USB
memory
stick
into
the
USB
port
o
r
connect
the
USB
device
to
the
USB
port
u
sing
a
suitable
cable
(not
supplied).
Auxiliary (AUX) socket
Connect the portable device (MP3 player…) to t
he auxiliary Jack socket using an audio cable
(
not
sup
plied).
First
adjust the volume of your portable device
(
to a high level). Then adjust the volume of your
a
udio system.
Display
and management of the controls are
v
ia the portable device. Choose
the source.
Page 309 of 380

307
The audio equipment will only play audio files with ".wma, .aac, .flac, .ogg and .mp3"
f
ile extensions and with a bit rate of between
3
2 Kbps and 320 Kbps.
It
also supports VBR (Variable Bit Rate) mode.
No
other type of file (.mp4, ...) can be played.
".wma"
files must be of the standard wma 9 type.
The
sampling rates supported are 32, 44 and
4
8 KHz.
It
is advisable to restrict file names to
2
0 characters, without using of special
c
haracters (e.g.: " " ? ; ù) to avoid any playing
a
nd
d
isplaying
pro
blems.
Information and advice
Use only USB memory sticks formatted FAT32 (file allocation table).
The
system
supports
USB
mass
s
torage
portable
players,
BlackBerry
®
devices o
r A
pple® players via USB
ports.
The
adaptor cable not supplied.
Control
of
the
peripheral device is with
t
he
audio
system
controls.
Other
peripherals, not recognised on
c
onnection,
must
be connected to the
a
uxiliary
socket
using a Jack cable (not
sup
plied). It
is recommended that the USB cable
f
or the portable device is used.
The system does not support the simultaneous connection of two identical devices (two m
emory sticks or two Apple
® players) but it is p
ossible
to
connect
one
memory stick and one A
pple
® player at the same time.
Audio and Telematics
Page 310 of 380

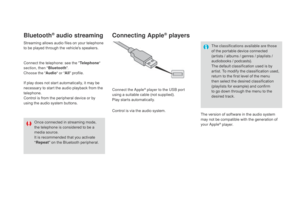
Bluetooth® audio streaming
Streaming allows audio files on your telephone to be played through the vehicle's speakers.
Connect
the telephone: see the "Telephone "
section, then " Bluetooth".
Choose the " Audio" or "All"
pro
file.
If
play does not start automatically, it may be
n
ecessary to start the audio playback from the
t
elephone.
Control
is from the peripheral device or by
u
sing the audio system buttons.
Once
connected in streaming mode,
t
he telephone is considered to be a
m
edia source.
It
is recommended that you activate
"R
epeat"
on the Bluetooth peripheral.
Connecting Apple® players
Connect the Apple® player to the USB port
using
a
suitable
cable (not supplied).
Play
starts
automatically.
Control
is
via
the
audio system. The classifications available are those
of
the portable device connected
(
artists / albums / genres / playlists /
a
udiobooks / podcasts).
The default classification used is by
a
rtist. To modify the classification used,
r
eturn to the first level of the menu
t
hen select the desired classification (
playlists for example) and confirm t
o go down through the menu to the
de
sired
t
rack.
The
version of software in the audio system
m
ay not be compatible with the generation of
y
our Apple
® player.
Page 311 of 380
12
13
15
309
Managing the Jukebox
Connect the device (MP3 player...) to the USB port or auxiliary Jack socket using a suitable
a
udio cable.
When
no audio file is copied to the
s
ystem, which has a capacity of 8 GB,
a
ll of the Jukebox function symbols are
g
reyed and are not available.
Select " Media list ". Select
the magnifying glass to enter t
he folder or album and select audio
f
ile by audio file.
Select copy " Copy Jukebox ". Select "
Confirm " then "Copy".
Select " Sor t by folder ". Select "
ne
w folder" to create a
folder
structure in the Jukebox.
" Sor t by album ". Select "
Keep structure " to retain the structure
from
the device.
While
copying the system returns to the
p
rimary page; you can go back to the copy view
a
t any time by selecting this button.
Or Or
Audio and Telematics
Page 312 of 380
12
3
3
3
4
4
4
5
5
5
6
6
6
7
7
7
Level 1
Settings
Level 2Level 3
Audio settings Audio settings
Audio settings
Choice of color scheme