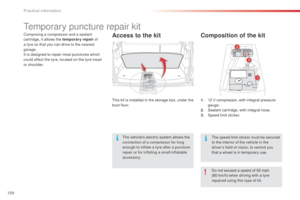
Page 105 of 292

103
C3Picasso_en_Chap07_securite-enfants_ed01-2015
"ISOFIX" mountings
- 2 rings A, located between the backrest
and the seat cushion, identified by a label, -
a r
ing B
, located in the roof, with the TOP
TETHER logo, for fixing the upper strap.
The TOP TETHER is used to secure the
upper strap of child seats that have one. This
arrangement limits the for ward tipping of the
child seat in the event of a front impact. To secure the child seat to the TOP TETHER
:
-
r
emove and stow the head restraint before
installing a child seat on this seat (refit it
once the child seat has been removed),
-
p
ass the child seat upper strap between
the apertures for the head restraint rods,
-
f
ix the hook on the upper strap to the
ring B
,
-
t
ighten the upper strap.
Your vehicle is approved to the latest
ISOFIX
regulations .
The seats represented below, are fitted with
regulation ISOFIX mountings.
If a child is not installed in a vehicle
correctly, the child's protection in the
event of an accident will be compromised.
There are 3 rings for each seat:
Follow strictly the advice given in the
installation instructions provided with
the child seat.
This ISOFIX mounting system provides reliable,
safe and fast fitting of the child seat in your
vehicle.
ISOFIX child seats are fitted with two latches
which are secured easily on these rings A .
Some also have an upper strap which can be
attached to ring B . Refer to the table for the possibilities for fitting
ISOFIX child seats in your vehicle.
The rear seats must be in the fully back
position to install ISOFIX seats.
7
Child safety
Page 106 of 292
104
C3Picasso_en_Chap07_securite-enfants_ed01-2015
ISOFIX child seat recommended by CITROËN and approved for
your vehicle
"RÖMER Duo Plus ISOFIX"
(size category B1 )
Group 1: from 9 to 18 kg
Installed only in the for wards facing position.
Secured to rings A , as well as the third ring B, called the TOP TETHER,
using the upper strap.
Three seat body angles: sitting, reclining, lying.
This child seat can also be used on seats which are not fitted with ISOFIX mountings. In this case, it must be attached to the vehicle seat using
the three point seat belt.
Follow the instructions for fitting the child seat given in the seat manufacturer's installation guide.
Child safety
Page 107 of 292

105
C3Picasso_en_Chap07_securite-enfants_ed01-2015
Table of seating positions for ISOFIX child seatsIn accordance with European Regulations, this table indicates the options for installing ISOFIX child seats on seats in the vehicle fitted with ISOFIX
mountings.
In the case of universal and semi-universal ISOFIX child seats, the ISOFIX size category, determined by a letter from A to G, is indicated on the child
seat next to the ISOFIX logo.
I UF:
s
eat suitable for the installation of an I sofix Universal seat, F or wards-facing secured using the
upper strap.
IL- SU: seat suitable for the installation of an I sofix Semi-Universal seat either:
-
r
ear ward facing fitted with an upper strap or a support leg,
-
f
or ward facing fitted with a support leg,
-
a s
hell seat fitted with an upper strap or a support leg.
For advice on securing the top tether belt, refer to the " I
S
OFIX
m
ountings" section.
*
The ISOFIX infant car seat (shell seat), secured on the lower rings of a vehicle ISOFIX seat, occupies two rear seats.
Weight of the child / indicative age
Less than 10 kg (group 0)
Up to approx. 6
months Less than 10 kg
(group 0)
Less than 13 kg (group 0+)
Up to approx. 1 year From 9 to 18 kg (group 1)
From approx. 1 to 3 years
Type of ISOFIX child seat Shellrearward facing rearward facing forward facing
ISOFIX size categor y F G C D E C D A B B1
ISOFIX universal and semi-universal child
seats which can be installed on the outer
rear seats IL- SU
* IL- SU IL- SU IUF
IL- SU
Remove and stow the head restraint
before installing a child seat with a
backrest on a passenger seat. Refit the
head restraint once the child seat has
been removed.
7
Child safety
Page 108 of 292

106
C3Picasso_en_Chap07_securite-enfants_ed01-2015
The incorrect installation of a child seat in a
vehicle compromises the child's protection in
the event of an accident.
Ensure that there is no seat belt or seat belt
buckle under the child seat, as this could
destabilise it.
Remember to fasten the seat belts or the
child seat harnesses keeping the slack
relative to the child's body to a minimum,
even for short journeys.
When installing a child seat using the seat
belt, ensure that the seat belt is tightened
correctly on the child seat and that it secures
the child seat firmly on the seat of your
vehicle. If your passenger seat is adjustable,
move it for wards if necessary.
At rear seating positions, always leave
sufficient space between the front seat and:
-
a r
ear ward facing child seat,
-
t
he child's feet for a child seat fitted
forward facing.
To do this, move the front seat for wards
and, if necessary, move its backrest into the
upright position. For optimum installation of the for ward facing
child seat, ensure that the back of the child
seat is as close as possible to the backrest of
the vehicle's seat, in contact if possible.
You mst remove the head restraint before
installing a child seat with backrest to a
passenger seat.
Ensure that the head restraint is stored or
attached securely to prevent it from being
thrown around the vehicle in the event of
sharp braking. Refit the head restraint when
the child seat is removed.
As a safety precaution, do not leave:
-
a c
hild or children alone and
unsupervised in a vehicle,
-
a c
hild or an animal in a vehicle which
is exposed to the sun, with the windows
closed,
-
t
he keys within reach of children inside
the vehicle.
To prevent accidental opening of the doors
and rear windows, use the child lock.
Take care not to open the rear windows by
more than one third.
To protect young children from the rays of the
sun, fit side blinds on the rear windows.Installing a booster seat
The chest part of the seat belt must be
positioned on the child's shoulder without
touching the neck.
Ensure that the lap part of the seat belt
passes correctly over the child's thighs.
CITROËN recommends the use of a booster
seat which has a back, fitted with a seat belt
guide at shoulder level.
Advice
Children at the front
The legislation on carrying children on the
front passenger seat is specific to each
country. Refer to the legislation in force in
your country.
Deactivate the passenger's front airbag
when a rear ward facing child seat is installed
on the front passenger seat.
Otherwise, the child risks being seriously
injured or killed if the airbag is deployed.
Child safety
Page 109 of 292

107
C3Picasso_en_Chap07_securite-enfants_ed01-2015
Manual child lockMechanical system to prevent opening of the
rear door using its interior control.
The control is located on the edge of each rear
d o o r.
Locking
F Insert the ignition key in the red control.
F T urn in the direction indicated by the arrow
marked on the door.
Electric child lockControl system to prevent opening of the rear
doors using their interior controls and use of
the rear electric windows.
The control is located on the driver's door, with
the electric window controls.
Locking
F Press button A.
The indicator lamp in button A comes on, accompanied
by a message in the multifunction screen.
This indicator lamp remains on until the child lock is
deactivated.
Unlocking
F Insert the ignition key in the red control.
F T urn in the opposition direction to the arrow
marked on the door.
Unlocking
F Press button A again.
The indicator lamp in button A goes off,
accompanied by a message in the multifunction
screen.
This indicator lamp remains off until the child
lock is activated.
The activation of the function
is confirmed by the temporary
illumination of this warning lamp in
the translucent digital instrument
panel. Any other status of the indicator
lamp indicates a malfunction of the
electric child lock. Have it checked
by a CITROËN dealer or a qualified
workshop.
This system is independent and in no
circumstances does it take the place of
the central locking system.
Check the status of the child lock each
time you switch on the ignition.
Always remove the key from the ignition
when leaving the vehicle, even for a
short time.
7
Child safety
Page 110 of 292

108
C3Picasso_en_Chap08_securite_ed01-2015
Direction indicatorsHazard warning lamps
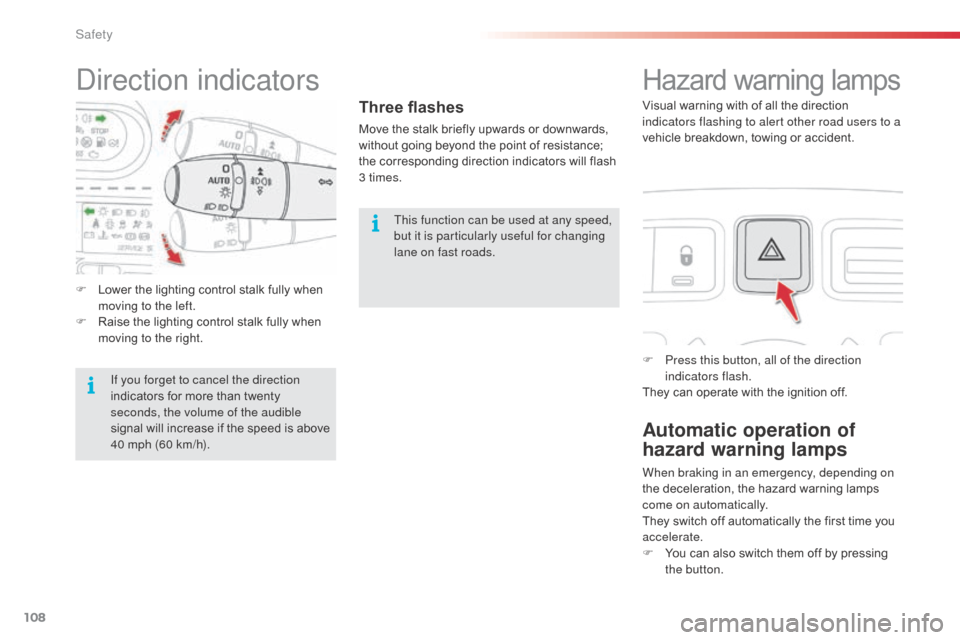
F Press this button, all of the direction indicators flash.
They can operate with the ignition off.
Automatic operation of
hazard warning lamps
When braking in an emergency, depending on
the deceleration, the hazard warning lamps
come on automatically.
They switch off automatically the first time you
accelerate.
F
Y
ou can also switch them off by pressing
the button.
Three flashes
Move the stalk briefly upwards or downwards,
without going beyond the point of resistance;
the corresponding direction indicators will flash
3 times. Visual warning with of all the direction
indicators flashing to alert other road users to a
vehicle breakdown, towing or accident.
F
L
ower the lighting control stalk fully when
moving to the left.
F
R
aise the lighting control stalk fully when
moving to the right.
If you forget to cancel the direction
indicators for more than twenty
seconds, the volume of the audible
signal will increase if the speed is above
40 mph (60 km/h). This function can be used at any speed,
but it is particularly useful for changing
lane on fast roads.
Safety
Page 111 of 292

109
C3Picasso_en_Chap08_securite_ed01-2015
Horn
F Press one of the spokes of the steering wheel. Audible warning to alert other road users to an
imminent danger.
Under-inflation detection
System which automatically checks the pressures of the tyres while driving.The system monitors the pressures in the four
tyres, once the vehicle is moving.
It compares the information given by the four
wheel speed sensors with reference values,
which must be reinitialised ever y time the
tyre pressures are adjusted or a wheel
changed .
The system triggers an alert as soon as it
detects a drop in the inflation pressure of one
or more tyres.
The under-inflation detection system
does not replace the need for vigilance
on the part of the driver.
This system does not avoid the need to
check the tyre pressures (including the
spare wheel) every month as well as
before a long journey.
Driving with under-inflated tyres impairs
road holding, extends braking distances
and causes premature tyre wear,
particularly under arduous condition
(high loading, high speed, long journey). The inflation pressures defined for
your vehicle can be found on the tyre
pressure label.
For more information on the
identification markings, refer to the
corresponding section.
Tyre pressures should be checked
when the tyres are "cold" (vehicle
stopped for 1 hour or after a journey of
less than 6 miles (10 km) at moderate
speeds).
Other wise (when hot), add 0.3 bar to
the pressures shown on the label.
Driving with under-inflated tyres
increases fuel consumption.
8
Safety
Page 112 of 292

110
C3Picasso_en_Chap08_securite_ed01-2015
Under-inflation alert
This is given by fixed illumination of
this warning lamp, accompanied by
an audible signal and, depending on
equipment, the display of a message.
F
R
educe speed immediately, avoid
excessive steering movements and sudden
braking.
F
S
top the vehicle as soon as it is safe
to do so.
The loss of pressure detected does not
always cause visible bulging of the tyre.
Do not satisfy yourself with just a visual
check. The alert is maintained until the system
is reinitialised.
F
I n the event of a puncture, use the
temporary puncture repair kit or the spare
wheel (depending on equipment),
or
F
i
f you have a compressor, such as the one
in the temporary puncture repair kit, check
the pressures of the four tyres when cold,
or
F
i
f it is not possible to make this check
immediately, drive carefully at reduced
speed.
Reinitialisation
It is necessary to reinitialise the system every
time one or more tyre pressure is adjusted, and
after changing one or more wheels.
A label attached to the middle pillar, driver's
side, gives a reminder of this.
Before reinitialising the system, ensure
that the pressures of the four tyres are
correct for the use of the vehicle and in
line with the recommendations on the
tyre pressure label.
The under-inflation detection system
does not give a warning if a pressure is
incorrect at the time of reinitialisation.
Safety