2016 CHRYSLER TOWN AND COUNTRY service indicator
[x] Cancel search: service indicatorPage 637 of 727
Loose Fuel Filler Cap Message
If the vehicle diagnostic system determines that the fuel
filler cap is loose, improperly installed, or damaged, a
“gASCAP” message will display in the odometer or a
“CHECK GASCAP” message will be displayed in the
Electronic Vehicle Information Center (EVIC). Refer to
“Electronic Vehicle Information Center (EVIC)” in “Un-
derstanding Your Instrument Panel” for further informa-
tion. Tighten the gas cap until a “clicking” sound is
heard. This is an indication that the gas cap is properly
tightened.
Push the odometer reset button to turn the message off. If
the problem persists, the message will appear the next
time the vehicle is started. This might indicate a damaged
cap. If the problem is detected twice in a row, the system
will turn on the MIL. Resolving the problem will turn the
MIL light off.
EMISSIONS INSPECTION AND MAINTENANCE
PROGRAMS
In some localities, it may be a legal requirement to pass
an inspection of your vehicle’s emissions control system.
Failure to pass could prevent vehicle registration.For states that require an Inspection and Mainte-
nance (I/M), this check verifies the “Malfunction
Indicator Light (MIL)” is functioning and is not
on when the engine is running, and that the OBD II
system is ready for testing.
Normally, the OBD II system will be ready. The OBD II
system may notbe ready if your vehicle was recently
serviced, recently had a dead battery or a battery replace-
ment. If the OBD II system should be determined not
ready for the I/M test, your vehicle may fail the test.
7
MAINTAINING YOUR VEHICLE 635
Page 638 of 727
Your vehicle has a simple ignition actuated test, which
you can use prior to going to the test station. To check if
your vehicle’s OBD II system is ready, you must do the
following:
1. Cycle the ignition switch to the ON position, but donot crank or start the engine.
NOTE: If you crank or start the engine, you will have to
start this test over.
2. As soon as you cycle the ignition switch to the ON position, you will see the Malfunction Indicator Light
(MIL) symbol come on as part of a normal bulb check.
3. Approximately 15 seconds later, one of two things will happen:
• The MIL will flash for about 10 seconds and then
return to being fully illuminated until you turn OFF the ignition or start the engine. This means that your
vehicle’s OBD II system is
not readyand you should
not proceed to the I/M station.
• The MIL will not flash at all and will remain fully
illuminated until you place the ignition in the off
position or start the engine. This means that your
vehicle’s OBD II system is readyand you can proceed
to the I/M station.
If your OBD II system is not ready,you should see your
authorized dealer or repair facility. If your vehicle was
recently serviced or had a battery failure or replacement,
you may need to do nothing more than drive your
vehicle as you normally would in order for your OBD II
system to update. A recheck with the above test routine
may then indicate that the system is now ready.
Regardless of whether your vehicle’s OBD II system is
ready or not, if the MIL is illuminated during normal
vehicle operation you should have your vehicle serviced
636 MAINTAINING YOUR VEHICLE
Page 688 of 727
MAINTENANCE SCHEDULE
Your vehicle is equipped with an automatic oil change
indicator system. The oil change indicator system will
remind you that it is time to take your vehicle in for
scheduled maintenance.
Based on engine operation conditions, the oil change
indicator message will illuminate. This means that ser-
vice is required for your vehicle. Operating conditions
such as frequent short-trips, trailer tow, extremely hot or
cold ambient temperatures, and E85 fuel usage will
influence when the “Oil Change Required” message is
displayed. Severe Operating Conditions can cause the
change oil message to illuminate as early as 3,500 miles
(5,600 km) since last reset. Have your vehicle serviced as
soon as possible, within the next 500 miles (805 km).
Your authorized dealer will reset the oil change indicator
message after completing the scheduled oil change. If a
scheduled oil change is performed by someone otherthan your authorized dealer, the message can be reset by
referring to the steps described under “Electronic Vehicle
Information Center (EVIC)” in “Understanding Your
Instrument Panel” for further information.
NOTE:
Under no circumstances should oil change inter-
vals exceed 10,000 miles (16,000 km), twelve months or
350 hours of engine run time, whichever comes first. The
350 hours of engine run or idle time is generally only a
concern for fleet customers.
Severe Duty All Models
Change Engine Oil at 4,000 miles (6,500 km) if the vehicle
is operated in a dusty and off road environment or is
operated predominately at idle or only very low engine
RPM’s. This type of vehicle use is considered Severe
Duty.
686 MAINTENANCE SCHEDULES
Page 716 of 727
Headlights On Reminder..................232
High Beam/Low Beam Select ...............236
Illuminated Entry ........................20
Interior ............................. .232
License ............................. .680
Lights On Reminder .....................232
Low Fuel ............................ .344
Malfunction Indicator (Check Engine) .........345
Park ............................ .352, 677
Passing ............................. .236
Reading ............................. .263
Rear Servicing ........................ .678
Rear Tail Lamps ....................... .678
Seat Belt Reminder ..................... .330
Security Alarm ........................ .339
Service .......................... .674, 676
Side Marker ....................... .677, 678
SmartBeams .......................... .236
Tire Pressure Monitoring (TPMS) ............347Traction Control
....................... .521
Turn Signal ..................128, 351, 677, 678
Warning (Instrument Cluster Description) . . .337, 351
Loading Vehicle ....................295, 569, 571
Capacities ........................... .571
Tires ............................... .531
Load Leveling System ..................... .304
Locks ..................................35
Door .................................35
Lubrication, Body ........................ .647
Luggage Rack (Roof Rack) ...................304
Lug Nuts .............................. .601
Maintenance Free Battery ....................644
Maintenance Procedures ....................637
Maintenance Schedule ..................... .686
Malfunction Indicator Light (Check Engine) . . .345, 635
Manual, Service ......................... .700
Map/Reading Lights ...................... .263
714 INDEX
Page 723 of 727
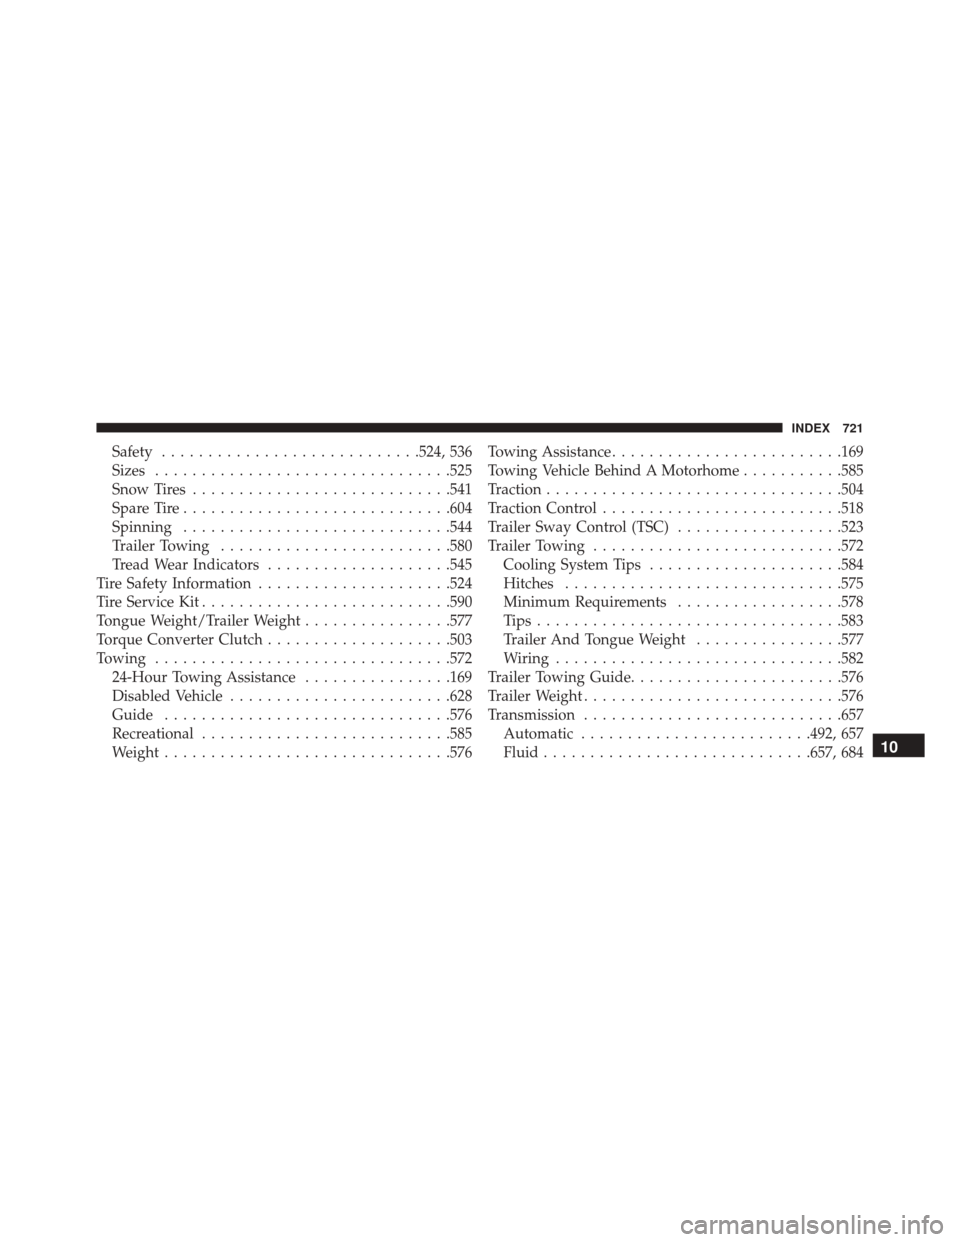
Safety........................... .524, 536
Sizes ............................... .525
Snow Tires ........................... .541
Spare Tire ............................ .604
Spinning ............................ .544
Trailer Towing ........................ .580
Tread Wear Indicators ....................545
Tire Safety Information .....................524
Tire Service Kit .......................... .590
Tongue Weight/Trailer Weight ................577
Torque Converter Clutch ....................503
Towing ............................... .572
24-Hour Towing Assistance ................169
Disabled Vehicle ....................... .628
Guide .............................. .576
Recreational .......................... .585
Weight .............................. .576Towing Assistance
........................ .169
Towing Vehicle Behind A Motorhome ...........585
Traction ............................... .504
Traction Control ......................... .518
Trailer Sway Control (TSC) ..................523
Trailer Towing .......................... .572
Cooling System Tips .....................584
Hitches ............................. .575
Minimum Requirements ..................578
Tips................................ .583
Trailer And Tongue Weight ................577
Wiring .............................. .582
Trailer Towing Guide ...................... .576
Trailer Weight ........................... .576
Transmission ........................... .657
Automatic ........................ .492, 657
Fluid ............................ .657, 684
10
INDEX 721
Page 724 of 727
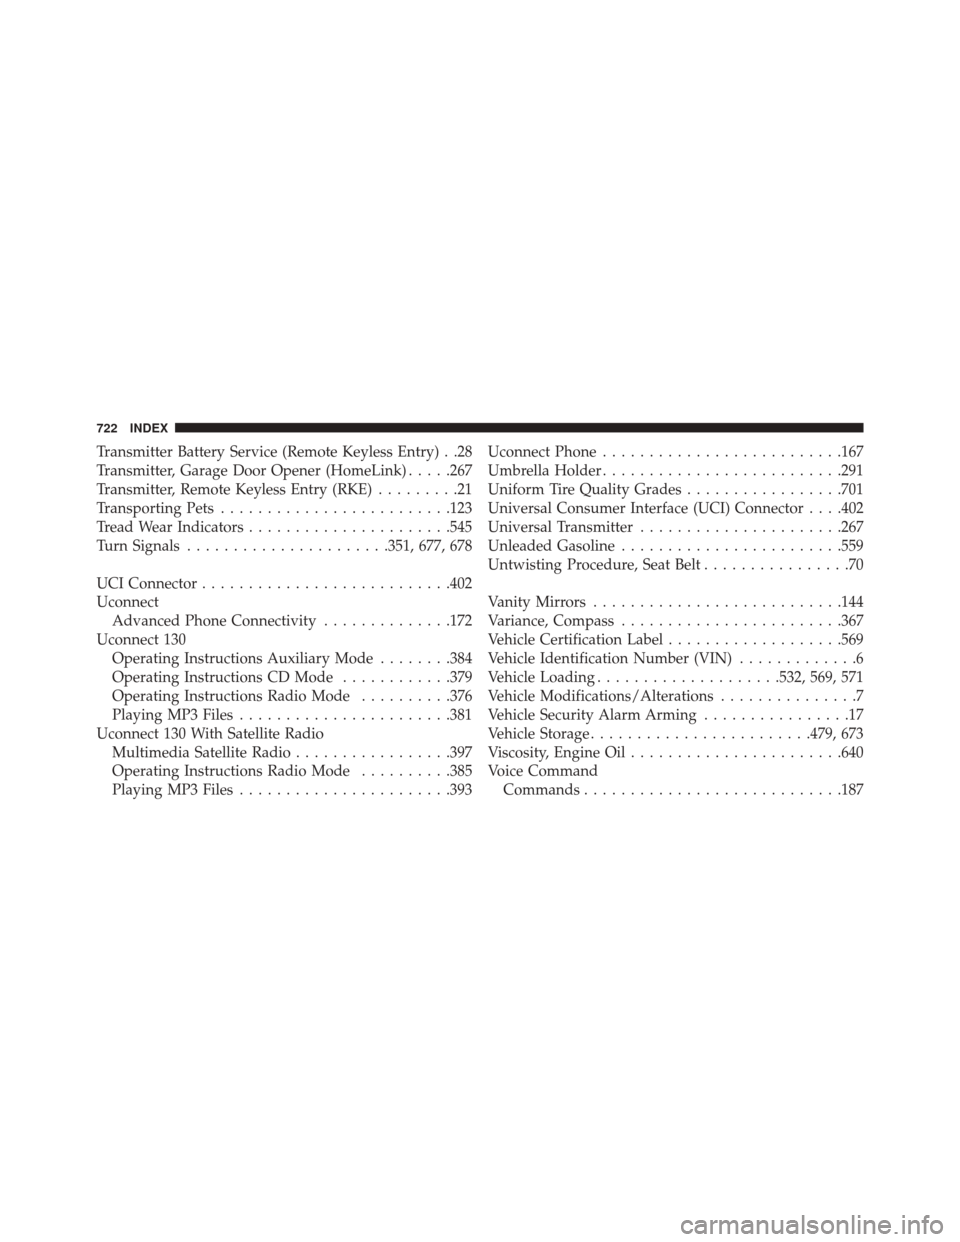
Transmitter Battery Service (Remote Keyless Entry) . .28
Transmitter, Garage Door Opener (HomeLink).....267
Transmitter, Remote Keyless Entry (RKE) .........21
Transporting Pets ........................ .123
Tread Wear Indicators ..................... .545
Turn Signals ..................... .351, 677, 678
UCI Connector .......................... .402
Uconnect Advanced Phone Connectivity ..............172
Uconnect 130 Operating Instructions Auxiliary Mode ........384
Operating Instructions CD Mode ............379
Operating Instructions Radio Mode ..........376
Playing MP3 Files ...................... .381
Uconnect 130 With Satellite Radio Multimedia Satellite Radio .................397
Operating Instructions Radio Mode ..........385
Playing MP3 Files ...................... .393Uconnect Phone
......................... .167
Umbrella Holder ......................... .291
Uniform Tire Quality Grades .................701
Universal Consumer Interface (UCI) Connector . . . .402
Universal Transmitter ..................... .267
Unleaded Gasoline ....................... .559
Untwisting Procedure, Seat Belt ................70
Vanity Mirrors .......................... .144
Variance, Compass ....................... .367
Vehicle Certification Label ...................569
Vehicle Identification Number (VIN) .............6
Vehicle Loading ....................532, 569, 571
Vehicle Modifications/Alterations ...............7
Vehicle Security Alarm Arming ................17
Vehicle Storage ....................... .479, 673
Viscosity, Engine Oil ...................... .640
Voice Command Commands ........................... .187
722 INDEX