Page 331 of 620
•1st Press Of Key Fob Unlocks
When �Driver Door� is selected with 1st Press Of Key Fob
Unlocks, only the driver’s door will unlock with the first
press of the Remote Keyless Entry (RKE) transmitter
UNLOCK button. You must press the RKE transmitter
UNLOCK button twice to unlock the passenger’s doors.
When �All Doors� is selected for 1st Press Of Key Fob
Unlocks, all doors will unlock on the first press of the
RKE transmitter UNLOCK button.
NOTE: If the vehicle is programmed 1st Press Of Key Fob
Unlocks “All Doors,” all doors will unlock no matter
which Passive Entry equipped door handle is grasped. If
1st Press Of Key Fob Unlocks “Driver Door” is pro-
grammed, only the driver ’s door will unlock when the
driver ’s door is grasped. With Passive Entry, if 1st Press
Of Key Fob Unlocks “Driver Door” is programmed,
touching the handle more than once will result in only
the driver ’s door opening. If “Driver Door” is selected, once the driver door is opened, the interior door lock/
unlock switch can be used to unlock all doors (or use
RKE transmitter).
•
Passive Entry — If Equipped
This feature allows you to lock and unlock the vehicles
door(s) without having to push the Remote Keyless Entry
(RKE) transmitter LOCK or UNLOCK buttons. To make
your selection, press the “Passive Entry” button on the
touchscreen, until a check-mark appears next to the
setting, showing that the setting has been selected. Refer
to “Keyless Enter-N-Go” in “Things To Know Before
Starting Your Vehicle”.
• Personal Settings Linked to Key Fob — If Equipped
This feature provides automatic recall of all settings
stored to a memory location (driver ’s seat, exterior
mirrors, steering column position and radio station pre-
sets) to enhance driver mobility when entering and
exiting the vehicle. To make your selection, press the
4
UNDERSTANDING YOUR INSTRUMENT PANEL 329
Page 332 of 620
“Personal Settings Linked to Key Fob” button on the
touchscreen, until a check-mark appears next to the
setting, showing that the setting has been selected.
NOTE:The seat will return to the memorized seat
location (if Personal Settings Linked to Key Fob is set to
ON) when the Remote Keyless Entry (RKE) transmitter is
used to unlock the door. Refer to “Driver Memory Seat”
in “Understanding The Features Of Your Vehicle” for
further information.
Auto Comfort Systems — If Equipped
After pressing the “Auto-On Comfort” button on the
touchscreen the following settings will be available:
• Auto-On Driver Heated/Ventilated Seat & Steering
Wheel With Vehicle Start — If Equipped
When this feature is selected the driver’s heated seat and
heated steering wheel will automatically turn ON when temperatures are below 40° F (4.4° C). When tempera-
tures are above 80° F (26.7° C) the driver vented seat will
turn ON. To make your selection, press the “Auto-On
Driver Heated/Ventilated Seat & Steering Wheel With
Vehicle Start” button to select from “Off,” “Remote Start”
or “All Starts” until a check-mark appears next to setting,
showing that setting has been selected.
Engine Off Options
After pressing the “Engine Off Options” button on the
touchscreen the following settings will be available:
•
Easy Exit Seat — If Equipped
When this feature is selected, the Driver ’s seat will
automatically move rearward once the engine is shut off.
To make your selection, press the “Easy Exit Seat” button
on the touchscreen, until a check-mark appears next to
setting, showing that setting has been selected.
330 UNDERSTANDING YOUR INSTRUMENT PANEL
Page 338 of 620
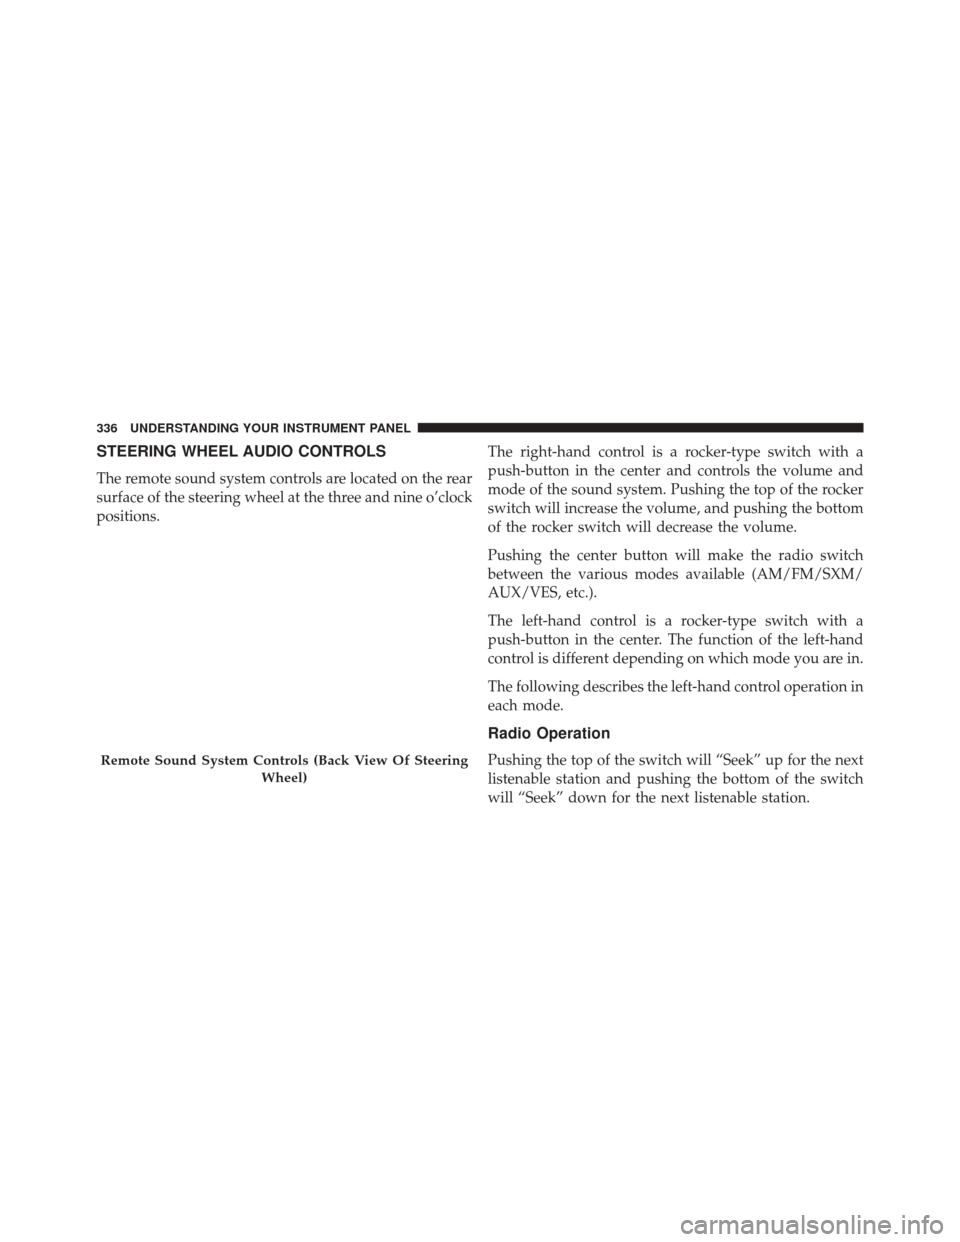
STEERING WHEEL AUDIO CONTROLS
The remote sound system controls are located on the rear
surface of the steering wheel at the three and nine o’clock
positions.The right-hand control is a rocker-type switch with a
push-button in the center and controls the volume and
mode of the sound system. Pushing the top of the rocker
switch will increase the volume, and pushing the bottom
of the rocker switch will decrease the volume.
Pushing the center button will make the radio switch
between the various modes available (AM/FM/SXM/
AUX/VES, etc.).
The left-hand control is a rocker-type switch with a
push-button in the center. The function of the left-hand
control is different depending on which mode you are in.
The following describes the left-hand control operation in
each mode.
Radio Operation
Pushing the top of the switch will “Seek” up for the next
listenable station and pushing the bottom of the switch
will “Seek” down for the next listenable station.Remote Sound System Controls (Back View Of Steering
Wheel)
336 UNDERSTANDING YOUR INSTRUMENT PANEL
Page 353 of 620
If you see theicon on your touchscreen, you have
the Uconnect 8.4AN system. If not, you have a
Uconnect 8.4A system. Get Started
All you need to control your Uconnect system with your
voice are the buttons on your steering wheel.
1. Visit
UconnectPhone.com to check mobile device and
feature compatibility and to find phone pairing
instructions.
2. Reduce background noise. Wind and passenger con- versations are examples of noise that may impact
recognition.
Uconnect 8.4AN
4
UNDERSTANDING YOUR INSTRUMENT PANEL 351
Page 361 of 620
TIP:Voice Text Reply is not compatible with iPhone, but
if your vehicle is equipped with Siri Eyes Free, you can
use your voice to send a text message.
Climate (8.4A/8.4AN)
Too hot? Too cold? Adjust vehicle temperatures hands-
free and keep everyone comfortable while you keep
moving ahead. (If vehicle is equipped with climate
control.)
Push the VR button
. After the beep, say one of the
following commands:
• Set driver temperature to 70degrees
• Set passenger temperature to 70degrees TIP:
Voice Command for Climate may only be used to
adjust the interior temperature of your vehicle. Voice
Command will not work to adjust the heated seats or
steering wheel if equipped.
Uconnect 8.4A/8.4AN Climate
4
UNDERSTANDING YOUR INSTRUMENT PANEL 359
Page 374 of 620
▫Flowing/Rising Water ..................397
▫ Shallow Standing Water .................397
� ELECTRIC POWER STEERING .............398
� FUEL SAVER TECHNOLOGY 5.7L ENGINE ONLY
— IF EQUIPPED ...................... .399
� PARKING BRAKE ..................... .400
� BRAKE SYSTEM ...................... .402
� ELECTRONIC BRAKE CONTROL SYSTEM . . . .403
▫ Electronic Brake Force Distribution (EBD) . . . .403
▫ Brake System Warning Light ..............403
▫ Anti-Lock Brake System (ABS) ............404
▫ Anti-Lock Brake Warning Light ............405
▫ Brake Assist System (BAS) ...............406 ▫
Hill Start Assist (HSA) .................407
▫ Traction Control System (TCS) ............410
▫ Electronic Stability Control (ESC) ..........410
▫ Electronic Roll Mitigation (ERM) ..........415
▫ Ready Alert Braking (RAB) ...............416
▫ Rainy Brake Support (RBS) ...............416
� TIRE SAFETY INFORMATION .............417
▫ Tire Markings ....................... .417
▫ Tire Identification Number (TIN) ...........420
▫ Tire Terminology And Definitions ..........422
▫ Tire Loading And Tire Pressure ...........423
� TIRES — GENERAL INFORMATION ........428
▫ Tire Pressure ....................... .428
372 STARTING AND OPERATING
Page 387 of 620
Standard Gear Selector
The standard transmission gear selector has PARK, RE-
VERSE, NEUTRAL, DRIVE, and LOW shift positions.
Using the LOW position manually downshifts the trans-
mission to a lower gear based on vehicle speed.Premium Gear Selector With AutoStick
The premium transmission gear selector provides PARK,
REVERSE, NEUTRAL, DRIVE, and SPORT shift posi-
tions. Manual shifts can be made using the AutoStick
shift control (shift paddles mounted on the steering
wheel). Pressing the shift paddles (-/+) while in the
DRIVE or SPORT position will manually select the trans-
mission gear, and will display the current gear in the
instrument cluster as 1, 2, 3, etc. Refer to “AutoStick” in
this section for further information.
Gear Ranges
DO NOT race the engine when shifting from PARK or
NEUTRAL into another gear range.
NOTE:
After selecting any gear range, wait a moment to
allow the selected gear to engage before accelerating.
This is especially important when the engine is cold.
Gear Selector
5
STARTING AND OPERATING 385
Page 393 of 620
5. Restart the engine.
6. Shift into the desired gear range. If the problem is nolonger detected, the transmission will return to normal
operation.
NOTE: Even if the transmission can be reset, we recom-
mend that you visit your authorized dealer at your
earliest possible convenience. Your authorized dealer has
diagnostic equipment to determine if the problem could
recur.
If the transmission cannot be reset, authorized dealer
service is required.
AUTOSTICK — IF EQUIPPED
AutoStick is a driver-interactive transmission feature
providing manual shift control, giving you more control
of the vehicle. AutoStick allows you to maximize engine
braking, eliminate undesirable upshifts and downshifts,
and improve overall vehicle performance. This system can also provide you with more control during passing,
city driving, cold slippery conditions, mountain driving,
trailer towing, and many other situations.
Operation
When the transmission is in DRIVE or SPORT mode, it
will operate automatically, shifting between the eight
available gears. To engage AutoStick, simply tap one of
the steering wheel-mounted shift paddles (+/-) while in
DRIVE or SPORT mode. In DRIVE mode, this will
activate a temporary AutoStick mode. The transmission
will revert back to normal operation after a period of
time, depending on accelerator pedal activity. When the
transmission gear selector is in the SPORT position,
tapping either shift paddle will activate
�permanent�
AutoStick mode. The transmission will remain in
AutoStick mode until the driver deliberately disables
AutoStick (as described below). Tapping (-) to enter
AutoStick will downshift the transmission to the next
5
STARTING AND OPERATING 391