2016 CHEVROLET ORLANDO tow
[x] Cancel search: towPage 96 of 372
Black plate (2,1)Chevrolet Orlando Owner Manual - 2013 - CRC - 6/5/12
4-2 Storage
Center Console Storage
Open Storage
This vehicle may have a center
console storage that is open.
Covered Storage
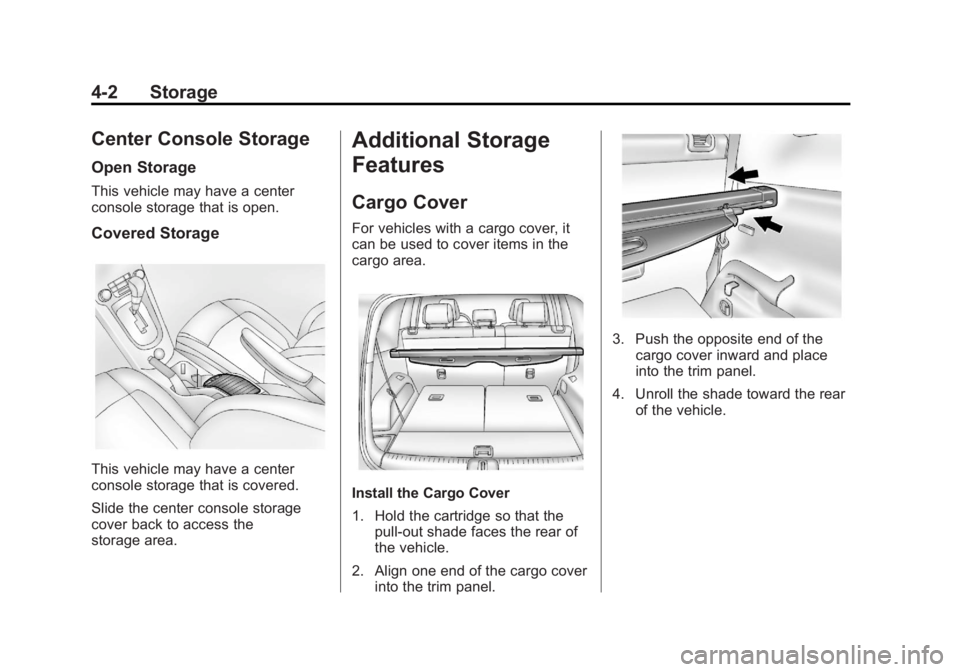
This vehicle may have a center
console storage that is covered.
Slide the center console storage
cover back to access the
storage area.
Additional Storage
Features
Cargo Cover
For vehicles with a cargo cover, it
can be used to cover items in the
cargo area.
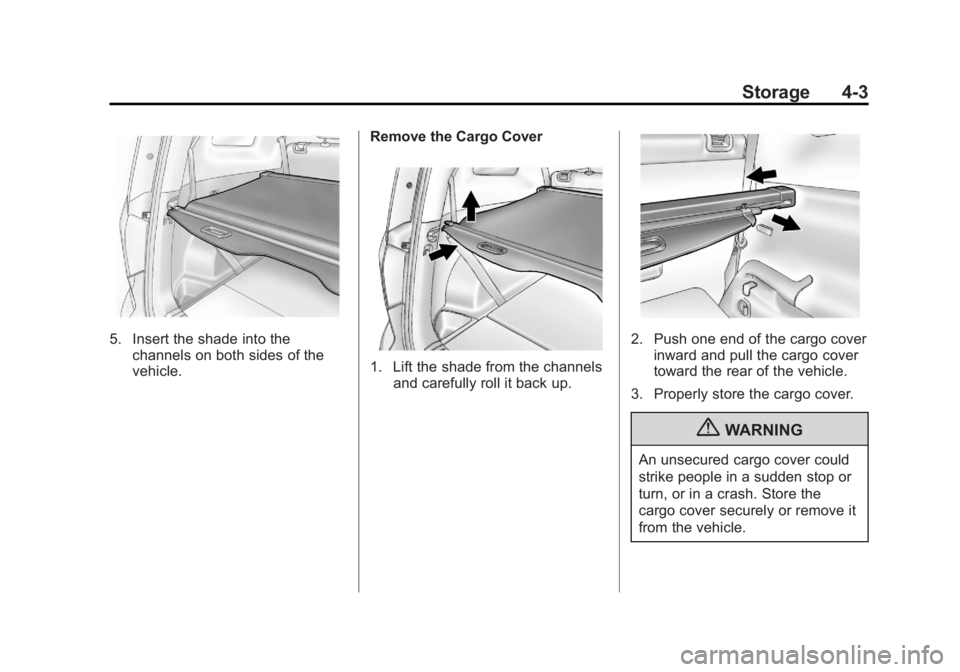
Install the Cargo Cover
1. Hold the cartridge so that thepull-out shade faces the rear of
the vehicle.
2. Align one end of the cargo cover into the trim panel.
3. Push the opposite end of thecargo cover inward and place
into the trim panel.
4. Unroll the shade toward the rear of the vehicle.
Page 97 of 372
Black plate (3,1)Chevrolet Orlando Owner Manual - 2013 - CRC - 6/5/12
Storage 4-3
5. Insert the shade into thechannels on both sides of the
vehicle. Remove the Cargo Cover
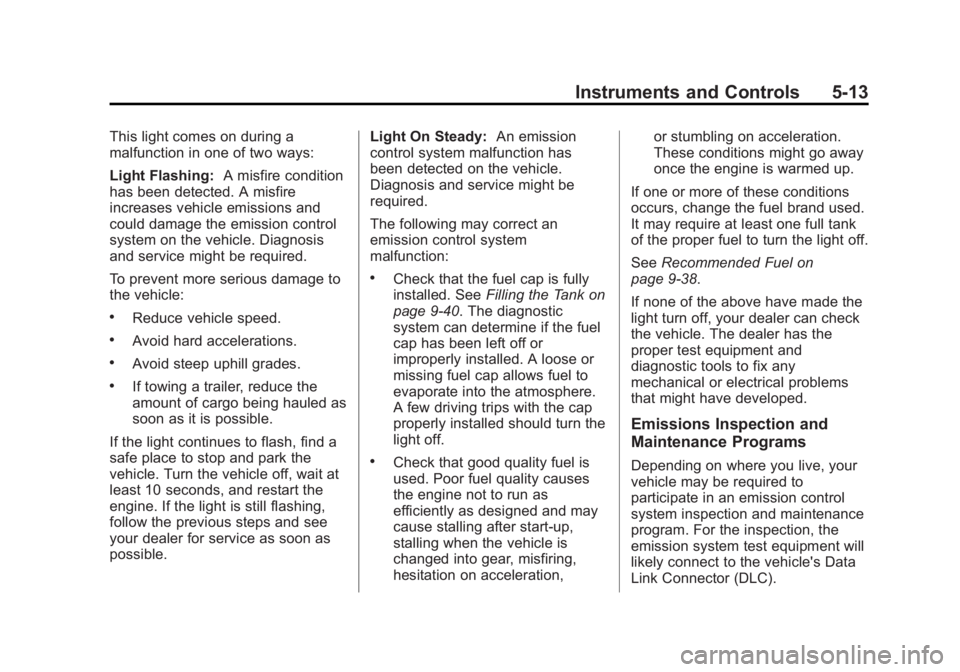
1. Lift the shade from the channels
and carefully roll it back up.
2. Push one end of the cargo cover
inward and pull the cargo cover
toward the rear of the vehicle.
3. Properly store the cargo cover.
{WARNING
An unsecured cargo cover could
strike people in a sudden stop or
turn, or in a crash. Store the
cargo cover securely or remove it
from the vehicle.
Page 104 of 372

Black plate (4,1)Chevrolet Orlando Owner Manual - 2013 - CRC - 6/5/12
5-4 Instruments and Controls
INT(Intermittent Wipes):Move the
lever up to INT for intermittent
wipes, then turn the
xINT band
up for more frequent wipes or down
for less frequent wipes.
OFF: Use to turn the wipers off.
8(Mist): For a single wipe, briefly
move the wiper lever down. For
several wipes, hold the wiper
lever down.
Clear snow and ice from the wiper
blades before using them. If frozen
to the windshield, carefully loosen or
thaw them. Damaged blades should
be replaced. See Wiper Blade
Replacement on page 10‑23.
Heavy snow or ice can overload the
wiper motor. Wipe Parking
If the ignition is changed to
LOCK/OFF mode while the wipers
are on LO, HI, or INT, they will
immediately stop.
If the windshield wiper lever is then
moved to off before the driver door
is opened or within 10 minutes, the
wipers will restart and move to the
base of the windshield.
If the ignition is changed to LOCK/
OFF while the wipers are performing
wipes due to windshield washing,
the wipers continue to run until they
reach the base of the windshield.
Windshield Washer
Pull the windshield wiper lever
toward you to spray windshield
washer fluid and activate the wipers.
The wipers will continue until the
lever is released or the maximum
wash time is reached. When the
windshield wiper lever is released,
additional wipes may occur
depending on how long the
windshield washer had beenactivated. See
Washer Fluid on
page 10‑18 for information on filling
the windshield washer fluid
reservoir.
{WARNING
In freezing weather, do not use
the washer until the windshield is
warmed. Otherwise the washer
fluid can form ice on the
windshield, blocking your vision.
Rear Window Wiper/
Washer
The rear wiper controls are on the
end of the windshield wiper lever.
Page 113 of 372
Black plate (13,1)Chevrolet Orlando Owner Manual - 2013 - CRC - 6/5/12
Instruments and Controls 5-13
This light comes on during a
malfunction in one of two ways:
Light Flashing:A misfire condition
has been detected. A misfire
increases vehicle emissions and
could damage the emission control
system on the vehicle. Diagnosis
and service might be required.
To prevent more serious damage to
the vehicle:
.Reduce vehicle speed.
.Avoid hard accelerations.
.Avoid steep uphill grades.
.If towing a trailer, reduce the
amount of cargo being hauled as
soon as it is possible.
If the light continues to flash, find a
safe place to stop and park the
vehicle. Turn the vehicle off, wait at
least 10 seconds, and restart the
engine. If the light is still flashing,
follow the previous steps and see
your dealer for service as soon as
possible. Light On Steady:
An emission
control system malfunction has
been detected on the vehicle.
Diagnosis and service might be
required.
The following may correct an
emission control system
malfunction:
.Check that the fuel cap is fully
installed. See Filling the Tank on
page 9‑40. The diagnostic
system can determine if the fuel
cap has been left off or
improperly installed. A loose or
missing fuel cap allows fuel to
evaporate into the atmosphere.
A few driving trips with the cap
properly installed should turn the
light off.
.Check that good quality fuel is
used. Poor fuel quality causes
the engine not to run as
efficiently as designed and may
cause stalling after start-up,
stalling when the vehicle is
changed into gear, misfiring,
hesitation on acceleration, or stumbling on acceleration.
These conditions might go away
once the engine is warmed up.
If one or more of these conditions
occurs, change the fuel brand used.
It may require at least one full tank
of the proper fuel to turn the light off.
See Recommended Fuel on
page 9‑38.
If none of the above have made the
light turn off, your dealer can check
the vehicle. The dealer has the
proper test equipment and
diagnostic tools to fix any
mechanical or electrical problems
that might have developed.
Emissions Inspection and
Maintenance Programs
Depending on where you live, your
vehicle may be required to
participate in an emission control
system inspection and maintenance
program. For the inspection, the
emission system test equipment will
likely connect to the vehicle's Data
Link Connector (DLC).
Page 115 of 372
Black plate (15,1)Chevrolet Orlando Owner Manual - 2013 - CRC - 6/5/12
Instruments and Controls 5-15
The brake system warning light
should come on briefly as the
engine is started. If it does not come
on, have the vehicle serviced by
your dealer.
{WARNING
The brake system might not be
working properly if the brake
system warning light is on.
Driving with the brake system
warning light on can lead to a
crash. If the light is still on after
the vehicle has been pulled off
the road and carefully stopped,
have the vehicle towed for
service.If the light comes on while driving, a
chime sounds. Pull off the road and
stop. The pedal might be harder to
push or go closer to the floor.
It might also take longer to stop.
If the light is still on, have the
vehicle towed for service. See
Towing the Vehicle on page 10‑75.
Antilock Brake System
(ABS) Warning Light
The Antilock Brake System (ABS)
light comes on briefly when the
engine is started.
If the light does not come on, have it
fixed so it will be ready to warn if
there is a problem. If the ABS light comes on and stays
on while driving, stop as soon as
possible and turn the ignition off.
Start the engine again to reset the
system. If the light stays on after
driving at a speed above 20 km/h
(13 mph), see your dealer for
service. A chime may also sound
when the light comes on steady.
If the regular brake system warning
light is not on, the vehicle still has
brakes, but not antilock brakes.
If the regular brake system warning
light is also on, the vehicle does not
have antilock brakes and there is a
problem with the regular brakes.
See
Brake System Warning Light on
page 5‑14.
See Brake System Messages on
page 5‑25 for all brake‐related DIC
messages.
Page 136 of 372
Black plate (2,1)Chevrolet Orlando Owner Manual - 2013 - CRC - 6/5/12
6-2 Lighting
5(Headlamps):Turns the
headlamps on together with the
lamps listed below. A warning chime
sounds if the driver door is opened
when the ignition switch is off and
the headlamps are on.
.Parking Lamps
.Taillamps
.License Plate Lamps
.Instrument Panel Lights
.Sidemarker Lamps
#(Front Fog Lamps): For
vehicles with fog lamps, press to
turn the lamps on or off.
See Front Fog Lamps on page 6‑5.
When the lights are on,
;will be
lit. See Lamps On Reminder on
page 5‑20.
Headlamp High/
Low-Beam Changer
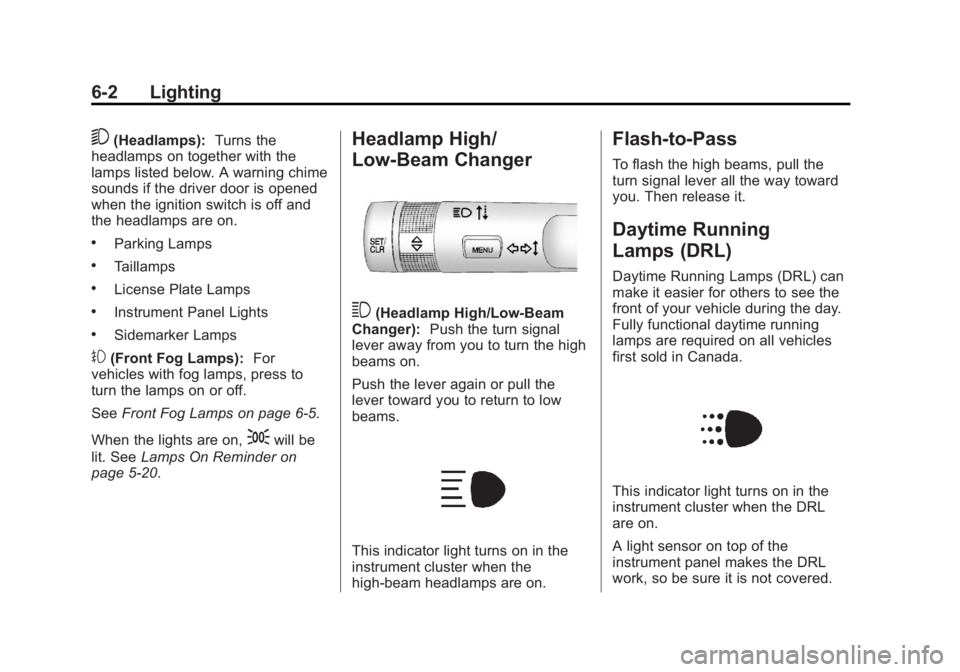
3(Headlamp High/Low-Beam
Changer): Push the turn signal
lever away from you to turn the high
beams on.
Push the lever again or pull the
lever toward you to return to low
beams.
This indicator light turns on in the
instrument cluster when the
high-beam headlamps are on.
Flash-to-Pass
To flash the high beams, pull the
turn signal lever all the way toward
you. Then release it.
Daytime Running
Lamps (DRL)
Daytime Running Lamps (DRL) can
make it easier for others to see the
front of your vehicle during the day.
Fully functional daytime running
lamps are required on all vehicles
first sold in Canada.
This indicator light turns on in the
instrument cluster when the DRL
are on.
A light sensor on top of the
instrument panel makes the DRL
work, so be sure it is not covered.
Page 181 of 372
Black plate (1,1)Chevrolet Orlando Owner Manual - 2013 - CRC - 6/5/12
Driving and Operating 9-1
Driving and
Operating
Driving Information
Distracted Driving . . . . . . . . . . . . . 9-2
Defensive Driving . . . . . . . . . . . . . 9-2
Drunk Driving . . . . . . . . . . . . . . . . . 9-3
Control of a Vehicle . . . . . . . . . . . 9-3
Braking . . . . . . . . . . . . . . . . . . . . . . . 9-3
Steering . . . . . . . . . . . . . . . . . . . . . . . 9-3
Off-Road Recovery . . . . . . . . . . . . 9-4
Loss of Control . . . . . . . . . . . . . . . . 9-4
Driving on Wet Roads . . . . . . . . . 9-5
Highway Hypnosis . . . . . . . . . . . . 9-6
Hill and Mountain Roads . . . . . . 9-6
Winter Driving . . . . . . . . . . . . . . . . . 9-7
If the Vehicle Is Stuck . . . . . . . . . 9-8
Vehicle Load Limits . . . . . . . . . . . 9-9
Starting and Operating
New Vehicle Break-In . . . . . . . . 9-13
Ignition Positions . . . . . . . . . . . . 9-14
Starting the Engine . . . . . . . . . . 9-16
Engine Heater . . . . . . . . . . . . . . . 9-17
Retained AccessoryPower (RAP) . . . . . . . . . . . . . . . 9-18
Shifting Into Park . . . . . . . . . . . . 9-18 Shifting out of Park . . . . . . . . . . 9-19
Parking . . . . . . . . . . . . . . . . . . . . . . 9-20
Parking over Things
That Burn . . . . . . . . . . . . . . . . . . 9-20
Engine Exhaust
Engine Exhaust . . . . . . . . . . . . . . 9-20
Running the Vehicle WhileParked . . . . . . . . . . . . . . . . . . . . . 9-21
Automatic Transmission
Automatic Transmission . . . . . 9-21
Manual Mode . . . . . . . . . . . . . . . . 9-23
Manual Transmission
Manual Transmission . . . . . . . . 9-24
Brakes
Antilock BrakeSystem (ABS) . . . . . . . . . . . . . . 9-26
Parking Brake . . . . . . . . . . . . . . . 9-27
Brake Assist . . . . . . . . . . . . . . . . . 9-27
Ride Control Systems
Traction Control System (TCS) . . . . . . . . . . . . . . 9-28
StabiliTrak
®System . . . . . . . . . 9-29
Cruise Control
Cruise Control . . . . . . . . . . . . . . . 9-31
Object Detection Systems
Ultrasonic Parking Assist . . . . 9-33
Rear Vision Camera (RVC) . . . . . . . . . . . . . 9-35
Fuel
Fuel . . . . . . . . . . . . . . . . . . . . . . . . . 9-38
Recommended Fuel . . . . . . . . . 9-38
Gasoline Specifications . . . . . . 9-38
California FuelRequirements . . . . . . . . . . . . . . 9-38
Fuels in Foreign Countries . . . 9-39
Fuel Additives . . . . . . . . . . . . . . . 9-39
Filling the Tank . . . . . . . . . . . . . . 9-40
Filling a Portable Fuel Container . . . . . . . . . . . . . . . . . . . 9-41
Towing
General TowingInformation . . . . . . . . . . . . . . . . . 9-42
Driving Characteristics and Towing Tips . . . . . . . . . . . . . . . . 9-42
Trailer Towing . . . . . . . . . . . . . . . . 9-45
Towing Equipment . . . . . . . . . . . 9-46
Conversions and Add-Ons
Add-On Electrical Equipment . . . . . . . . . . . . . . . . . 9-47
Page 189 of 372
Black plate (9,1)Chevrolet Orlando Owner Manual - 2013 - CRC - 6/5/12
Driving and Operating 9-9
WARNING (Continued)
vehicle can overheat, causing an
engine compartment fire or other
damage. Spin the wheels as little
as possible and avoid going
above 56 km/h (35 mph).
Rocking the Vehicle to Get
it Out
Turn the steering wheel left and
right to clear the area around the
front wheels. Turn off any traction
system. Shift back and forth
between R (Reverse) and a low
forward gear, spinning the wheels
as little as possible. To prevent
transmission wear, wait until the
wheels stop spinning before shifting
gears. Release the accelerator
pedal while shifting, and press
lightly on the accelerator pedal
when the transmission is in gear.Slowly spinning the wheels in the
forward and reverse directions
causes a rocking motion that could
free the vehicle. If that does not get
the vehicle out after a few tries, it
might need to be towed out. If the
vehicle does need to be towed out,
see
Towing the Vehicle on
page 10‑75.
Vehicle Load Limits
It is very important to know how
much weight the vehicle can
carry. This weight is called the
vehicle capacity weight and
includes the weight of all
occupants, cargo, and all
nonfactory-installed options.
Two labels on the vehicle show
how much weight it may
properly carry: the Tire and
Loading Information label and
the Certification label.
{WARNING
Do not load the vehicle any
heavier than the Gross
Vehicle Weight Rating
(GVWR), or either the
maximum front or rear Gross
Axle Weight Rating (GAWR).
This can cause systems to
break and change the way the
vehicle handles. This could
cause loss of control and a
crash. Overloading can also
shorten the life of the vehicle.